HD4DP v2
HD4DP v2For the project "Orthopride Knee" only the local version of HD4DP v2 can be used. HD4DP v2 WEB is not available for this project.
In the following sections, we will provide you with information on how to proceed with the application HD4DP v2:
Request access to an HD application for a specific project
Request access to an HD application for a specific projectHealthdata.be applications such as HD4DP v2 and healthstat.be process sensitive personal information. Therefore, strictly controlled processes are used to grant access to these applications.
The Entity Access Management (EAM) portal of healthdata.be facilitates these processes. In this article we describe how to use it. To navigate to the EAM application, enter the URL https://eam.healthdata.be in your internet browser.
Note: As the documentation of the EAM portal is being updated on a regular basis, please be advised to check the Release notes first.
Select one of the following capacities that suits your position in order to request access to an HD application:
Standard End-users
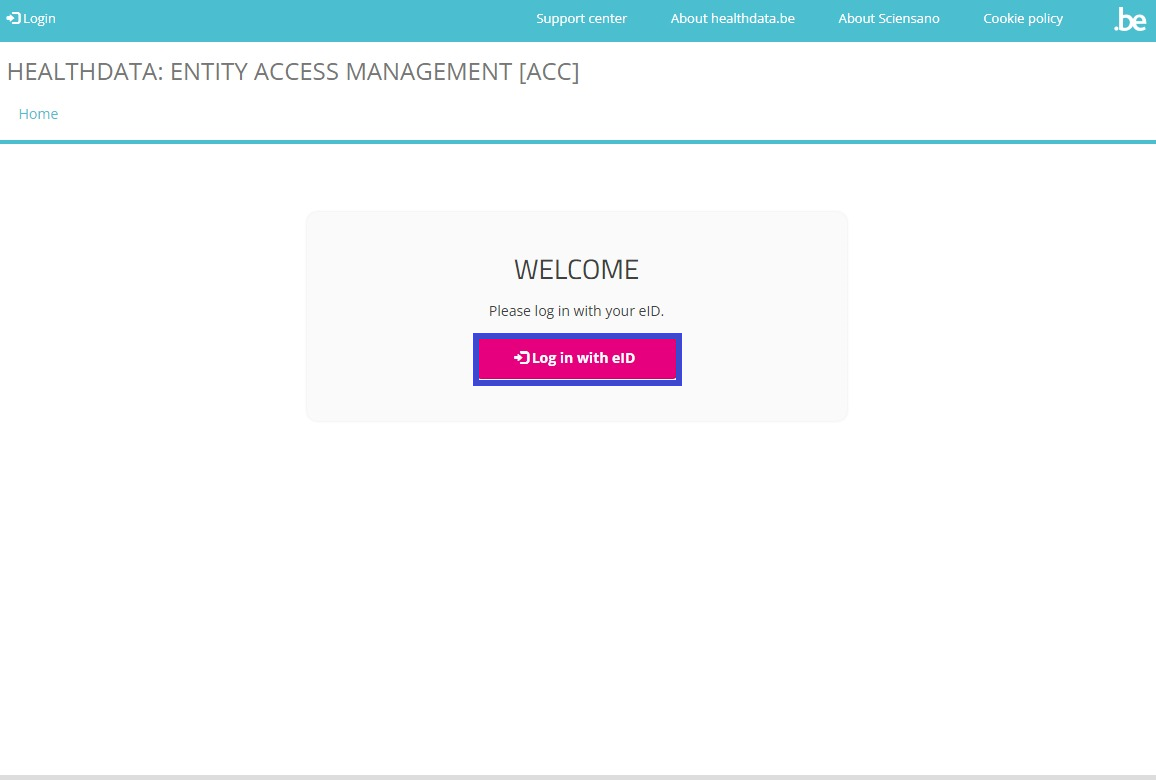
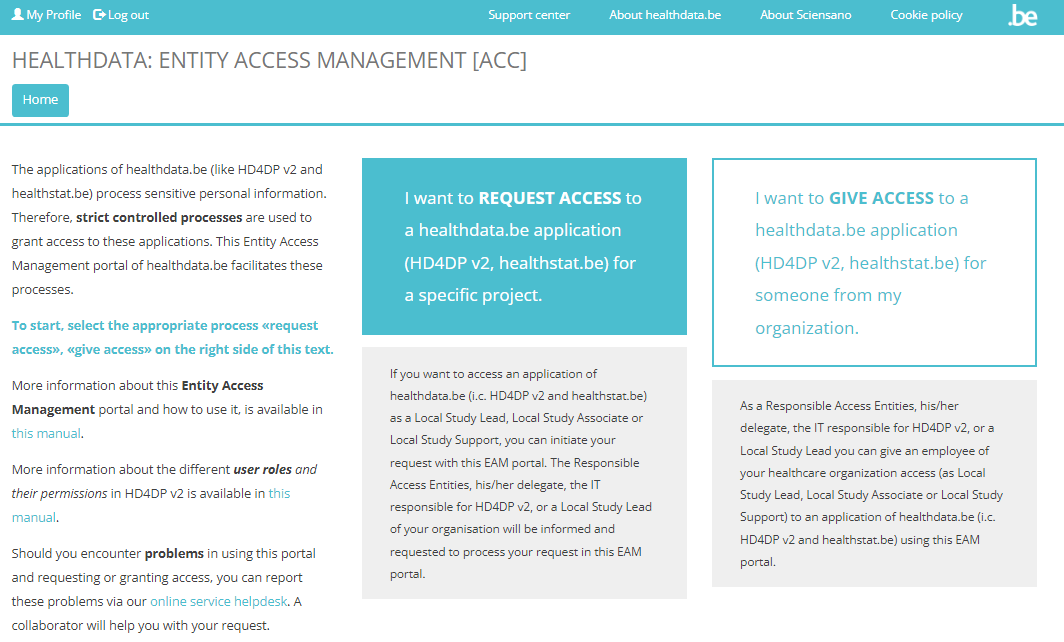
To request access to healthdata.be applications (such as HD4DP v2 and healthstat.be) as a standard end-user, you need to click on REQUEST ACCESS in the blue text box in the middle of the screen.

You will be directed to the next screen, where you select the button Log in with eID.
Clicking on this button leads you to the government's Federal Authentication Service (FAS), where you can log in with multiple digital keys with eID or digital identity.
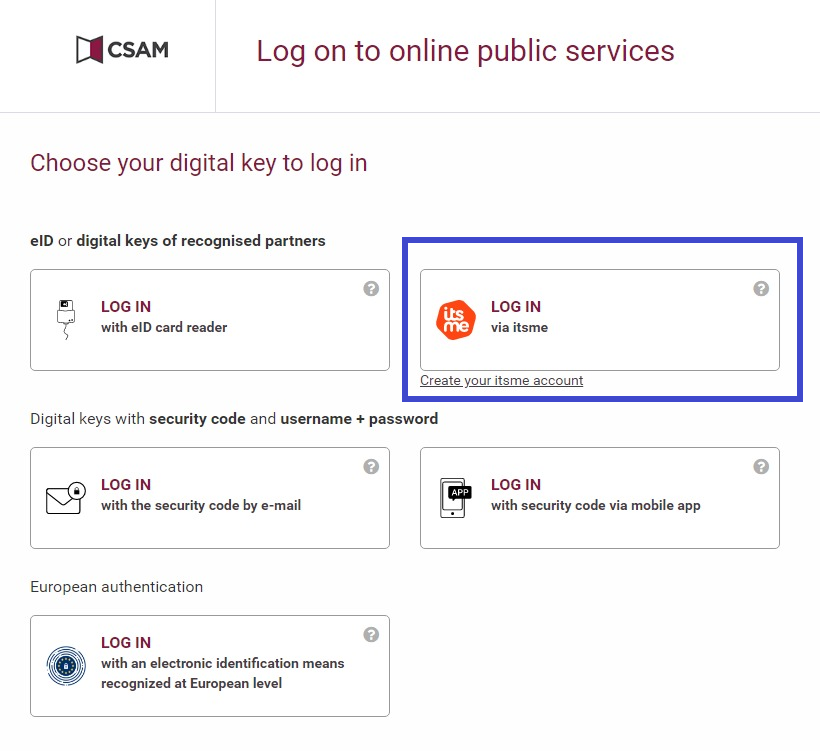
If you choose to connect with ItsMe, you can enter your cell phone number.
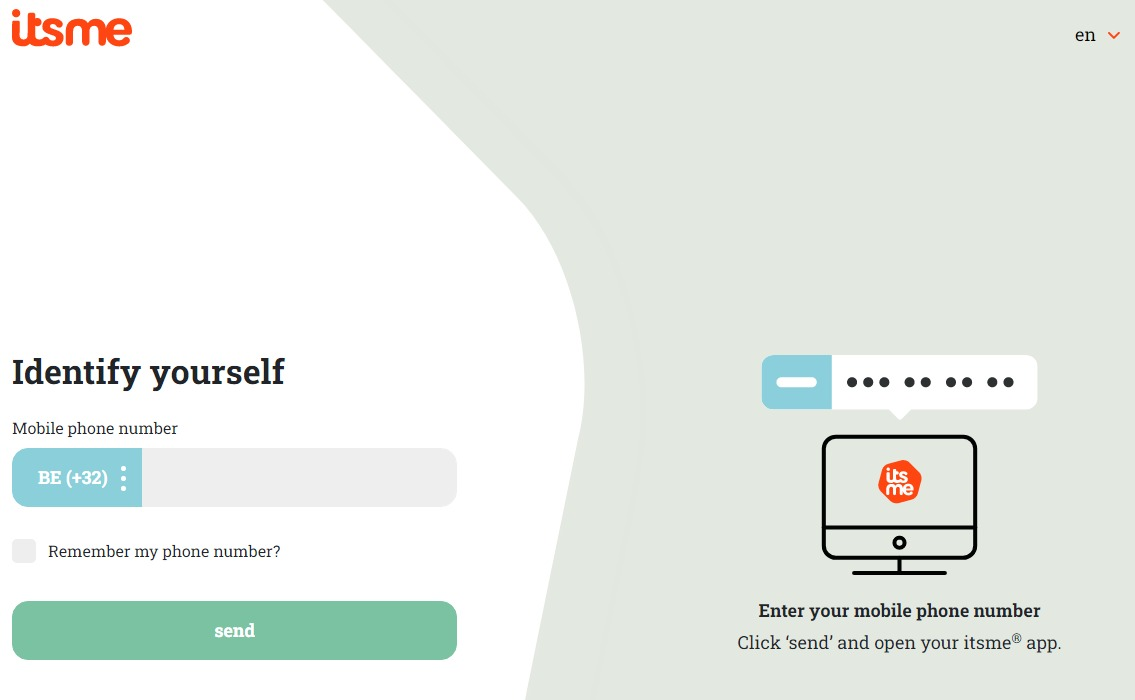
Follow the instructions on your mobile device via the ItsMe application.

Once you have run through the ItsMe login procedure, you want to select the green confirmation button (available in FR and NL) in the screen below to access the Sciensano environment.

After selection of the confirmation button, you are logged in to the EAM portal page as indicated by the available My profile and Log out options to the top-left of your screen.
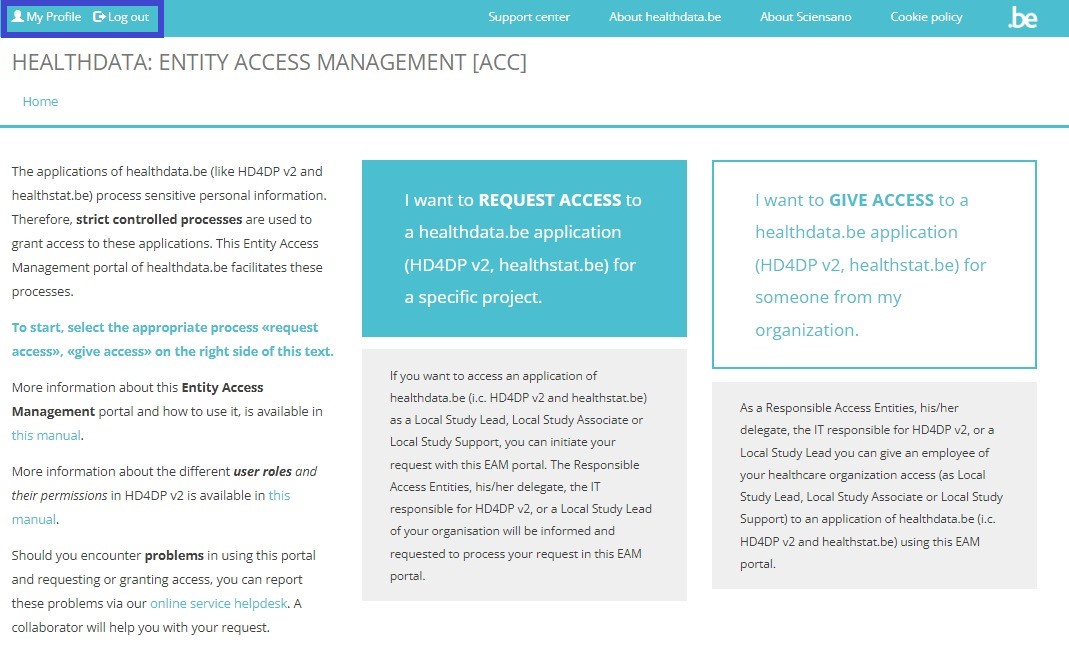
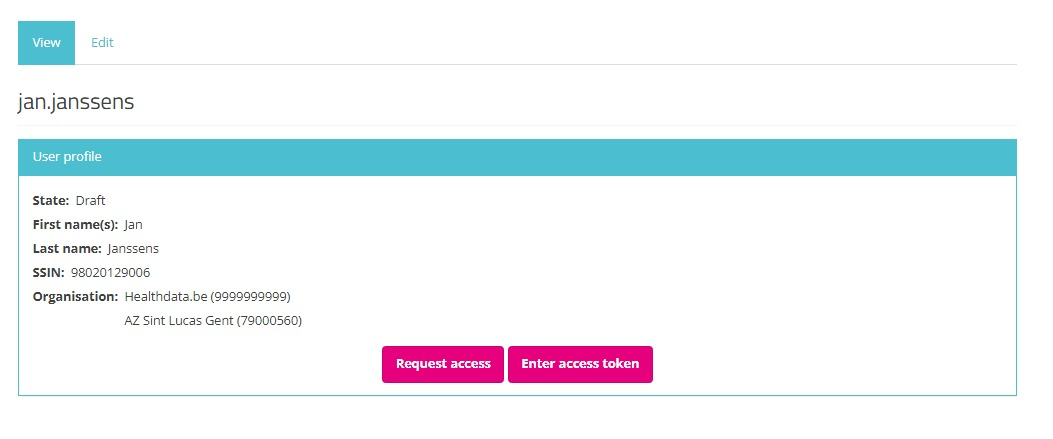
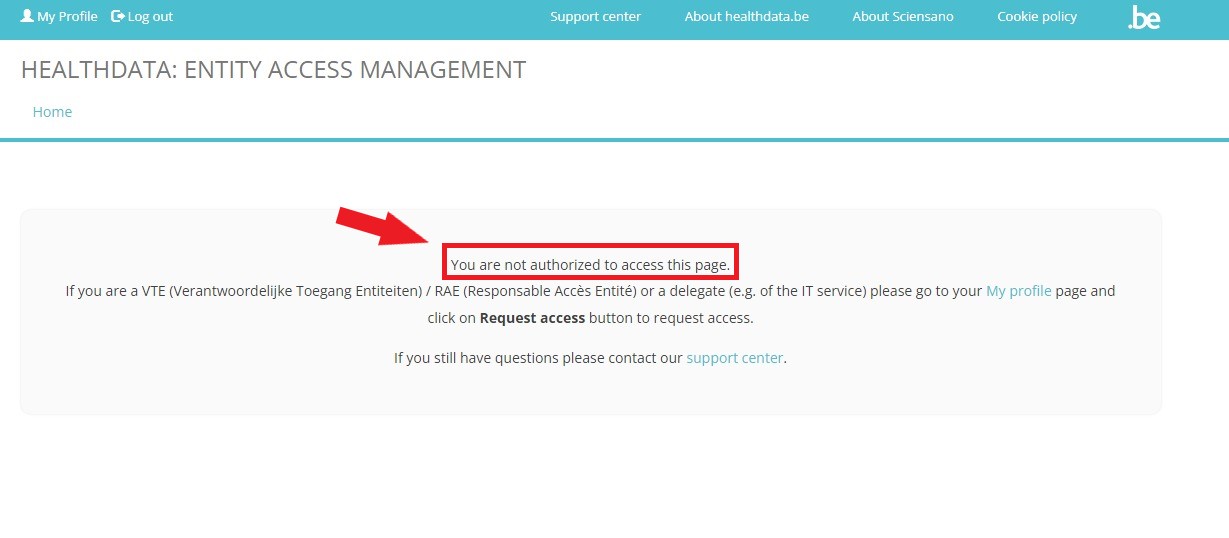
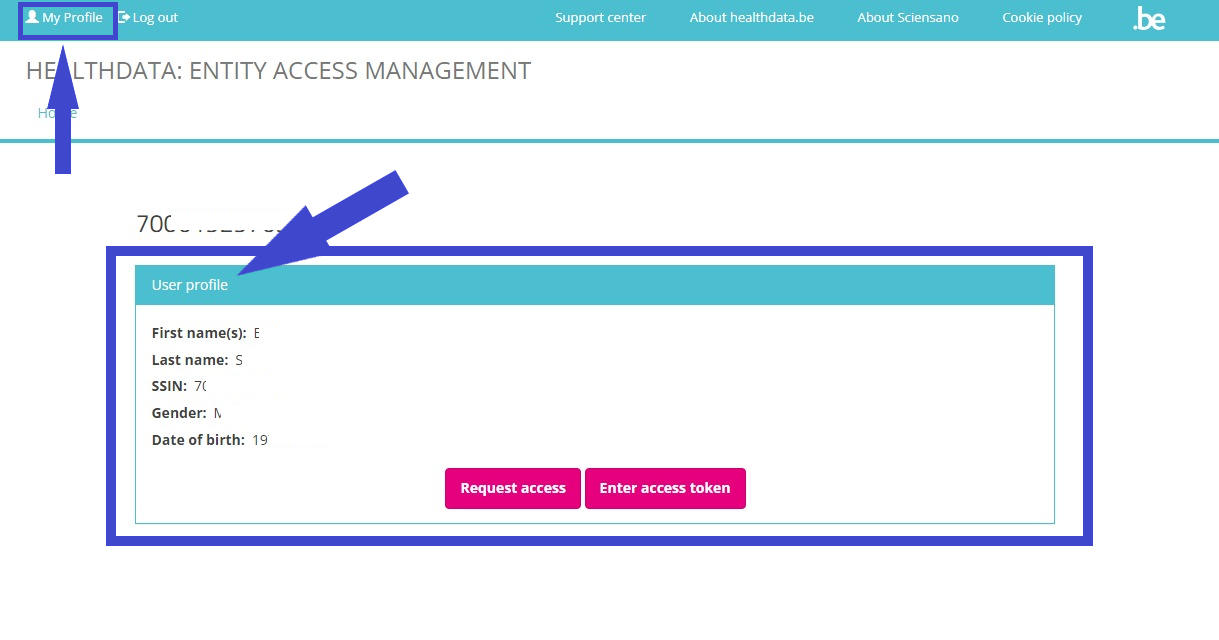
When selecting the REQUEST ACCESS link in the blue highlighted text box, in order to fill out the Request access form, the following message appears:

Click on the My profile link in the message, which redirects you to your profile page. Your user profile needs validation before being able to enter and complete the Request access form.
Select the Edit tab to complete your profile information.
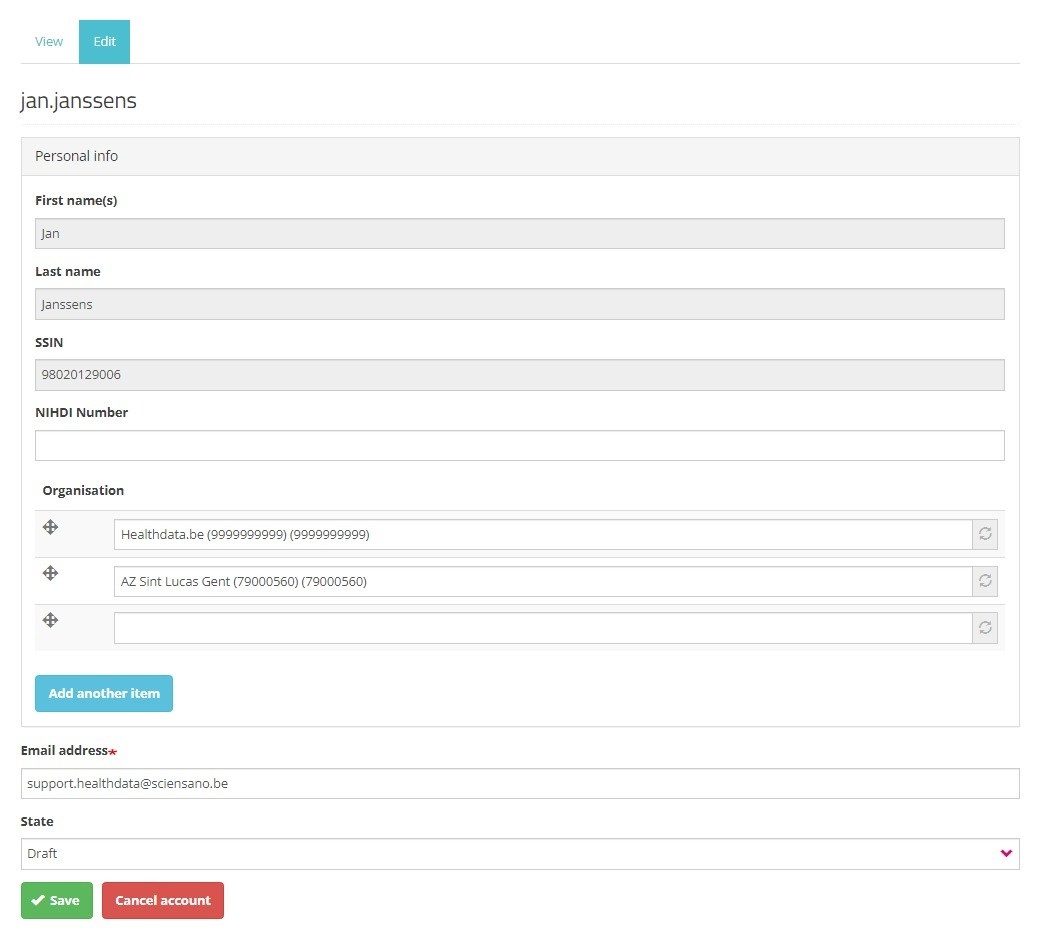
Next to the profile information that is automatically prefilled based on your eID data, you need to complete the following fields:
NIHDI Number: Your NIHDI number if available.
Organization: Add the organization(s) you are affiliated with. This field includes the name and NIHDI number of the organization.
Email address: Mandatory field for which the content can't be retrieved from the eID. Your email address will be used for communication on the profile validation and access request.
State: Select one of the options (see image underneath):
- Draft: This status indicates that you have not finished completing the profile fields yet. Only you can see the filled in data at this stage. Modification of the profile information is restricted to the status "Draft". You can however Save profile information as Draft to finalize and send it for validation lateron.
- Validation Requested: The provided user profile information is complete and you want to send it for validation to the SPOC.

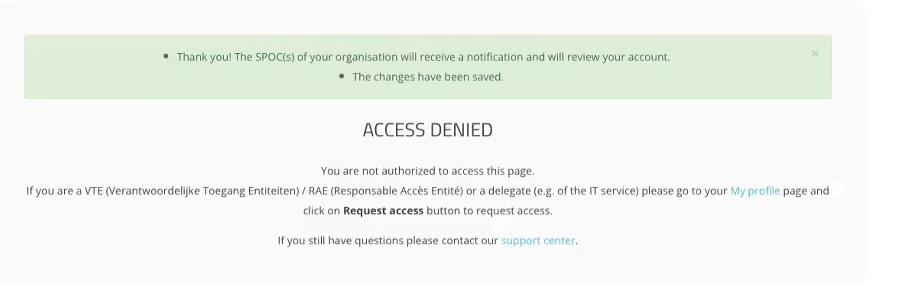
Click on the Save button to send your profile information to the SPOC. An Access Denied message appears on the screen, indicating you can't modify your filled in and sent profile information anymore.
Return to the My profile page to see your profile has the pending status. Also, the Edit tab has disappeared, preventing from modifications afterwards:
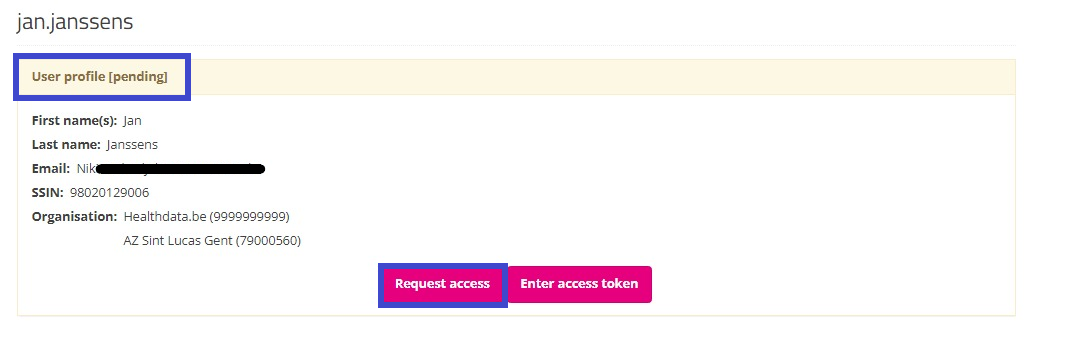
Your profile will soon be validated by the SPOC, which will be visible on your profile page as follows:
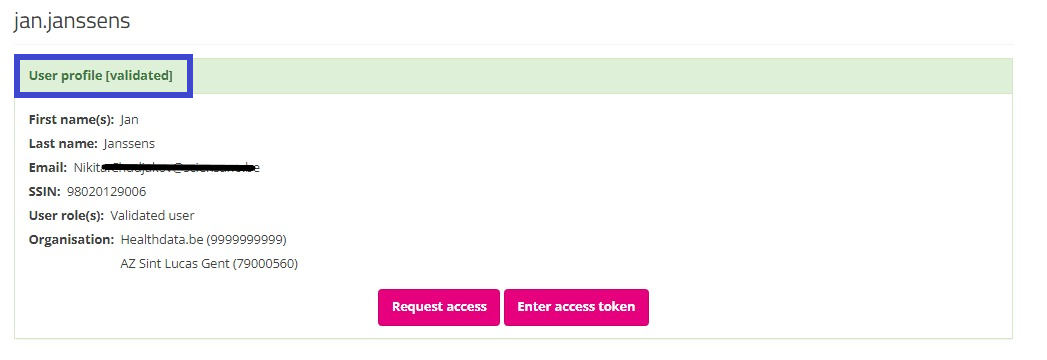
After validation of your profile by the SPOC, you select Home to return to the EAM portal page. Attention: Do not select the button "Request access" (soon: "Request SPOC rights"), since this leads to the process of requesting access as a SPOC.

In the EAM portal page you want to select the REQUEST ACCESS link in the blue highlighted text box again.
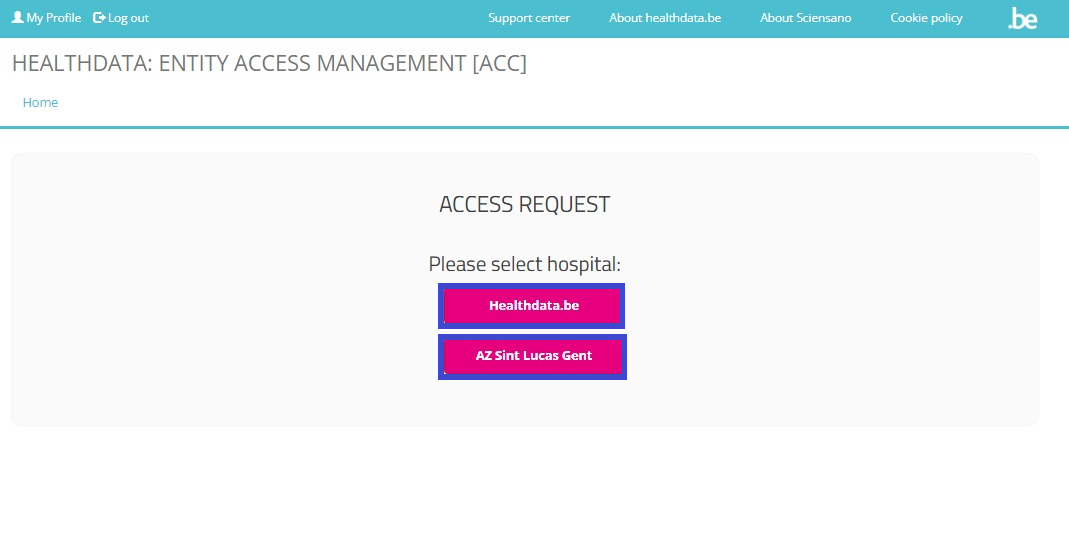
Select the hospital you are affiliated with for the application(s) and project(s) you want to request access to.
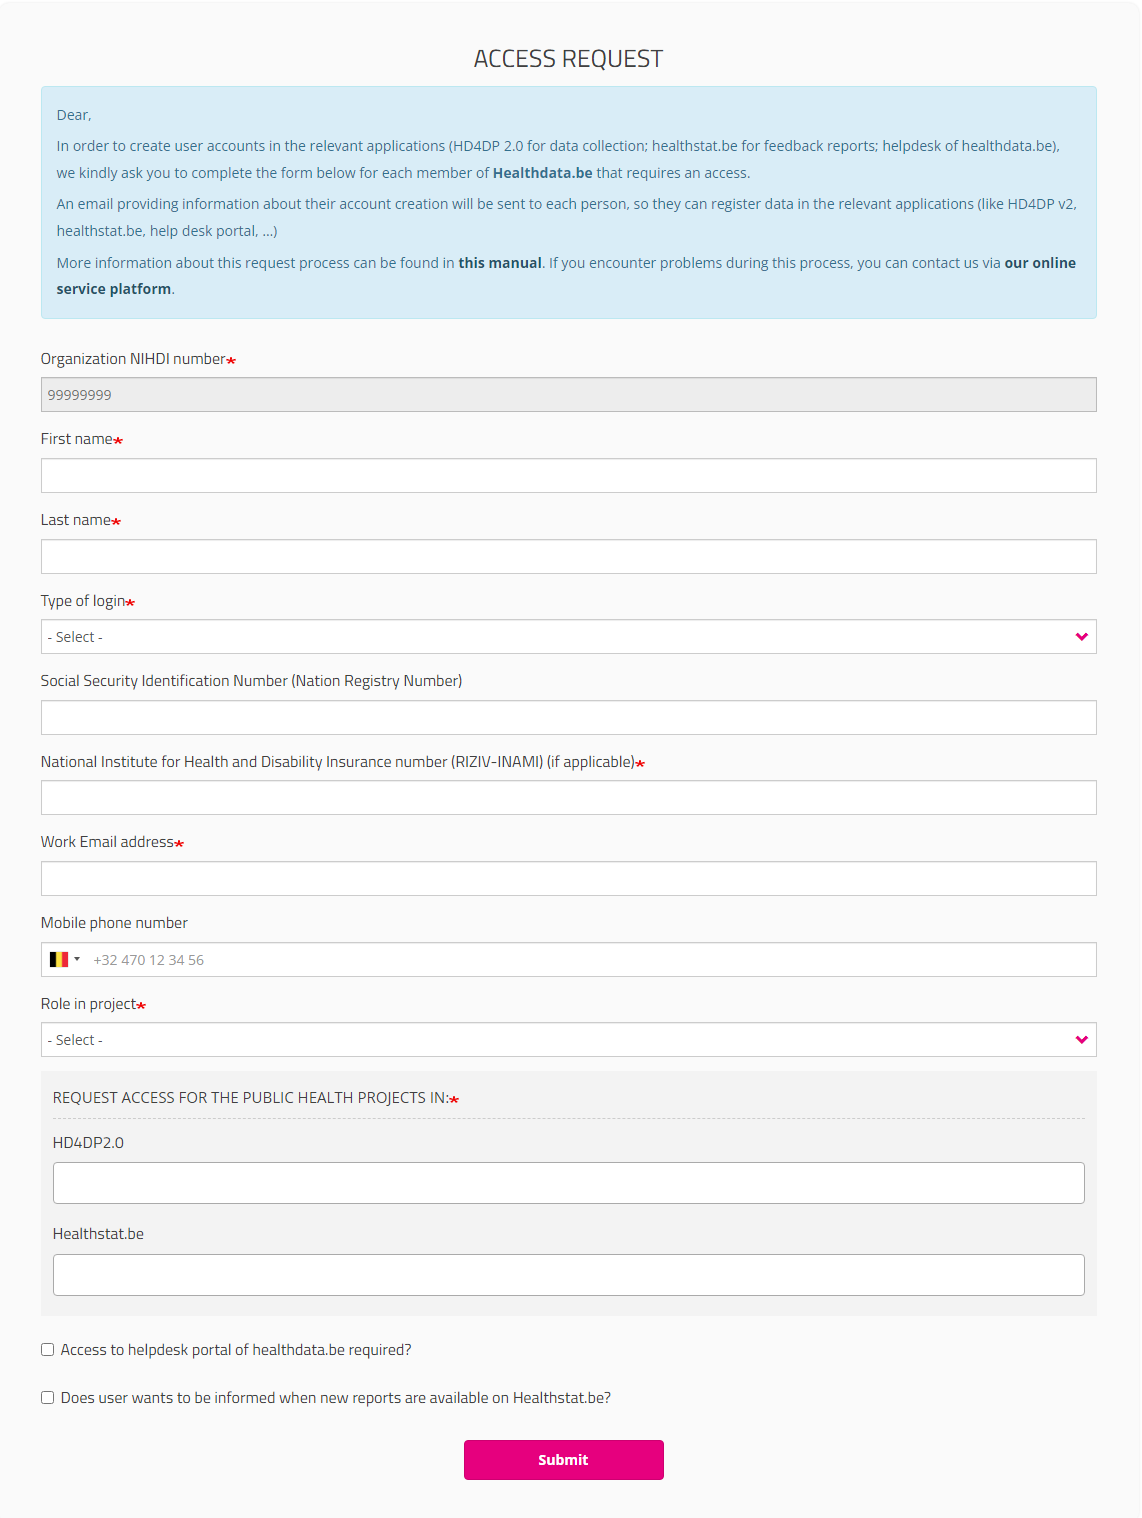
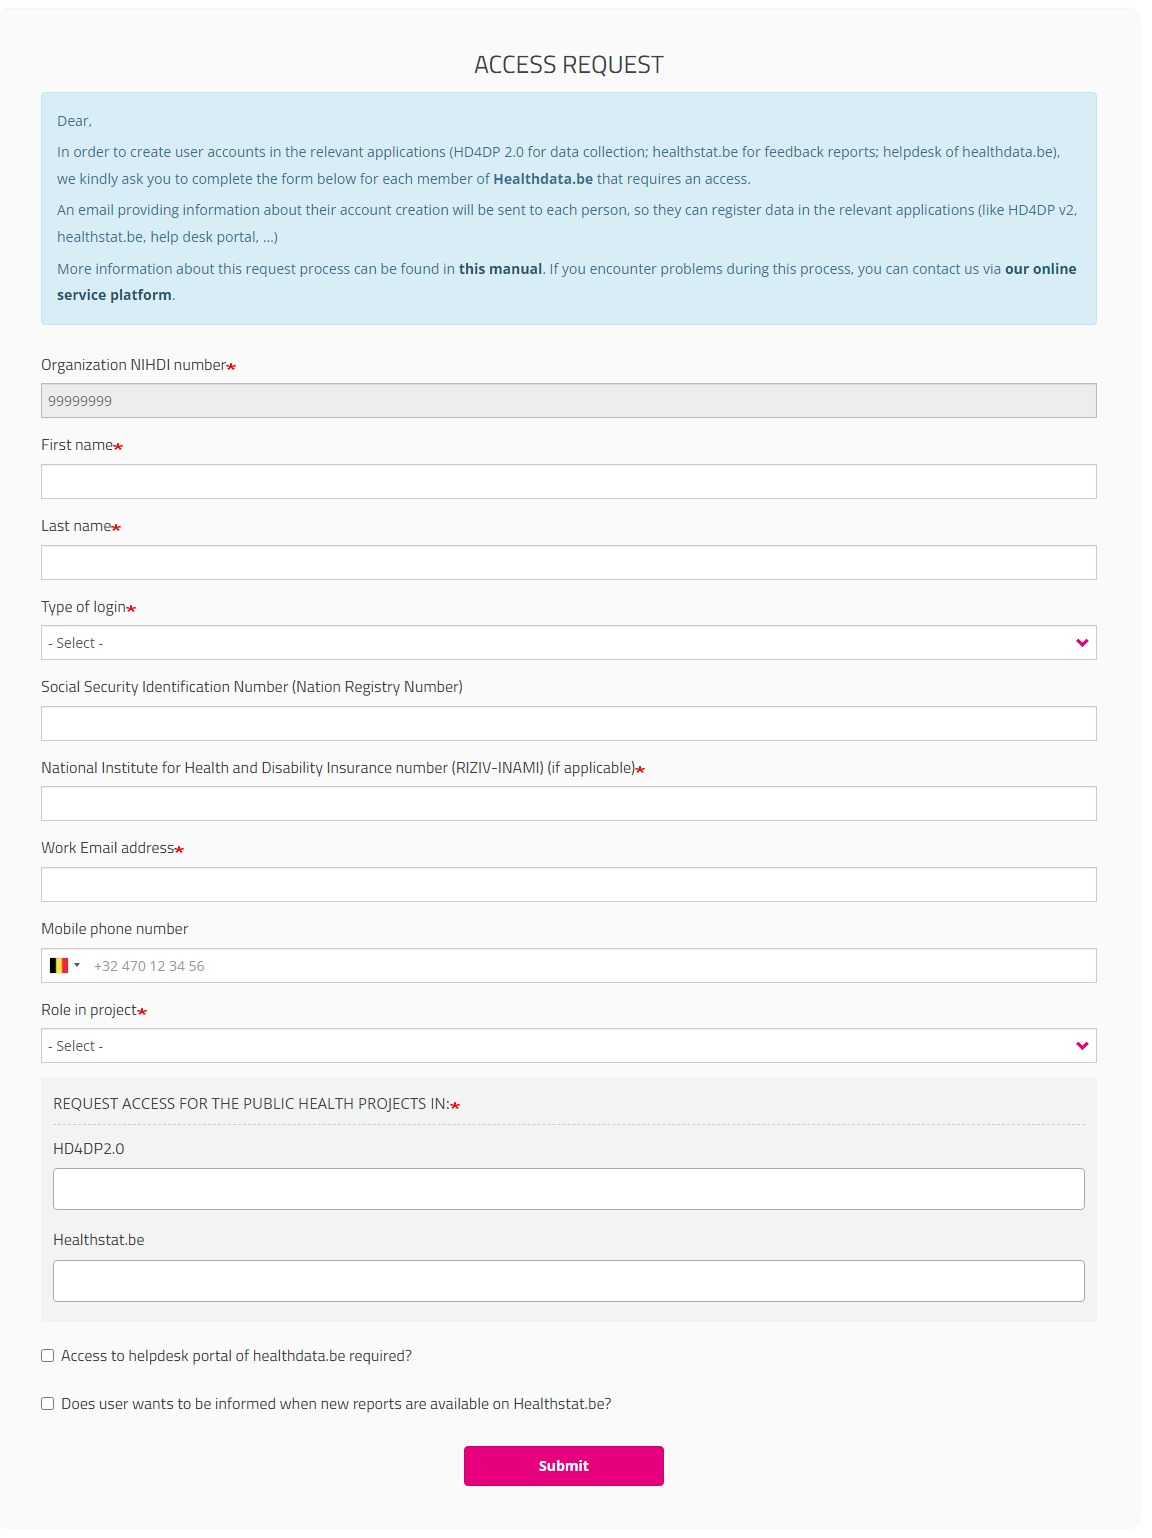
You can now start completing the Request Access form.
Please fill in all required fields (indicated with a red asterisk *), make a selection in the mandatory drop-down lists and, optionally, tick the check boxes for additional help and/or information.
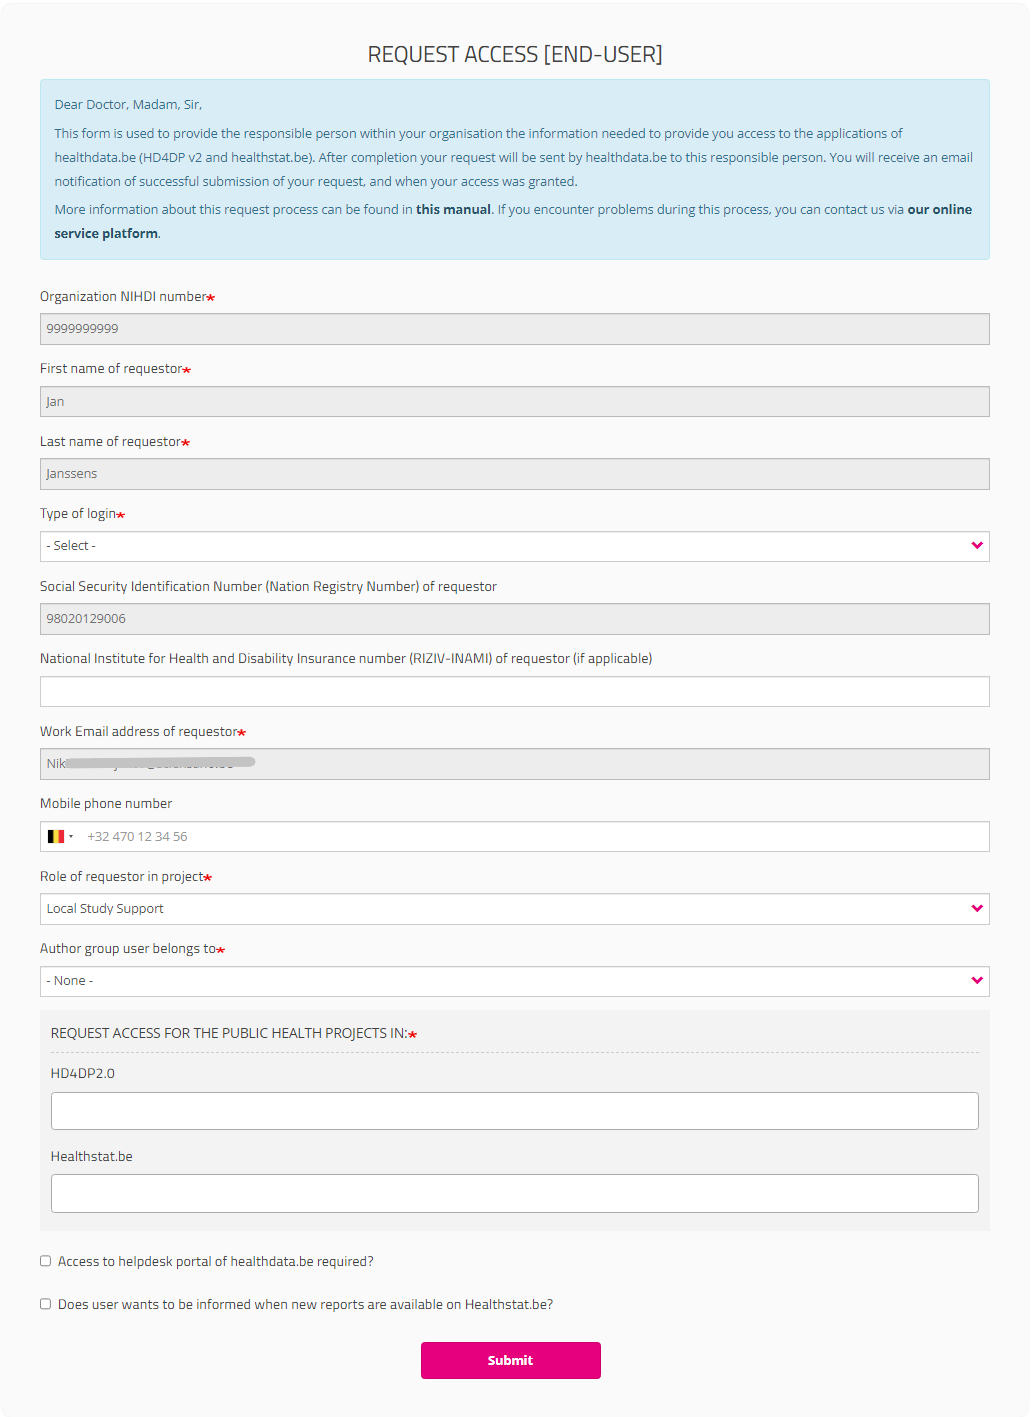
Type of login field:
If you select "Belgium resident" for the field “Type of Login”, entering the mobile phone number is optional.

If you are a "Non-Belgium resident", the Mobile phone number field becomes mandatory to allow for the two factor authentication:

Role of requestor in project field
You must indicate your role in the project (Local Study Lead, Local Study Associate or Local Study Support). Your role determines your access options in HD4DP2 for this project. Read more about the scope of the roles in User roles in HD4DP v2.

When selecting Local Study Support you will be asked to select the name of your Local Study Associate in a drop-down list. This list is automatically populated and specific to the organization you have selected earlier.

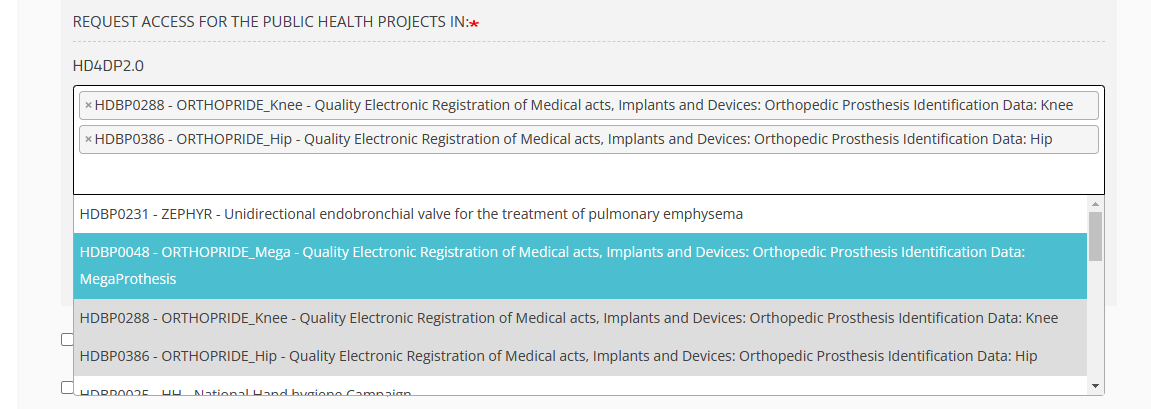
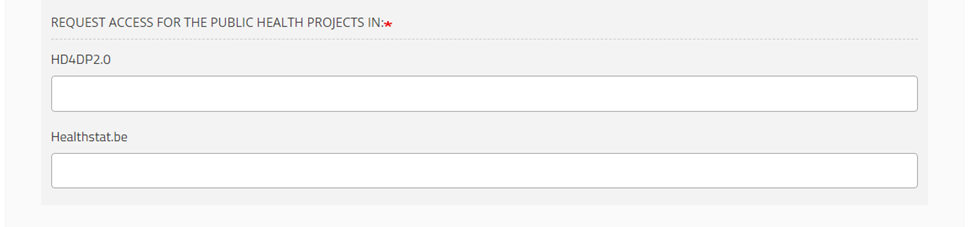
HD4DP2.0 field
Click in the field under HD4DP2.0 if you want to access the application to make registrations for the selected project:
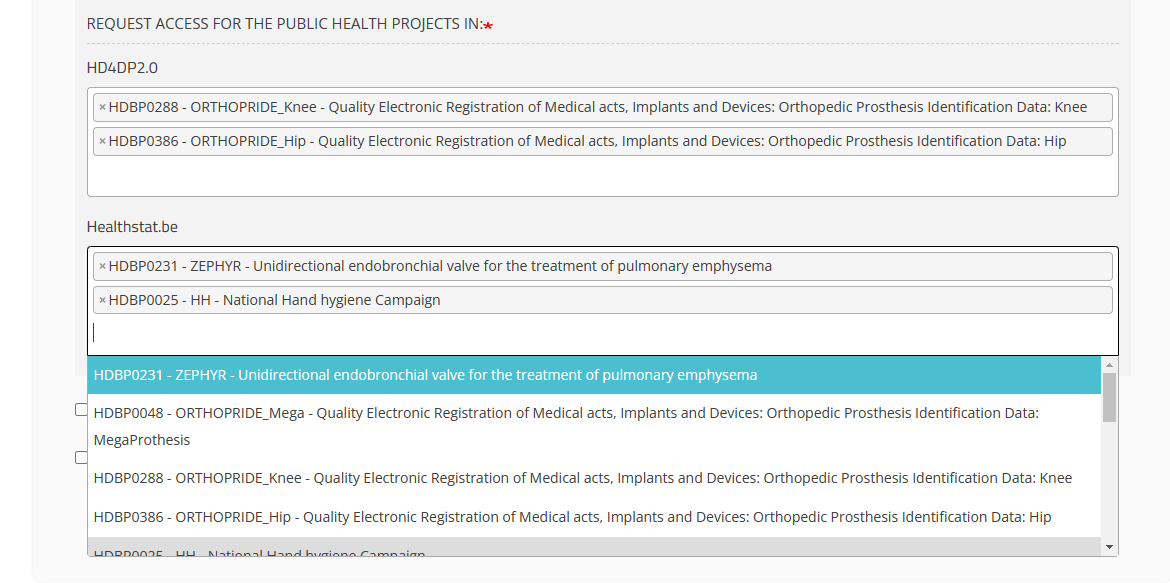
Healthstat.be field
Click in the field under healthstat.be if you want to access the reporting of the selected project:
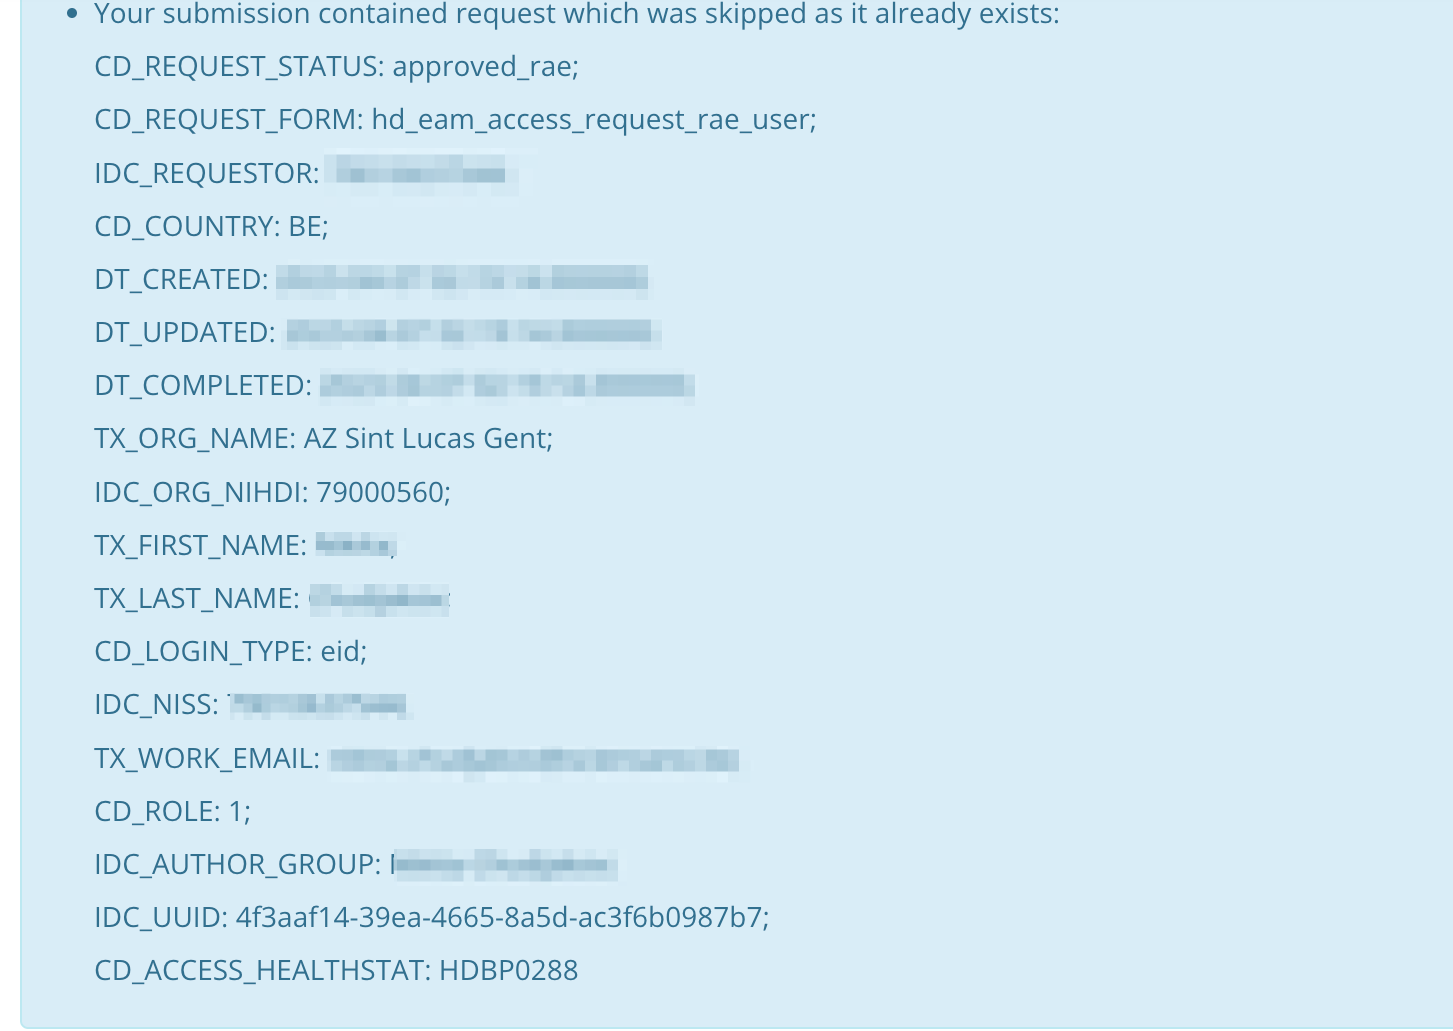
It can happen that a user inadvertently submits requests for access to the same applications and/or projects. The requests are screened for duplicates by checking on organization number, role, author group and project code. In case duplicates are detected, the end-user will receive the following message:
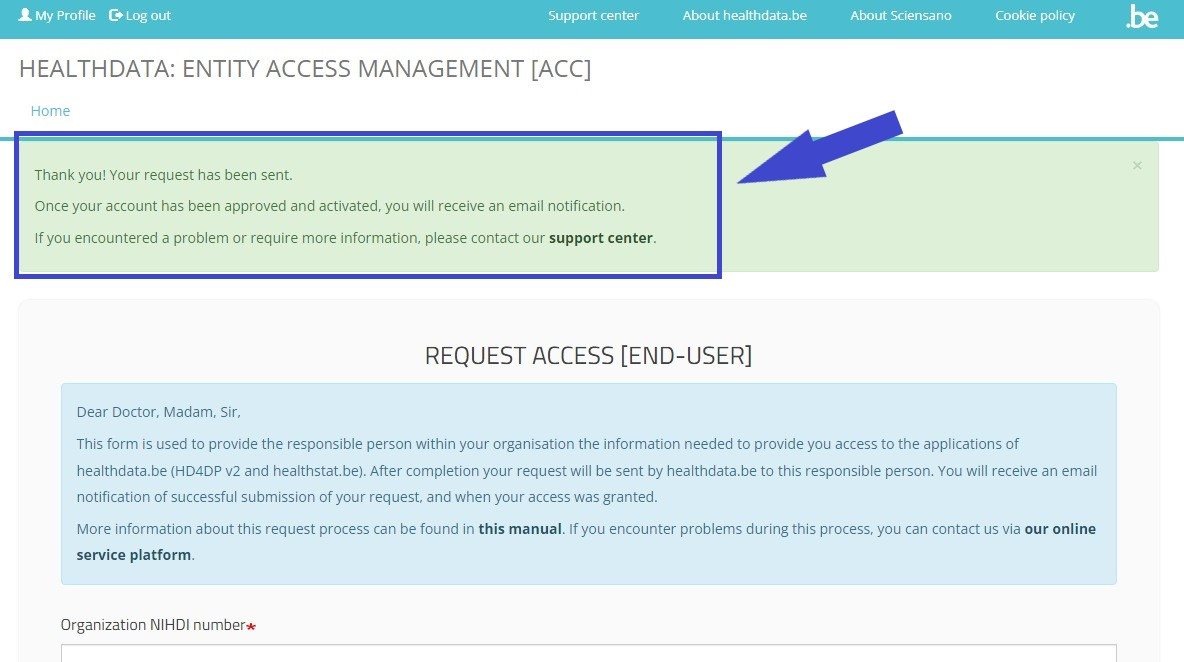
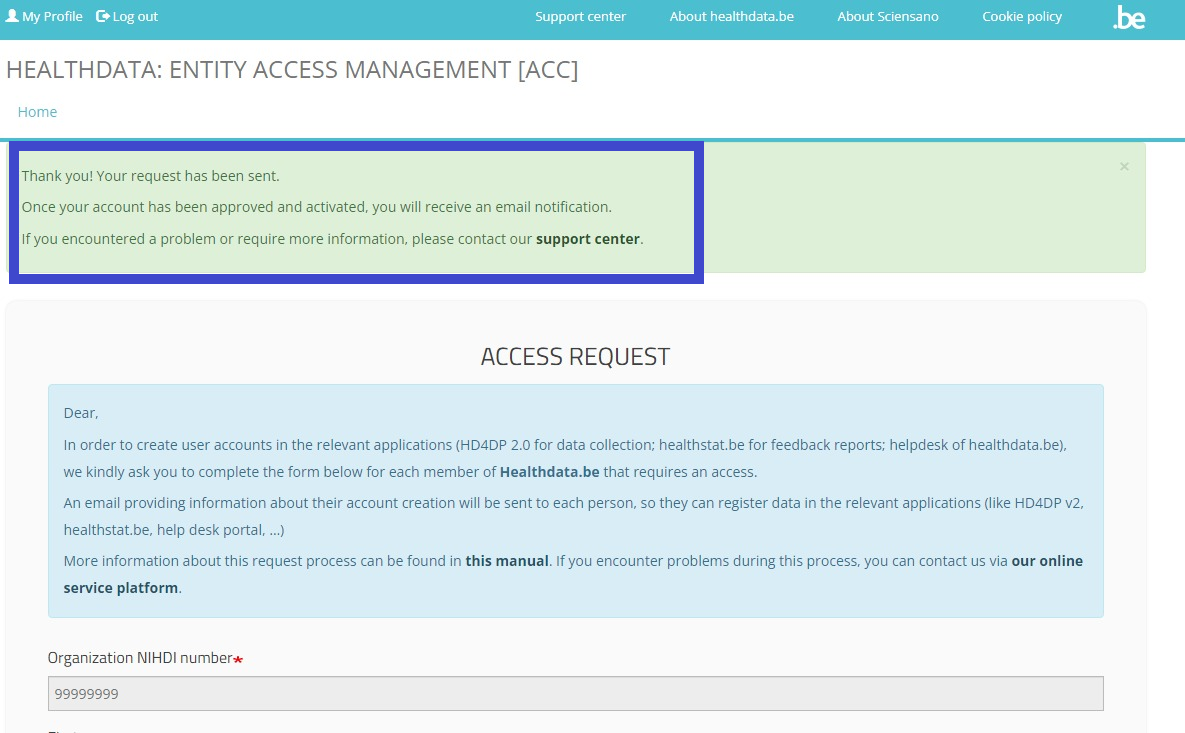
Once you have completed the Request Access form, click on the Submit button. When the submission was successful, you will receive a confirmation message.
Single IT points-of-contact (IT SPOC)
A single-point of contact or SPOC is a role that extends beyond the function of a VTE/RAE. More specific, it can be any employee within an organization whom this role has been assigned to.
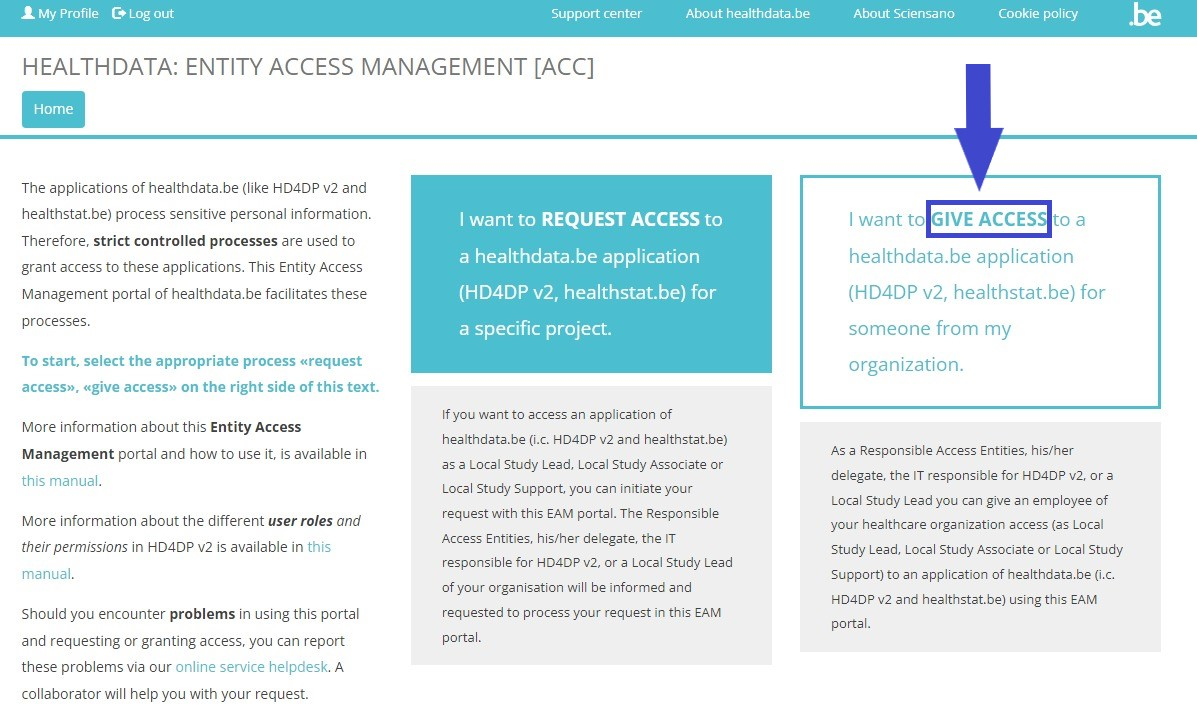
To request access to healthdata.be applications such as like HD4DP v2 and healthstat.be as a single-point of contact (SPOC), you want to select GIVE ACCESS in the white text box to the right of the screen.

If you have not yet requested access to these forms, and therefore are not recognized as a user with the SPOC role, you will receive the following message:
In this case you want to select My Profile (top left in the menu) and click on the button Request access (soon: "Request SPOC rights").

The Request access [RAE] screen pops up.
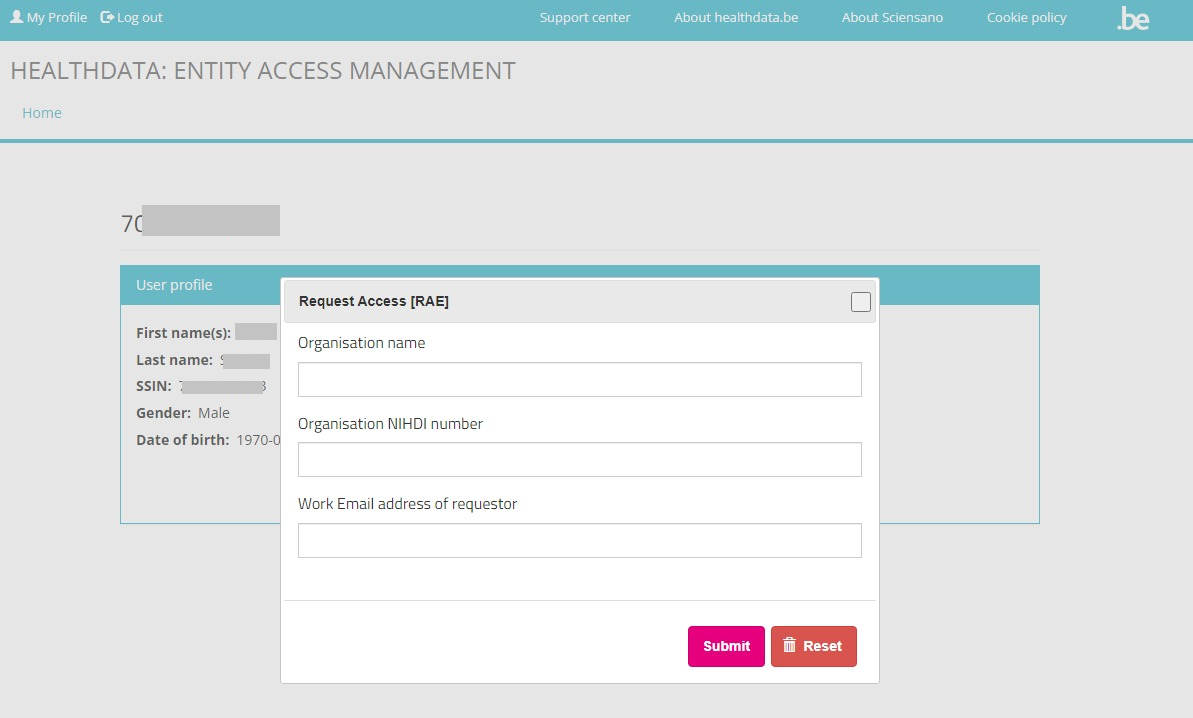
Fill in all requested fields and click on the Submit button.
After submission of the RAE form healthdata.be support carries out a background check considering your SPOC authority within the organization mentioned, and will send you a confirmation e-mail with a special token. Once you have received this token, return to the My Profile page and select the button Enter access token.
The Access token screen appears:

Fill in the NIHDI code for your organization and the access token you received per e-mail. After clicking on Submit, you will be redirected to the EAM portal page, where you again select GIVE ACCESS.
The ACCESS REQUEST form appears. By filling out the requested fields, a SPOC is able to give access to users within their organization who want to access a healthdata.be application (HD4DP2.0 or Healthstat).
Once you have completed the Access Request form, click on the Submit button. When the submission was successful, you will receive a confirmation message.
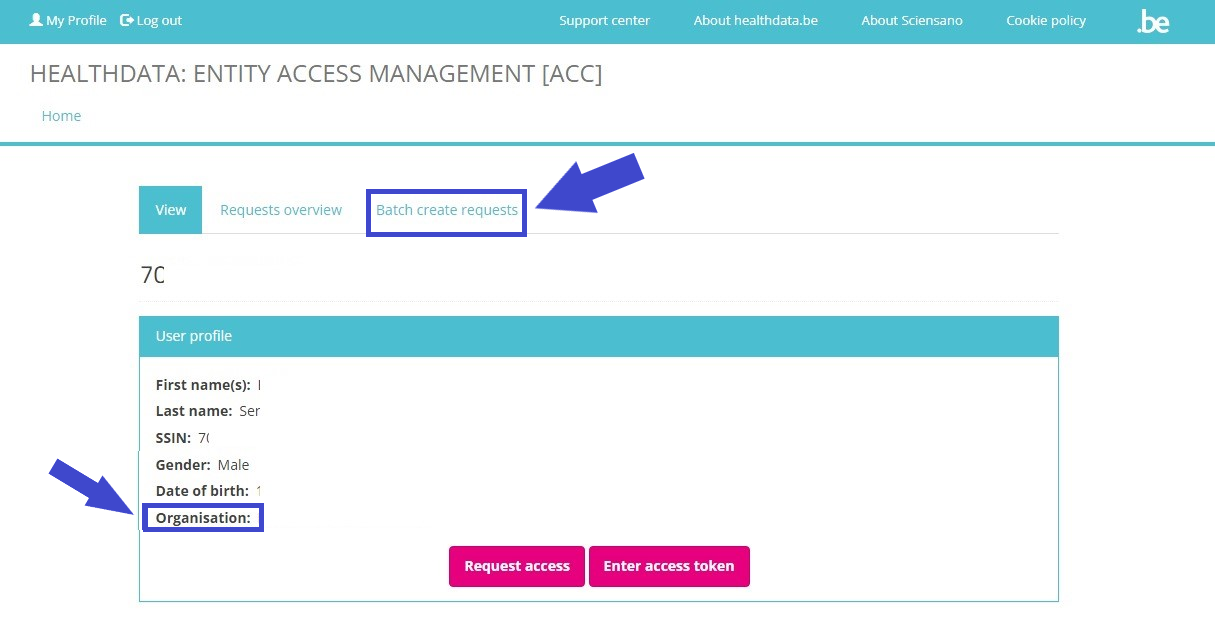
If you now return to My profile, you will see that it has been extended with the information "Responsible Access Entry" under User role(s). Also the tabs Profiles, Requests, Batch create requests and Edit have been added.
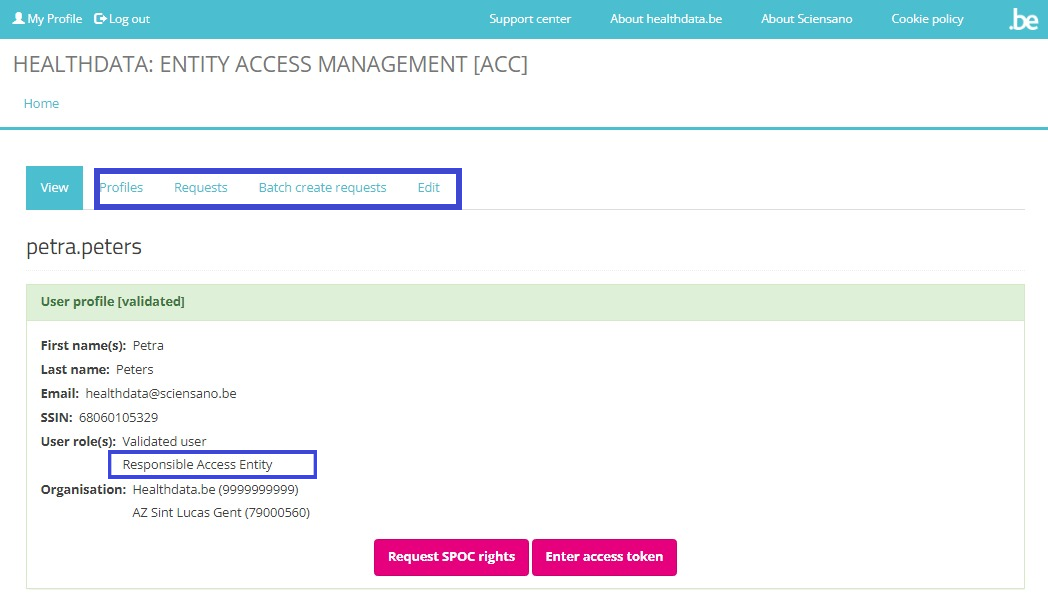
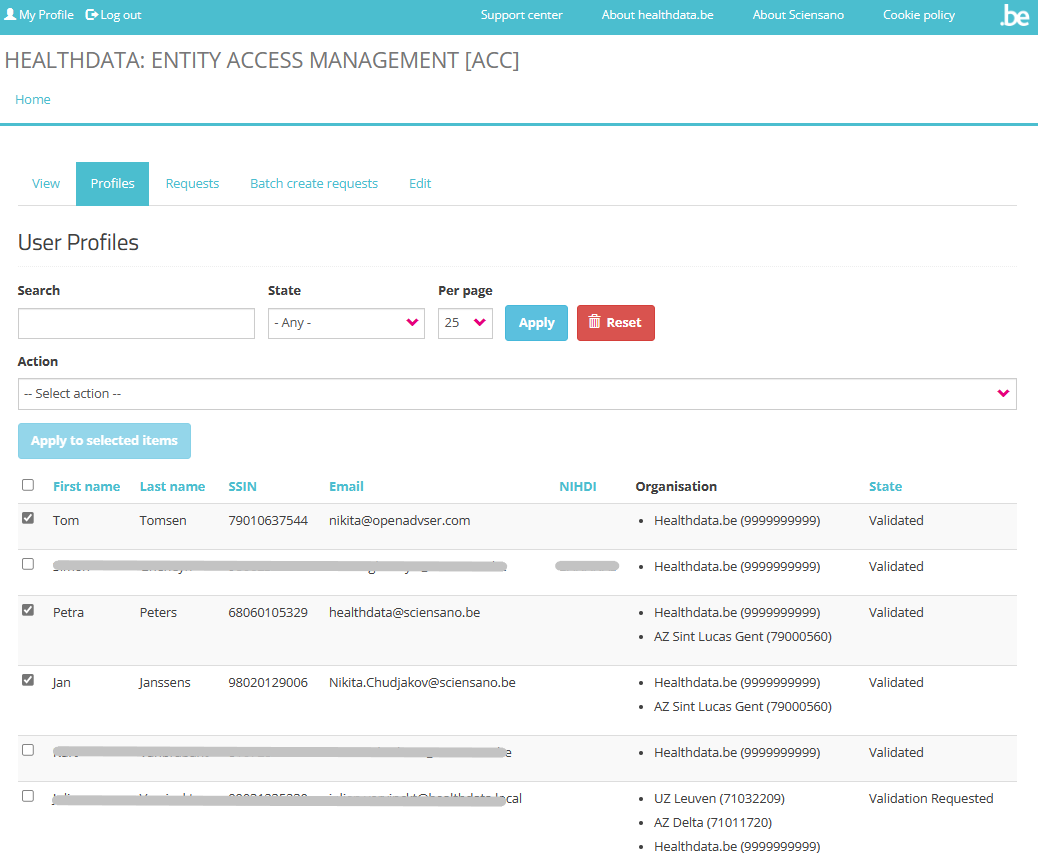
The Profiles tab of the validated SPOC profile offers the possibility to Search, Select and Sort profiles. Selected user profiles in the list can be Validated or Rejected via the Action drop-down menu.
In the Requests tab the SPOC can manage the overview of requests. More information is to be found on SPOC actions upon a request.
See documentation under Give access to multiple users in batch for more information on the Batch create requests tab.
Saved user profile information can't be modified, unless upon action of the SPOC. The Edit tab offers the option to enter the NIHDI number, add organizations, modify the email address and toggle the state between Validated or Rejected. Select the Save button to install the new profile information.
International users
For international users a link to a special form will be provided:
https://eam.healthdata.be/forms/hd_eam_access_request_user_int
Selecting this link redirects you to a more extensive Request Access form. Fill in all required fields (indicated with a red asterisk *), make a selection in the mandatory drop-down lists and, optionally, tick the check boxes for additional help and/or information:
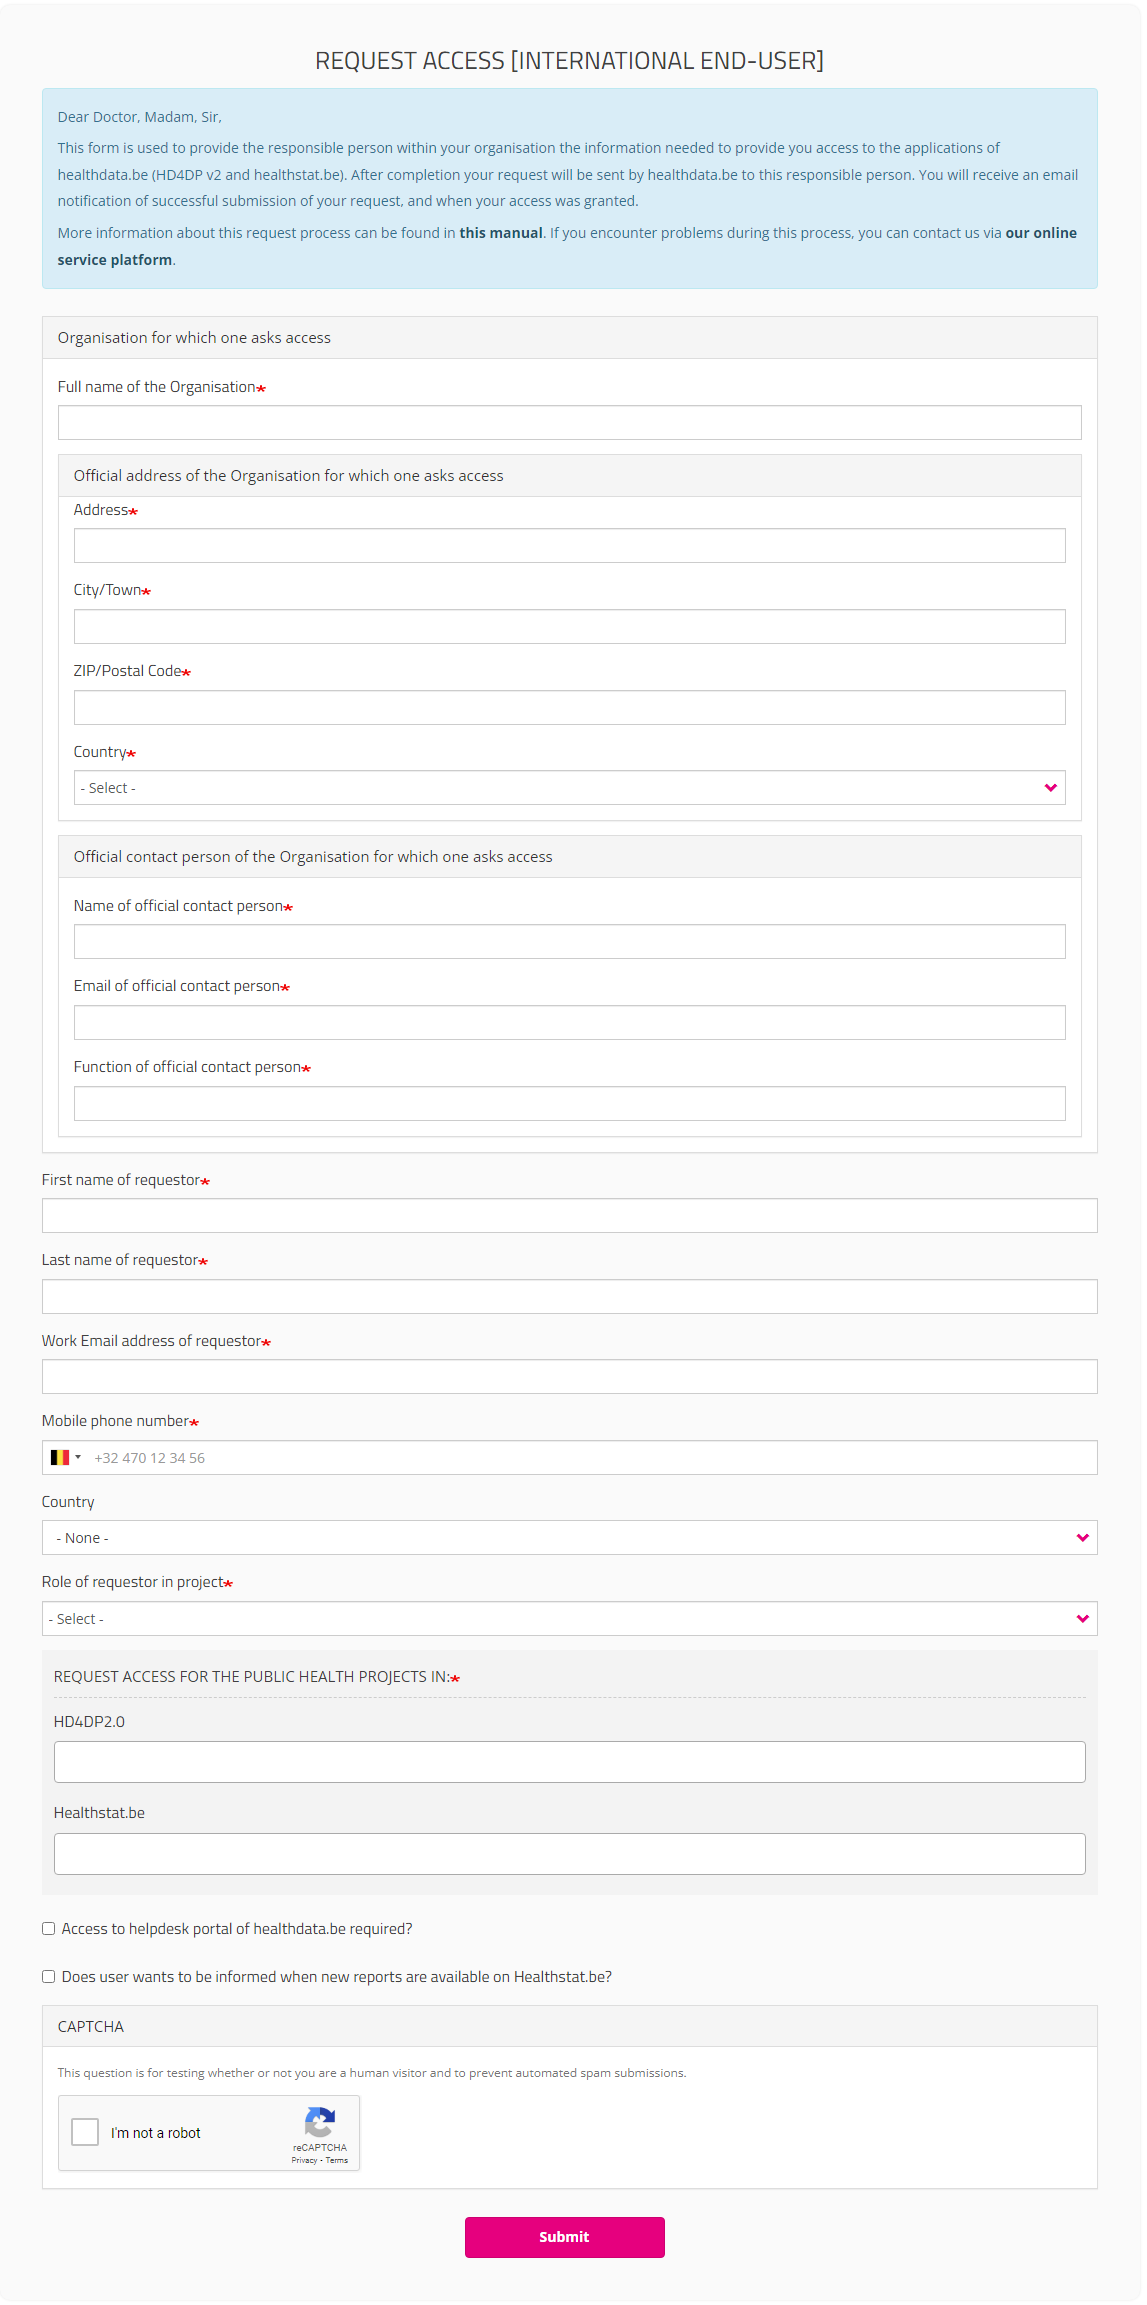
After submitting the form, an e-mail is sent to the Service Desk staff for an identification and authorization process. If the request is approved, the international user receives an e-mail with account information. International users, however, are not able to log in, nor can they consult overviews of requests at this moment.
Deze documentatie wordt regelmatig bijgewerkt. We proberen de informatie zo correct, volledig en zo duidelijk mogelijk weer te geven. Als u desondanks iets in de documentatie ziet dat niet correct is, niet overeenkomt met uw ervaring, of verdere verduidelijking vereist, maak dan een verzoek aan (type: verzoek om informatie) via ons portaal (https://sciensano.service-now.com/sp) of stuur ons een e-mail via support.healthdata@sciensano.be om dit documentatieprobleem te melden. Vergeet niet de URL of het webadres van de pagina met het documentatieprobleem te vermelden. Wij zullen de documentatie dan aanpassen. Bedankt!User roles in HD4DP v2
User roles in HD4DP v2Several user roles are possible in the HD4DP v2 application:
Local Study Lead: This role takes responsibility for the study or project within the participating healthcare organization. Often this is the head of the clinical department involved in the study or project. The Local Study Lead can:
- make registrations in HD4DP v2
- view all registrations made by colleagues (regardless of role) for the study or project
Local Study Associate (author): The Local Study Associate is a healthcare professional that participates in the study or project. He/she reports/records medical information towards the researcher using HD4DP v2 and thereby assumes responsibility on the correctness of the reported information. He/she is considered to be the author of the registration. For each author an author group will be created. This will be represented in the registration form. The Local Study Associate can:
- make registrations in HD4DP v2
- only see all registrations assigned to his/her author group, not those of other colleagues (other author groups) in the same healthcare organization participating in the same study or project
Local Study Support (co-author): A Local Study Associate can delegate registration to a Local Study Support. Often this is an administrative collaborator or staff of a department medical coding. The Local Study Associate is still considered the author of the registration; the Local Study Support is considered co-author. The Local Study Associate can view and change registrations made by Local Study Support. The Local Study Support can:
- make registrations in HD4DP v2
- only see all registrations assigned to his/her author group, not those of other colleagues (other author groups) in the same healthcare organization participating in the same study or project
By default, only 1 Local Study Lead is created by healthdata.be (Sciensano) for each project within each organization. This means that only 1 person can see all registrations made for that project within that organization. This policy prevents HD4DP v2 users to see personal and sensitive information from persons they do not have a therapeutic relationship with.
In case organizations create more then 1 Local Study Leads for a project within that organization, so that they all can see each others registrations, and thus personal and sensitive information from persons they do not have a therapeutic relationship with, the organizations are fully responsible and accountable for this policy deviation. Healthdata.be (Sciensano) cannot be held responsible or accountable for this policy deviation. Professionals wanting to participate in projects are kindly suggested to contact the Data Protection Officer (DPO) of their organization to consult them about this intended policy deviation.
This documentation is being updated regularly. We try to provide as correct, complete and clear as possible information on these pages. Nevertheless, if you see anything in the documentation that is not correct, does not match your experience or requires further clarification, please create a request (type : request for information) via our portal (https://sciensano.service-now.com/sp) or send us an e-mail via support.healthdata@sciensano.be to report this documentation issue. Please, do not forget to mention the URL or web address of the page with the documentation issue. We will then adjust the documentation as soon as possible. Thank you!Give access to an HD application for someone from your organization
Give access to an HD application for someone from your organizationTo give access to the applications of healthdata.be (like HD4DP v2 and healthstat.be), you need to click on GIVE ACCESS in the white text box on the EAM portal page.
You can give access to
Give access to a single user
After selection of GIVE ACCESS on the EAM portal page, an ACCESS REQUEST form is shown.
Completing this form is similar to the process on the Request Access page for standard end-users. In the capacity of a SPOC, however, you will now fill in an Access Request form for a user within your organization.
Please fill in all required fields (indicated with a red asterisk *), make a selection in the mandatory drop-down lists and, optionally, tick the check boxes for additional help and/or information.
Organization NIHDI number
The NIHDI number of the organization is already provided, since your account is connected to this organization.
Role in project
When selecting Local Study Support, you will be asked to make a selection in the drop-down list of Author groups. These author groups are specified for the organization in question.
HD4DP2.0 field
Click in the field under HD4DP2.0 if you want to access the application to make registrations for the selected project:
Healthstat.be field
Click in the field under healthstat.be if you want to access the reporting of the selected project:
Once you have completed the access request form, click on the Submit button. When the submisson was successful, you will receive a confirmation message.
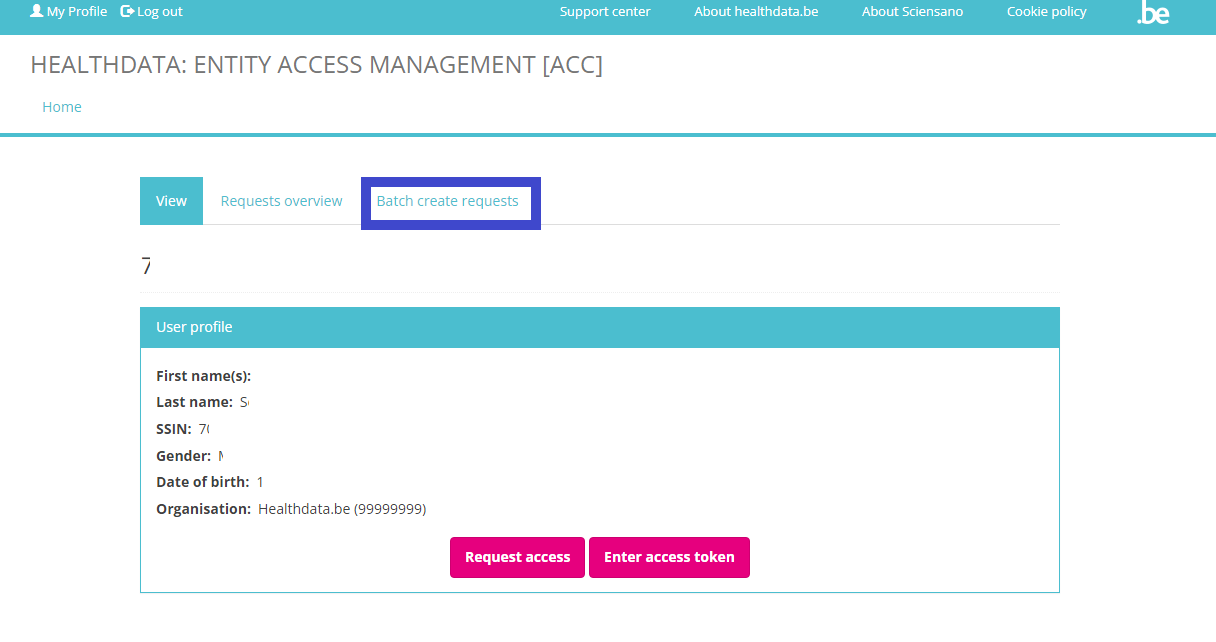
If you now return to My profile, the User profile is extended with the Organization name and code. And an extra tab Batch create requests has been added.
Continue to Give access to multiple users in batch in order to give access to multiple users in one operation.
Give access to multiple users in batch
The person whom has been assigned the SPOC role for the healthcare organization (HCO) is able to give access to multiple users in batch. The SPOC therefore needs to return to the User profile page and select the tab Batch create requests.
In the tab Batch create requests a CSV file can be selected via the file selection button.
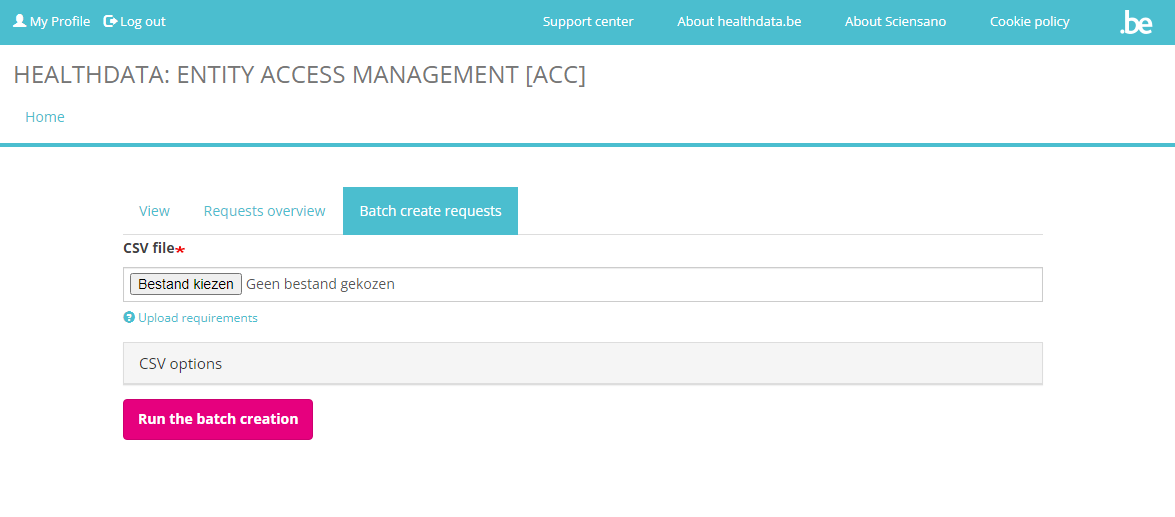
Upload the CSV file and click on the Run the batch creation button. An example of a CSV file structure is available here:
By doing so, a master request per line will be automatically generated, and then the information will be split into sub-requests (one per application or project) and saved in the healthdata.be DB2 for further processing.
A table schema (https://specs.frictionlessdata.io//table-schema/) to validate CSV looks as follows. An example file is available here: eam_csv_batch_requests_schema.json
User roles and corresponding values
To complete the “role”, 3 different choices are possible:
- 1= Local Study Lead: Only 1 Local Study Lead can be created by healthdata.be (Sciensano) for each registry within each organization.
- 2= Local Study Associate (= author). This will be the default role a user will receive, the reason why it was prefilled with “2”.
- 3= Local Study Support (= co-author). This role can be given if it is more suitable for the user. A Support will always need an Associate to which he/she will be assigned.
When selecting role 3 (= Local Study Support), the name of the ‘Local Study Associate’ is expected in the field “author_group”. To be filled in in the format <first_name last_name> of the Associate, with just 1 space (tab) between the two names).
When selecting role 2 (= Local Study Associate), the field author_group must be left empty.
This documentation is being updated regularly. We try to provide as correct, complete and clear as possible information on these pages. Nevertheless, if you see anything in the documentation that is not correct, does not match your experience or requires further clarification, please create a request (type : request for information) via our portal (https://sciensano.service-now.com/sp) or send us an e-mail via support.healthdata@sciensano.be to report this documentation issue. Please, do not forget to mention the URL or web address of the page with the documentation issue. We will then adjust the documentation as soon as possible. Thank you!Overview of the requests
Overview of the requestsAfter submission of the requests for access and receipt of the confirmation message, you are able to consult the validation process and other features of the requests via the tab Requests overview on the My Profile page.
Based on the scope of the requests overview, we can distinguish between
Overview of the requests for end-users
In order to view their own requests, end-users can open the My Profile page and click on the tab Requests overview.
The overview shown can be searched and sorted in the top row as needed (see figure below). End-users will only see a list of requests they have created for themselves.
Request UUID field
This field contains the unique ID’s of the requests. The occurence of the same unique ID in several rows indicates that this master request consists of several subrequests, each one per project and per application that has been selected in the request form. These subrequests are than saved in the healthdata.be DB2 for further processing.
Status field
The Status field indicates whether the request has been created (value “created”; meaning to be approved by the SPOC) or approved (value “approved_rae”; meaning the request was approved by the SPOC and will be ready for sharing credentials).
Role in project field
The values in this field are Local Study Lead, Local Study Associate, Local Study Support. More detailed information about these roles can be found in User roles in HD4DP v2.
Application field
This field contains the application you have selected in the Request Access (End-User) or Access Request form to access the public health projects: HD4DP2.0 or Healthstat.be.
Project code field
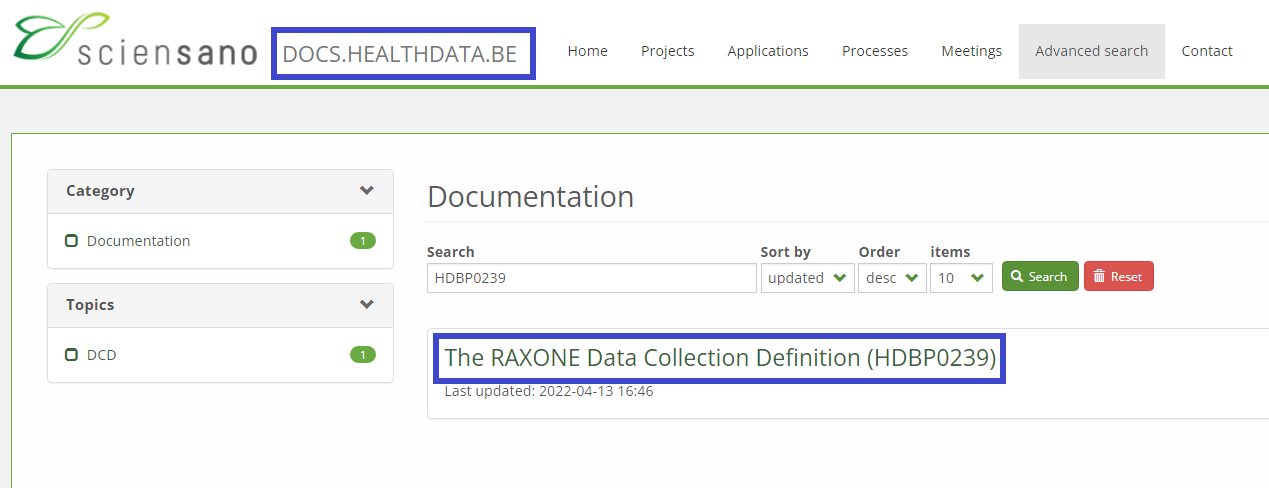
The value in this field is the Healthdata.be business project code. Entering this code in the publically accessible FAIR portal (fair.healthdata.be) results in the dataset for this project.
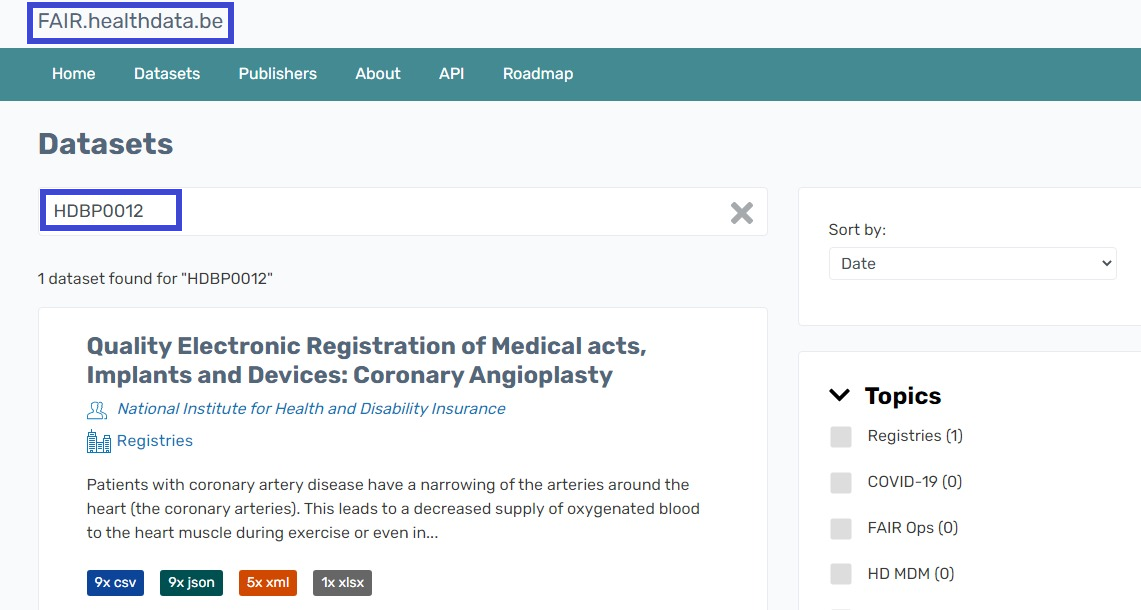
Or you can enter this code in the Advanced search field on the Healthdata.be docs pages to find the respective project’s documentation.
Overview of the requests for IT single points-of-contact (IT SPOC)
SPOCs have the capacity to view all requests for their organization.
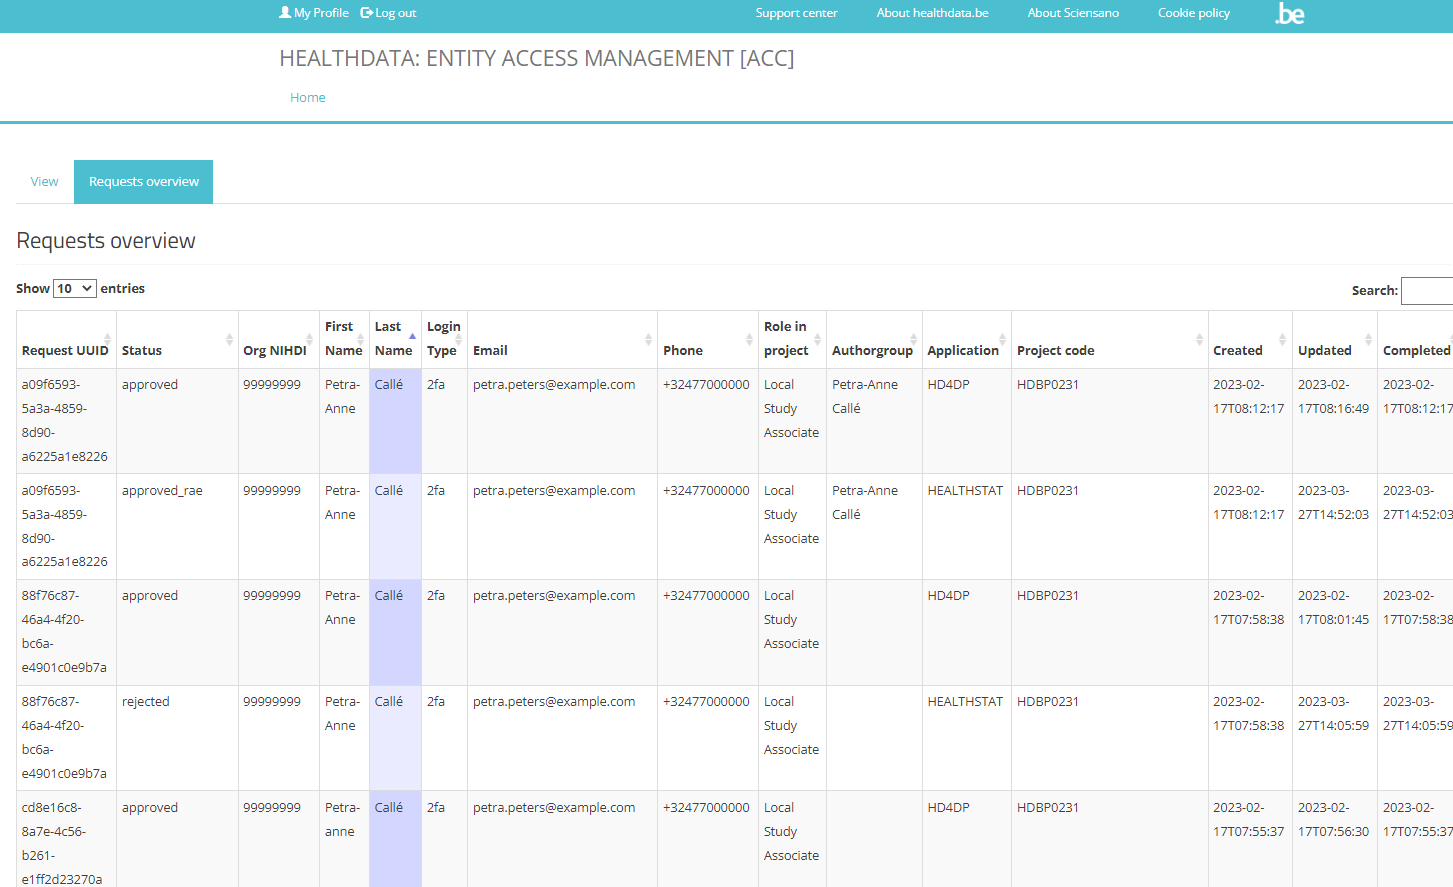
To view the Status of the request of the users of their affiliation, the SPOC needs to select the My Profile page and to click on the tab Requests overview (see screenshot below). Requests in this overview can be searched and sorted as needed.
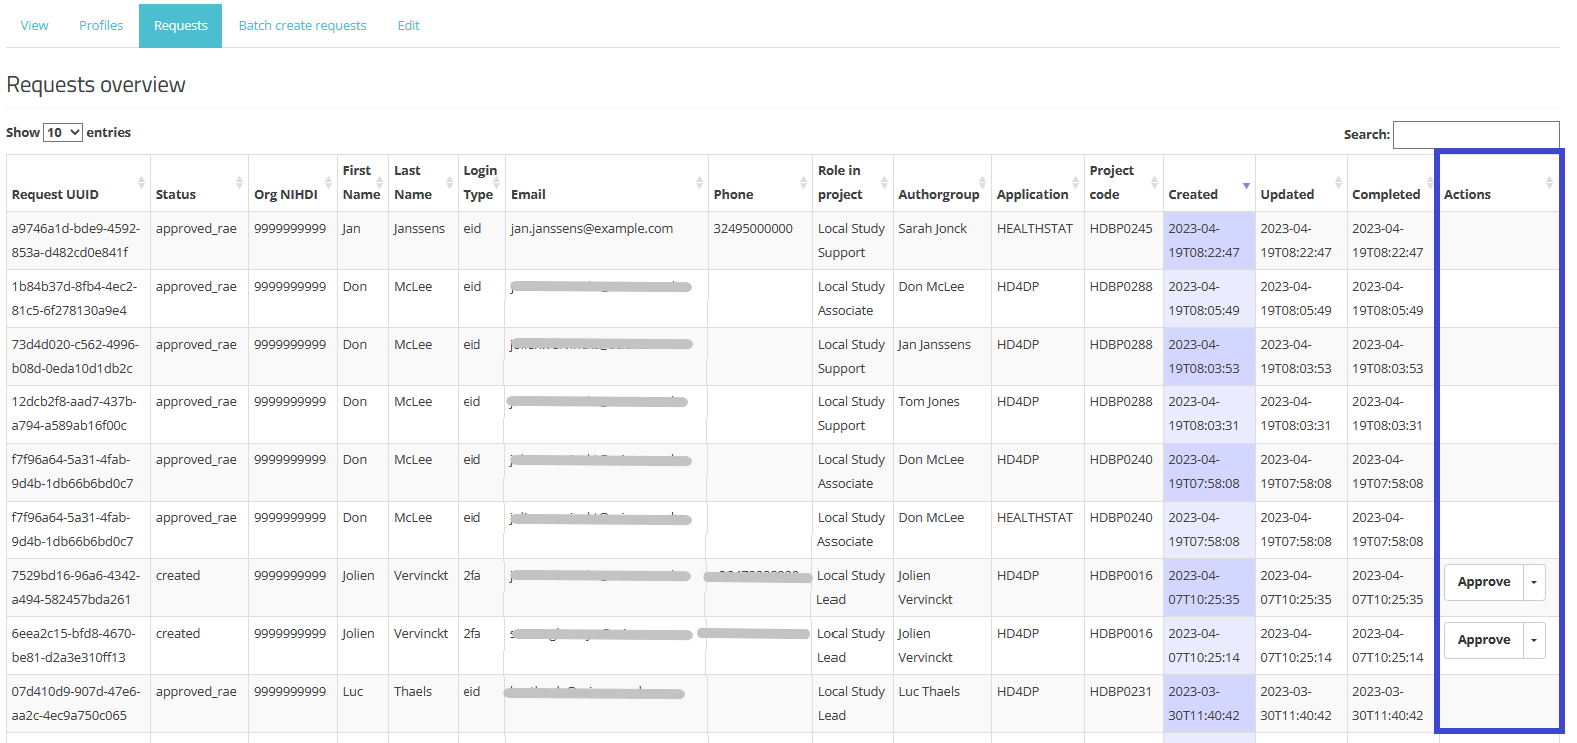
New: Actions field
This field describes the extra actions a SPOC can take, i.e. approve or reject requests. This functionality is explained in SPOC actions upon a request in more detail.
Request UUID field
This field contains the unique ID’s of the requests. The occurence of the same unique ID in several rows indicates that this master request consists of several subrequests, each one per project and per application that has been selected in the request form. These subrequests are than saved in the healthdata.be DB2 for further processing.
Status field
The Status field can only receive the status “approved_rae” since the request was made by the SPOC.
Role in project field
The values in this field are Local Study Lead, Local Study Associate, Local Study Support. More detailed information about these roles can be found in User roles in HD4DP v2.
Application field
This field contains the application you have selected in the Request Access (End-User) or Access Request form to access the public health projects: HD4DP2.0 or Healthstat.be.
Project code field
The value in this field is the Healthdata.be business project code. Entering this code in the publically accessible FAIR portal (fair.healthdata.be) results in the dataset for this project.
Or you can enter this code in the Advanced search field on the Healthdata.be docs pages to find the respective project’s documentation.
This documentation is being updated regularly. We try to provide as correct, complete and clear as possible information on these pages. Nevertheless, if you see anything in the documentation that is not correct, does not match your experience or requires further clarification, please create a request (type : request for information) via our portal (https://sciensano.service-now.com/sp) or send us an e-mail via support.healthdata@sciensano.be to report this documentation issue. Please, do not forget to mention the URL or web address of the page with the documentation issue. We will then adjust the documentation as soon as possible. Thank you!SPOC actions
SPOC actionsIn this article, we cover the different actions of a SPOC in more detail.
SPOC actions upon a request
SPOCs will be notified in case a request for access was made by a colleague, allowing them to review the overview table to manage all requests for their organization.
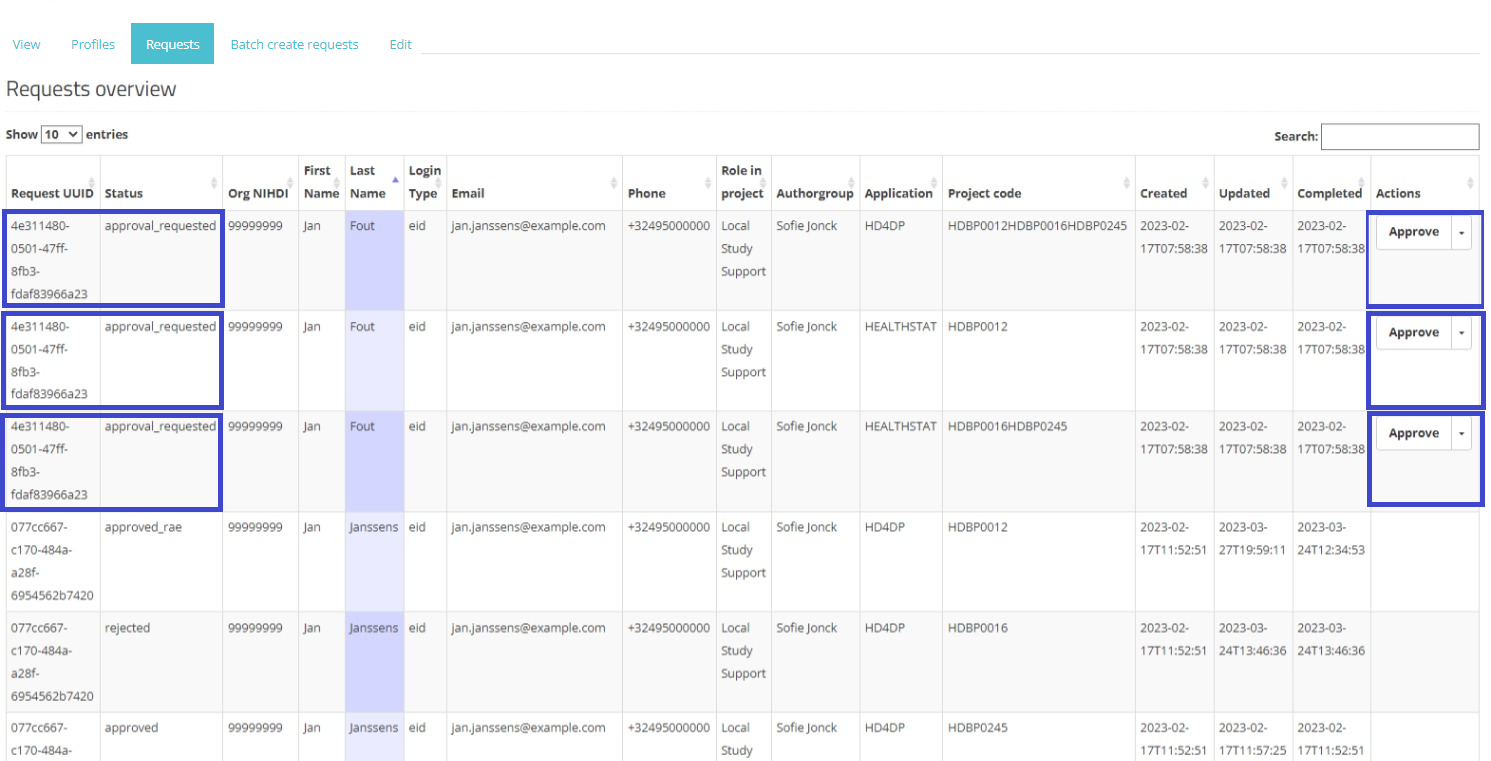
To open the overview table, the SPOC needs to navigate to "My Profile" followed by selection of the "Requests" tab. The overview of the requests appears (see below).
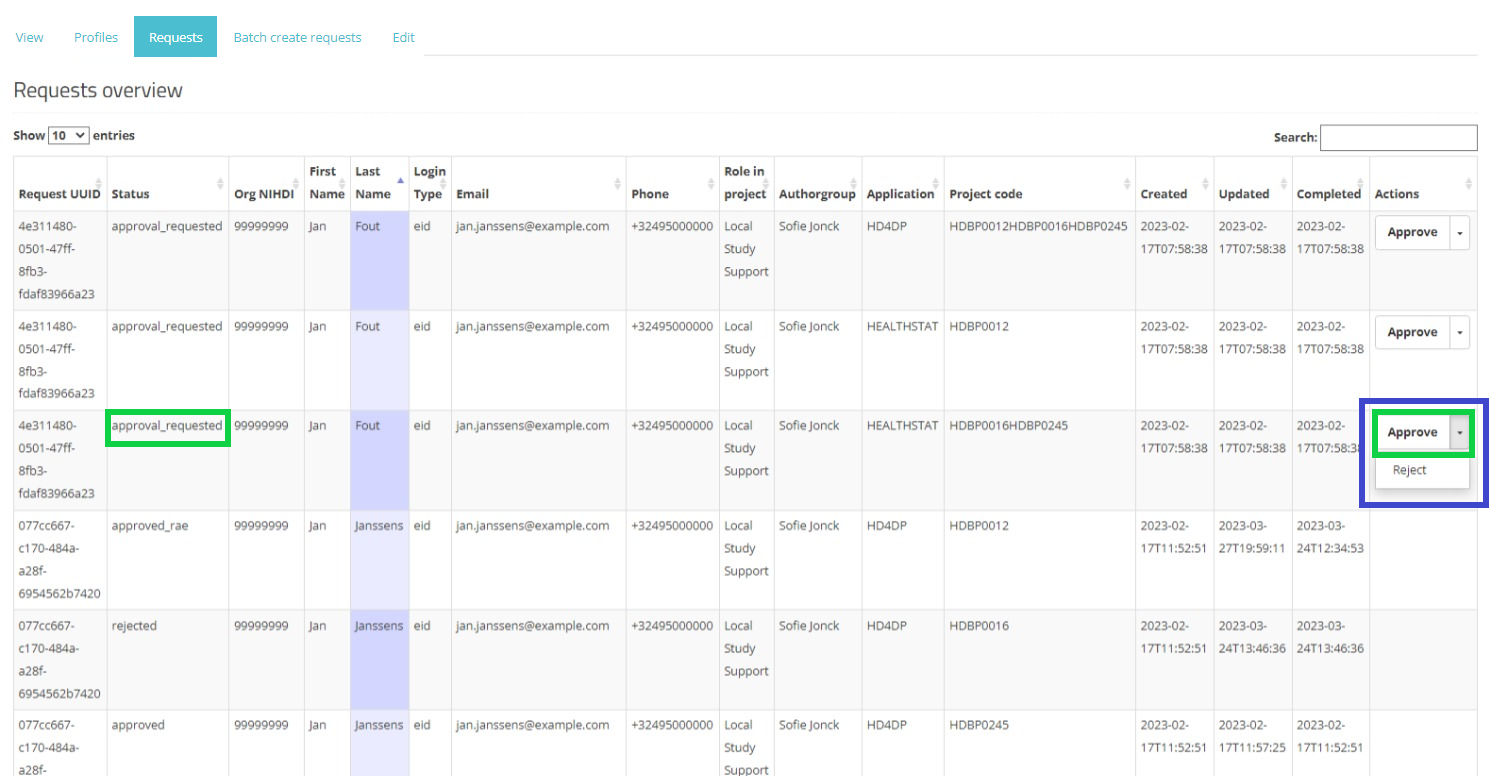
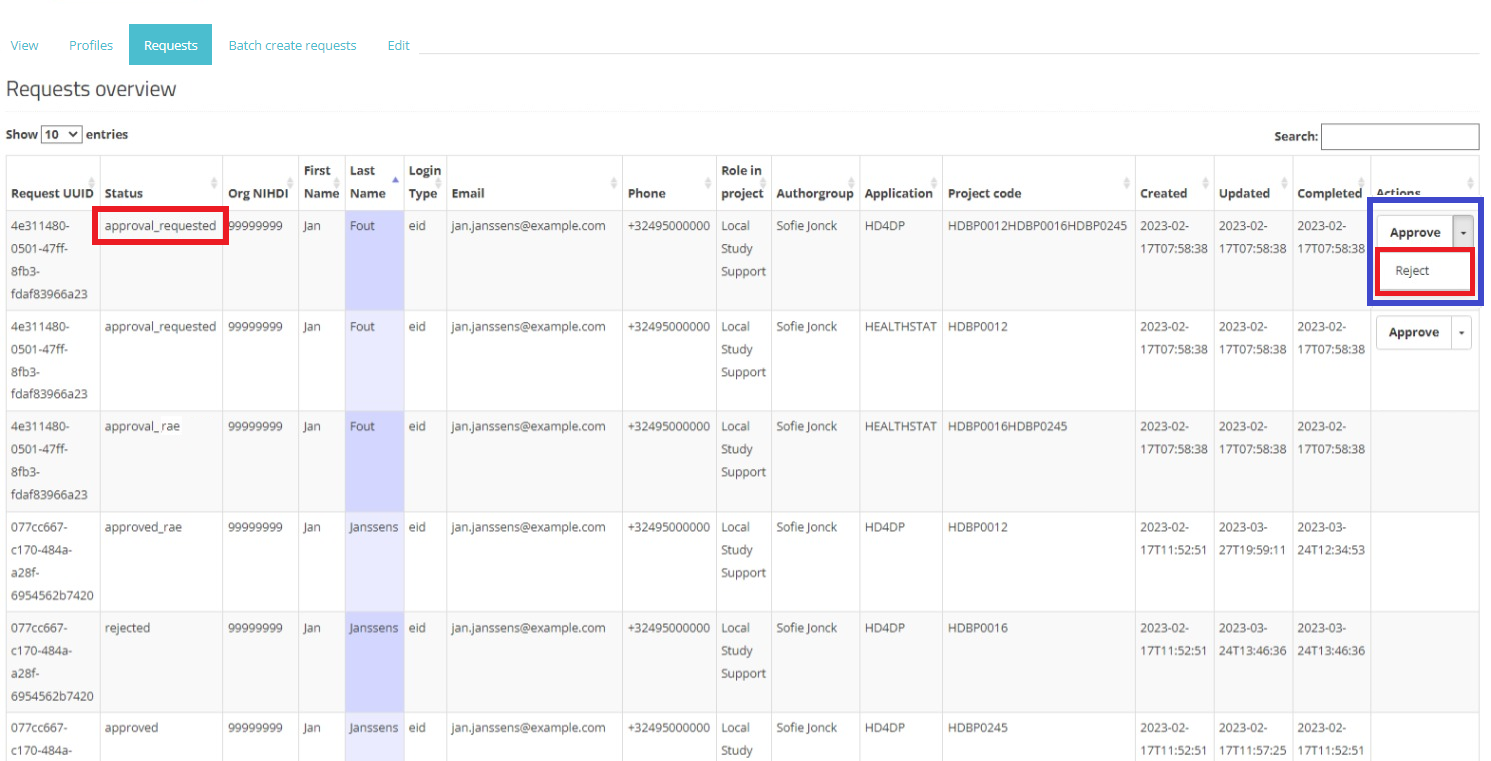
In the Actions field an Approve/Reject selection button is displayed next to each request with the status created or approval_requested (framed in blue). Two actions are possible now: the SPOC can either approve or reject the user's request.
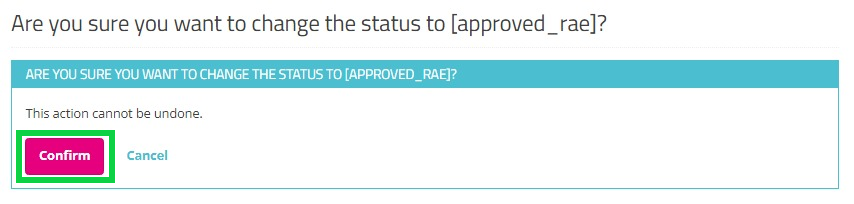
When selecting Approve, and after confirmation of this action, the status of the request changes to "approved_rae" and the dates in both fields Updated and Completed are updated accordingly as demonstrated in the screenshots below. Once the registry goes in production the account will be created automatically and the credentials will be shared to the user by e-mail.
Approve action:
Pop-up confirmation query:
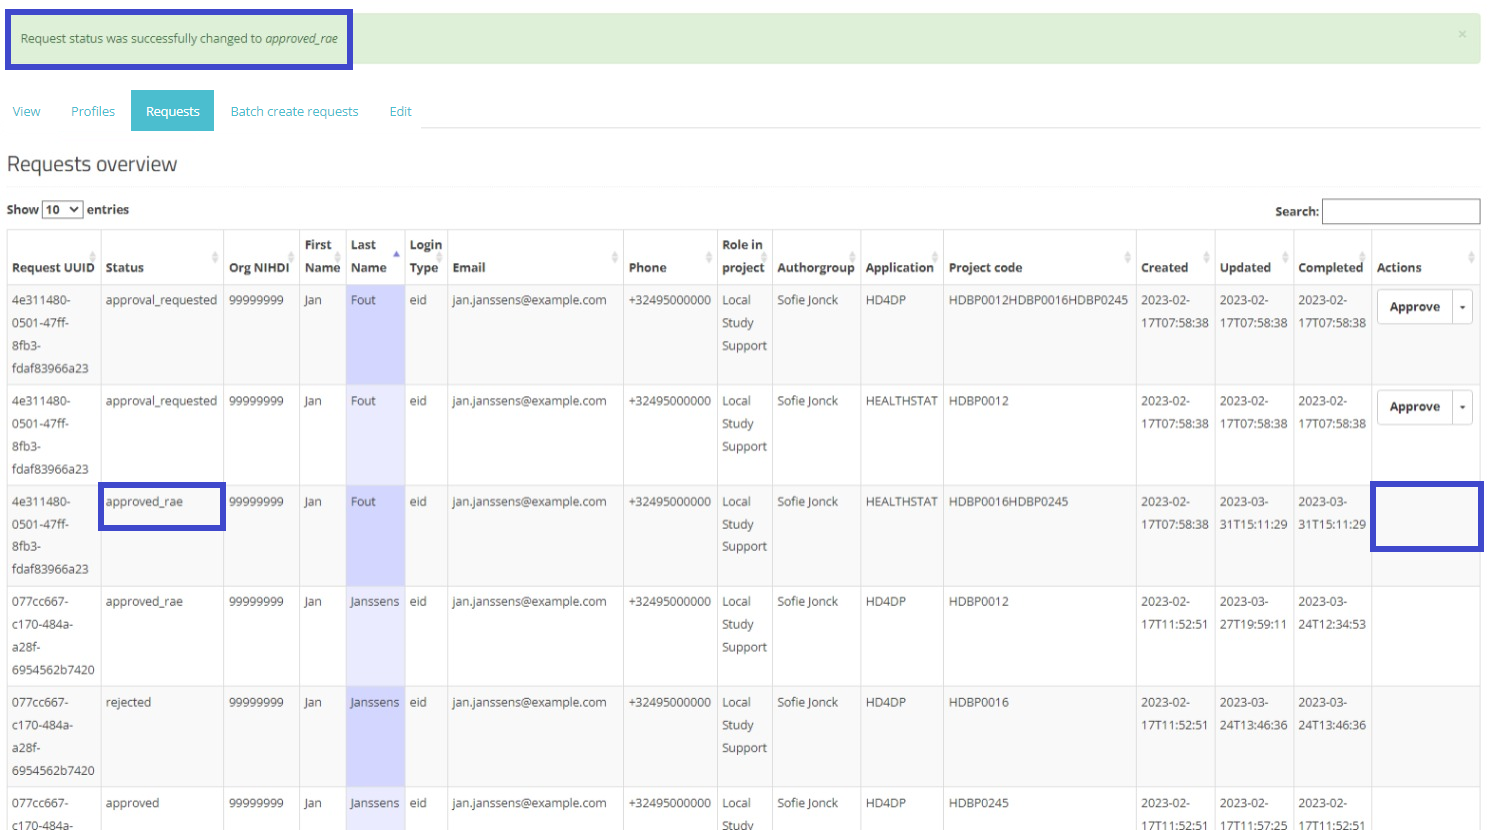
Approved:
When returning to the overview, you will notice that the status of the request has changed to "approved_rae". The Approve/Reject button in the Actions field has disappeared.
When selecting Reject, and after confirmation of this action, the request receives the status "rejected", the dates in the fields Updated and Completed are updated accordingly. A rejected request remains in the overview for information purposes. Compare following screens:
Reject action:
Pop-up confirmation query:
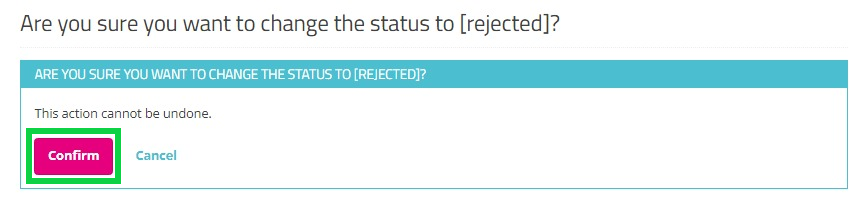
Rejected:
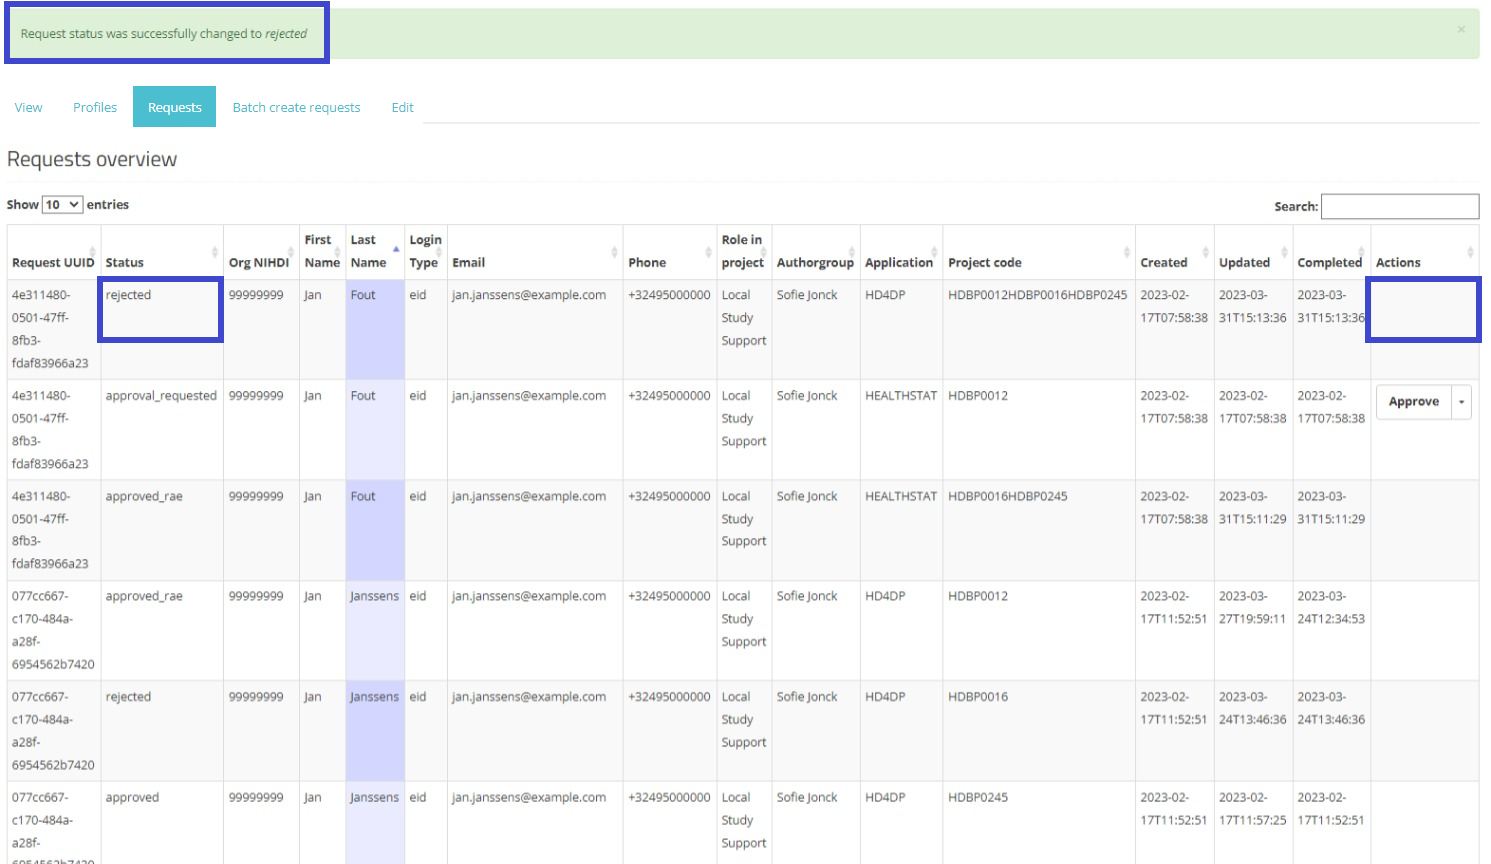
The requester will also be notified of the rejected request by e-mail:
Dear,
Your request for access to EAM was rejected.
Please contact your HD4DP SPOC for more information.
Best regards
Healthdata Support
Access the HD4DP v2 application
Access the HD4DP v2 applicationTo access the application HD4DP v2, you must first request an account. If you do not have an account yet, please read the article "Request access to an HD application for a specific project" first.
Once your account has been created, you will receive an e-mail with following information (Note that the text between the [ ] will be adapted.):
- Organization: [RIZIV number - Name]
- Login: [email]
- Password: [password]
- Application URL: [url]
With these credentials you can access the application HD4DP v2 of your organization:
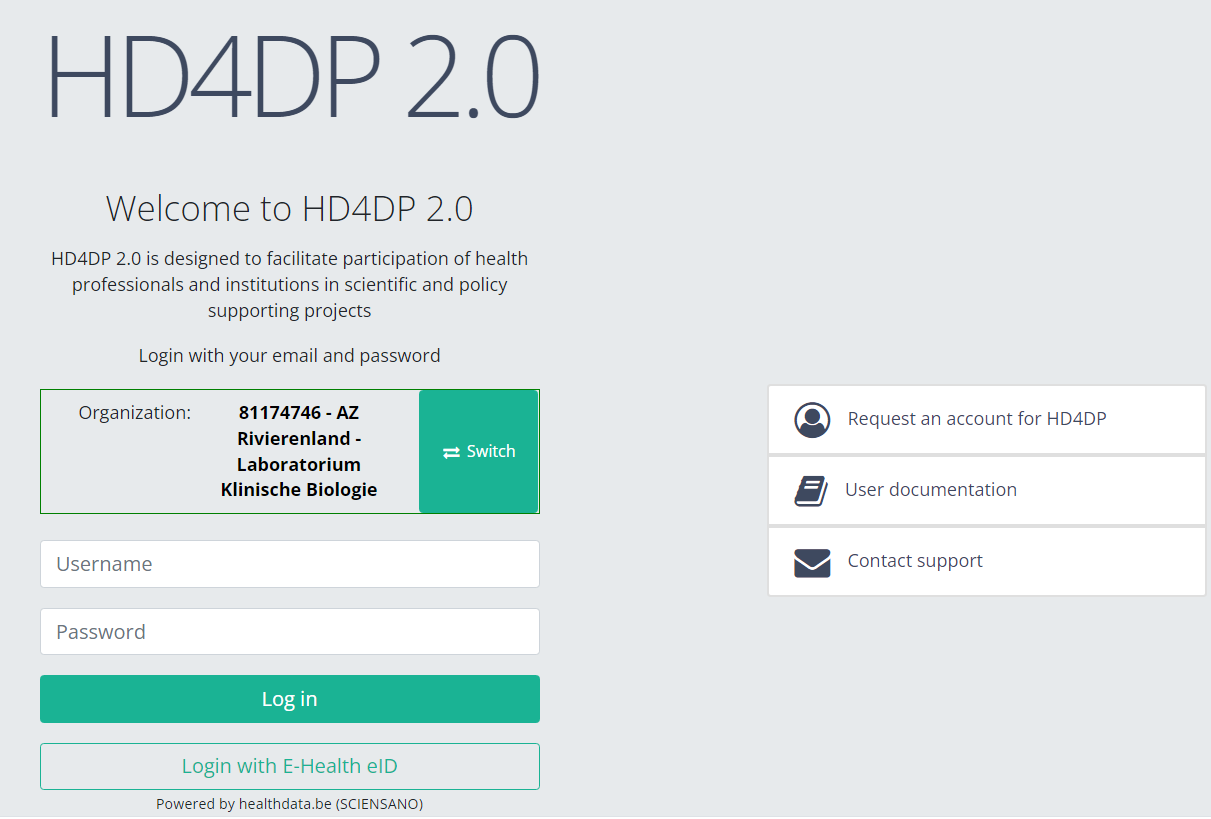
- Go to the url mentioned in the email
- Select "your organization" from the list
- Your organization: [RIZIV number – Name]
- Click on "Next"
- Fill in your "username" and "password"
- Click on "Log in"
This documentation is being updated regularly. We try to provide as correct, complete and clear as possible information on these pages. Nevertheless, if you see anything in the documentation that is not correct, does not match your experience or requires further clarification, please create a request (type : request for information) via our portal (https://sciensano.service-now.com/sp) or send us an e-mail via support.healthdata@sciensano.be to report this documentation issue. Please, do not forget to mention the URL or web address of the page with the documentation issue. We will then adjust the documentation as soon as possible. Thank you!Navigate to the Orthopride Knee project
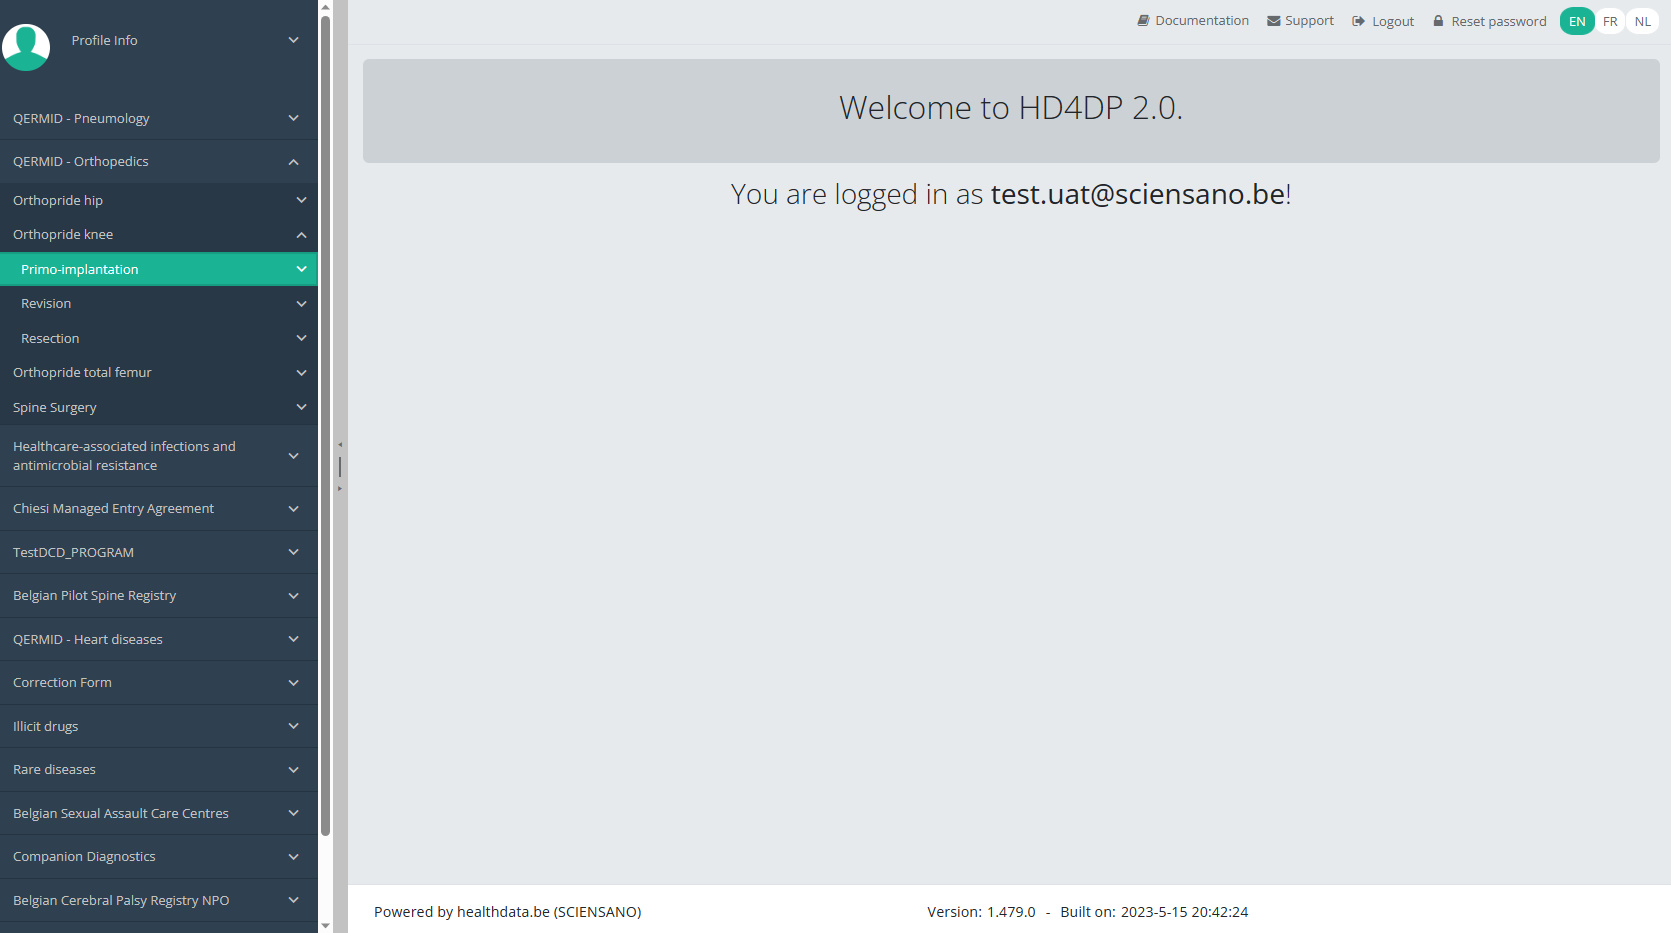
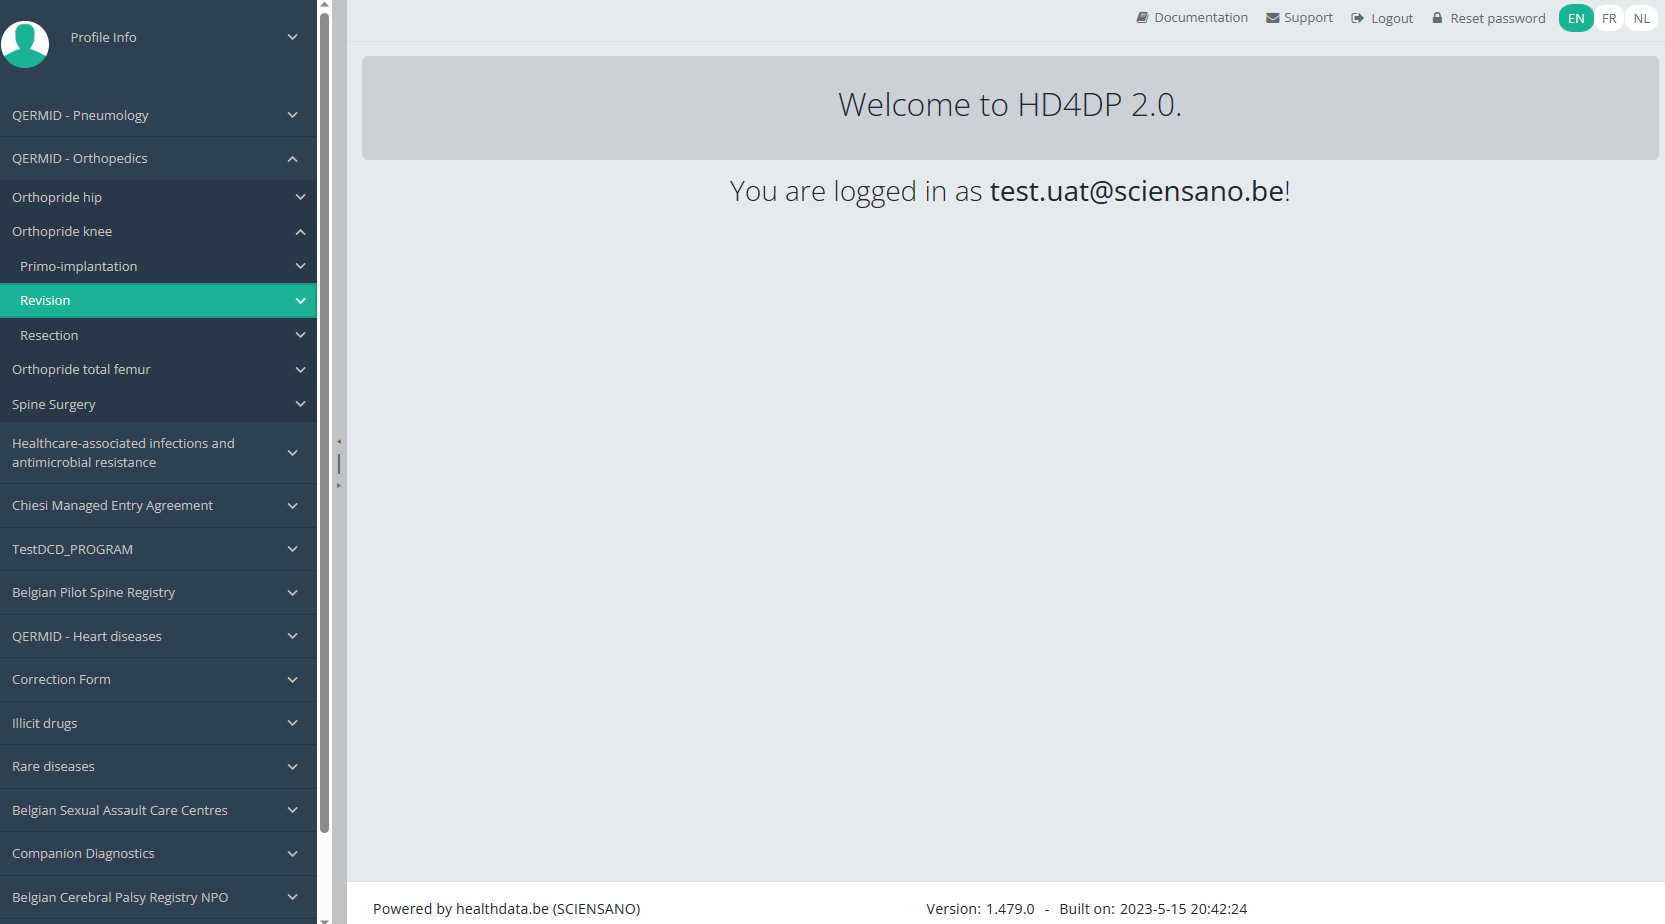
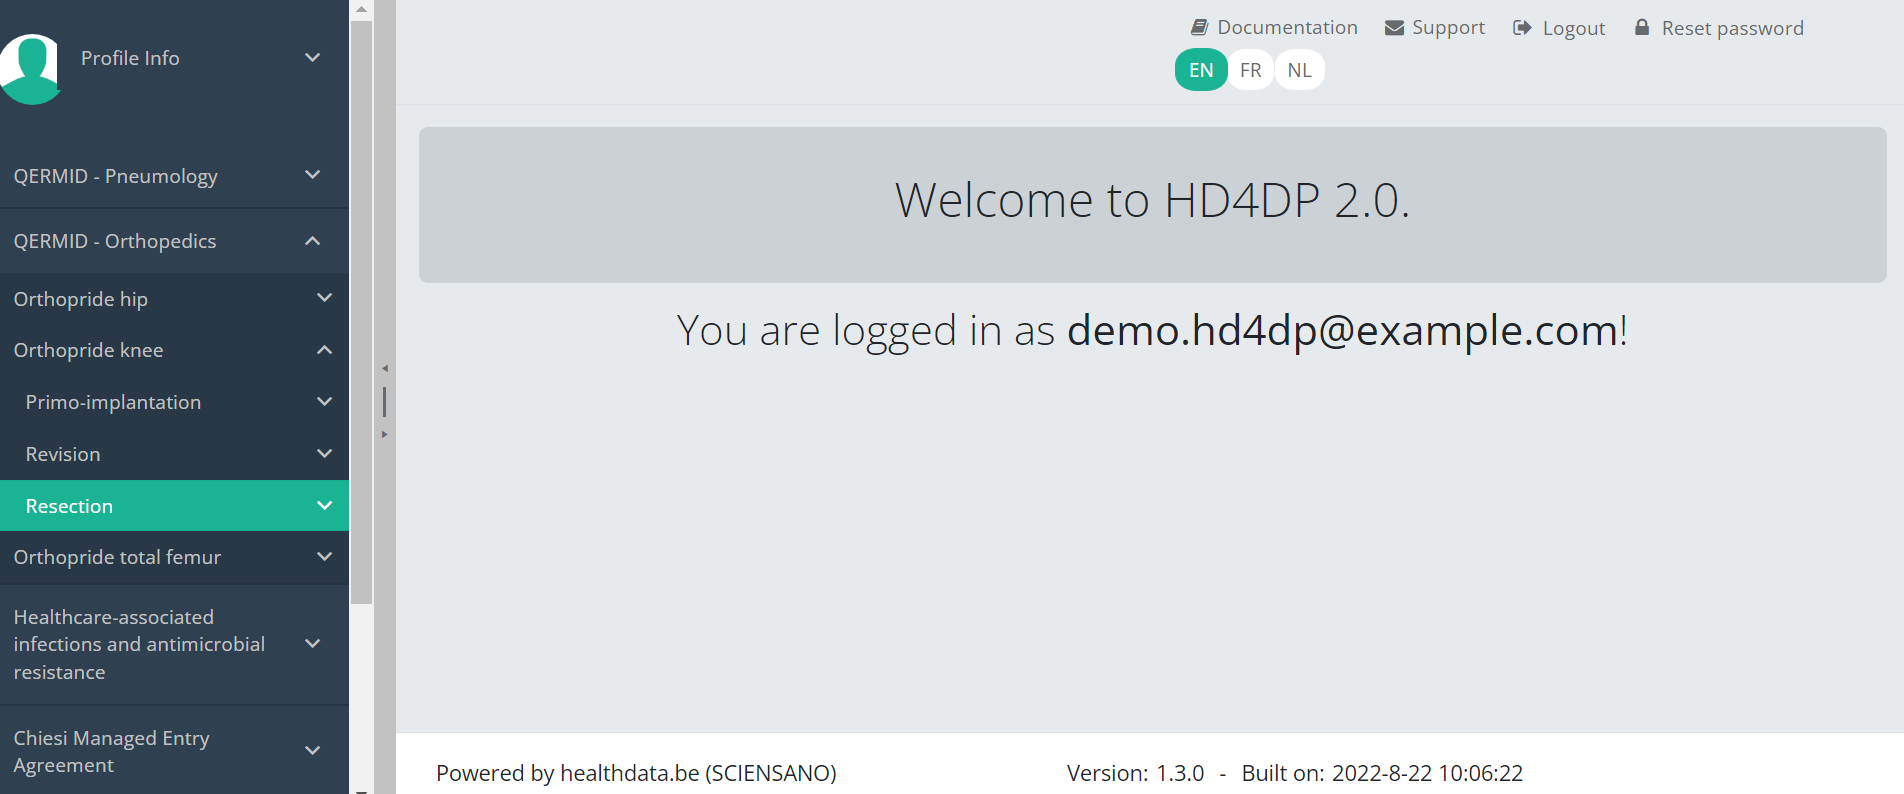
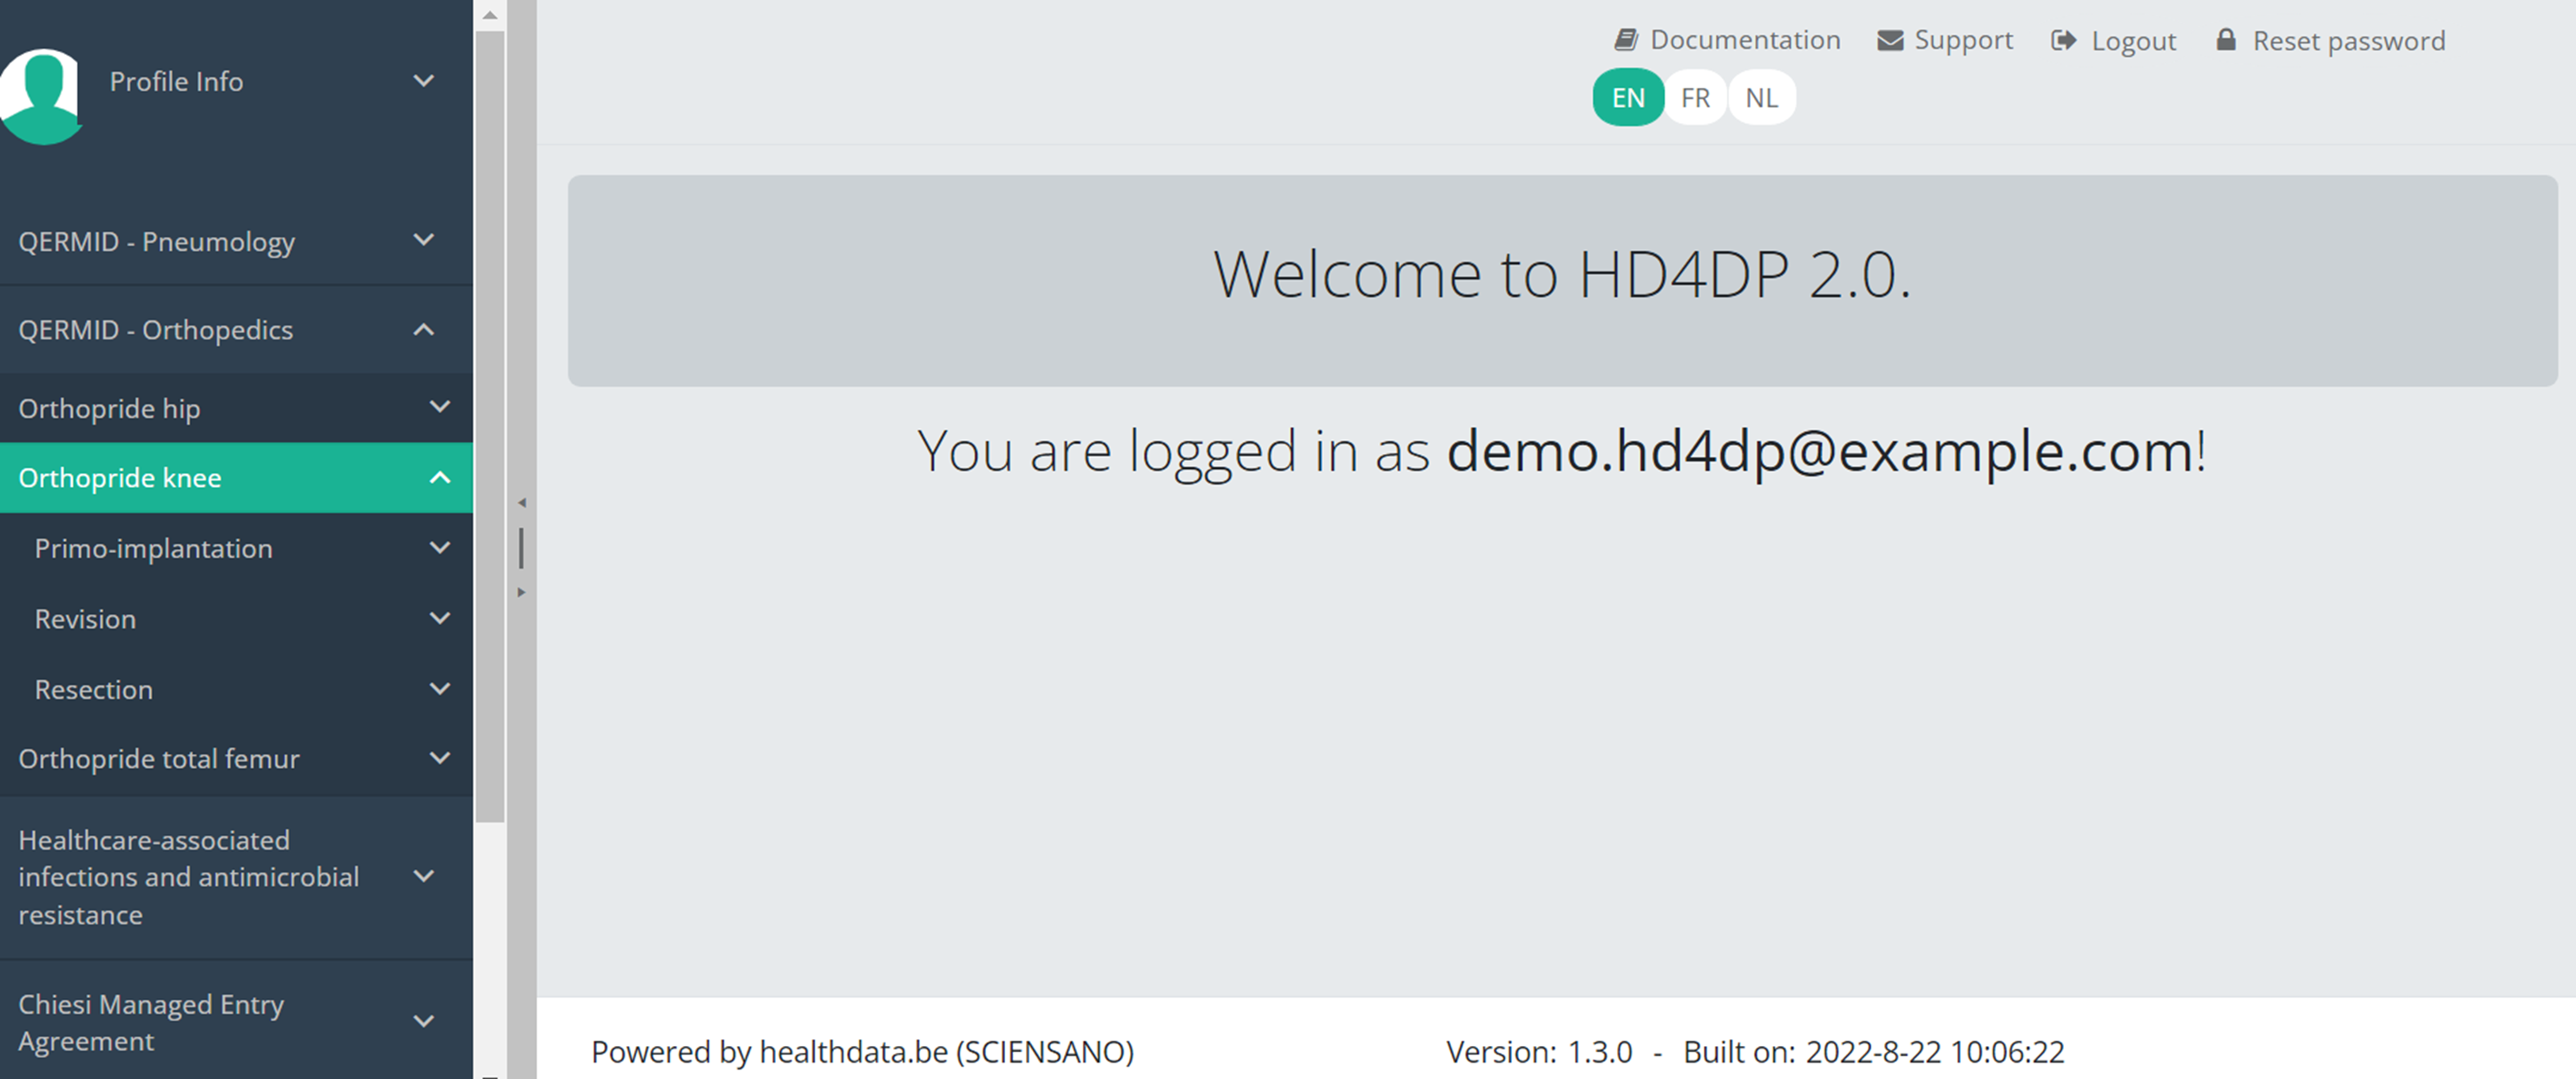
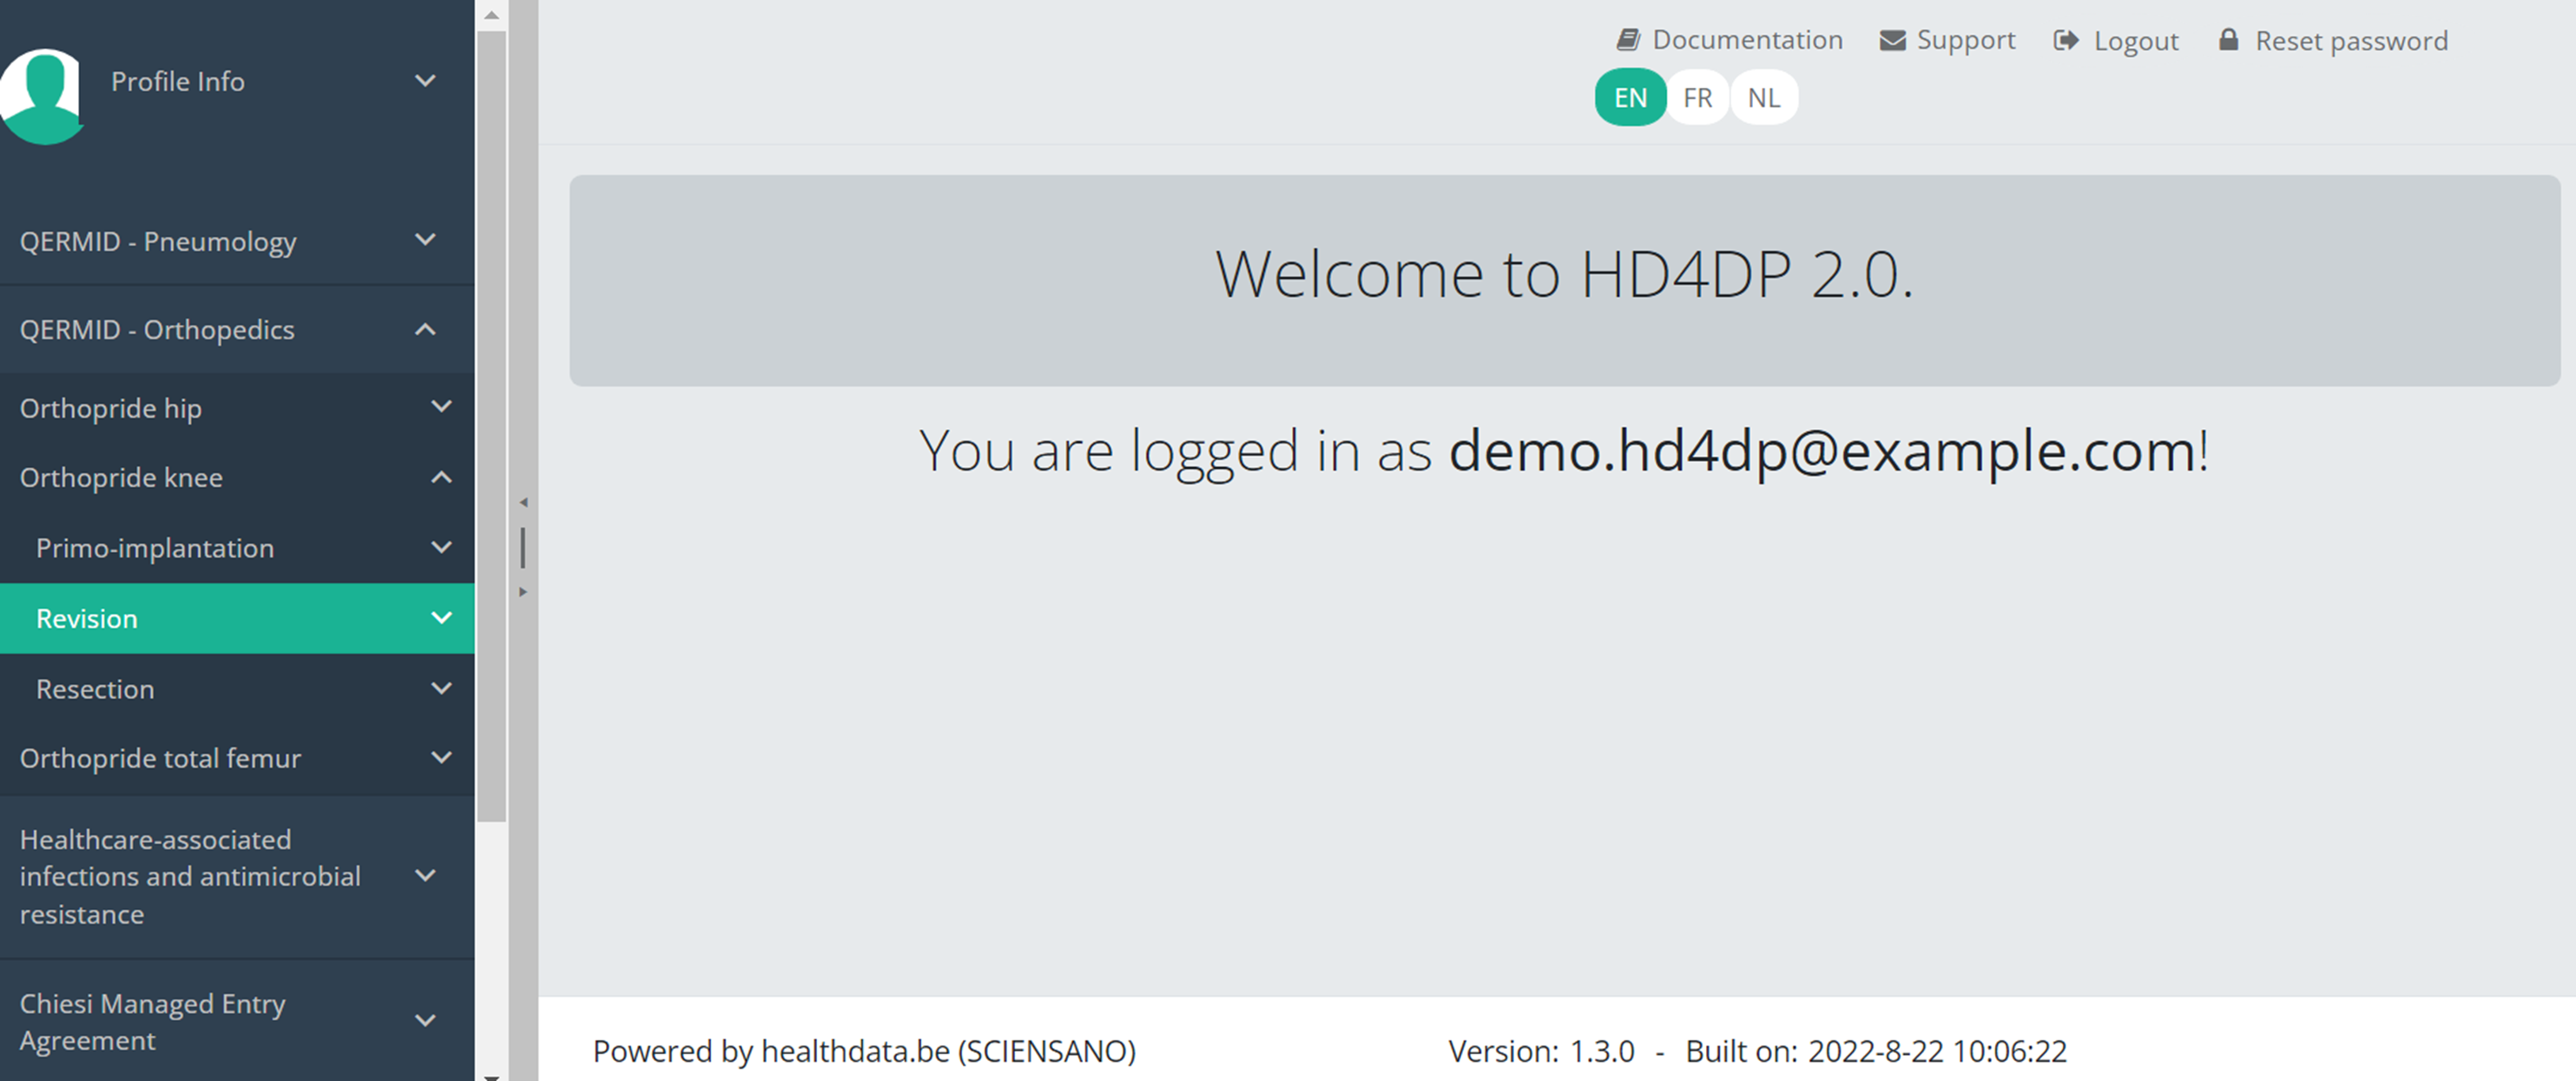
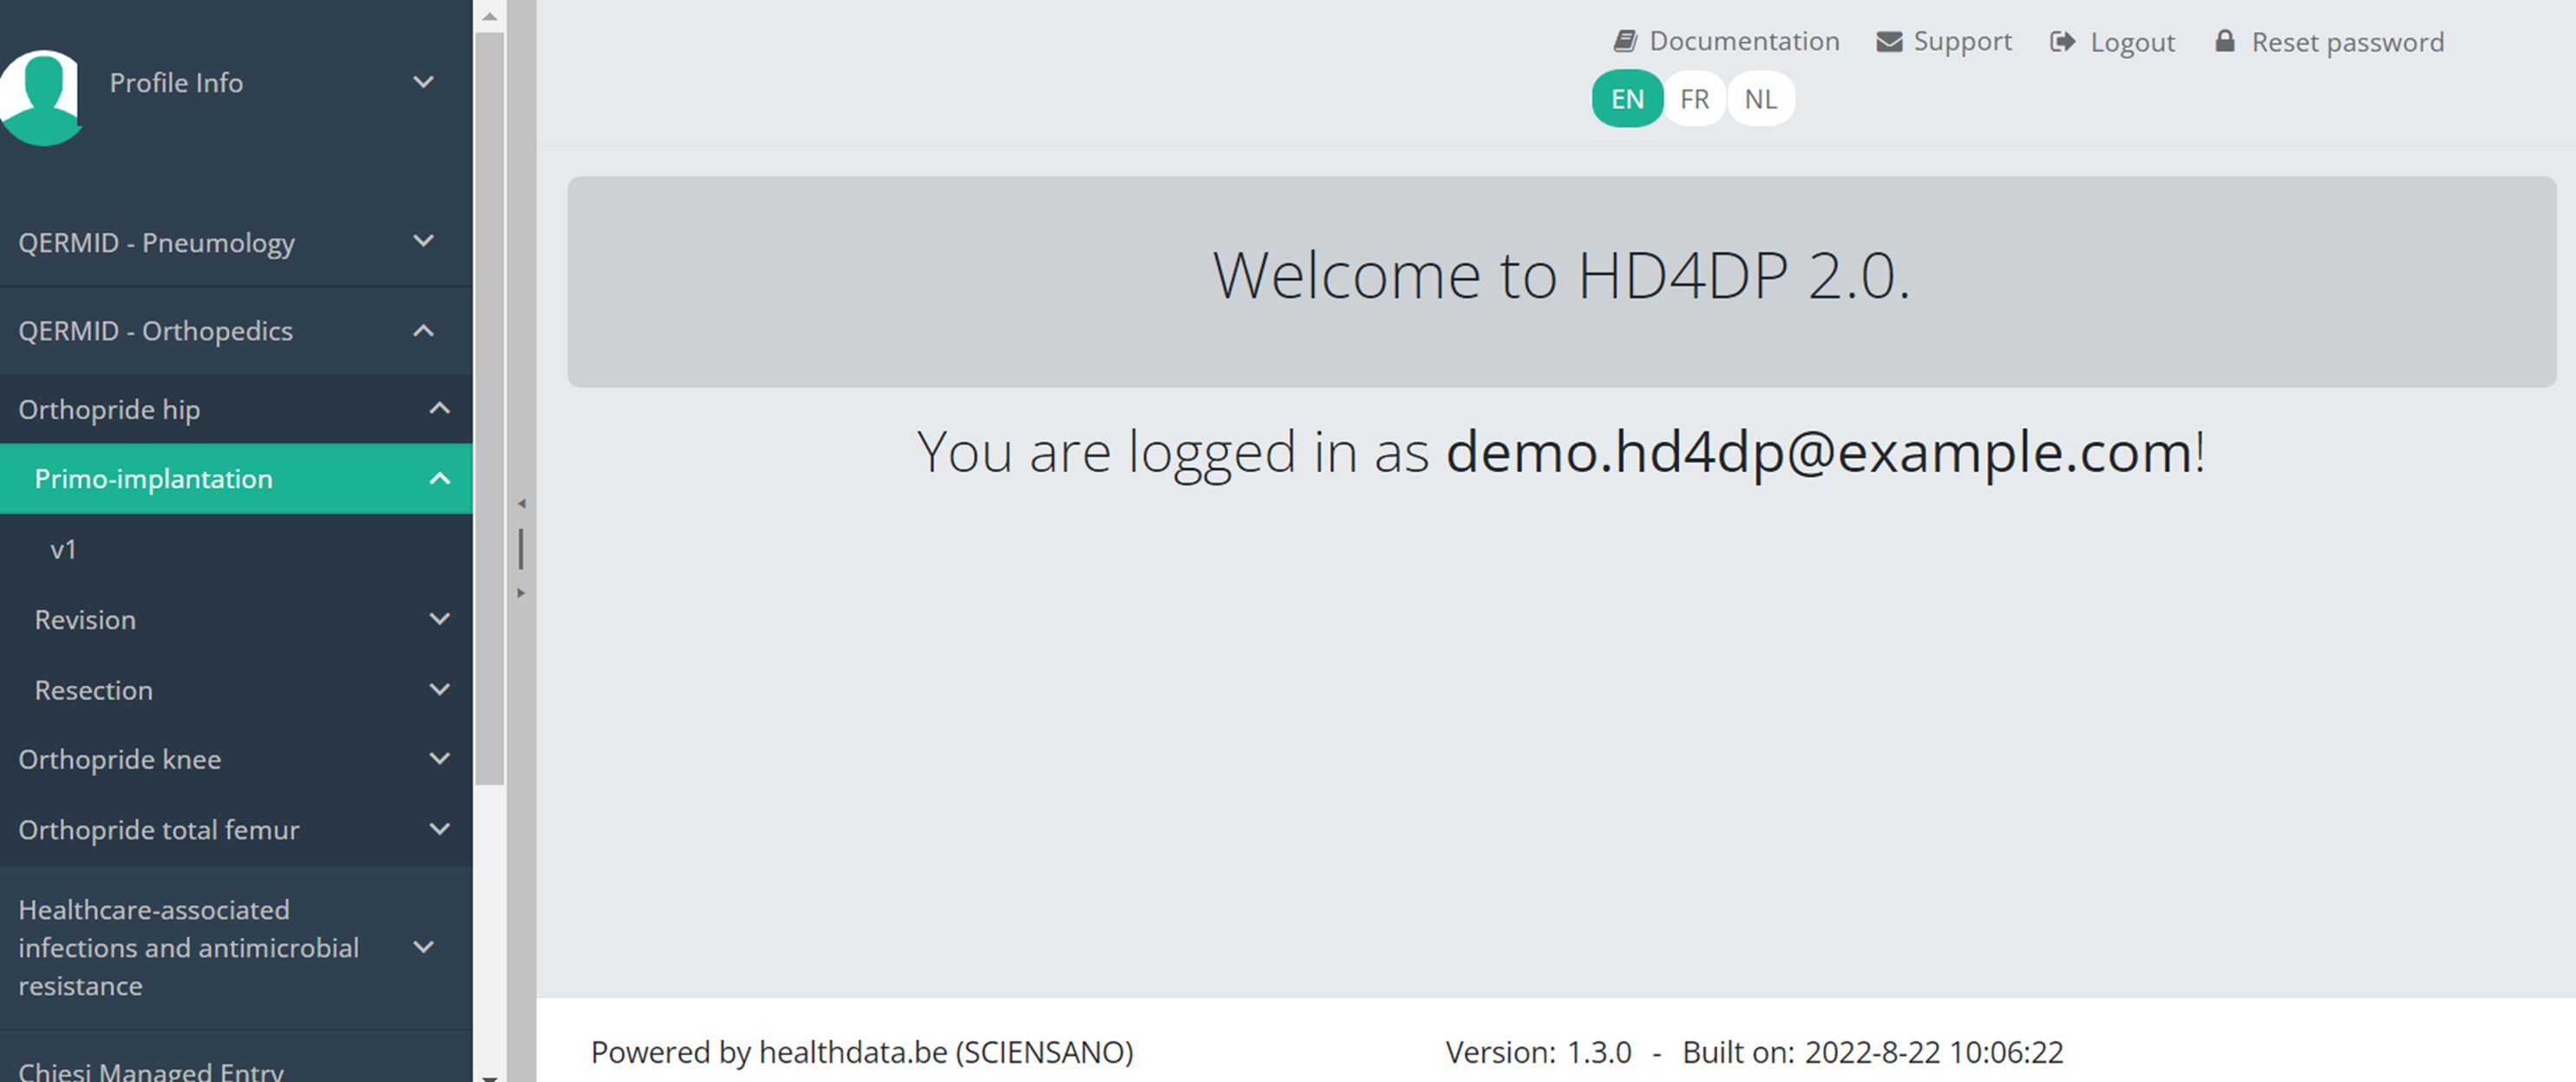
Navigate to the Orthopride Knee projectWhen logged in, you will see the Welcome page. In the left dark blue menu you can see all the study programs and projects you have access to.
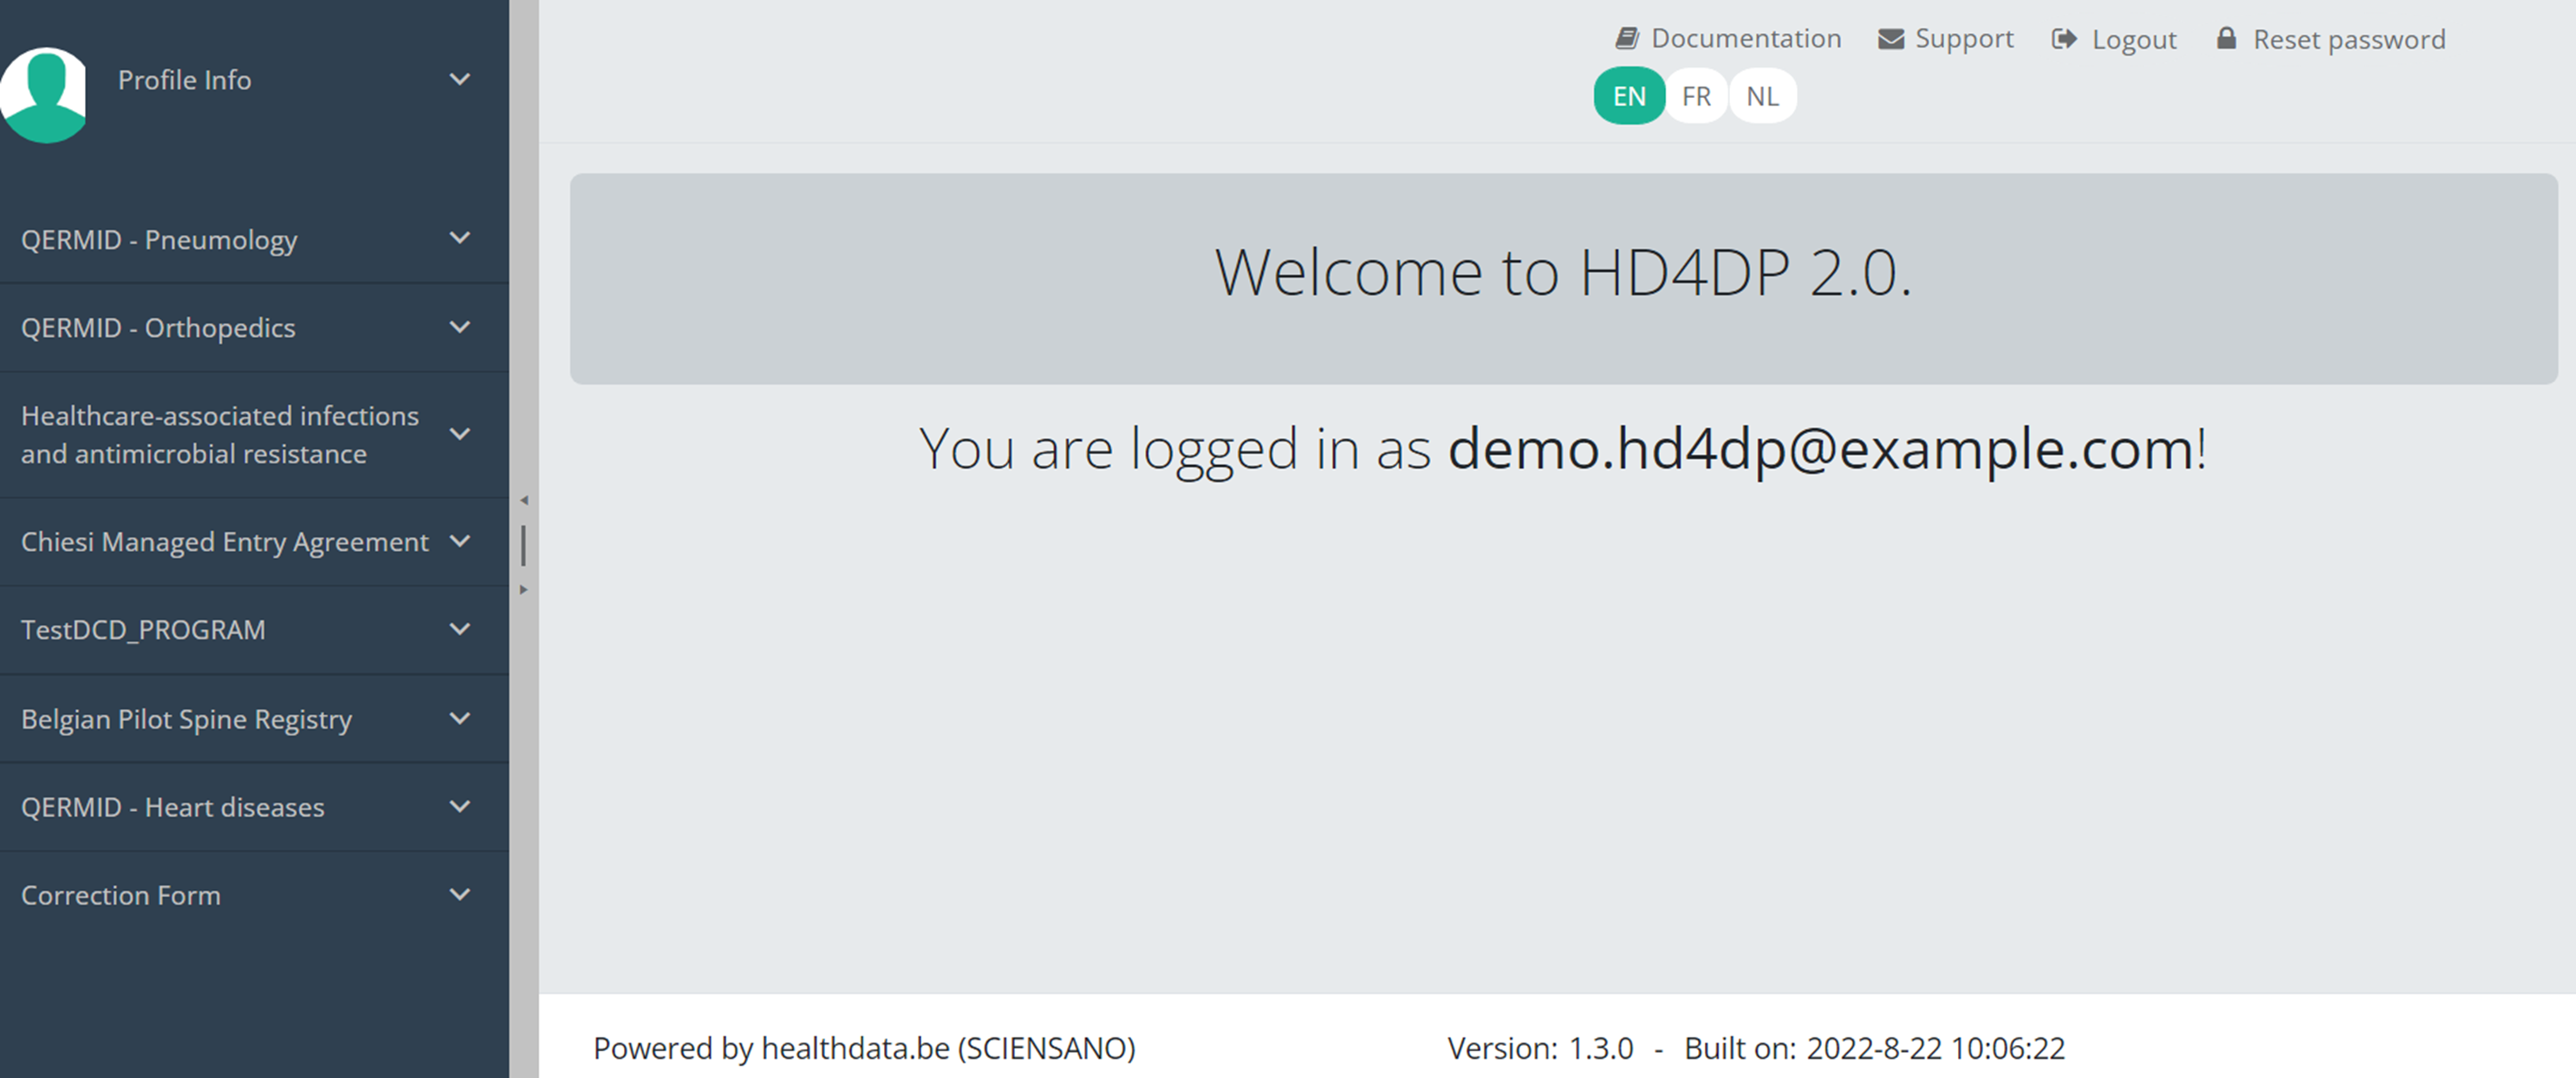
When you select the study program QERMID Orthopedics, you can see the study projects Orthopride Hip, Orthopride Knee and Orthopride total femur .
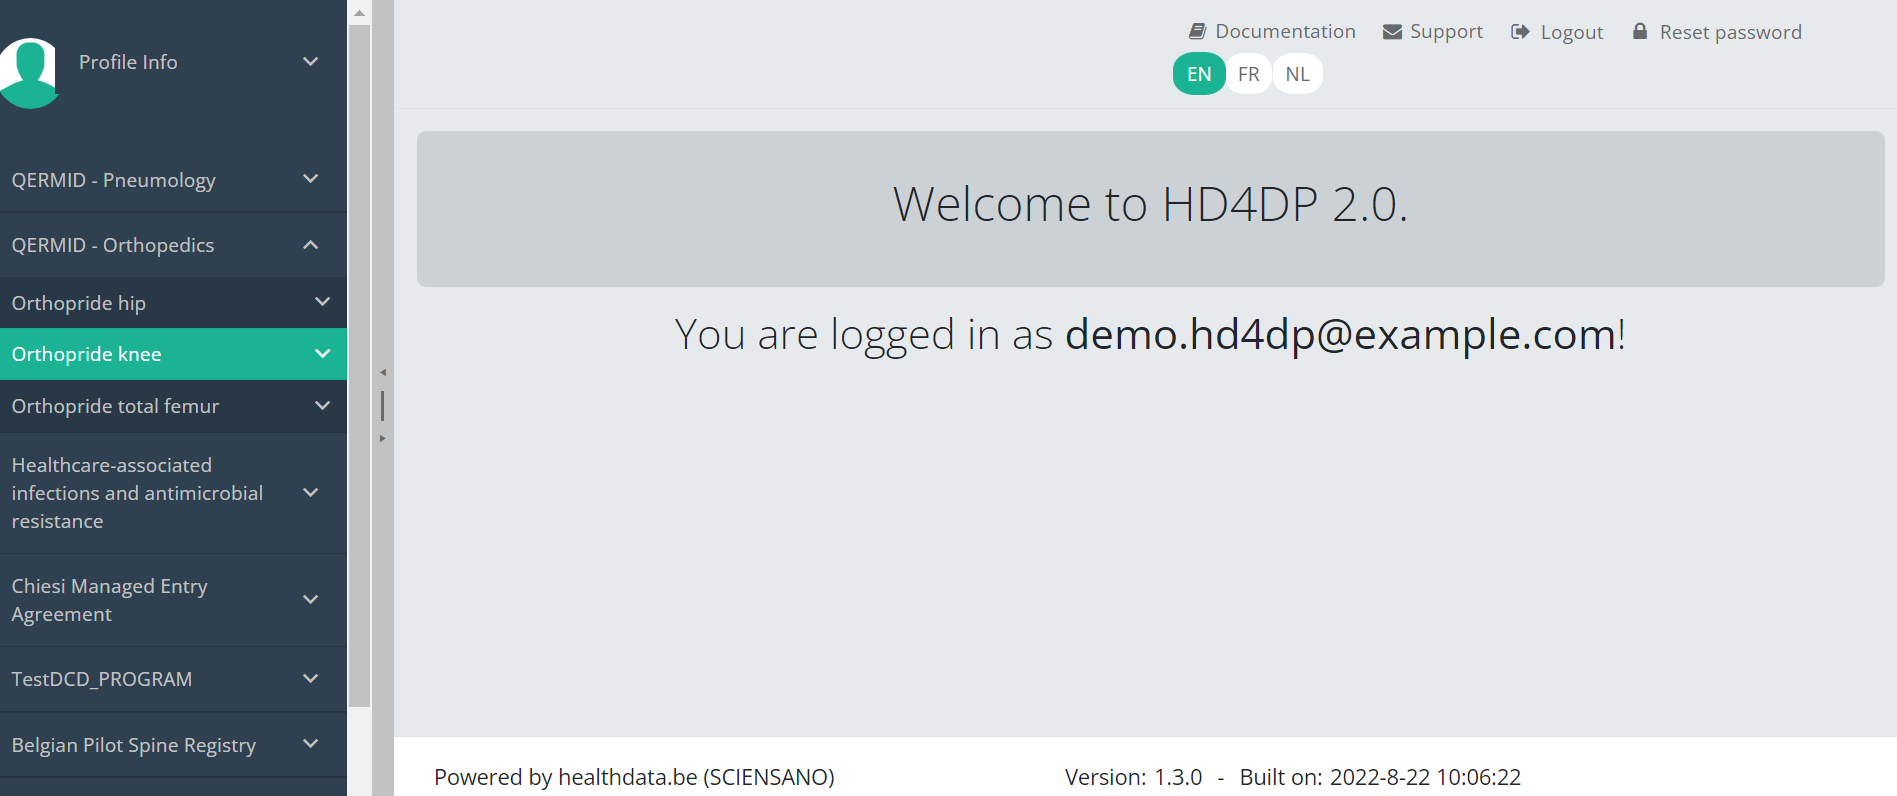
Select the study project Orthpride Knee.
You will see that the study project Orthopride Knee consists of three parts: Primo-implantation, Revision and Resection.

This documentation is being updated regularly. We try to provide as correct, complete and clear as possible information on these pages. Nevertheless, if you see anything in the documentation that is not correct, does not match your experience or requires further clarification, please create a request (type : request for information) via our portal (https://sciensano.service-now.com/sp) or send us an e-mail via support.healthdata@sciensano.be to report this documentation issue. Please, do not forget to mention the URL or web address of the page with the documentation issue. We will then adjust the documentation as soon as possible. Thank you!Create a Knee registration
Create a Knee registrationThe study project Orthopride Knee consists of three sections: Primo-implantation, Revision and Resection.

On the following pages we explain how you can register for each section.
This documentation is being updated regularly. We try to provide as correct, complete and clear as possible information on these pages. Nevertheless, if you see anything in the documentation that is not correct, does not match your experience or requires further clarification, please create a request (type : request for information) via our portal (https://sciensano.service-now.com/sp) or send us an e-mail via support.healthdata@sciensano.be to report this documentation issue. Please, do not forget to mention the URL or web address of the page with the documentation issue. We will then adjust the documentation as soon as possible. Thank you!Create a Knee registration "Primo-implantation"
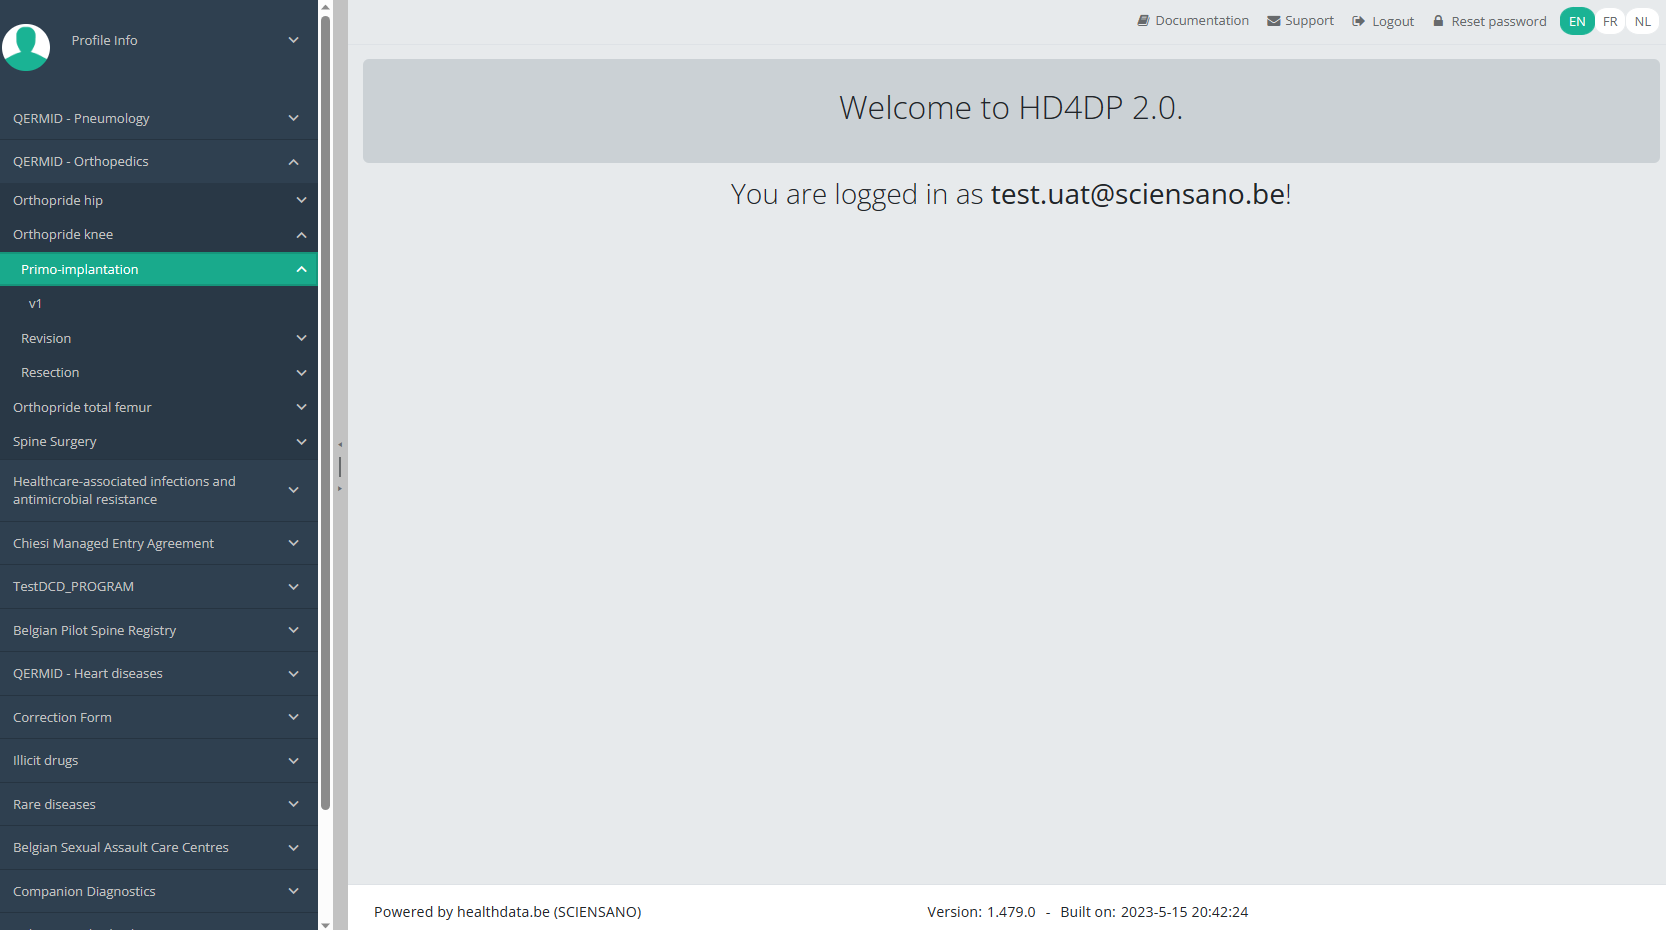
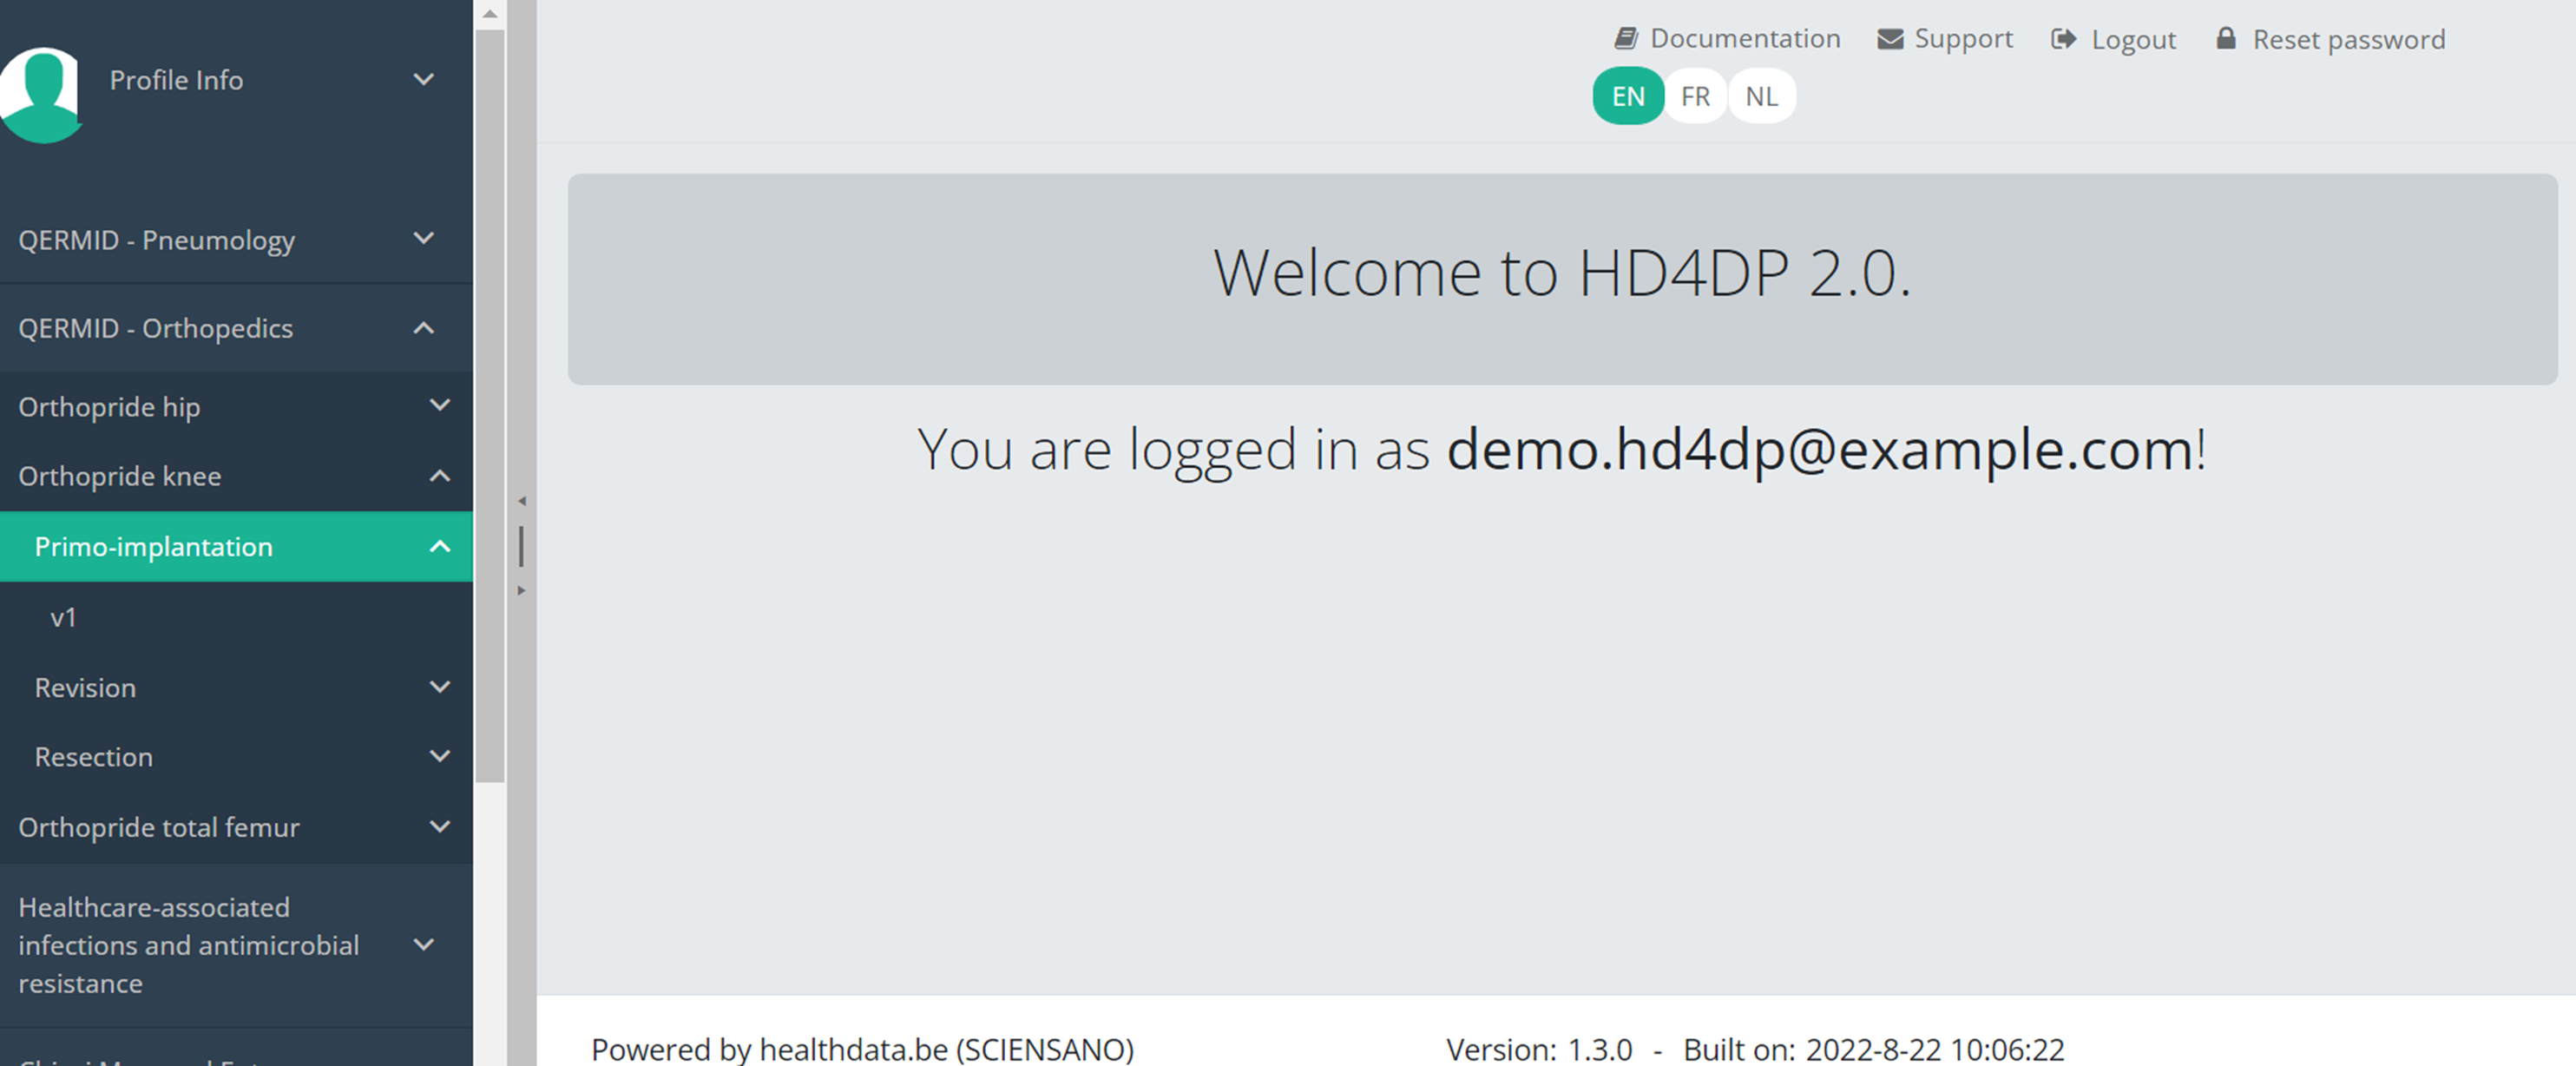
Create a Knee registration "Primo-implantation"To create a "Primo-implantation" registration for the study project Orthopride Knee, select "Primo-implantation" in the dark blue left menu.
You will see the number of versions of this study section. In this case, there is only one version.
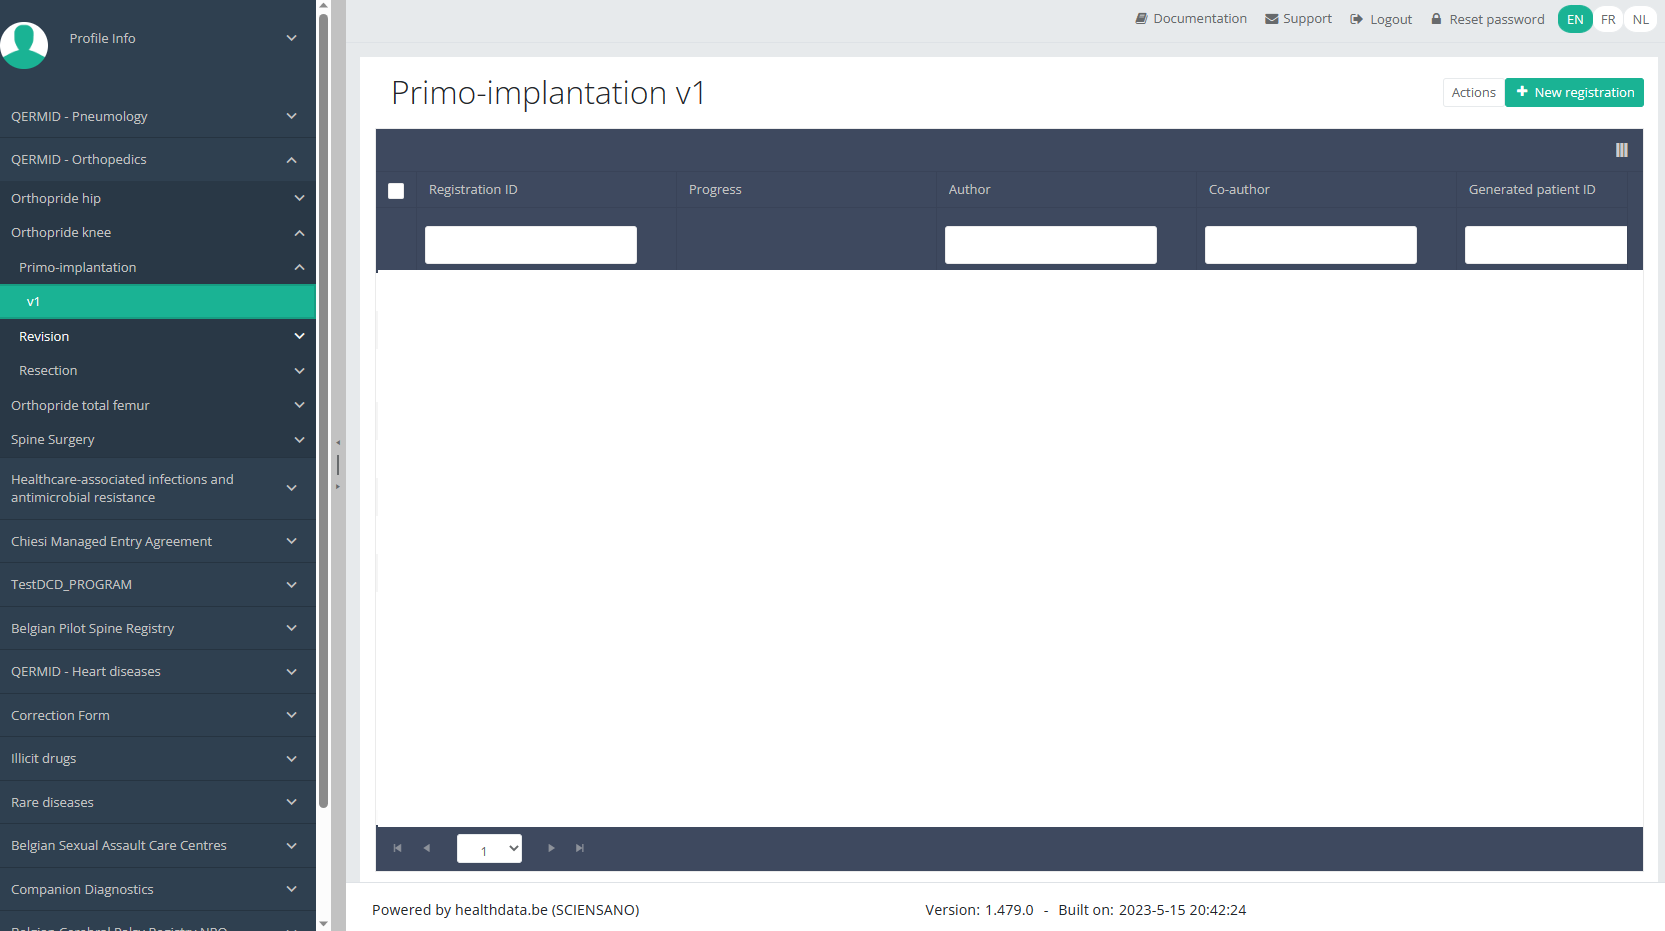
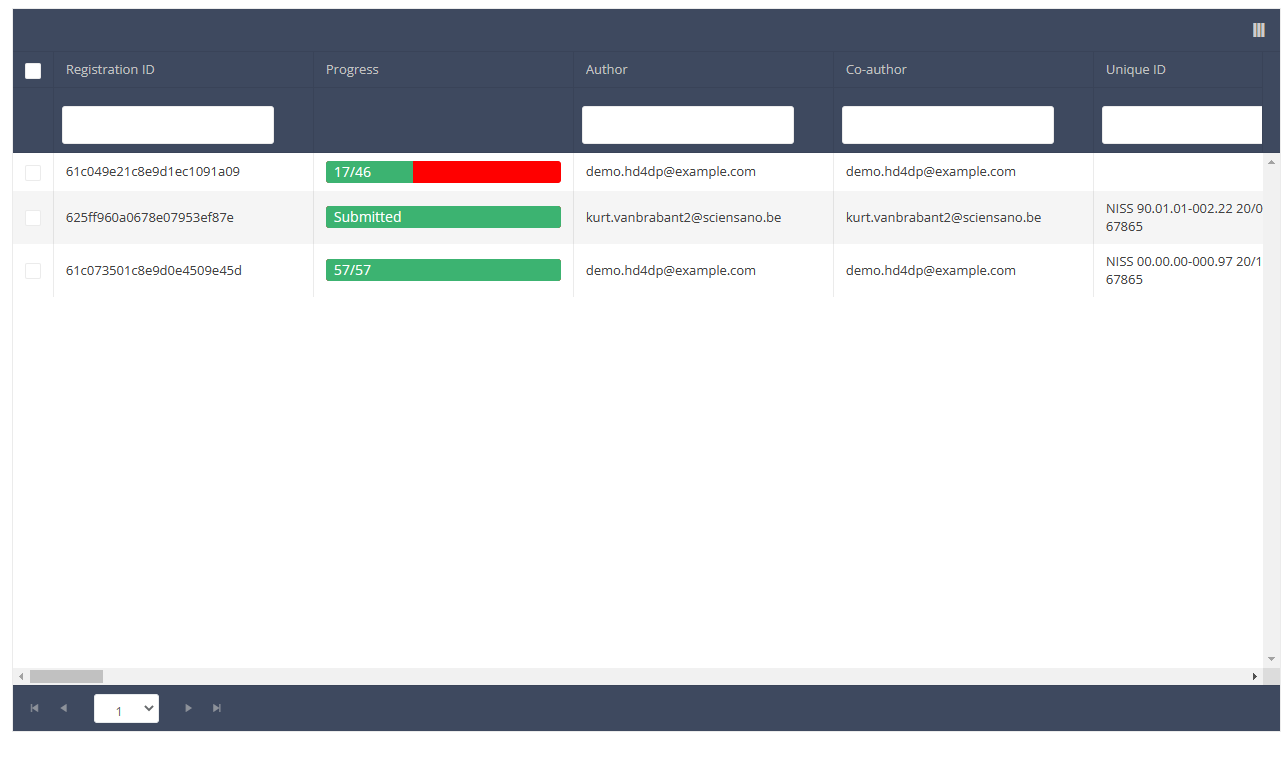
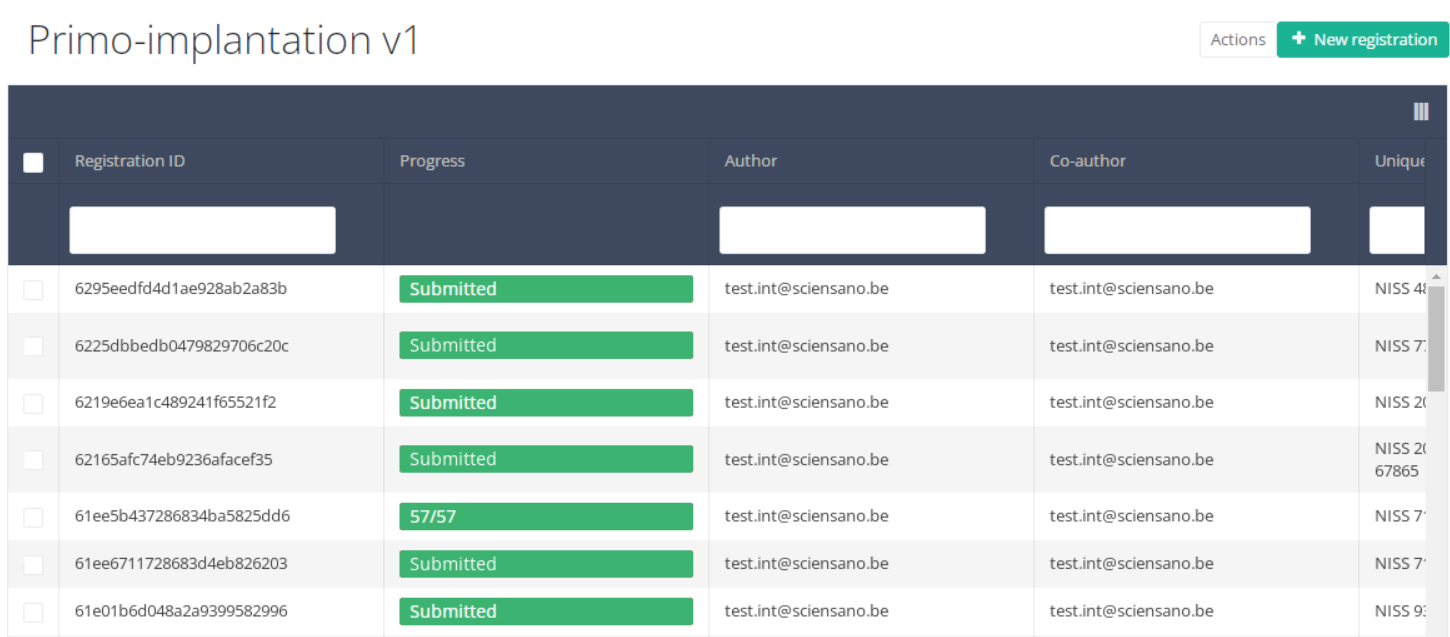
When you select the highest version of this study section for the first time, you will see an empty overview table in the main part of your screen. The table contains, among others, the following items: Registration ID, Progress, Author, Co-author, Unique ID, Business key, Registration code, National registry ID of the patient...
NOTE:
The study section is not always available in the selected language. In that case the text frame pictured below covers the language selection buttons. It automatically disappears after a few seconds.
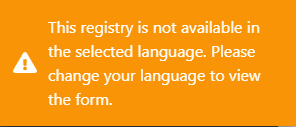
You will have to select the desired language through the respective language buttons:
NL for Dutch, FR for French or EN for English.
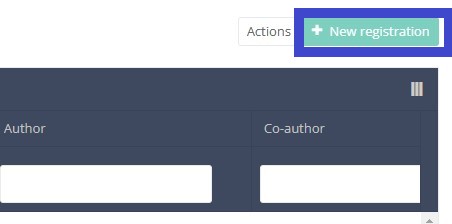
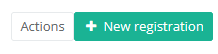
In the top right corner of the screen you can find a green button "+ New registration". Select this button.
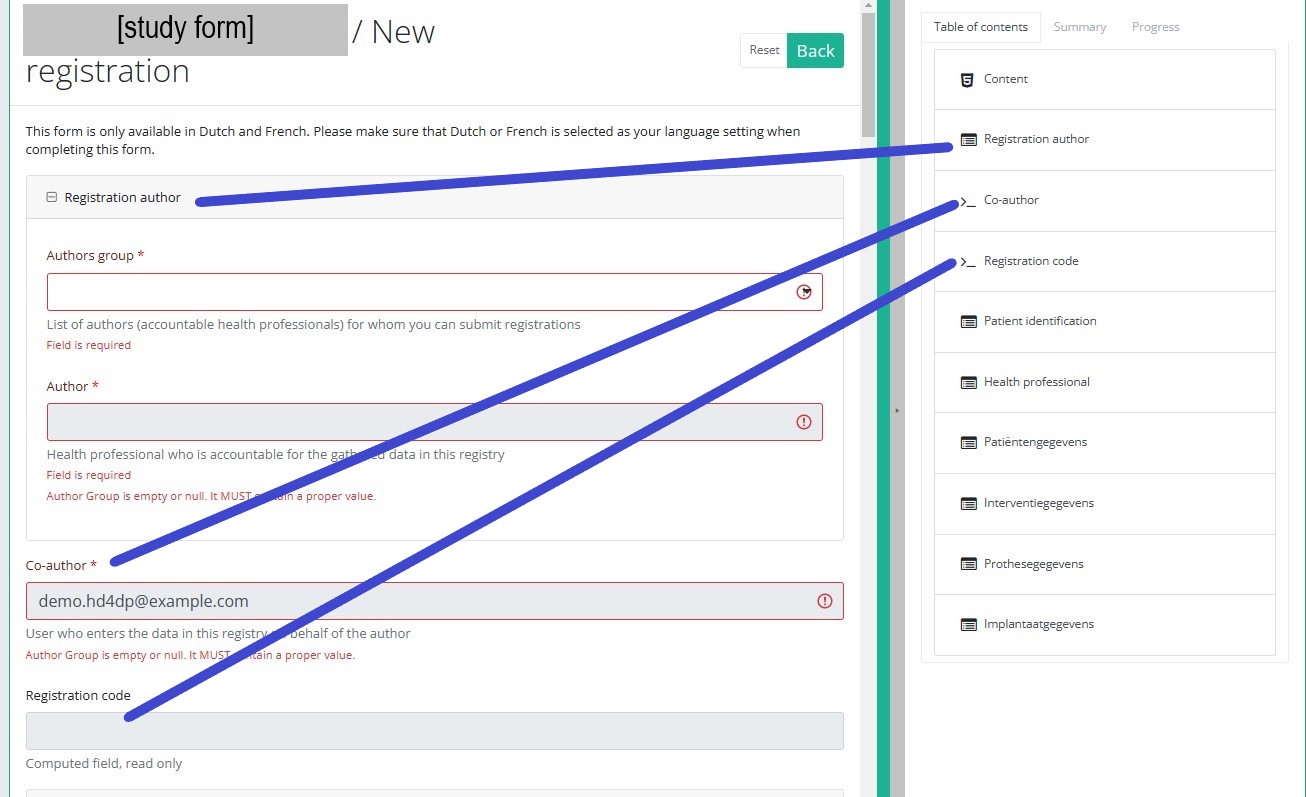
After selection of the "+ New registration" button the main screen will be replaced by 2 sections: a study form in the middle of the screen and a table of contents on the right-hand side of the screen.
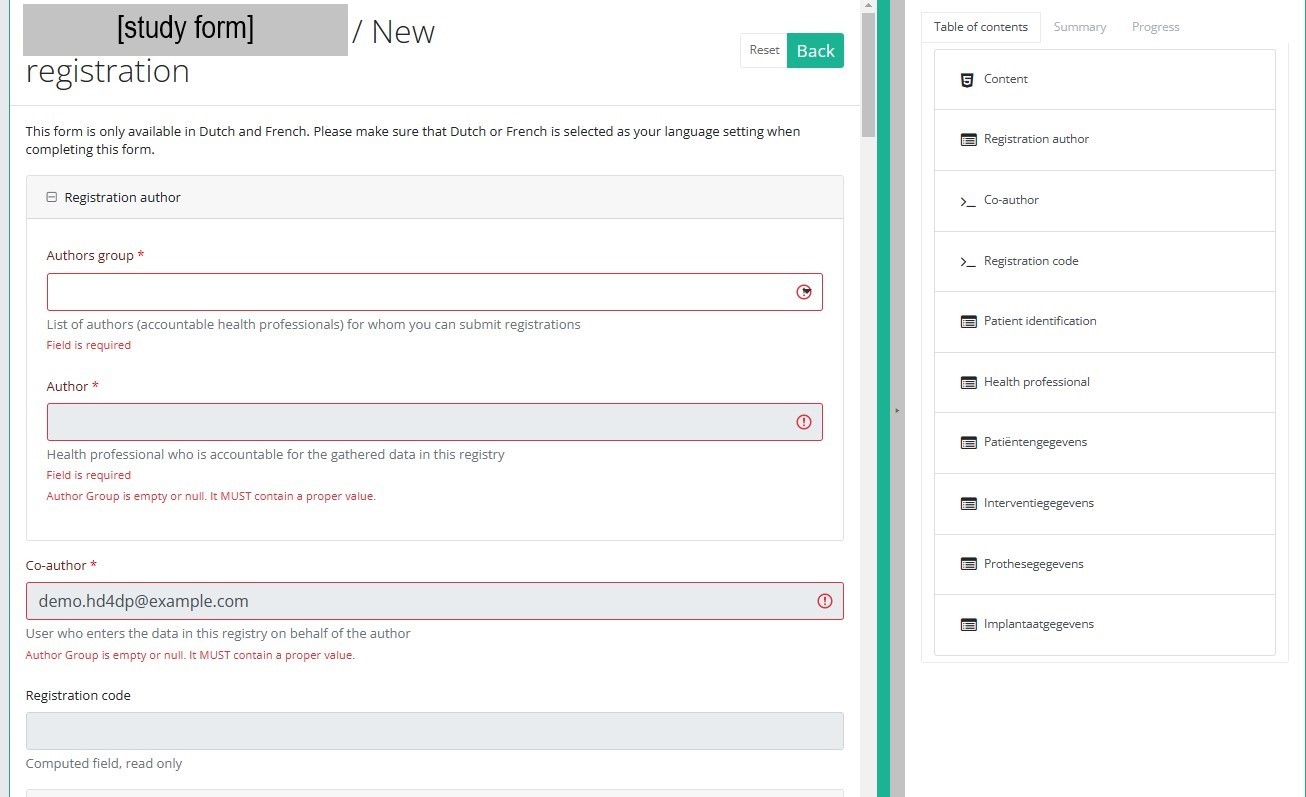
By completing the study form you will create a registration for the respective study project.
Table of contents
The Table of contents offers an overview of the sections that are to be completed. It can also be used to navigate through the study form instead of scrolling up and down in the study form: clicking on a section in the table of contents will take you directly to this section in the study form.
Take into account that the study form may contain conditional fields. This means that some fields with selection options ONLY will be displayd IF related fields in previous sections have been completed.
E.g. the field ‘Type implantaat / Type d’implant’ under section ‘Implantaatgegevens / Données d’implant’ ONLY opens up, IF the field ‘Type resectie / Type de résection’ in the section ‘Interventiegegevens / Données de l’intervention’ has been completed.
Detailled information on conditional fields is to be found in the respective DCD specifications.
ATTENTION!
If you want to search and add the data of the implant used, you first have to select the Implant data item in the Table of contents from the right-hand side section of the screen. The relevant item will now appear in the middle section of the screen.
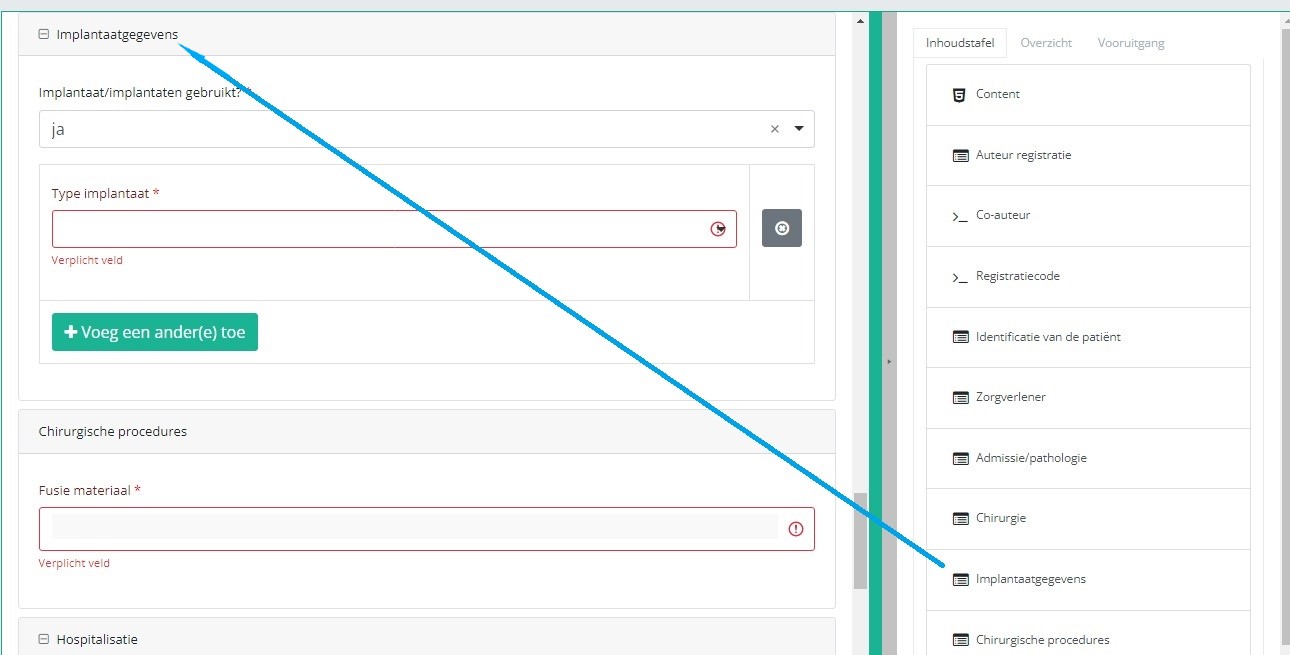
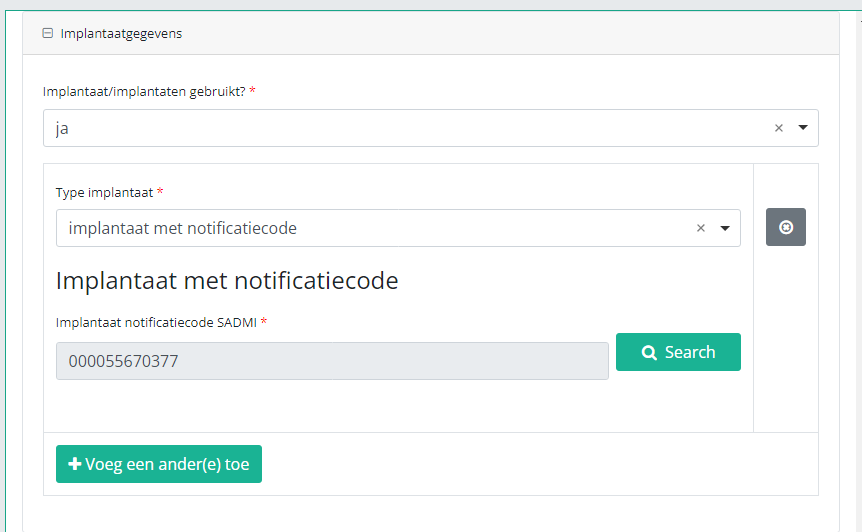
In case an implant with notification code has been used, it is possible to retrieve the corresponding data from the SADMI database. In order to do so, you select yes under Implant(s) used? and implant with notification code under Type of implant.
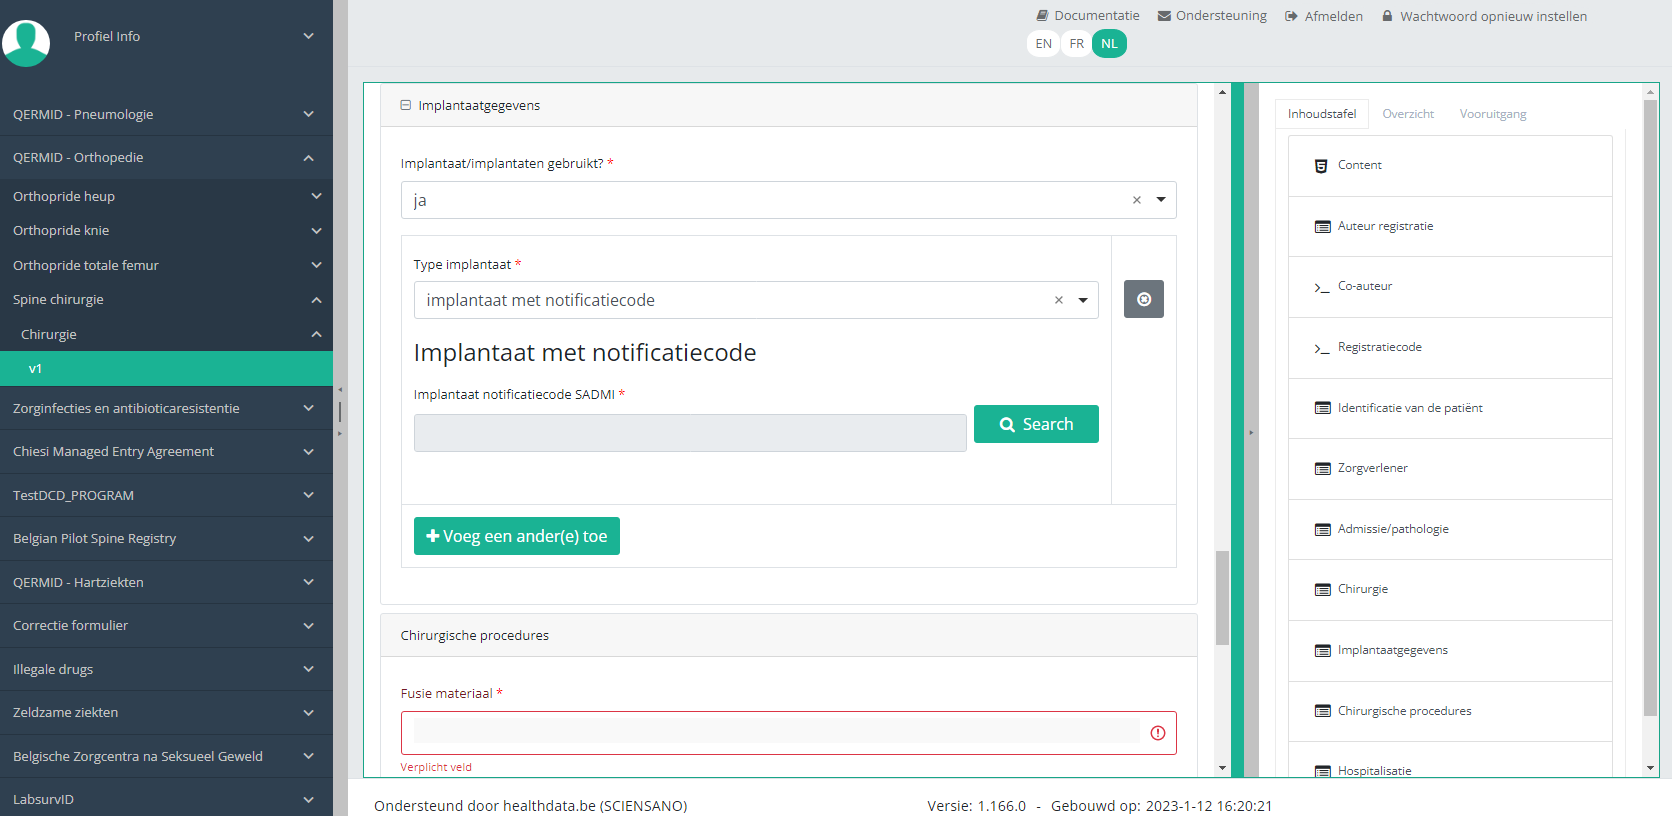
In some interfaces this option is also referred to as genotificeerd serieproduct implantaat. Select this option.
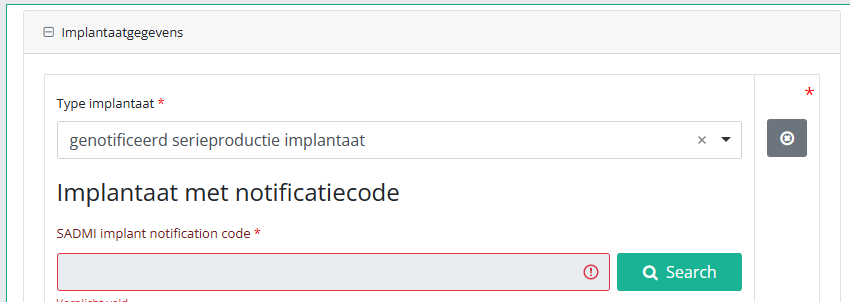
Now, click on the Search button. The SADMI Notification code search window will pop up. Enter the notification code you have available in the relevant field and click on the Search button.
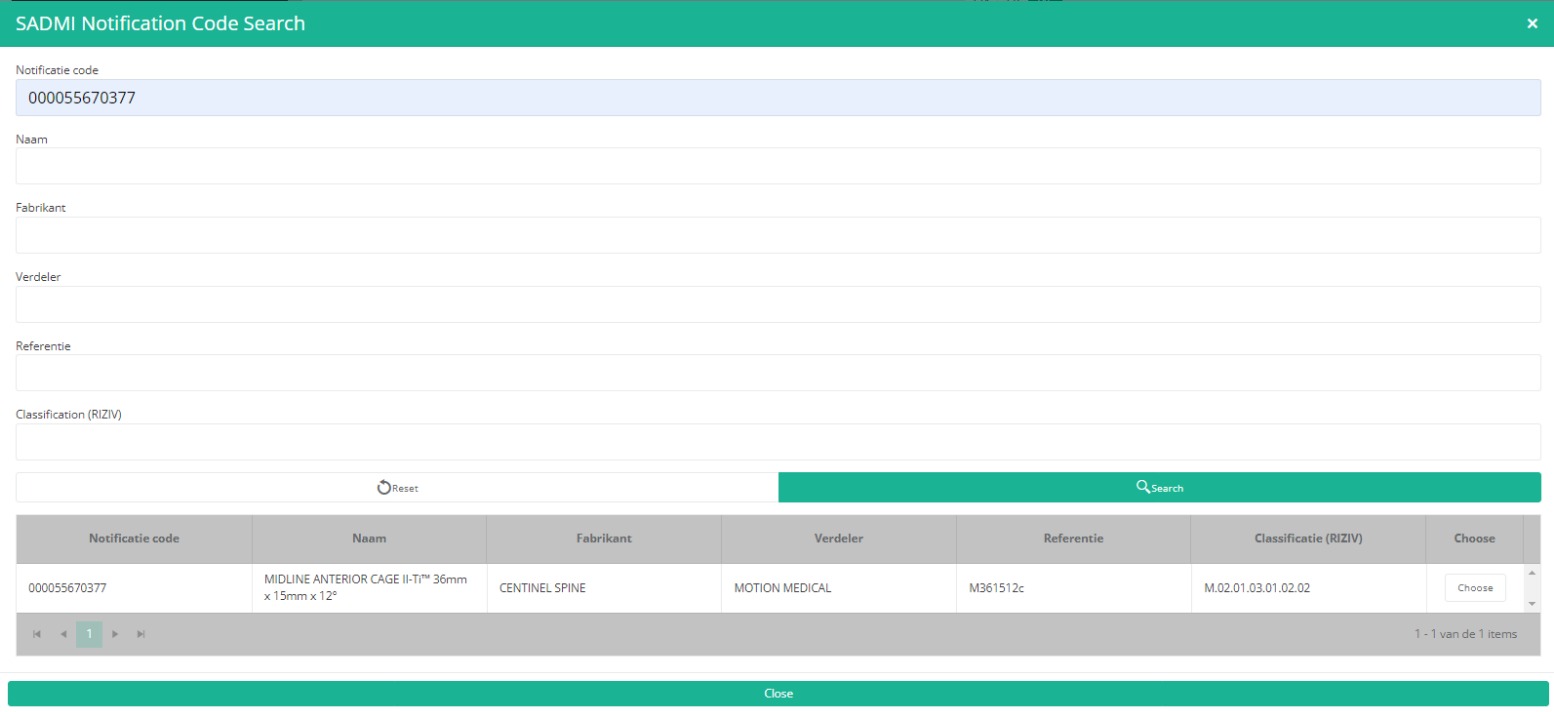
The screen refreshes and shows all implant data underneath the search button.

It is now NECESSARY to select the Choose button to the right in order to effectively ADD the data to the registration form.
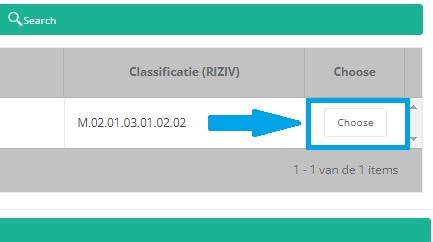
Hereafter, you will automatically return to the registration form, where the SADMI notification code of the implant has been registered. You can now repeat the procedure above to add further implants via the "Add another" button.
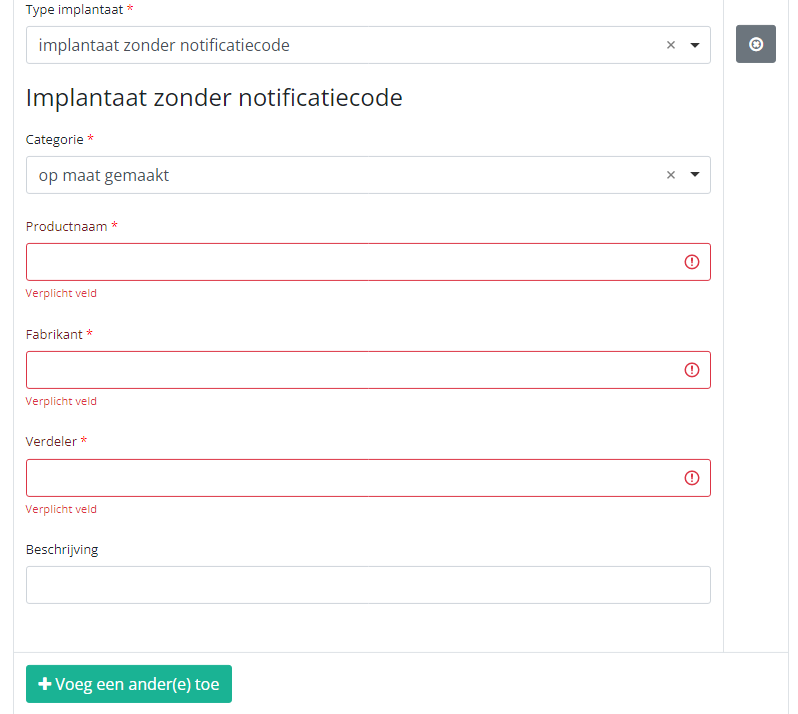
In case an implant without notification code has been used, you have to select the Category and enter the necessary data you have at hand.
Note: SADMI stands for Source Authentique des dispositifs médicaux implantables. General and technical information can be found in the SADMI cookbook which is provided through the eHealth platform.
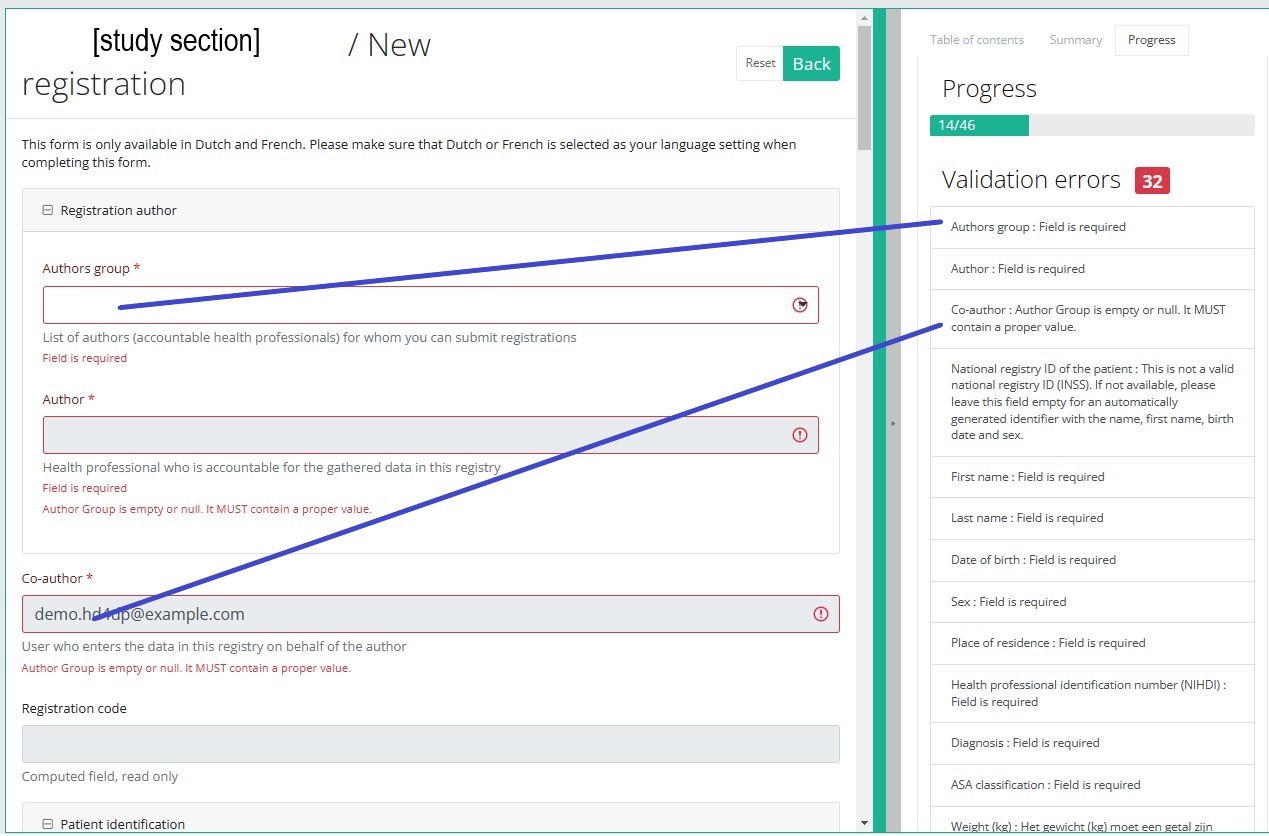
Progress
By selecting the tab "Progress" on the right-hand side of the screen, the table of contents will be replaced by a progress bar and a list of open validation errors).
You can use the list of open validation errors to navigate through the study form: selection of a validation error in the list will take you to this section in the study form.
When the study form is completed and there are no validation errors, you can save or submit this registration: Save or Submit. Notice that the Submit button is in clear green.
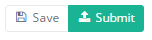
When the study form is completed but there are validation errors, you can save but not submit this registration: Save but not submit. Notice that the Submit button is in dim green.
When the study form is saved or submitted, the screen switches to the overview table. Now, this table is not empty anymore but shows the saved or submitted registration.
This documentation is being updated regularly. We try to provide as correct, complete and clear as possible information on these pages. Nevertheless, if you see anything in the documentation that is not correct, does not match your experience or requires further clarification, please create a request (type : request for information) via our portal (https://sciensano.service-now.com/sp) or send us an e-mail via support.healthdata@sciensano.be to report this documentation issue. Please, do not forget to mention the URL or web address of the page with the documentation issue. We will then adjust the documentation as soon as possible. Thank you!Create a Knee registration "Revision"
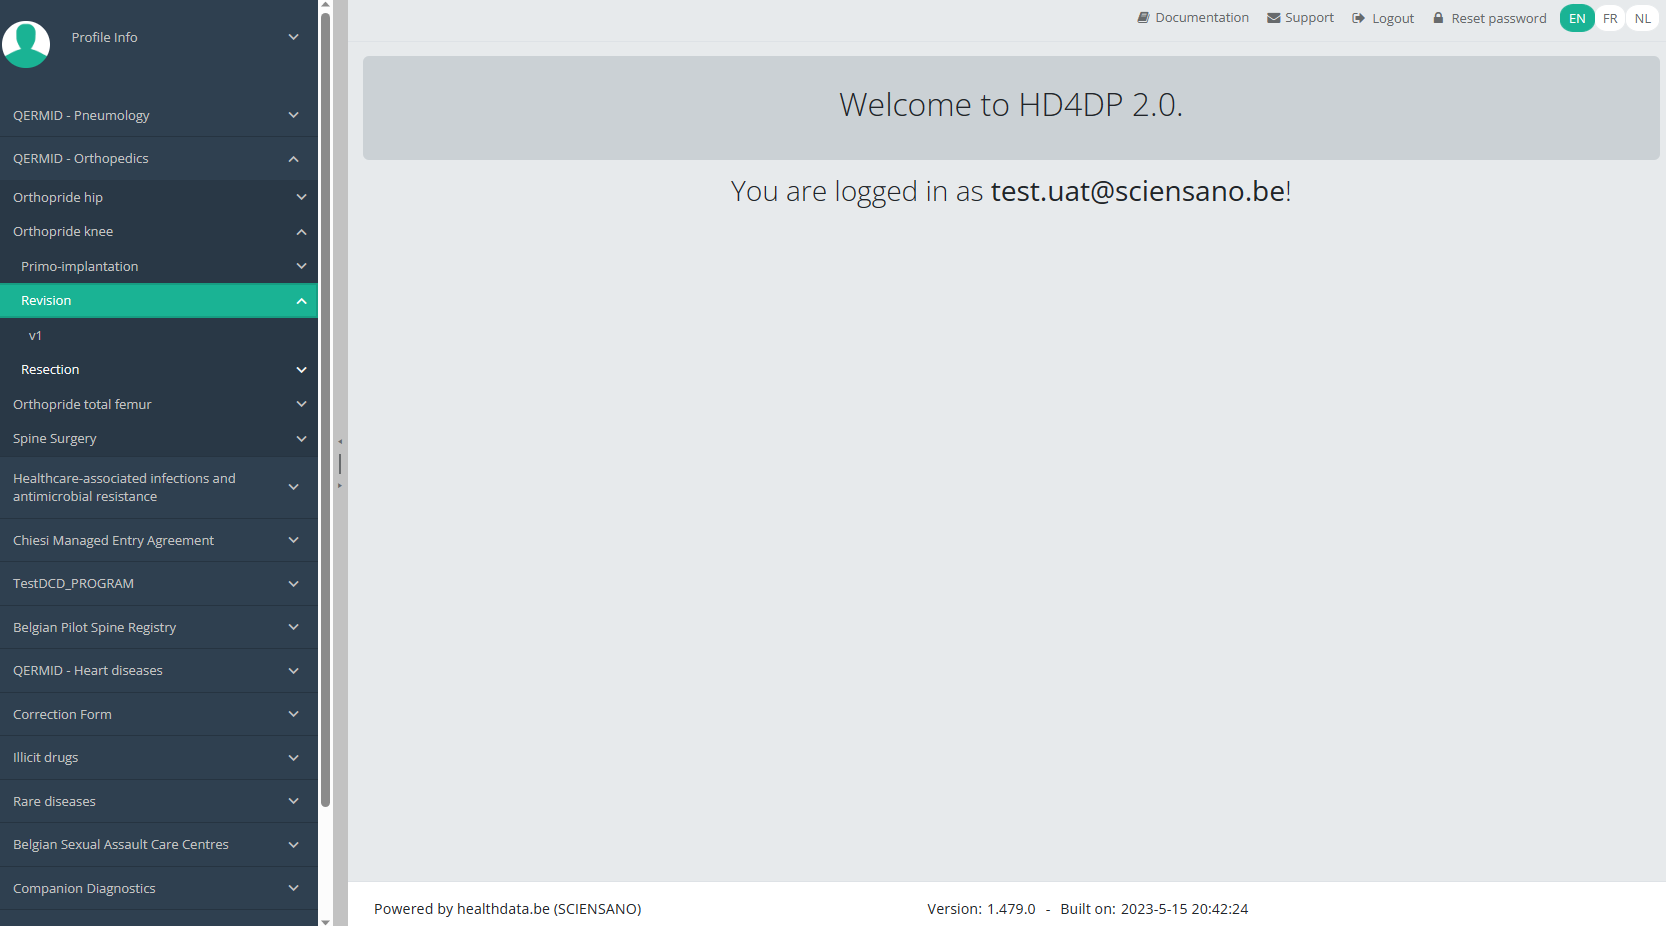
Create a Knee registration "Revision"To create a "Revision" registration for the study project Orthopride Knee, select "Revision" in the dark blue left menu.
You will see the number of versions of this study section. In this case, there is only one version.
When you select the highest version of this study section for the first time, you will see an empty overview table in the main part of your screen. The table contains, among others, the following items: Registration ID, Progress, Author, Co-author, Unique ID, Business key, Registration code, National registry ID of the patient...

NOTE:
The study section is not always available in the selected language. In that case the text frame pictured below covers the language selection buttons. It automatically disappears after a few seconds.
You will have to select the desired language through the respective language buttons:
NL for Dutch, FR for French or EN for English.
In the top right corner of the screen you can find a green button "+ New registration". Select this button.
After selection of the "+ New registration" button the main screen will be replaced by 2 sections: a study form in the middle of the screen and a table of contents on the right-hand side of the screen.
By completing the study form you will create a registration for the respective study project.
Table of contents
The Table of contents offers an overview of the sections that are to be completed. It can also be used to navigate through the study form instead of scrolling up and down in the study form: clicking on a section in the table of contents will take you directly to this section in the study form.
Take into account that the study form may contain conditional fields. This means that some fields with selection options ONLY will be displayd IF related fields in previous sections have been completed.
E.g. the field ‘Type implantaat / Type d’implant’ under section ‘Implantaatgegevens / Données d’implant’ ONLY opens up, IF the field ‘Type resectie / Type de résection’ in the section ‘Interventiegegevens / Données de l’intervention’ has been completed.
Detailled information on conditional fields is to be found in the respective DCD specifications.
ATTENTION!
If you want to search and add the data of the implant used, you first have to select the Implant data item in the Table of contents from the right-hand side section of the screen. The relevant item will now appear in the middle section of the screen.
In case an implant with notification code has been used, it is possible to retrieve the corresponding data from the SADMI database. In order to do so, you select yes under Implant(s) used? and implant with notification code under Type of implant.
In some interfaces this option is also referred to as genotificeerd serieproduct implantaat. Select this option.
Now, click on the Search button. The SADMI Notification code search window will pop up. Enter the notification code you have available in the relevant field and click on the Search button.
The screen refreshes and shows all implant data underneath the search button.
It is now NECESSARY to select the Choose button to the right in order to effectively ADD the data to the registration form.
Hereafter, you will automatically return to the registration form, where the SADMI notification code of the implant has been registered. You can now repeat the procedure above to add further implants via the "Add another" button.
In case an implant without notification code has been used, you have to select the Category and enter the necessary data you have at hand.
Note: SADMI stands for Source Authentique des dispositifs médicaux implantables. General and technical information can be found in the SADMI cookbook which is provided through the eHealth platform.
Progress
By selecting the tab "Progress" on the right-hand side of the screen, the table of contents will be replaced by a progress bar and a list of open validation errors).
You can use the list of open validation errors to navigate through the study form: selection of a validation error in the list will take you to this section in the study form.
When the study form is completed and there are no validation errors, you can save or submit this registration: Save or Submit. Notice that the Submit button is in clear green.
When the study form is completed but there are validation errors, you can save but not submit this registration: Save but not submit. Notice that the Submit button is in dim green.
When the study form is saved or submitted, the screen switches to the overview table. Now, this table is not empty anymore but shows the saved or submitted registration.
This documentation is being updated regularly. We try to provide as correct, complete and clear as possible information on these pages. Nevertheless, if you see anything in the documentation that is not correct, does not match your experience or requires further clarification, please create a request (type : request for information) via our portal (https://sciensano.service-now.com/sp) or send us an e-mail via support.healthdata@sciensano.be to report this documentation issue. Please, do not forget to mention the URL or web address of the page with the documentation issue. We will then adjust the documentation as soon as possible. Thank you!Create a Knee registration "Resection"
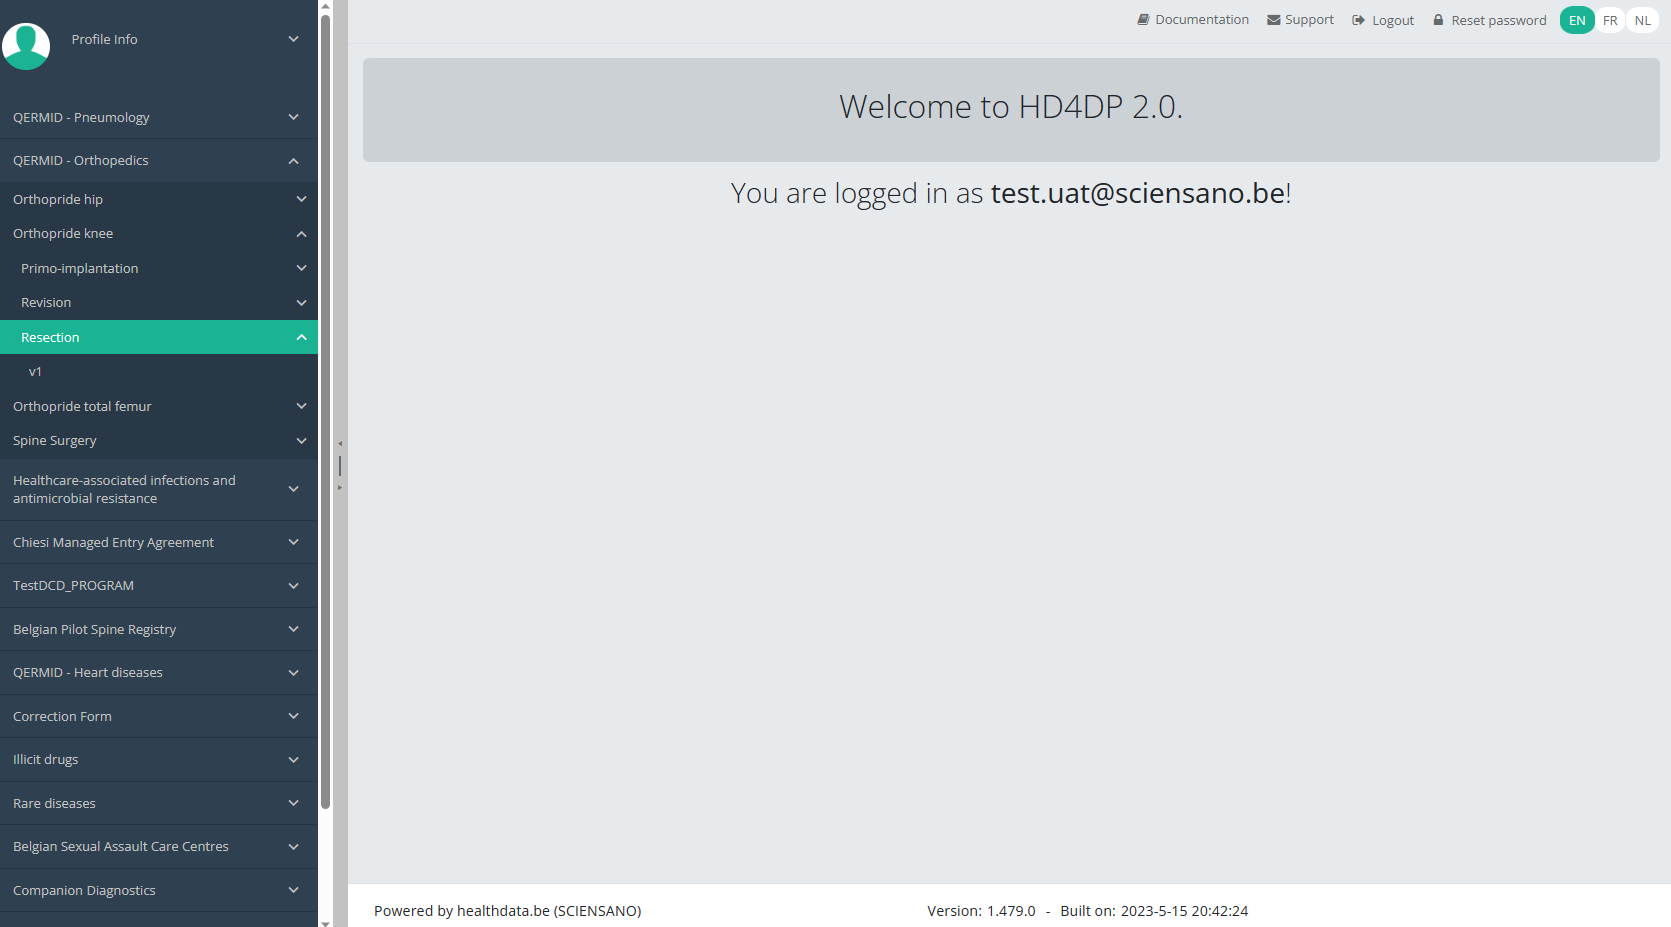
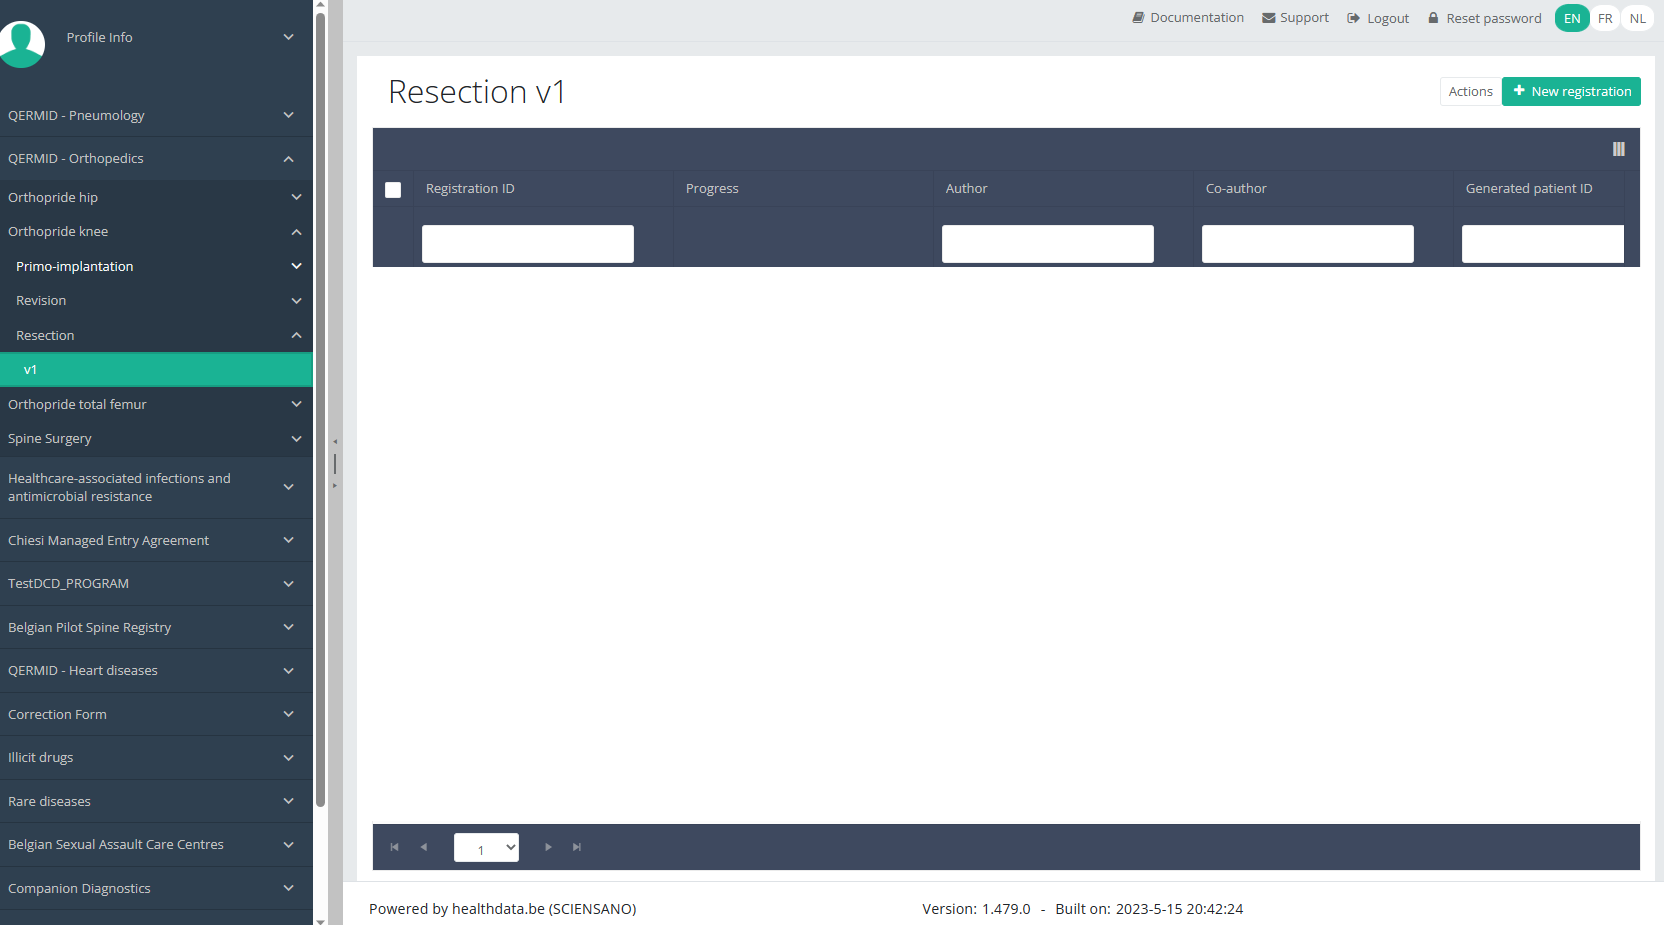
Create a Knee registration "Resection"To create a "Resection" registration for the study project Orthopride Knee, select "Resection" in the dark blue left menu.
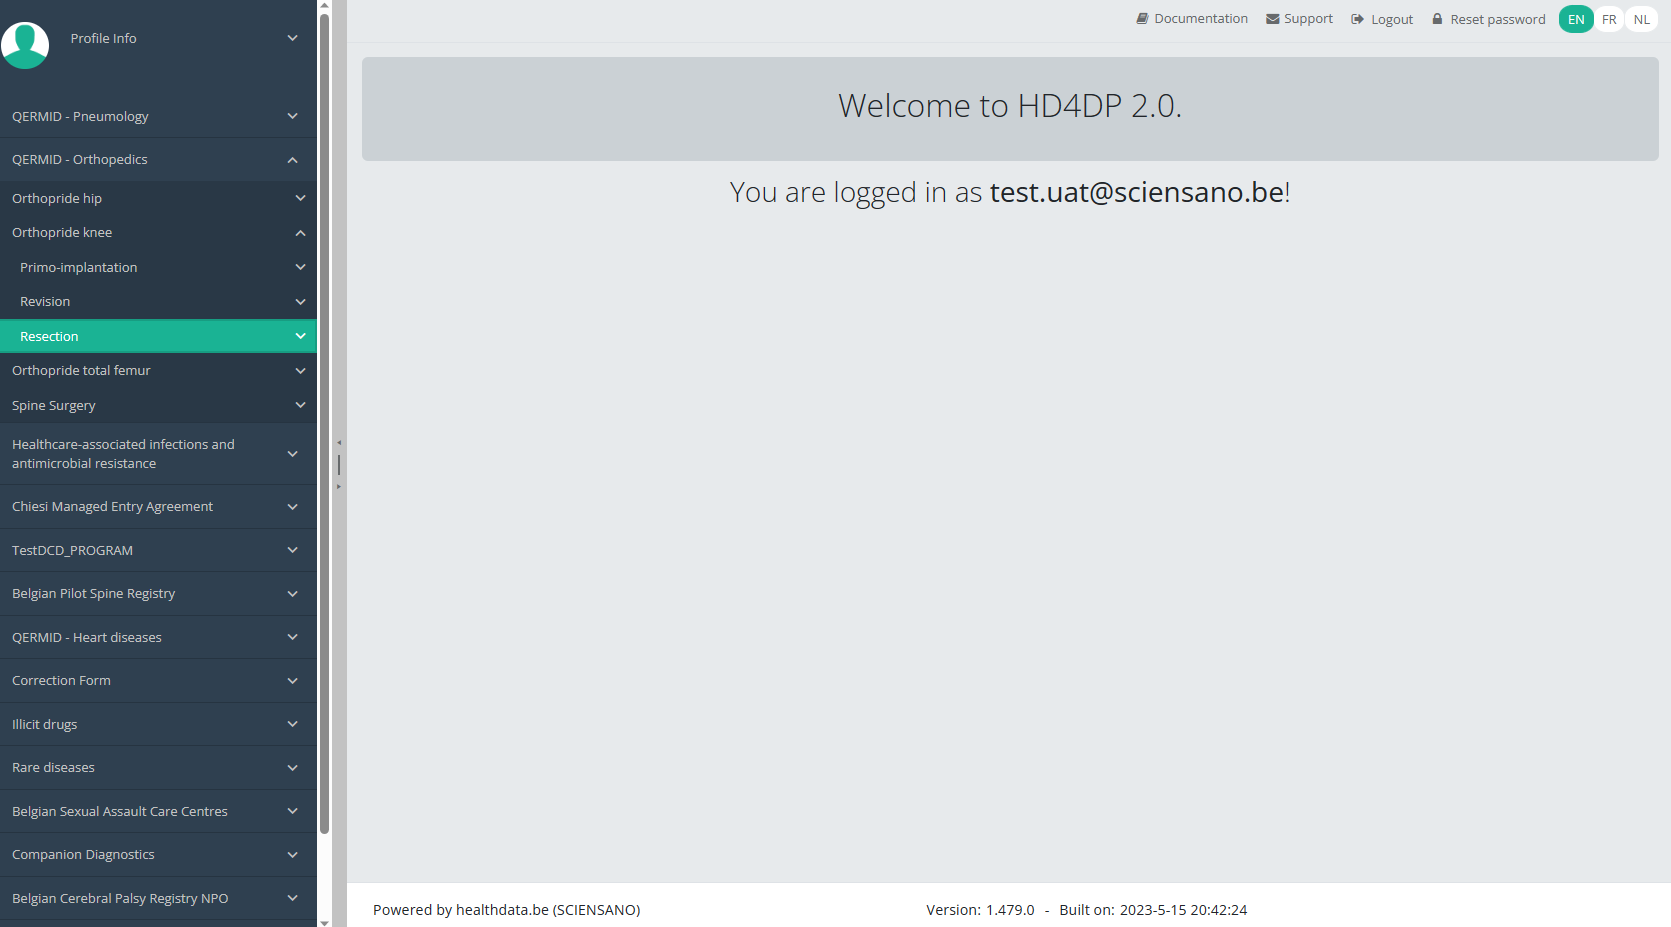
You will see the number of versions of this study section. In this case, there is only one version.
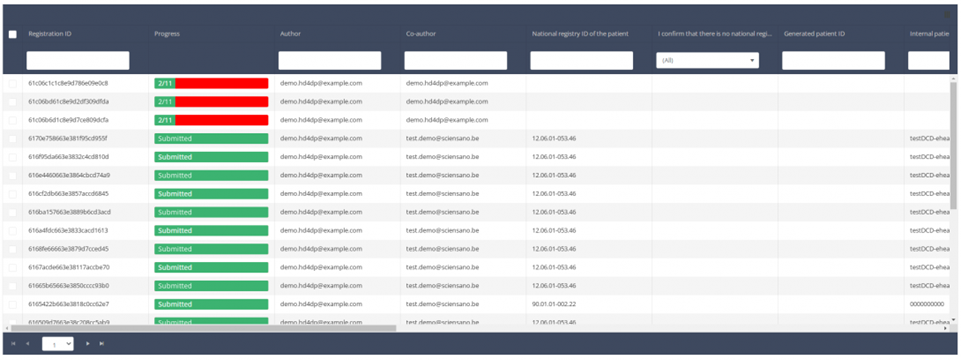
When you select the highest version of this study section for the first time, you will see an empty overview table in the main part of your screen. The table contains, among others, the following items: Registration ID, Progress, Author, Co-author, Unique ID, Business key, Registration code, National registry ID of the patient...
NOTE:
The study section is not always available in the selected language. In that case the text frame pictured below covers the language selection buttons. It automatically disappears after a few seconds.
You will have to select the desired language through the respective language buttons:
NL for Dutch, FR for French or EN for English.
In the top right corner of the screen you can find a green button "+ New registration". Select this button.
After selection of the "+ New registration" button the main screen will be replaced by 2 sections: a study form in the middle of the screen and a table of contents on the right-hand side of the screen.
By completing the study form you will create a registration for the respective study project.
Table of contents
The Table of contents offers an overview of the sections that are to be completed. It can also be used to navigate through the study form instead of scrolling up and down in the study form: clicking on a section in the table of contents will take you directly to this section in the study form.
Take into account that the study form may contain conditional fields. This means that some fields with selection options ONLY will be displayd IF related fields in previous sections have been completed.
E.g. the field ‘Type implantaat / Type d’implant’ under section ‘Implantaatgegevens / Données d’implant’ ONLY opens up, IF the field ‘Type resectie / Type de résection’ in the section ‘Interventiegegevens / Données de l’intervention’ has been completed.
Detailled information on conditional fields is to be found in the respective DCD specifications.
ATTENTION!
If you want to search and add the data of the implant used, you first have to select the Implant data item in the Table of contents from the right-hand side section of the screen. The relevant item will now appear in the middle section of the screen.
In case an implant with notification code has been used, it is possible to retrieve the corresponding data from the SADMI database. In order to do so, you select yes under Implant(s) used? and implant with notification code under Type of implant.
In some interfaces this option is also referred to as genotificeerd serieproduct implantaat. Select this option.
Now, click on the Search button. The SADMI Notification code search window will pop up. Enter the notification code you have available in the relevant field and click on the Search button.
The screen refreshes and shows all implant data underneath the search button.
It is now NECESSARY to select the Choose button to the right in order to effectively ADD the data to the registration form.
Hereafter, you will automatically return to the registration form, where the SADMI notification code of the implant has been registered. You can now repeat the procedure above to add further implants via the "Add another" button.
In case an implant without notification code has been used, you have to select the Category and enter the necessary data you have at hand.
Note: SADMI stands for Source Authentique des dispositifs médicaux implantables. General and technical information can be found in the SADMI cookbook which is provided through the eHealth platform.
Progress
By selecting the tab "Progress" on the right-hand side of the screen, the table of contents will be replaced by a progress bar and a list of open validation errors).
You can use the list of open validation errors to navigate through the study form: selection of a validation error in the list will take you to this section in the study form.
When the study form is completed and there are no validation errors, you can save or submit this registration: Save or Submit. Notice that the Submit button is in clear green.
When the study form is completed but there are validation errors, you can save but not submit this registration: Save but not submit. Notice that the Submit button is in dim green.
When the study form is saved or submitted, the screen switches to the overview table. Now, this table is not empty anymore but shows the saved or submitted registration.
This documentation is being updated regularly. We try to provide as correct, complete and clear as possible information on these pages. Nevertheless, if you see anything in the documentation that is not correct, does not match your experience or requires further clarification, please create a request (type : request for information) via our portal (https://sciensano.service-now.com/sp) or send us an e-mail via support.healthdata@sciensano.be to report this documentation issue. Please, do not forget to mention the URL or web address of the page with the documentation issue. We will then adjust the documentation as soon as possible. Thank you!Find a Knee registration
Find a Knee registrationThe study project Orthopride Knee consists of three sections: Primo-implantation, Revision and Resection.

On the following pages we explain how you can find a registration for each section.
This documentation is being updated regularly. We try to provide as correct, complete and clear as possible information on these pages. Nevertheless, if you see anything in the documentation that is not correct, does not match your experience or requires further clarification, please create a request (type : request for information) via our portal (https://sciensano.service-now.com/sp) or send us an e-mail via support.healthdata@sciensano.be to report this documentation issue. Please, do not forget to mention the URL or web address of the page with the documentation issue. We will then adjust the documentation as soon as possible. Thank you!Find a Knee registration "Primo-implantation"
Find a Knee registration "Primo-implantation"To find a "Primo-implantation" registration for the study project Orthopride Knee, select "Primo-implantation" in the dark blue left menu.

When you select a version of this study section, you will see the summary table in the main part of your screen. This table contains, among other things: Registration ID, Progress, Author, Co-author, Unique ID, Business Key, Registration Code, National Patient Registry Number…
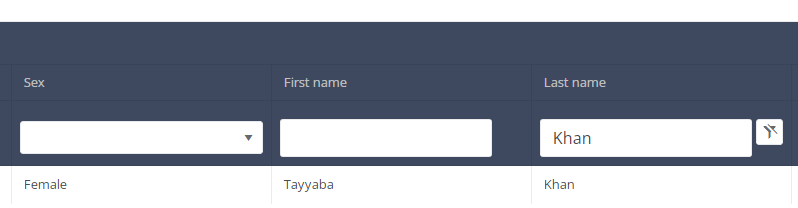
In the header of the summary table, you can use the filter below each column label. In the example below, the last name "Khan" has been entered in the filter (text field), so only the record with "Khan" is displayed.
This documentation is being updated regularly. We try to provide as correct, complete and clear as possible information on these pages. Nevertheless, if you see anything in the documentation that is not correct, does not match your experience or requires further clarification, please create a request (type : request for information) via our portal (https://sciensano.service-now.com/sp) or send us an e-mail via support.healthdata@sciensano.be to report this documentation issue. Please, do not forget to mention the URL or web address of the page with the documentation issue. We will then adjust the documentation as soon as possible. Thank you!Find a Knee registration "Revision"
Find a Knee registration "Revision"To find a "Revision" registration for the study project Orthopride Knee, select "Revision" in the dark blue left menu.

When you select a version of this study section, you will see the summary table in the main part of your screen. This table contains, among other things: Registration ID, Progress, Author, Co-author, Unique ID, Business Key, Registration Code, National Patient Registry Number…
In the header of the summary table, you can use the filter below each column label. In the example below, the last name "Khan" has been entered in the filter (text field), so only the record with "Khan" is displayed.
This documentation is being updated regularly. We try to provide as correct, complete and clear as possible information on these pages. Nevertheless, if you see anything in the documentation that is not correct, does not match your experience or requires further clarification, please create a request (type : request for information) via our portal (https://sciensano.service-now.com/sp) or send us an e-mail via support.healthdata@sciensano.be to report this documentation issue. Please, do not forget to mention the URL or web address of the page with the documentation issue. We will then adjust the documentation as soon as possible. Thank you!Find a Knee registration "Resection"
Find a Knee registration "Resection"To find a "Resection" registration for the study project Orthopride Knee, select "Resection" in the dark blue left menu.
When you select a version of this study section, you will see the summary table in the main part of your screen. This table contains, among other things: Registration ID, Progress, Author, Co-author, Unique ID, Business Key, Registration Code, National Patient Registry Number…
In the header of the summary table, you can use the filter below each column label. In the example below, the last name "Khan" has been entered in the filter (text field), so only the record with "Khan" is displayed.
This documentation is being updated regularly. We try to provide as correct, complete and clear as possible information on these pages. Nevertheless, if you see anything in the documentation that is not correct, does not match your experience or requires further clarification, please create a request (type : request for information) via our portal (https://sciensano.service-now.com/sp) or send us an e-mail via support.healthdata@sciensano.be to report this documentation issue. Please, do not forget to mention the URL or web address of the page with the documentation issue. We will then adjust the documentation as soon as possible. Thank you!Update a Knee registration
Update a Knee registrationThe study project Orthopride Knee consists of three sections: Primo-implantation, Revision and Resection.
On the following pages we explain how you can update a registration for each section.
This documentation is being updated regularly. We try to provide as correct, complete and clear as possible information on these pages. Nevertheless, if you see anything in the documentation that is not correct, does not match your experience or requires further clarification, please create a request (type : request for information) via our portal (https://sciensano.service-now.com/sp) or send us an e-mail via support.healthdata@sciensano.be to report this documentation issue. Please, do not forget to mention the URL or web address of the page with the documentation issue. We will then adjust the documentation as soon as possible. Thank you!Update a Knee registration "Primo-implantation"
Update a Knee registration "Primo-implantation"To update a "Primo-implantation" registration for the study project Orthopride Knee, select "Primo-implantation" in the dark blue left menu.

When you select a version of this study, you will see the summary table in the main body of your screen. The table includes the following items: Registration ID, Progress, Author, Co-author, Unique ID, Business Key, Registration Code, National registry number of the patient.…

Use the filters in the header of the table to find the registration you want to update.
Once you have found the registration, you can open the registration's study form by clicking on the corresponding row in the summary table.
You can complete missing fields and/or change previously completed fields in the survey form.
At the end of the survey form, you can Save or Submit the registration.
A registration can be updated as long as it has the status "Saved" and as long as the registration not has been submitted. A submitted registration cannot be updated or deleted again.
This documentation is being updated regularly. We try to provide as correct, complete and clear as possible information on these pages. Nevertheless, if you see anything in the documentation that is not correct, does not match your experience or requires further clarification, please create a request (type : request for information) via our portal (https://sciensano.service-now.com/sp) or send us an e-mail via support.healthdata@sciensano.be to report this documentation issue. Please, do not forget to mention the URL or web address of the page with the documentation issue. We will then adjust the documentation as soon as possible. Thank you!Update a Knee registration "Revision"
Update a Knee registration "Revision"To update a "Revision" registration for the study project Orthopride Knee, select "Revision" in the dark blue left menu.

When you select a version of this study, you will see the summary table in the main body of your screen. The table includes the following items: Registration ID, Progress, Author, Co-author, Unique ID, Business Key, Registration Code, National registry number of the patient.…
Use the filters in the header of the table to find the registration you want to update.
Once you have found the registration, you can open the registration's study form by clicking on the corresponding row in the summary table.
You can complete missing fields and/or change previously completed fields in the survey form.
At the end of the survey form, you can Save or Submit the registration.
A registration can be updated as long as it has the status "Saved" and as long as the registration not has been submitted. A submitted registration cannot be updated or deleted again.
This documentation is being updated regularly. We try to provide as correct, complete and clear as possible information on these pages. Nevertheless, if you see anything in the documentation that is not correct, does not match your experience or requires further clarification, please create a request (type : request for information) via our portal (https://sciensano.service-now.com/sp) or send us an e-mail via support.healthdata@sciensano.be to report this documentation issue. Please, do not forget to mention the URL or web address of the page with the documentation issue. We will then adjust the documentation as soon as possible. Thank you!Update a Knee registration "Resection"
Update a Knee registration "Resection"To update a "Resection" registration for the study project Orthopride Knee, select "Resection" in the dark blue left menu.

When you select a version of this study, you will see the summary table in the main body of your screen. The table includes the following items: Registration ID, Progress, Author, Co-author, Unique ID, Business Key, Registration Code, National registry number of the patient.…
Use the filters in the header of the table to find the registration you want to update.
Once you have found the registration, you can open the registration's study form by clicking on the corresponding row in the summary table.
You can complete missing fields and/or change previously completed fields in the survey form.
At the end of the survey form, you can Save or Submit the registration.
A registration can be updated as long as it has the status "Saved" and as long as the registration not has been submitted. A submitted registration cannot be updated or deleted again.
This documentation is being updated regularly. We try to provide as correct, complete and clear as possible information on these pages. Nevertheless, if you see anything in the documentation that is not correct, does not match your experience or requires further clarification, please create a request (type : request for information) via our portal (https://sciensano.service-now.com/sp) or send us an e-mail via support.healthdata@sciensano.be to report this documentation issue. Please, do not forget to mention the URL or web address of the page with the documentation issue. We will then adjust the documentation as soon as possible. Thank you!Delete a Knee registration
Delete a Knee registrationThe study project Orthopride Knee consists of three sections: Primo-implantation, Revision and Resection.

On the following pages we explain how you can delete a registration for each section.
This documentation is being updated regularly. We try to provide as correct, complete and clear as possible information on these pages. Nevertheless, if you see anything in the documentation that is not correct, does not match your experience or requires further clarification, please create a request (type : request for information) via our portal (https://sciensano.service-now.com/sp) or send us an e-mail via support.healthdata@sciensano.be to report this documentation issue. Please, do not forget to mention the URL or web address of the page with the documentation issue. We will then adjust the documentation as soon as possible. Thank you!Delete a Knee registration "Primo-implantation"
Delete a Knee registration "Primo-implantation"To delete a "Primo-implantation" registration for the study project Orthopride Knee, select "Primo-implantation" in the dark blue left menu.
When you select a version of this course of study, you will see the summary table in the main body of your screen. The table includes the following items: Registration ID, Progress, Author, Co-author, Unique ID, Business Key, Registration Code, National registry number of the patient...

Use the filters in the header of the table to find the registration you want to delete.
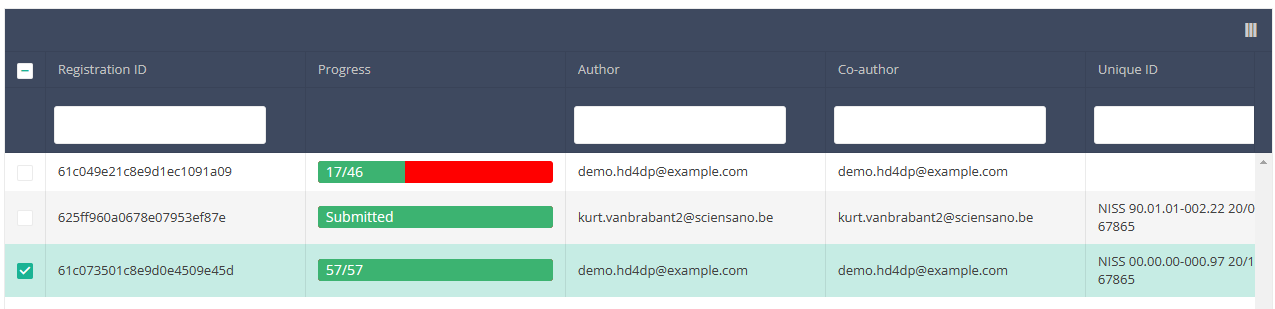
Once you have found the registration you want to delete, you must select the registration by checking the checkbox at the beginning of the row in the summary table.

Then you need to press the "Actions" button at the top right of the summary table.
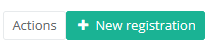
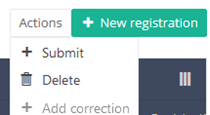
There are now two options, "Submit" and "Delete". Now press "Delete".
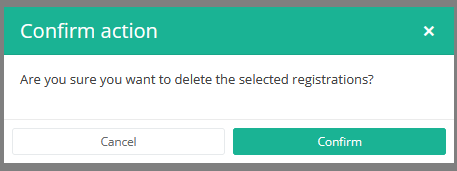
After you press "Delete," a pop-up message will appear asking you to confirm the deletion of the selected registration(s). If you are sure about this action, press "Confirm." If not, press "Cancel."
If you delete the registration, you cannot change its status or content.
The deleted registration will not be removed from the summary table. It remains present, but the status has changed from "Open" to "Deleted".
If you want to see only Open and Sent registrations, you can adjust the filter on the "Status" item in the summary table.
A registration can be deleted as long as the registration has not yet been submitted. If the status of a registration is "Open", the registration can still be deleted.
This documentation is being updated regularly. We try to provide as correct, complete and clear as possible information on these pages. Nevertheless, if you see anything in the documentation that is not correct, does not match your experience or requires further clarification, please create a request (type : request for information) via our portal (https://sciensano.service-now.com/sp) or send us an e-mail via support.healthdata@sciensano.be to report this documentation issue. Please, do not forget to mention the URL or web address of the page with the documentation issue. We will then adjust the documentation as soon as possible. Thank you!Delete a Knee registration "Revision"
Delete a Knee registration "Revision"To delete a "Revision" registration for the study project Orthopride Knee, select "Revision" in the dark blue left menu.
When you select a version of this course of study, you will see the summary table in the main body of your screen. The table includes the following items: Registration ID, Progress, Author, Co-author, Unique ID, Business Key, Registration Code, National registry number of the patient...
Use the filters in the header of the table to find the registration you want to delete.
Once you have found the registration you want to delete, you must select the registration by checking the checkbox at the beginning of the row in the summary table.
Then you need to press the "Actions" button at the top right of the summary table.
There are now two options, "Submit" and "Delete". Now press "Delete".
After you press "Delete," a pop-up message will appear asking you to confirm the deletion of the selected registration(s). If you are sure about this action, press "Confirm." If not, press "Cancel."
If you delete the registration, you cannot change its status or content.
The deleted registration will not be removed from the summary table. It remains present, but the status has changed from "Open" to "Deleted".
If you want to see only Open and Sent registrations, you can adjust the filter on the "Status" item in the summary table.
A registration can be deleted as long as the registration has not yet been submitted. If the status of a registration is "Open", the registration can still be deleted.
This documentation is being updated regularly. We try to provide as correct, complete and clear as possible information on these pages. Nevertheless, if you see anything in the documentation that is not correct, does not match your experience or requires further clarification, please create a request (type : request for information) via our portal (https://sciensano.service-now.com/sp) or send us an e-mail via support.healthdata@sciensano.be to report this documentation issue. Please, do not forget to mention the URL or web address of the page with the documentation issue. We will then adjust the documentation as soon as possible. Thank you!Delete a Knee registration "Resection"
Delete a Knee registration "Resection"To delete a "Resection" registration for the study project Orthopride Knee, select "Resection" in the dark blue left menu.

When you select a version of this course of study, you will see the summary table in the main body of your screen. The table includes the following items: Registration ID, Progress, Author, Co-author, Unique ID, Business Key, Registration Code, National registry number of the patient...
Use the filters in the header of the table to find the registration you want to delete.
Once you have found the registration you want to delete, you must select the registration by checking the checkbox at the beginning of the row in the summary table.
Then you need to press the "Actions" button at the top right of the summary table.
There are now two options, "Submit" and "Delete". Now press "Delete".
After you press "Delete," a pop-up message will appear asking you to confirm the deletion of the selected registration(s). If you are sure about this action, press "Confirm." If not, press "Cancel."
If you delete the registration, you cannot change its status or content.
The deleted registration will not be removed from the summary table. It remains present, but the status has changed from "Open" to "Deleted".
If you want to see only Open and Sent registrations, you can adjust the filter on the "Status" item in the summary table.
A registration can be deleted as long as the registration has not yet been submitted. If the status of a registration is "Open", the registration can still be deleted.
This documentation is being updated regularly. We try to provide as correct, complete and clear as possible information on these pages. Nevertheless, if you see anything in the documentation that is not correct, does not match your experience or requires further clarification, please create a request (type : request for information) via our portal (https://sciensano.service-now.com/sp) or send us an e-mail via support.healthdata@sciensano.be to report this documentation issue. Please, do not forget to mention the URL or web address of the page with the documentation issue. We will then adjust the documentation as soon as possible. Thank you!Submit a Knee registration
Submit a Knee registrationThe study project Orthopride Knee consists of three sections: Primo-implantation, Revision and Resection.

On the following pages we explain how you can submit a registration for each section.
This documentation is being updated regularly. We try to provide as correct, complete and clear as possible information on these pages. Nevertheless, if you see anything in the documentation that is not correct, does not match your experience or requires further clarification, please create a request (type : request for information) via our portal (https://sciensano.service-now.com/sp) or send us an e-mail via support.healthdata@sciensano.be to report this documentation issue. Please, do not forget to mention the URL or web address of the page with the documentation issue. We will then adjust the documentation as soon as possible. Thank you!Submit a Knee registration "Primo-implantation"
Submit a Knee registration "Primo-implantation"To submit a "Primo-implantation" registration for the study project Orthopride Knee using the overview table, select "Primo-implantation" in the dark blue left menu.

When you select a version of this course of study, you will see the summary table in the main body of your screen. The table includes the following items: Registration ID, Progress, Author, Co-author, Unique ID, Business Key, Registration Code, National registry number of the patient…
Use the filters in the header of the table to find the registration(s) you want to submit. For example, you can use the filters "Status" (set to "Open") and "Validation Errors" (set to "0") to find the registrations that are eligible for submission.

Once you have found the registration(s) you want to submit, you must select the registration(s) by checking the checkbox at the beginning of the row in the summary table.
Then you need to press the "Actions" button at the top right of the summary table.
There are now two options, "Submit" and "Delete". Now press "Submit".

After you press "Submit," a pop-up message will appear asking you to confirm the submission of the selected registration(s). If you are sure about this action, press "Confirm." If not, press "Cancel."
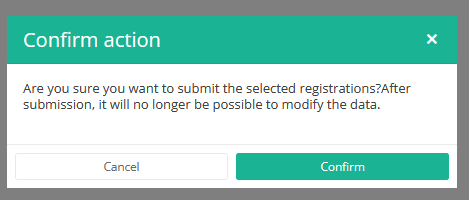
Once you confirm the submission, you cannot change the content of the registration(s). Sent registrations can also no longer be deleted.
The sent registration remains present in the summary table, but the status has changed from "Open" to "Submitted".
If you want to see only "Open" registrations, you can adjust the filter on the "Status" item in the summary table.
A registration can be submitted at the end of the creation process using the study form (see: Create a [project] registration).
When the registration was completed using the study form, saved and there are no more validation errors, the registration can also be submitted via the overview table. This method can be useful to submit multiple registrations in the same action.
This documentation is being updated regularly. We try to provide as correct, complete and clear as possible information on these pages. Nevertheless, if you see anything in the documentation that is not correct, does not match your experience or requires further clarification, please create a request (type : request for information) via our portal (https://sciensano.service-now.com/sp) or send us an e-mail via support.healthdata@sciensano.be to report this documentation issue. Please, do not forget to mention the URL or web address of the page with the documentation issue. We will then adjust the documentation as soon as possible. Thank you!Submit a Knee registration "Revision"
Submit a Knee registration "Revision"To submit a "Revision" registration for the study project Orthopride Knee using the overview table, select "Revision" in the dark blue left menu.

When you select a version of this course of study, you will see the summary table in the main body of your screen. The table includes the following items: Registration ID, Progress, Author, Co-author, Unique ID, Business Key, Registration Code, National registry number of the patient…
Use the filters in the header of the table to find the registration(s) you want to submit. For example, you can use the filters "Status" (set to "Open") and "Validation Errors" (set to "0") to find the registrations that are eligible for submission.
Once you have found the registration(s) you want to submit, you must select the registration(s) by checking the checkbox at the beginning of the row in the summary table.
Then you need to press the "Actions" button at the top right of the summary table.
There are now two options, "Submit" and "Delete". Now press "Submit".
After you press "Submit," a pop-up message will appear asking you to confirm the submission of the selected registration(s). If you are sure about this action, press "Confirm." If not, press "Cancel."
Once you confirm the submission, you cannot change the content of the registration(s). Sent registrations can also no longer be deleted.
The sent registration remains present in the summary table, but the status has changed from "Open" to "Submitted".
If you want to see only "Open" registrations, you can adjust the filter on the "Status" item in the summary table.
A registration can be submitted at the end of the creation process using the study form (see: Create a [project] registration).
When the registration was completed using the study form, saved and there are no more validation errors, the registration can also be submitted via the overview table. This method can be useful to submit multiple registrations in the same action.
This documentation is being updated regularly. We try to provide as correct, complete and clear as possible information on these pages. Nevertheless, if you see anything in the documentation that is not correct, does not match your experience or requires further clarification, please create a request (type : request for information) via our portal (https://sciensano.service-now.com/sp) or send us an e-mail via support.healthdata@sciensano.be to report this documentation issue. Please, do not forget to mention the URL or web address of the page with the documentation issue. We will then adjust the documentation as soon as possible. Thank you!Submit a Knee registration "Resection"
Submit a Knee registration "Resection"To submit a "Resection" registration for the study project Orthopride Knee using the overview table, select "Resection" in the dark blue left menu.

When you select a version of this course of study, you will see the summary table in the main body of your screen. The table includes the following items: Registration ID, Progress, Author, Co-author, Unique ID, Business Key, Registration Code, National registry number of the patient…
Use the filters in the header of the table to find the registration(s) you want to submit. For example, you can use the filters "Status" (set to "Open") and "Validation Errors" (set to "0") to find the registrations that are eligible for submission.
Once you have found the registration(s) you want to submit, you must select the registration(s) by checking the checkbox at the beginning of the row in the summary table.
Then you need to press the "Actions" button at the top right of the summary table.
There are now two options, "Submit" and "Delete". Now press "Submit".
After you press "Submit," a pop-up message will appear asking you to confirm the submission of the selected registration(s). If you are sure about this action, press "Confirm." If not, press "Cancel."
Once you confirm the submission, you cannot change the content of the registration(s). Sent registrations can also no longer be deleted.
The sent registration remains present in the summary table, but the status has changed from "Open" to "Submitted".
If you want to see only "Open" registrations, you can adjust the filter on the "Status" item in the summary table.
A registration can be submitted at the end of the creation process using the study form (see: Create a [project] registration).
When the registration was completed using the study form, saved and there are no more validation errors, the registration can also be submitted via the overview table. This method can be useful to submit multiple registrations in the same action.
This documentation is being updated regularly. We try to provide as correct, complete and clear as possible information on these pages. Nevertheless, if you see anything in the documentation that is not correct, does not match your experience or requires further clarification, please create a request (type : request for information) via our portal (https://sciensano.service-now.com/sp) or send us an e-mail via support.healthdata@sciensano.be to report this documentation issue. Please, do not forget to mention the URL or web address of the page with the documentation issue. We will then adjust the documentation as soon as possible. Thank you!Send a correction registration
Send a correction registrationSuppose we want to send a correction registration of "Primo-implantation" registration. In that case, we need to navigate to the study program QERMID Pneumology and then to the study project Endobronchial valve. There we need to select "Primo-implantation" in the dark blue left menu.
Important: a correction registration can be added only if the status of the registration is submitted.
A correction registration can be added in two ways. The first way is via the overview table and second way in the preview page of a registration.
Send a correction via Overview table
When the registration was submitted, the correction registration can be added via the overview table:
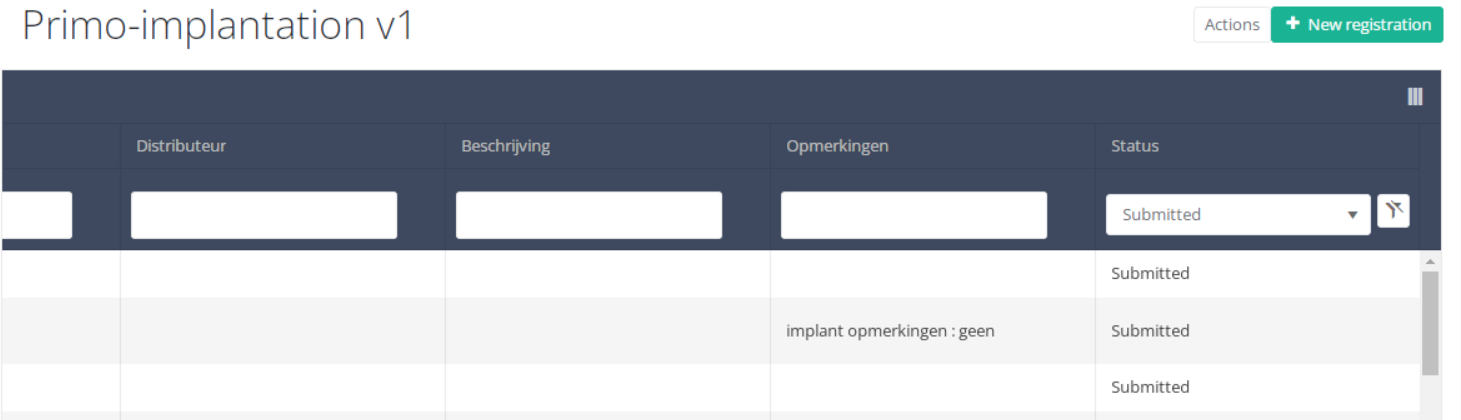
When you select a version of this study section, you will see the summary table in the main part of your screen. This table contains, among other things: Registration ID, Progress, Author, Co-author, Unique ID, Business Key, Registration Code, National Registry ID of the patient…
Use the filters in the table header to find the registration that need a correction. For example, you can use the "Status" (set to "Submitted") filter to get only submitted registrations.
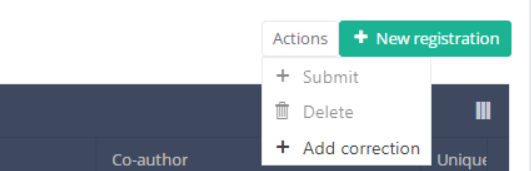
Then, you must press the "Actions" button at the top right of the summary table.
Three options are displayed : "Submit" and "Delete" and "Add correction" but only option "Add correction" is available for submitted registrations. Now press "Add correction".
After you press "Add correction", a pop-up window will appear asking you to confirm the action of adding a correction registration for selected registration. If you are sure of this action, press "Confirm". If not, press "Cancel".
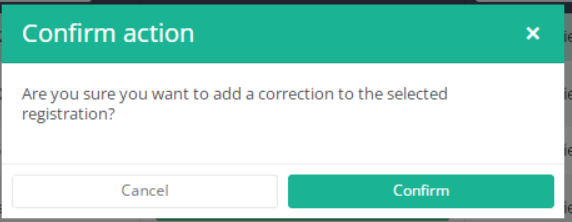
If you confirm, you will be redirected to correction registration form.
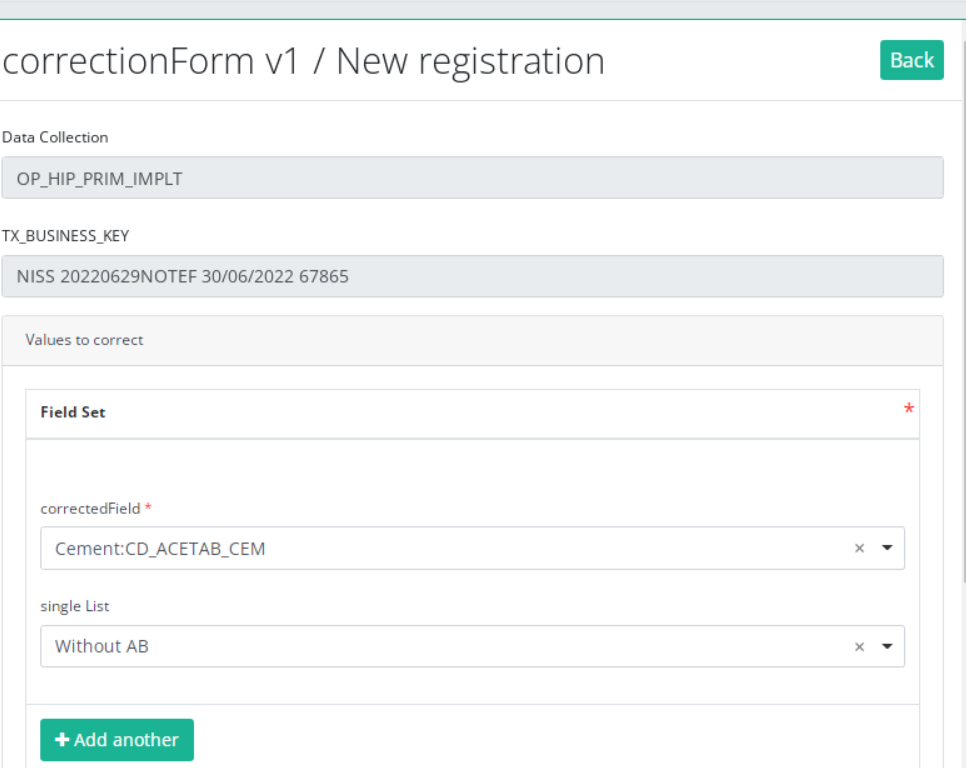
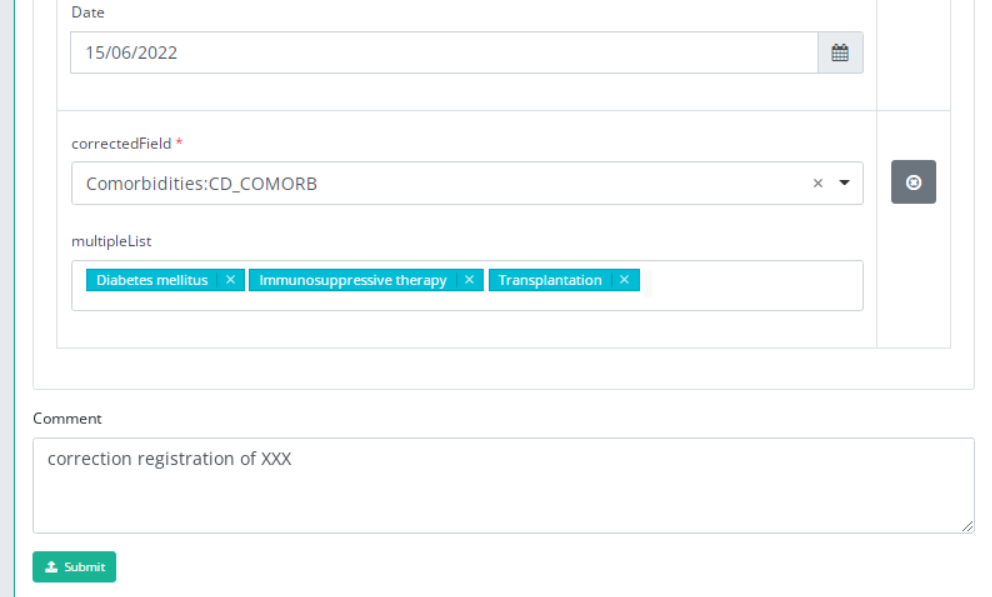
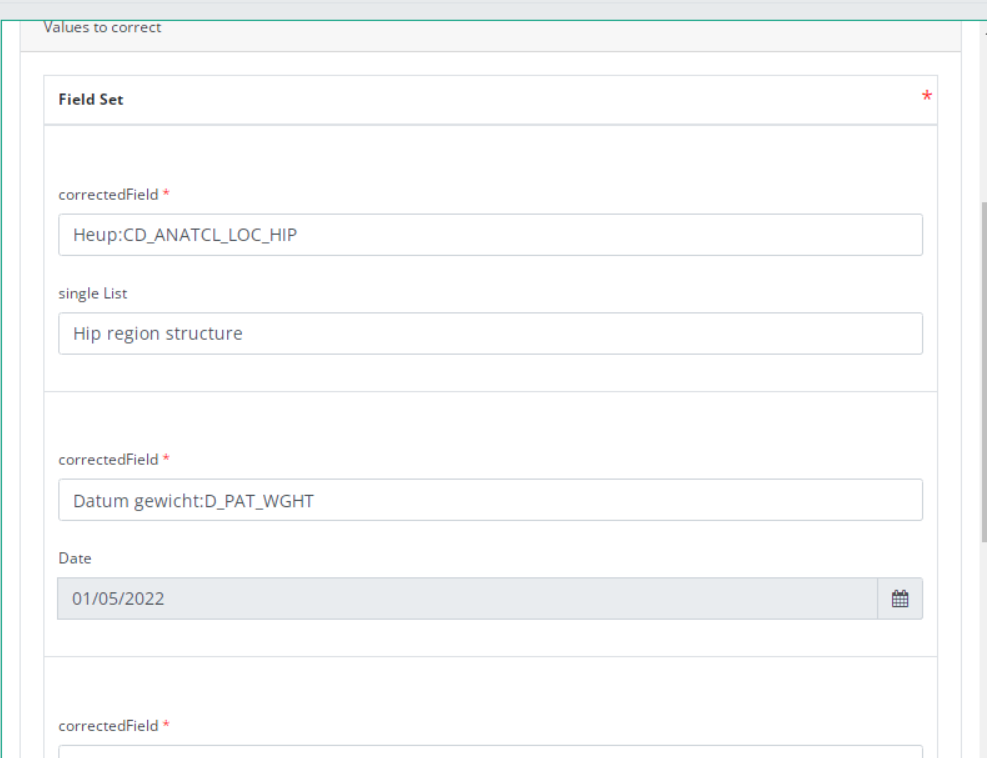
The correction DCD has no more than:
- Business key of original registration,
- The name of Data Collection,
- The field or variable which is wrong,
- The correction value,
- Comment field.
Some fields are automatically filled with values of original registration, like :"Data collection " and "Business_KEY" .
The number of fields to correct in the same correction registration is limited to three. You can add another field to correct by clicking on "Add another " button.
When you finish filling the correction registration, you can add a comment and send the correction by clicking on "submit" button.
Send a correction via Preview page
We can also add a correction form in the preview page of a registration.
Click on the registration to correct in overview table, you will be redirected to the preview page.
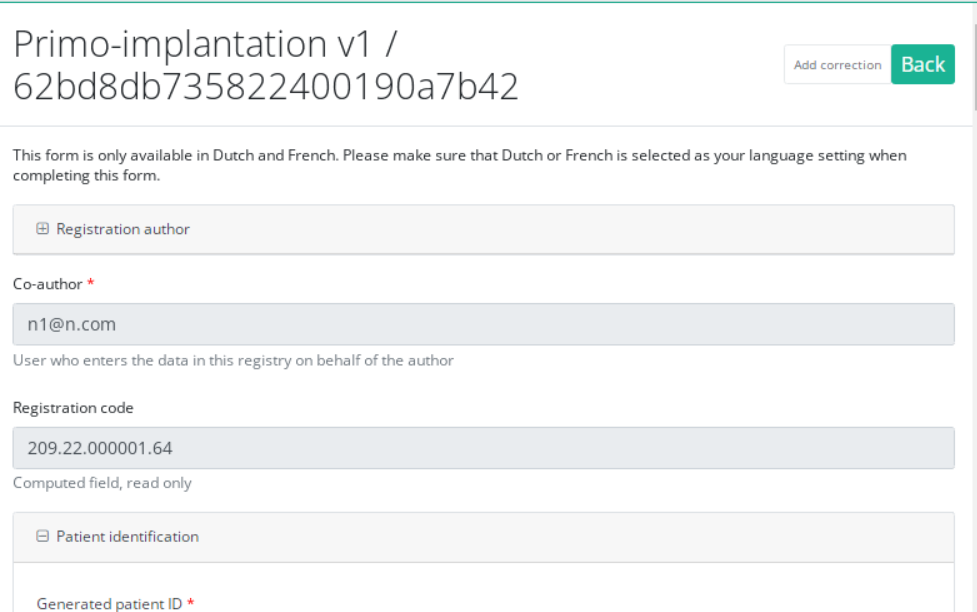
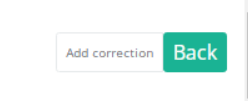
Click on "Add correction" button to add a correction for current registration.
Follow same steps described in previous section( See "1.Send a correction via Overview table")
Preview a correction registration
Correction form is a generic form available for all projects and DCDs.
If you want to preview "correction registrations" already submitted, you have to navigate to the study program Correction form and then to the study project Correction form. There you need to select the last version of "correction form" in the dark blue left menu.
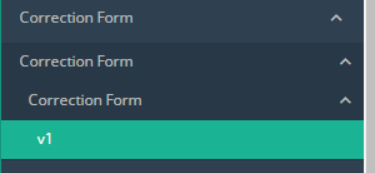
All corrections registrations will be displayed(of different projects). You can use the filters in the table header to find a specific registration.
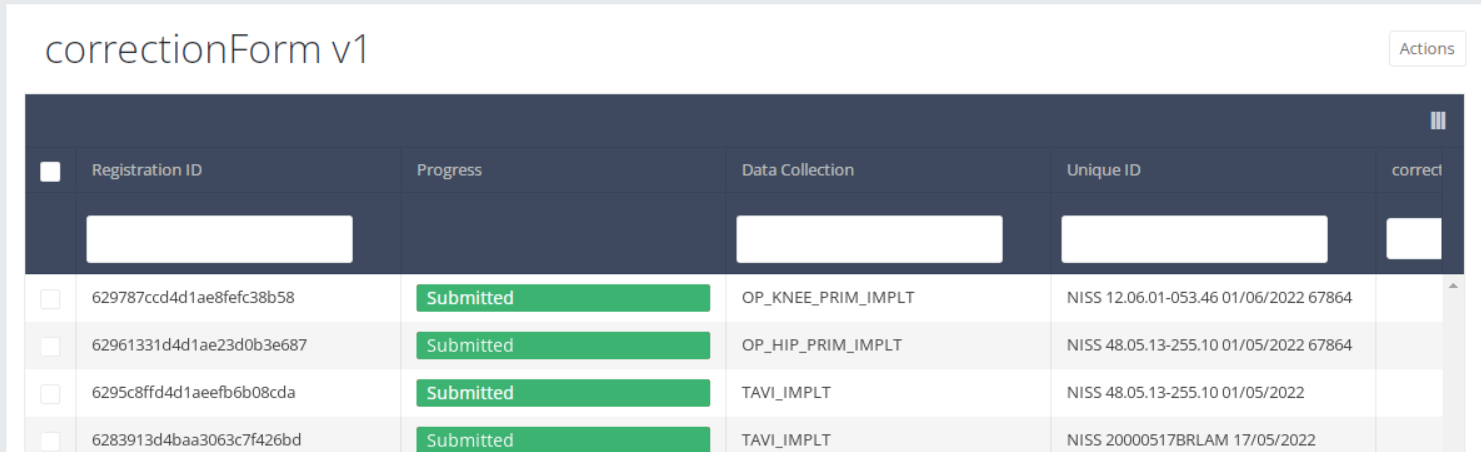
If you want to preview a correction registration, you need to click on, then you will be redirected to preview page.
Deze pagina werd vertaald met behulp van een automatische vertaalmachine met als doel om de inhoud sneller in uw taal te kunnen aanbieden. Een menselijke vertaler moet deze pagina nog beoordelen. Bijgevolg kan deze pagina nog grammaticale en andere taalfouten bevatten. Als u iets in de documentatie ziet dat niet correct is vertaald, neem dan contact met ons op via support.healthdata@sciensano.be (vergeet niet het webadres van de pagina te vermelden). Wij zullen de vertaling dan aanpassen. Bedankt!Deze documentatie wordt regelmatig bijgewerkt. We proberen de informatie zo correct, volledig en zo duidelijk mogelijk weer te geven. Als u desondanks iets in de documentatie ziet dat niet correct is, niet overeenkomt met uw ervaring, of verdere verduidelijking vereist, maak dan een verzoek aan (type: verzoek om informatie) via ons portaal (https://sciensano.service-now.com/sp) of stuur ons een e-mail via support.healthdata@sciensano.be om dit documentatieprobleem te melden. Vergeet niet de URL of het webadres van de pagina met het documentatieprobleem te vermelden. Wij zullen de documentatie dan aanpassen. Bedankt!