National Hand Hygiene Campagne
National Hand Hygiene CampagneWelcome to the technical documentation pages for the project National Hand Hygiene Campagne, provided by the service healthdata.be (Sciensano).
These pages provide information about the technical processes of the project. The following sections are (will be) provided:
- General project information
- The data collection
- The data transfer (documentation in progress)
- The data validation (documentation in progress)
- The data analysis (documentation in progress)
- The data reporting and visualisation (documentation in progress)
For scientific information of the project, please contact the primary organization that oversees implementation of project (see section "General project information").
This documentation is under construction. We try to provide as correct, complete and clear as possible information on these pages. Nevertheless, if you see anything in the documentation that is not correct, does not match your experience or requires further clarification, please send us an email via support.healthdata@sciensano.be to report this documentation issue. Please, do not forget to mention the URL or web address of the page with the documentation issue. We will then adjust the documentation as soon as possible. Thank you!General Hand Hygiene project information
General Hand Hygiene project informationProject name
National Hand Hygiene Campagne
Project abbreviation
HH
Project code
HDBP0025
Primary organization that oversees implementation of project
- Healthcare-associated infections and antimicrobial resistance (Sciensano)
Partner organization participating in project
- European Centre for Disease Prevention and Control (ECDC)
Organization that commissioned this project
- FPS Public Health, Food Chain Safety and Environment
- Federal Platform for Hospital Hygiene
Organization providing monetary or material support
- FPS Public Health, Food Chain Safety and Environment
Brief project description
The national campaign is aimed at 1) all healthcare workers / healthcare providers / caregivers who have direct contact with patients in hospitals (both acute, rehabilitation and psychiatric hospitals) and 2) hospitalized patients and their families. The campaign normally consists of two main parts:
- the actual sensitization of health care workers and patients on the basis of the
campaign material; and - the evaluation of the impact of the campaign based on the measurement before (normally) and after the sensitization phase of:
- the hand hygiene compliance of healthcare workers through direct observation
- the consumption of hand alcohol and
- compliance with basic hand hygiene requirements (optional)
The sensitization is multimodal. The sensitization combines a number of strategies:
- an audit with feedback (normally feedback of the results of the measurement of the compliance pre-campaign)
- training for healthcare workers
- promotion of hand alcohol
- involving the patient
- sensitization of healthcare providers
- involvement of managers and management
For the realization of the campaign, the development of the campaign material and the training tools, the "Recommendations on hand hygiene during care" were based on, as in each case, the Superior Health Council (SHC) and the "WHO Guidelines on hand hygiene in health care".
Regulatory framework of this project
Consult the regulatory framework information published on the fair.healthdata.be pages.
The Hand Hygiene data collection
The Hand Hygiene data collectionOrganizations and/or individuals that provide data
General hospitals, Psychiatric hospitals
Start date of the data collection
dd/mm/yyyy (not available)
End date of the data collection
dd/mm/yyyy (not available)
Periodicity of the data collection
Continuous voluntary registration, with intermediate mandatory participation in the National Hand Hygiene Campagne.
The Hand Hygiene Data Collection Definition (HDBP0025)
The Hand Hygiene Data Collection Definition (HDBP0025)In the file below you can find the Data Collection Definition (DCD) specifications of the project National Hand Hygiene Campaign. It is a detailed description of the content of three DCD's:
- PRE campaign
- POST campaign
- IN & OUTSIDE campaign
with field names, formats, values, validation rules, help texts, warning texts, translations ... These specifications were used to build the forms, csv's, and API's for this project, which you also can find in this project manual.
HD Data Collection Definition of project HDBP0025 NSIH HH v3.0 20211118
The Hand Hygiene Dataflow description
The Hand Hygiene Dataflow descriptionIn this section, we describe the dataflow of the Hand Hygiene project. Given the fact that both the local version and the web version of HD4DP v2 are used for this project, we describe both dataflows.
Dataflow via HD4DP v2 (Local version)
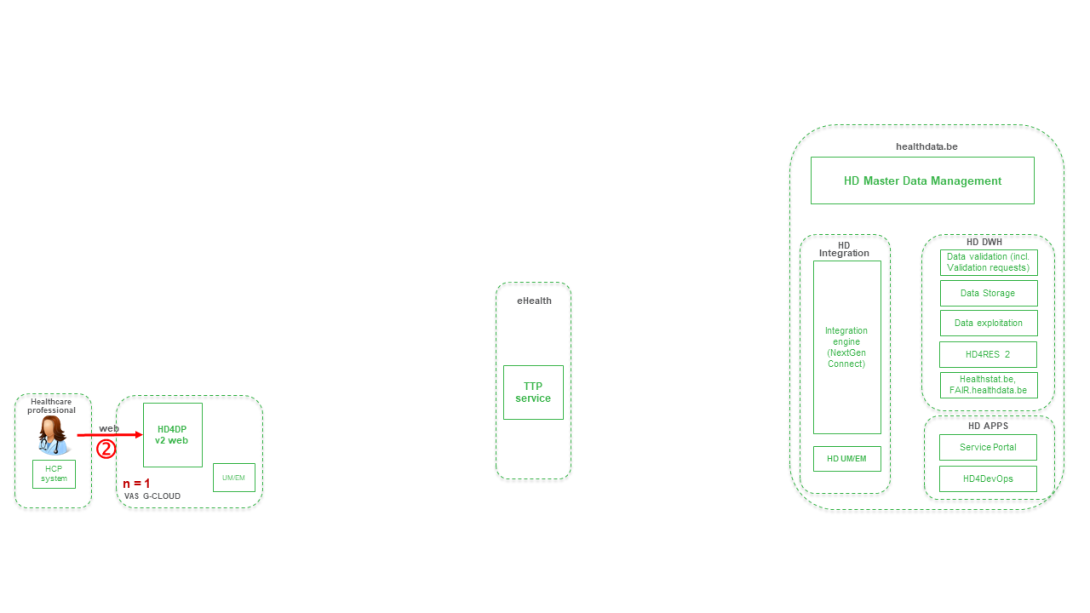
Step 1. Automatic data export from systems of data provider towards HD4DP v2 and prefill of forms if not complete.

Step 2. Manual registration (de novo or completion) of data in form component of HD4DP v2.
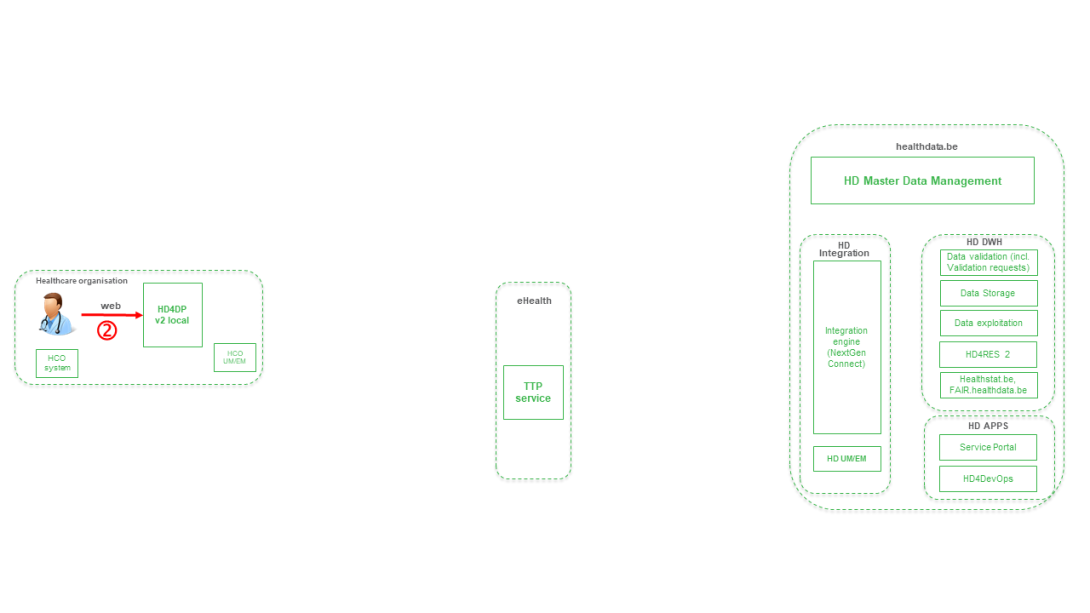
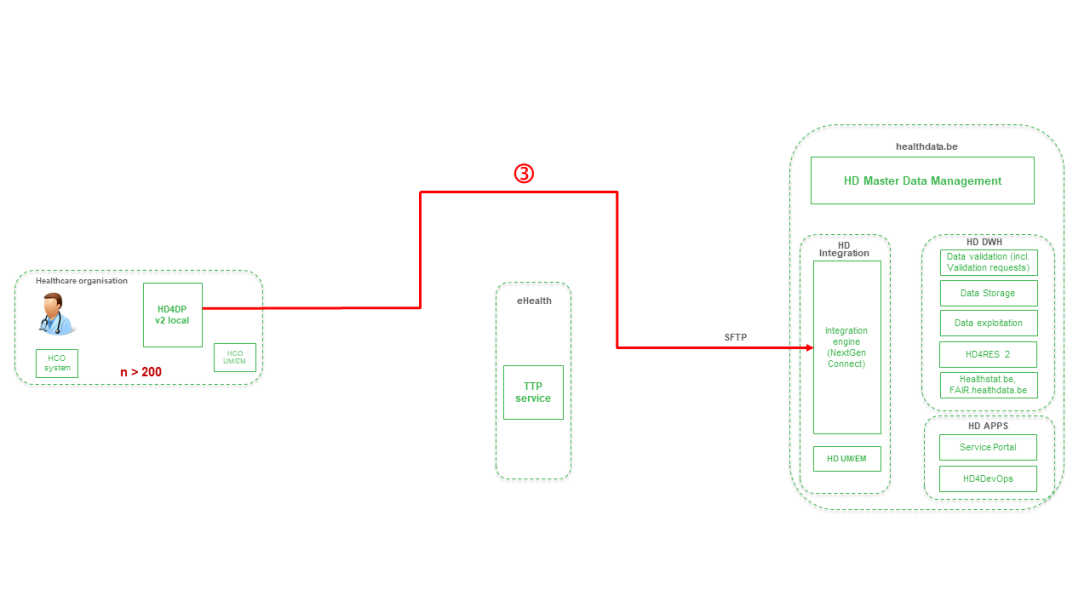
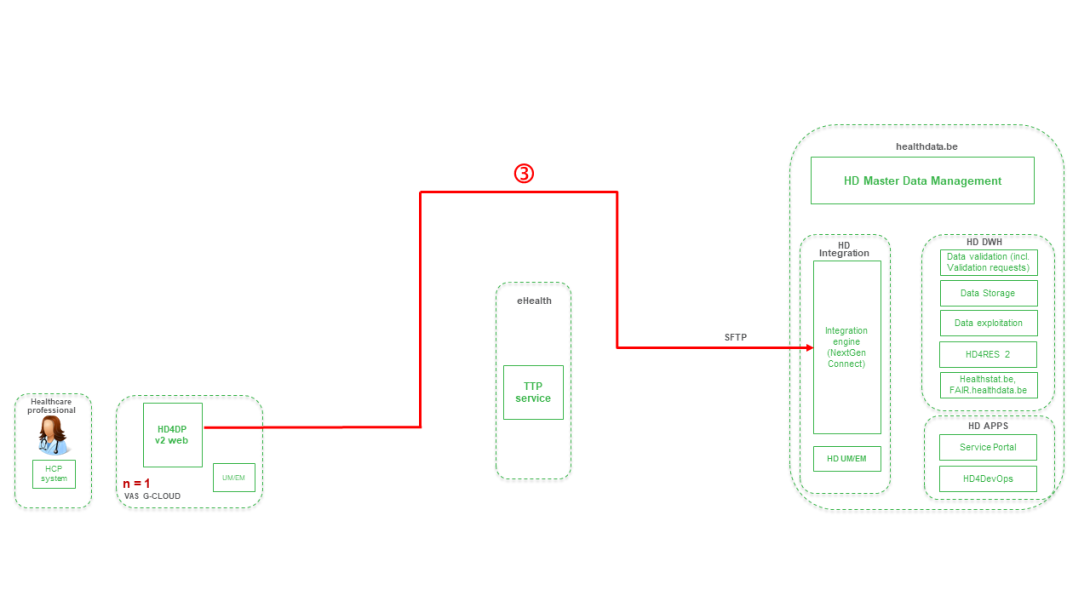
Step 3. Direct real time transfer of registry variables from HD4DP v2 towards HD.
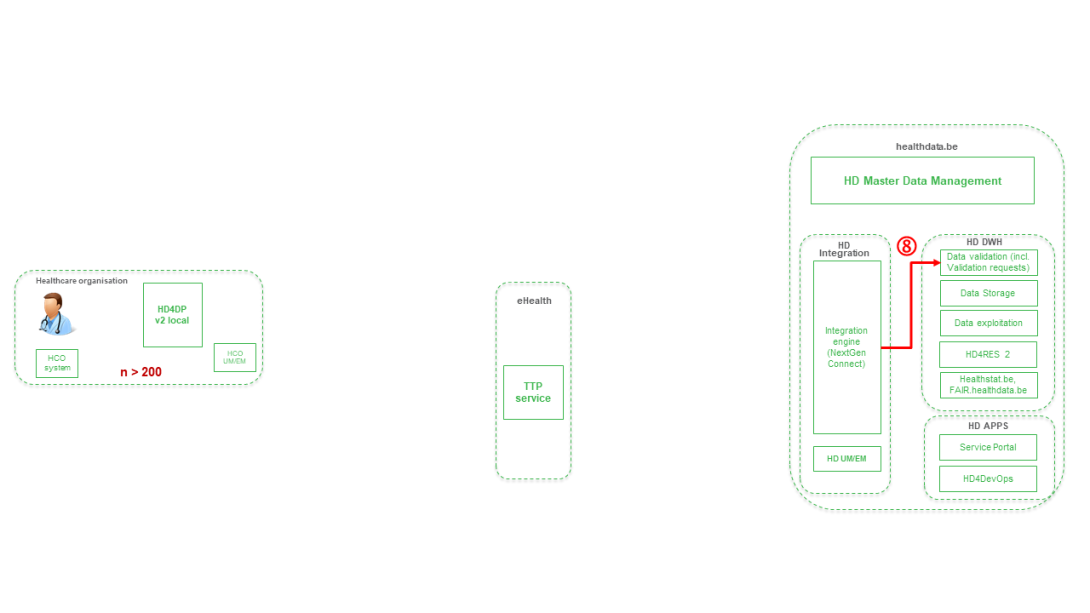
The standard steps 4. - 7. are not relevant for this project as no individual patient data is recorded and transferred.
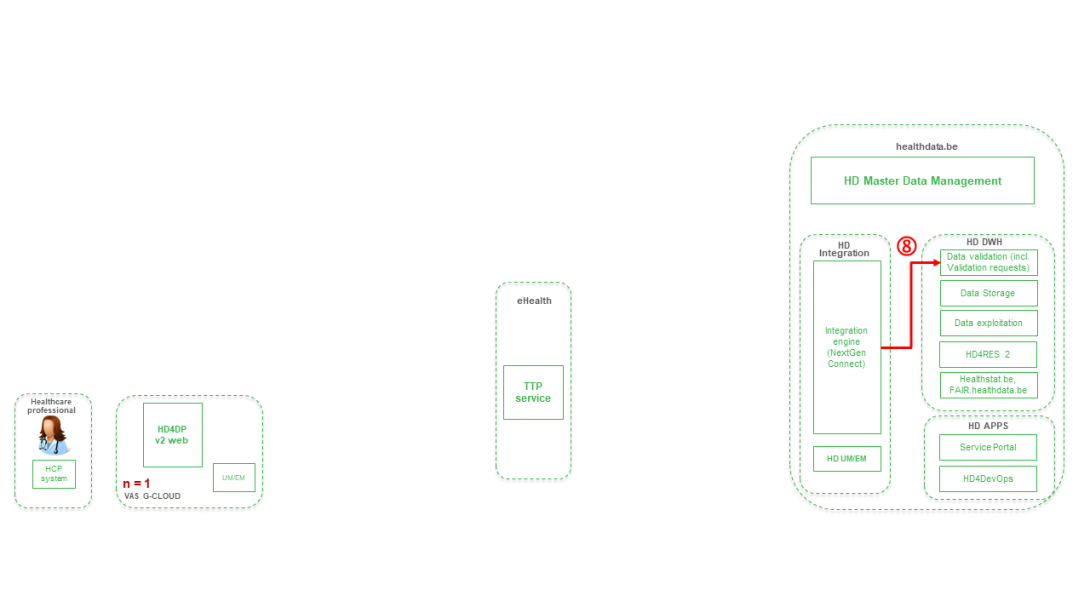
Step 8. Join and Transfer of records from HD Integration engine towards Data Validation environment on DHW
Dataflow via HD4DP v2 (web version)
Step 1. Automatic data export from systems of data provider towards HD4DP v2 web and prefill of forms if not complete.

Step 2. Manual registration (de novo or completion) of data in form component of HD4DP v2. web
Step 3. Direct real time transfer of registry variables and technical ID of record from HD4DP v2 web towards HD.
The standard steps 4. - 7. are not relevant for this project as no individual patient data is recorded and transferred.
Step 8. Join and Transfer of records from HD Integration engine towards Data Validation environment on HD DHW
HD4DP v2
HD4DP v2General description of the application HD4DP v2 Local
The HD4DP version 2.x Local is an electronic data capture (EDC) system: a computerized system designed for the collection of clinical data in electronic format for use in research supporting human public health policy. HD4DP (Health Data for Data providers) replaces the traditional paper-based data collection methodology and the proliferation of websites to streamline data collection and expedite the time to analysis and reporting.
Components and features
The HD4DP version 2.x Local application contains the following major components: NextGen Connect, Form.io, HD Connect (LOCAL Proxy), Local datawarehouse.
NextGen Connect
NextGen Connect is a health care integration engine that translates message standards into the standard required by the receiving system, including data formats and standards like HL7, DICOM, ANSI X12, ASCII, and XML. Main functionalities are filtering, transformation, extraction and routing.
The NextGen Connect component is used to handle all integrations within HD4DP 2.0 itself but also all integrations with the external world.
Data collections API: The form.io server offers a REST API which can be used to submit data for each known data collection. Data provider Master Systems cannot access this API directly but need to use the API exposed by the NextGen Connect component. This API is simply a proxy for the form.io API, but allows extra features on top of the form.io API such as security, monitoring, throttling, …
CSV API: For each data collection data can be submitted file-based using a CSV. A CSV can contain multiple data entries for a single data collection definition. These data entries are transformed and pushed by the NextGen Connect component towards the form.io server for potential manual post-processing and validation.
HL7 FHIR API: For some data collections an HL7 FHIR API will be available. The NextGen Connect component performs the transformation towards the Data Collections API and push the data into the form.io server.
Data delivery: the NextGen Connect component handles all routing of data towards the external world. This means it verifies the form.io server for completed data entries which have not yet been delivered. For each data entry that needs to be delivered, it determines where to send the data to, how it needs to be transformed and how it needs to be split. It performs all these actions in a guaranteed delivery fashion: it makes sure the data reaches its destination, possibly retrying when something went wrong.
Feedback: the NextGen Connect component coordinates the receival of feedback, potentially transforming it and pushing it towards the respective data collection entry using the data collections API.
Form.io
Form.io is a data management platform that includes a form builder with a drag and drop interface, management of data with complete API platform, management of users, offline forms, dynamic forms, automatic creation of API, and application embedding. In HD4DP v2, an Angular frontend application is available on top of the form.io server. This application provides a user interface to data providers in which they can see the different data collections for which they are allowed to record and submit data manually. A form.io backend server is responsible for providing the form definitions and registrations of new/updated entries.
HD Connect (LOCAL Proxy)
The HD Connect component is used to retrieve metadata from Master Data Management Database (MDM DB) residing on healthdata.be side.
Local datawarehouse
Each and every change in data entries on the form.io server is pushed towards the local datawarehouse (Local DWH) for easy reporting and data extraction. This local DWH consists of a PostgreSQL database.
Installation and maintenance
The application HD4DP v2 Local is provided without cost and installed remotely on the infrastructure of the healthcare organization by healthdata.be. Healthcare organizations are provided the system requirements for installation of HD4DP v2 application. Healthcare organizations that cannot provide the system requirements can opt to request access and use of a HD4DP v2 Local application of another healthcare organization. Healthcare organizations that cannot provide the system requirements and cannot access and use a HD4DP v2 Local application of another healthcare organization, can request access and use of HD4DP v2 WEB hosted by healthdata.be.
The application HD4DP v2 Local is maintained without cost remotely on the infrastructure of the healthcare organization by healthdata.be. The infrastructure on which the application HD4DP v2 Local is installed, should be maintained by the healthcare organization.
This documentation is being updated regularly. We try to provide as correct, complete and clear as possible information on these pages. Nevertheless, if you see anything in the documentation that is not correct, does not match your experience or requires further clarification, please create a request (type : request for information) via our portal (https://sciensano.service-now.com/sp) or send us an e-mail via support.healthdata@sciensano.be to report this documentation issue. Please, do not forget to mention the URL or web address of the page with the documentation issue. We will then adjust the documentation as soon as possible. Thank you!User manual of the application HD4DP v2
User manual of the application HD4DP v2 Bart.ServaesRequest access to an HD application for a specific project
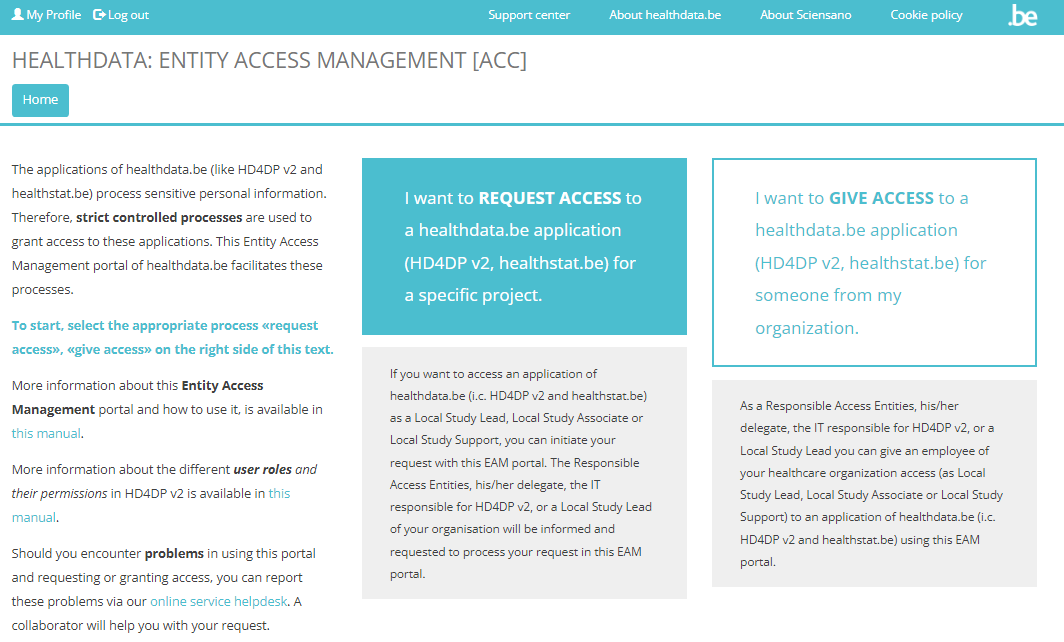
Request access to an HD application for a specific projectHealthdata.be applications such as HD4DP v2 and healthstat.be process sensitive personal information. Therefore, strictly controlled processes are used to grant access to these applications.
The Entity Access Management (EAM) portal of healthdata.be facilitates these processes. In this article we describe how to use it. To navigate to the EAM application, enter the URL https://eam.healthdata.be in your internet browser.
Note: As the documentation of the EAM portal is being updated on a regular basis, please be advised to check the Release notes first.
Select one of the following capacities that suits your position in order to request access to an HD application:
Standard End-users
To request access to healthdata.be applications (such as HD4DP v2 and healthstat.be) as a standard end-user, you need to click on REQUEST ACCESS in the blue text box in the middle of the screen.

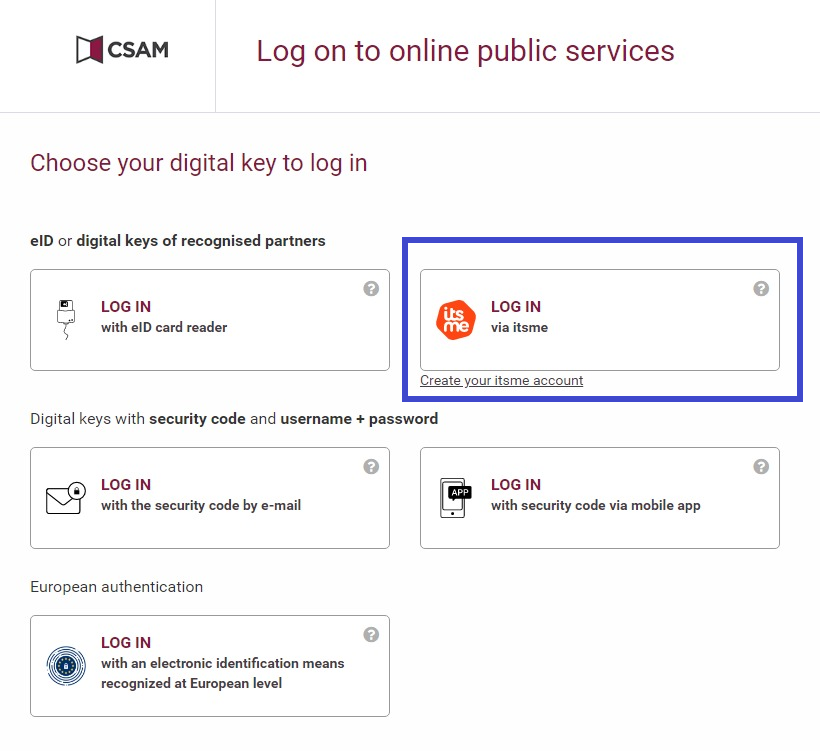
You will be directed to the next screen, where you select the button Log in with eID.
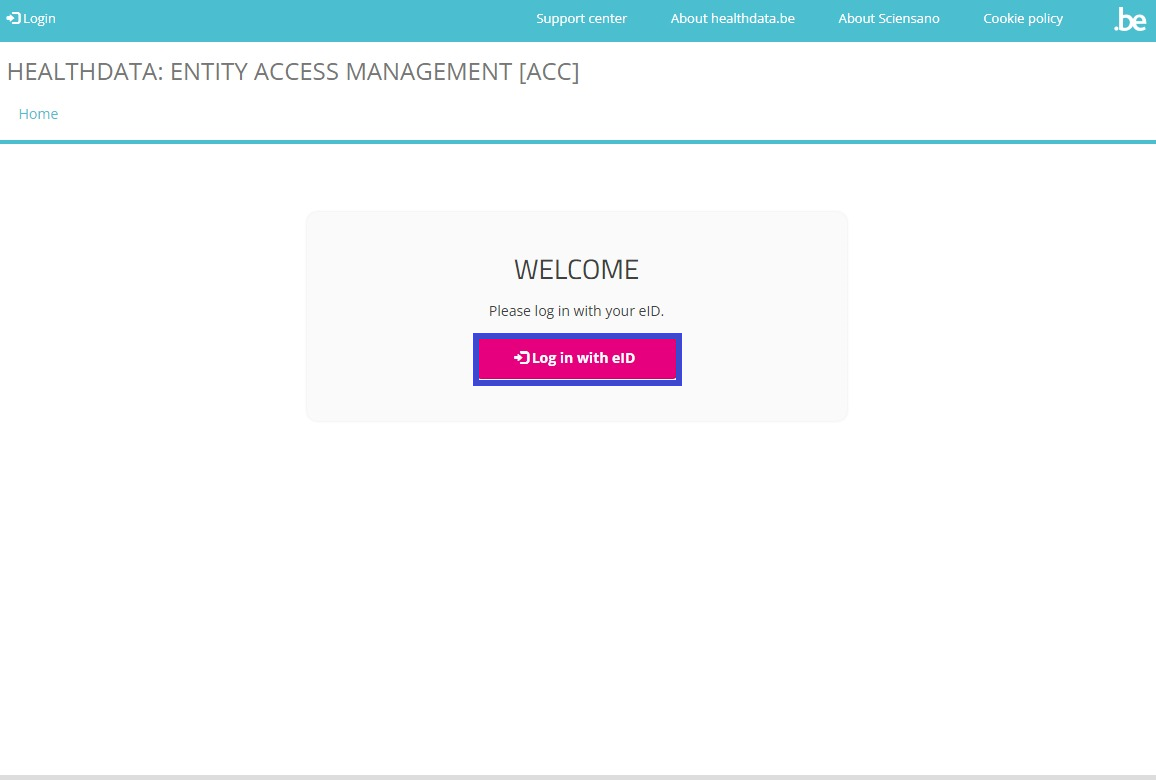
Clicking on this button leads you to the government's Federal Authentication Service (FAS), where you can log in with multiple digital keys with eID or digital identity.
If you choose to connect with ItsMe, you can enter your cell phone number.
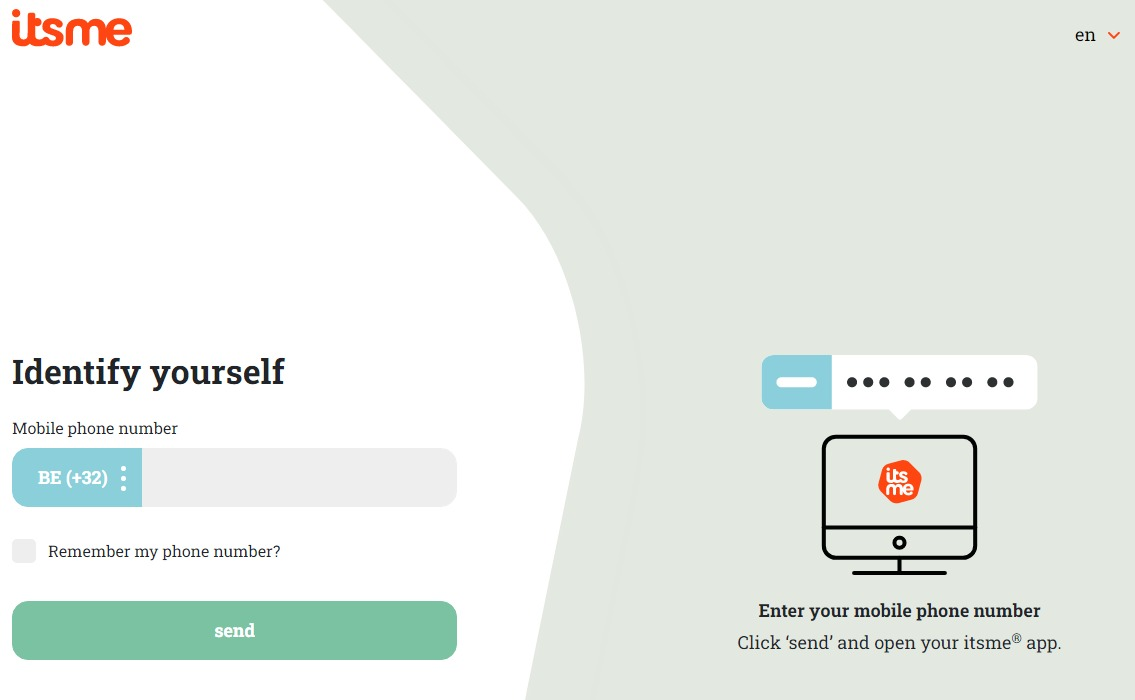
Follow the instructions on your mobile device via the ItsMe application.

Once you have run through the ItsMe login procedure, you want to select the green confirmation button (available in FR and NL) in the screen below to access the Sciensano environment.

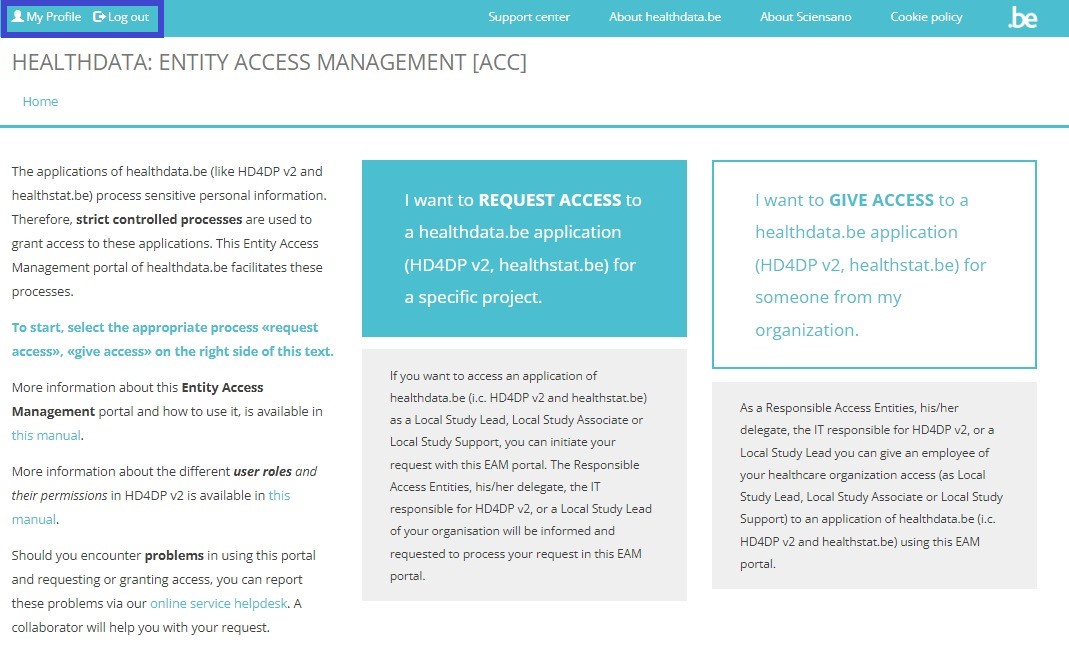
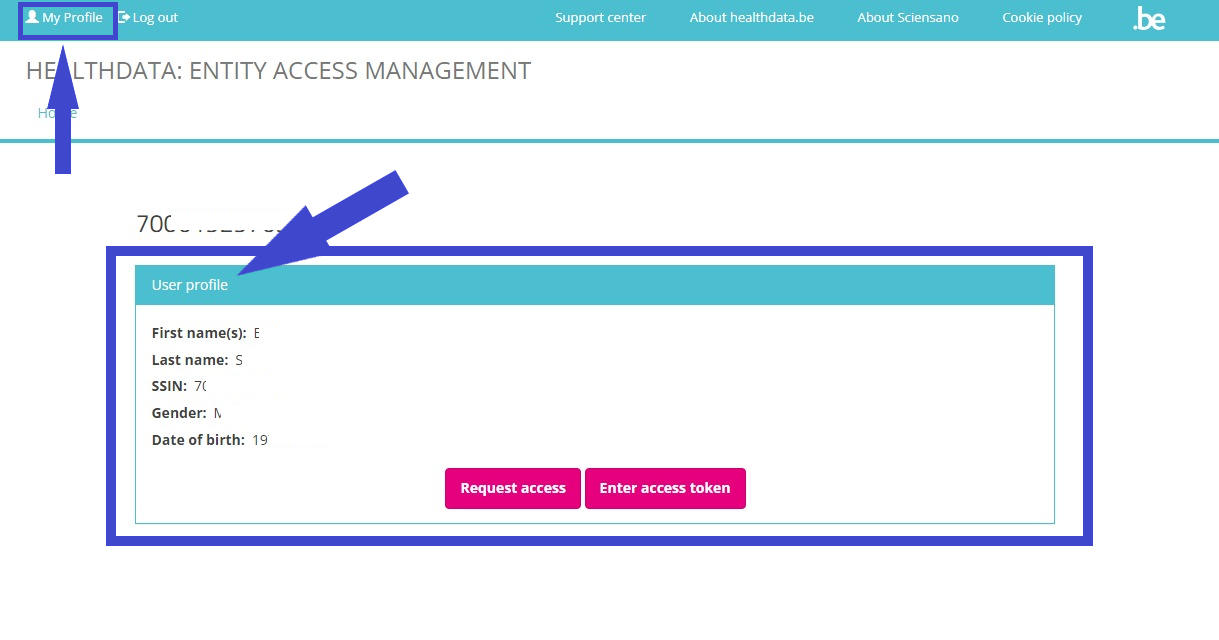
After selection of the confirmation button, you are logged in to the EAM portal page as indicated by the available My profile and Log out options to the top-left of your screen.
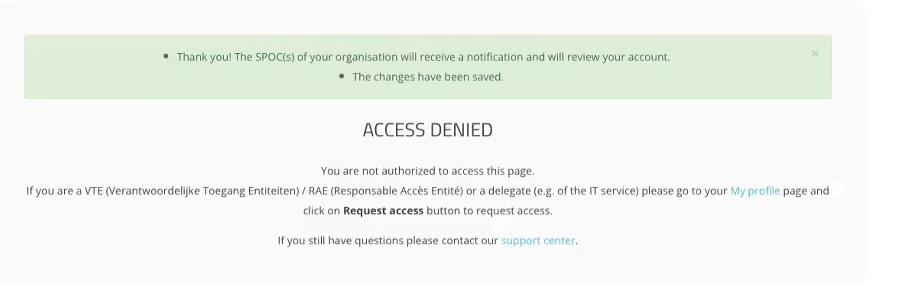
When selecting the REQUEST ACCESS link in the blue highlighted text box, in order to fill out the Request access form, the following message appears:

Click on the My profile link in the message, which redirects you to your profile page. Your user profile needs validation before being able to enter and complete the Request access form.
Select the Edit tab to complete your profile information.
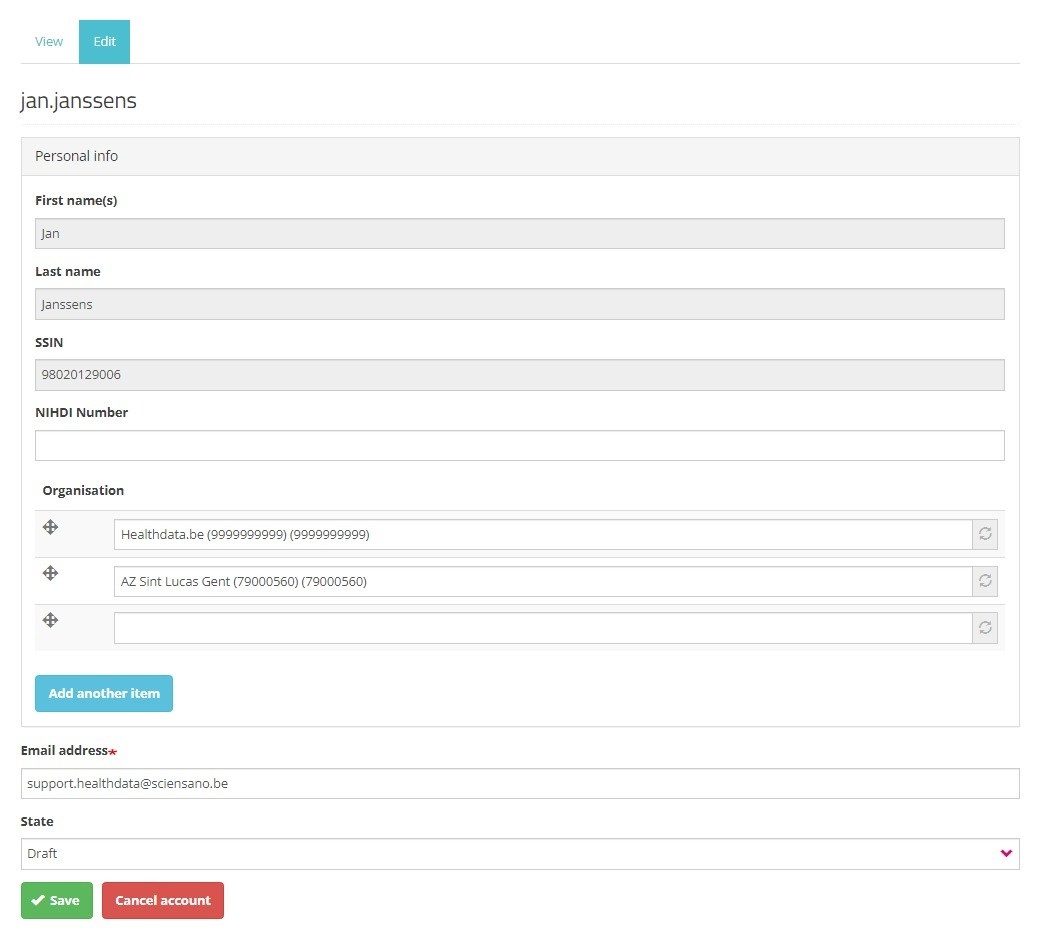
Next to the profile information that is automatically prefilled based on your eID data, you need to complete the following fields:
NIHDI Number: Your NIHDI number if available.
Organization: Add the organization(s) you are affiliated with. This field includes the name and NIHDI number of the organization.
Email address: Mandatory field for which the content can't be retrieved from the eID. Your email address will be used for communication on the profile validation and access request.
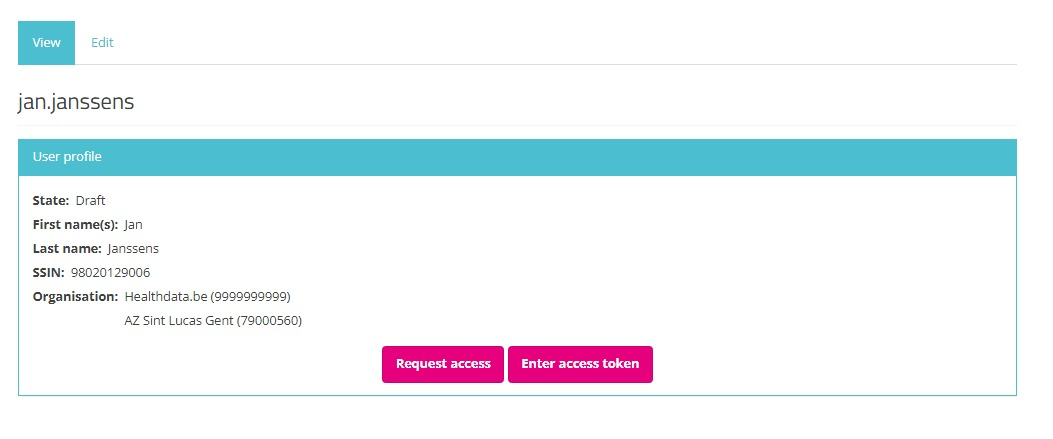
State: Select one of the options (see image underneath):
- Draft: This status indicates that you have not finished completing the profile fields yet. Only you can see the filled in data at this stage. Modification of the profile information is restricted to the status "Draft". You can however Save profile information as Draft to finalize and send it for validation lateron.
- Validation Requested: The provided user profile information is complete and you want to send it for validation to the SPOC.

Click on the Save button to send your profile information to the SPOC. An Access Denied message appears on the screen, indicating you can't modify your filled in and sent profile information anymore.
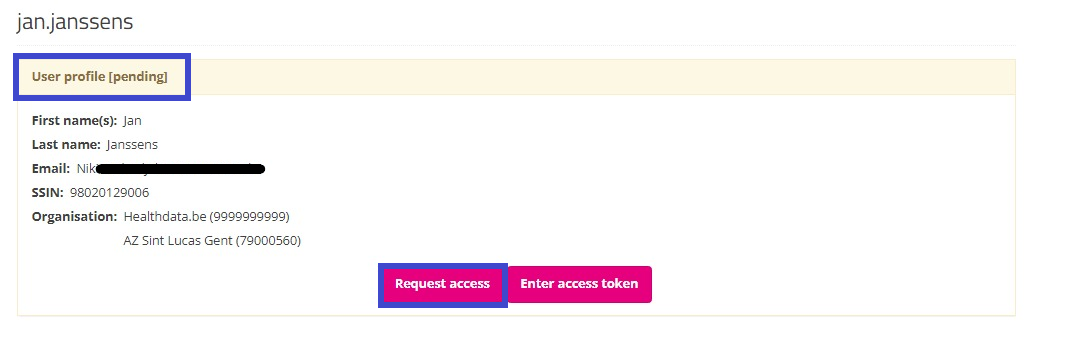
Return to the My profile page to see your profile has the pending status. Also, the Edit tab has disappeared, preventing from modifications afterwards:
Your profile will soon be validated by the SPOC, which will be visible on your profile page as follows:
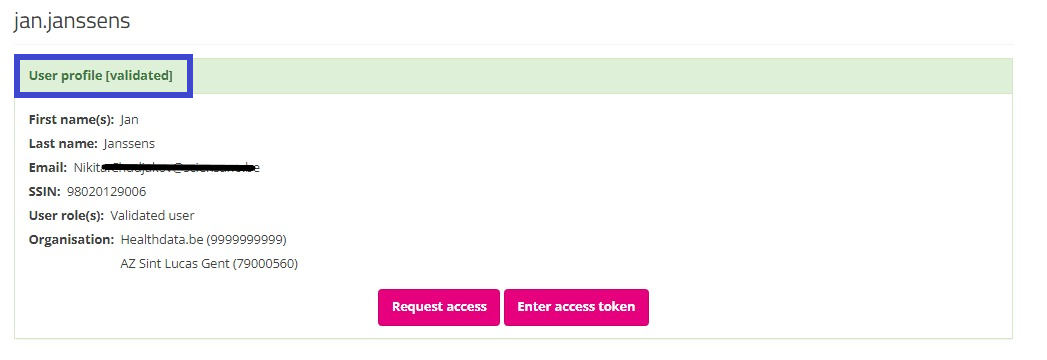
After validation of your profile by the SPOC, you select Home to return to the EAM portal page. Attention: Do not select the button "Request access" (soon: "Request SPOC rights"), since this leads to the process of requesting access as a SPOC.

In the EAM portal page you want to select the REQUEST ACCESS link in the blue highlighted text box again.
Select the hospital you are affiliated with for the application(s) and project(s) you want to request access to.
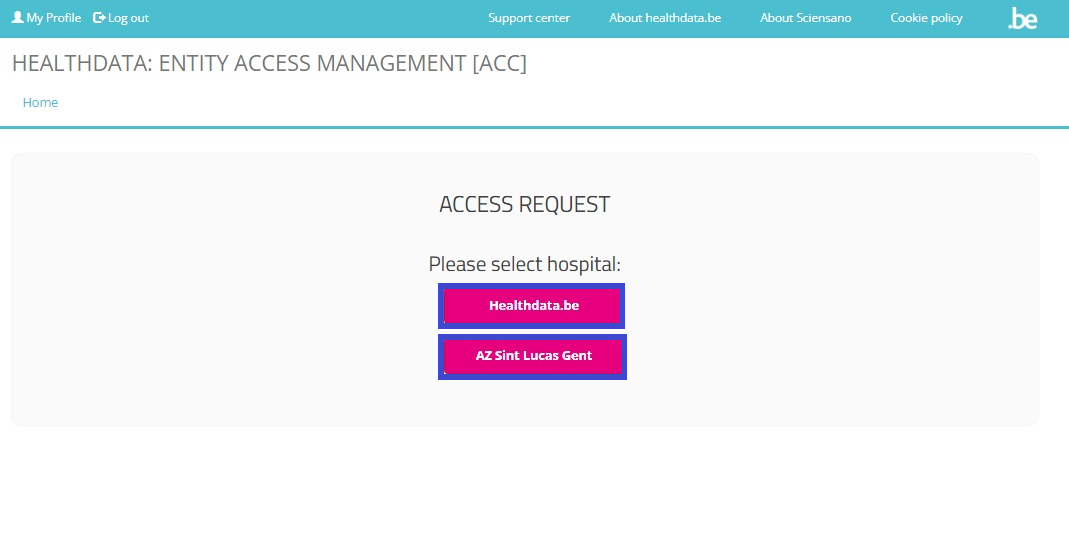
You can now start completing the Request Access form.
Please fill in all required fields (indicated with a red asterisk *), make a selection in the mandatory drop-down lists and, optionally, tick the check boxes for additional help and/or information.
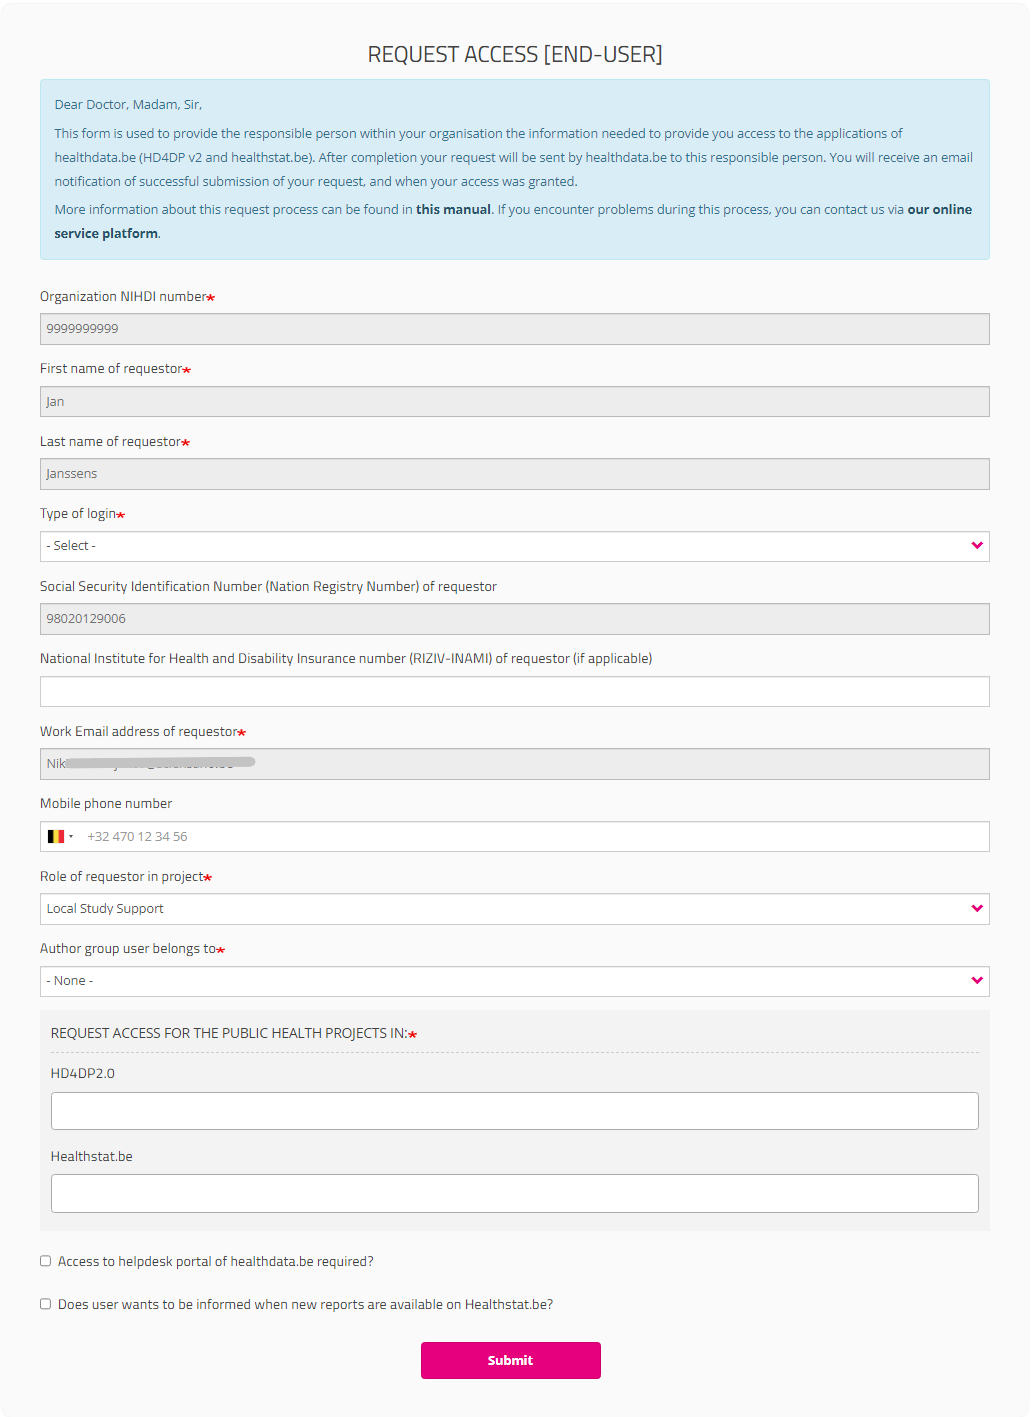
Type of login field:
If you select "Belgium resident" for the field “Type of Login”, entering the mobile phone number is optional.

If you are a "Non-Belgium resident", the Mobile phone number field becomes mandatory to allow for the two factor authentication:

Role of requestor in project field
You must indicate your role in the project (Local Study Lead, Local Study Associate or Local Study Support). Your role determines your access options in HD4DP2 for this project. Read more about the scope of the roles in User roles in HD4DP v2.

When selecting Local Study Support you will be asked to select the name of your Local Study Associate in a drop-down list. This list is automatically populated and specific to the organization you have selected earlier.

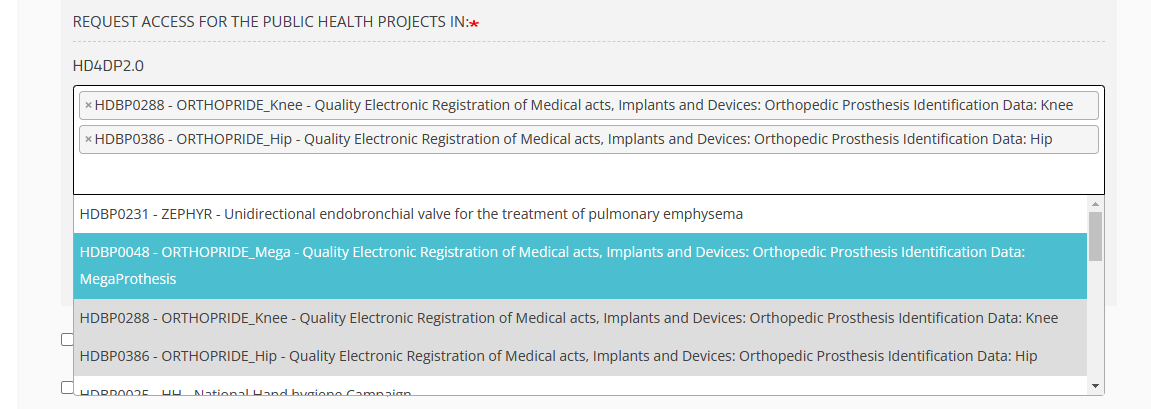
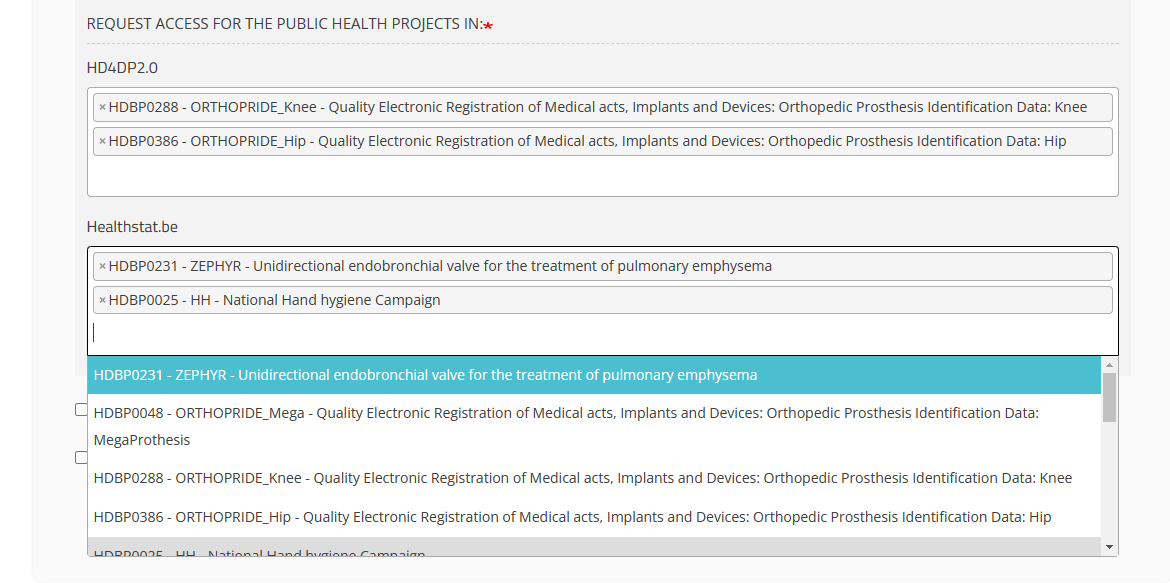
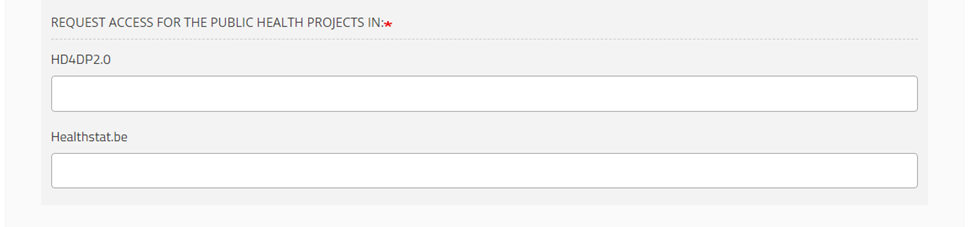
HD4DP2.0 field
Click in the field under HD4DP2.0 if you want to access the application to make registrations for the selected project:
Healthstat.be field
Click in the field under healthstat.be if you want to access the reporting of the selected project:
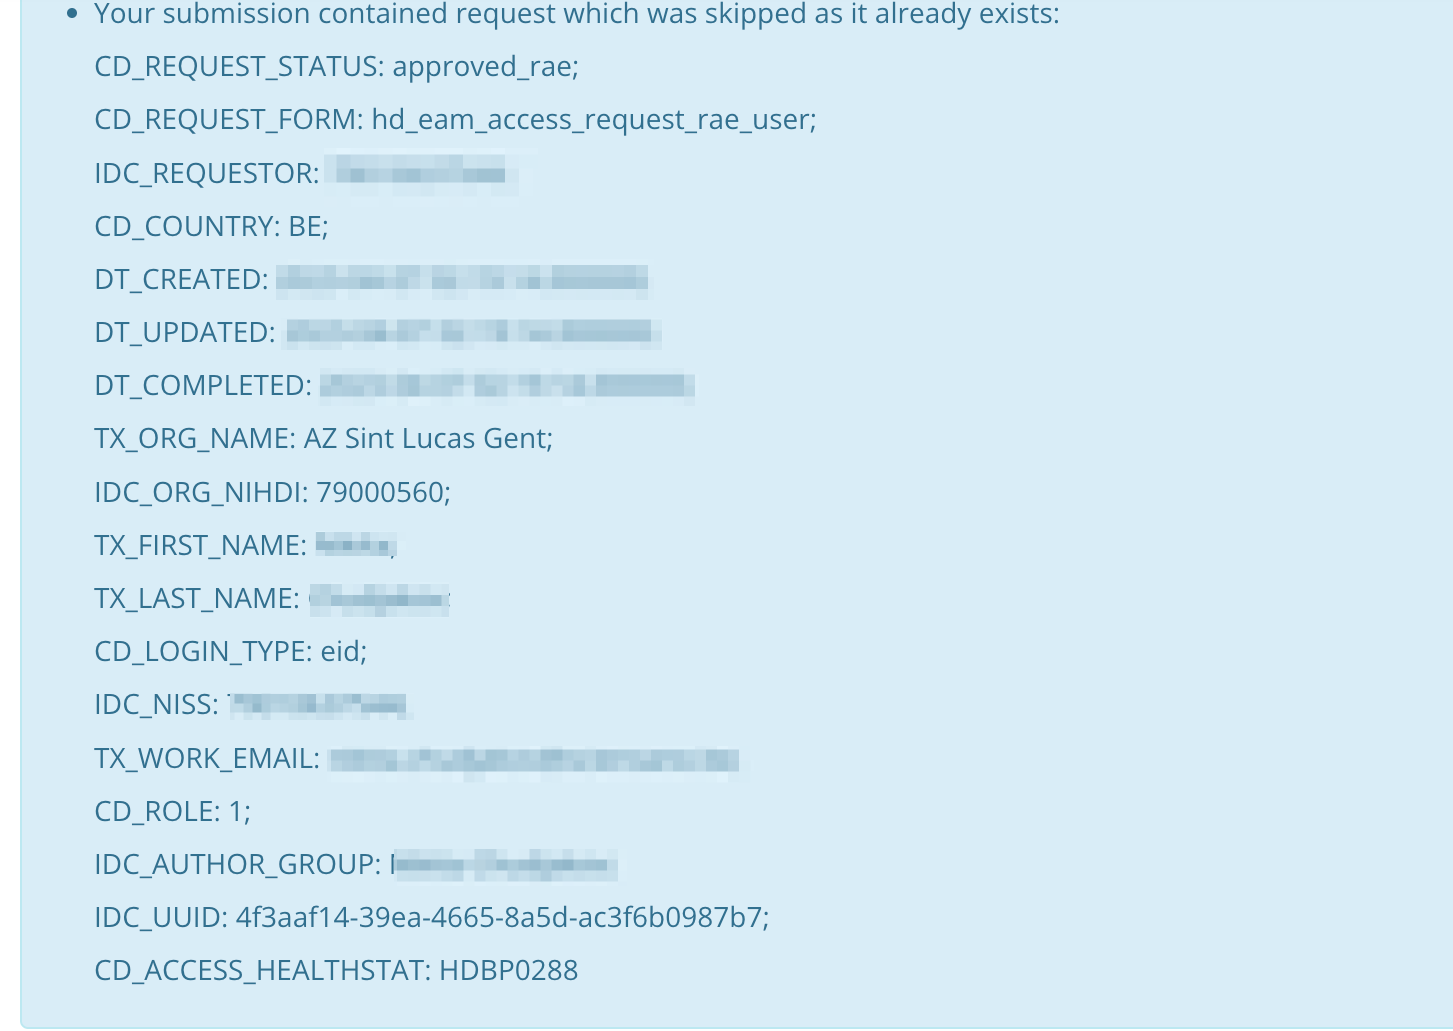
It can happen that a user inadvertently submits requests for access to the same applications and/or projects. The requests are screened for duplicates by checking on organization number, role, author group and project code. In case duplicates are detected, the end-user will receive the following message:
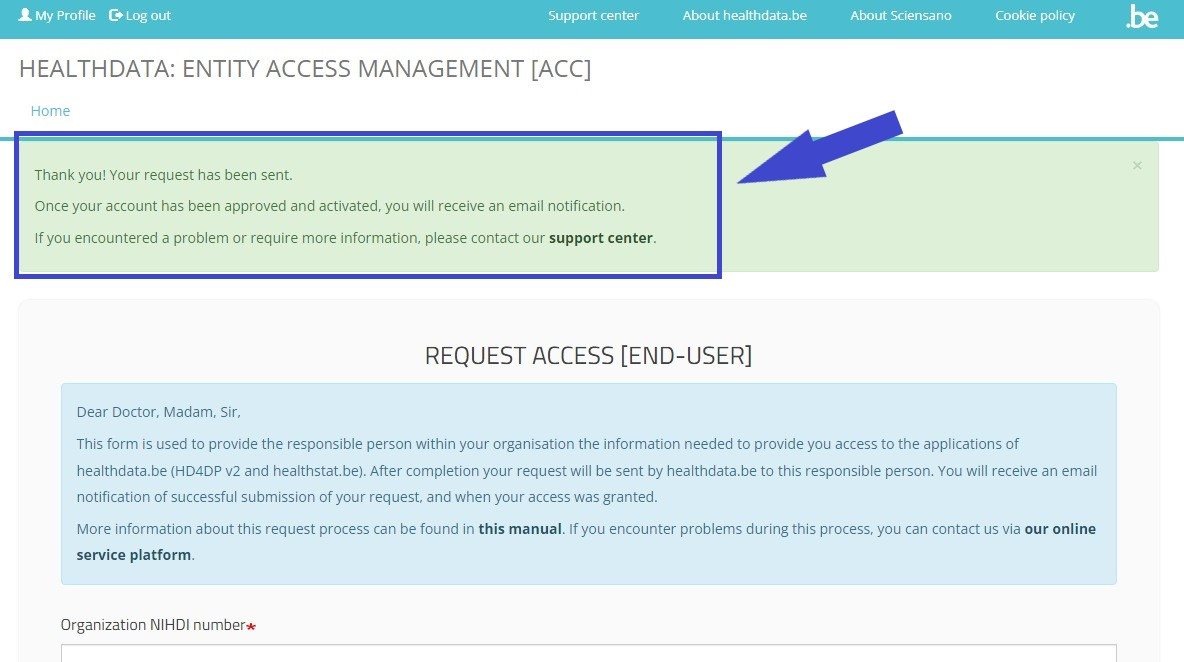
Once you have completed the Request Access form, click on the Submit button. When the submission was successful, you will receive a confirmation message.
Single IT points-of-contact (IT SPOC)
A single-point of contact or SPOC is a role that extends beyond the function of a VTE/RAE. More specific, it can be any employee within an organization whom this role has been assigned to.
To request access to healthdata.be applications such as like HD4DP v2 and healthstat.be as a single-point of contact (SPOC), you want to select GIVE ACCESS in the white text box to the right of the screen.

If you have not yet requested access to these forms, and therefore are not recognized as a user with the SPOC role, you will receive the following message:
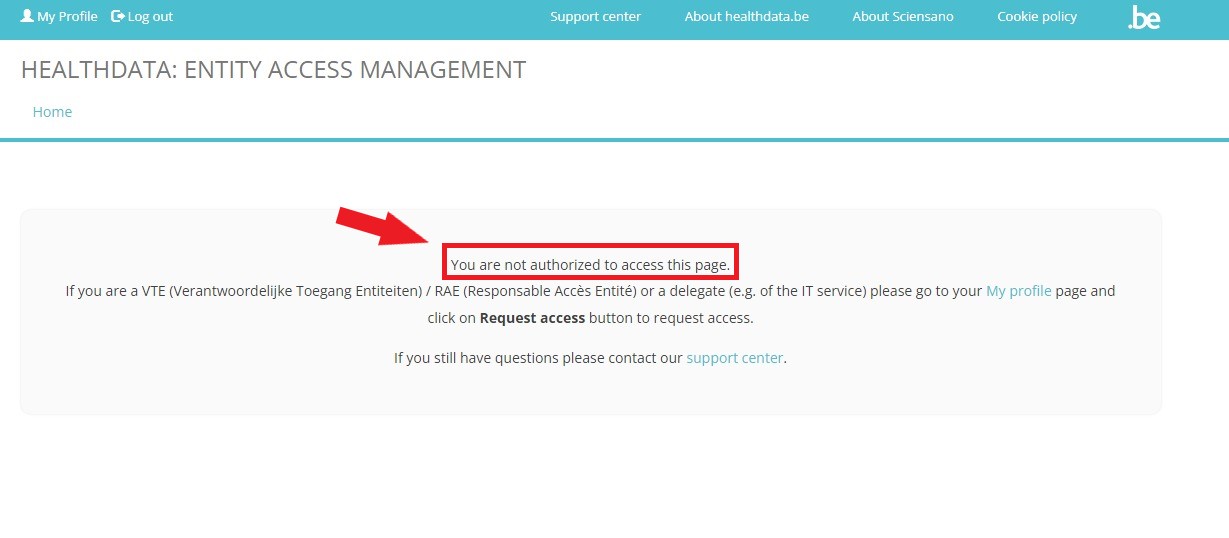
In this case you want to select My Profile (top left in the menu) and click on the button Request access (soon: "Request SPOC rights").

The Request access [RAE] screen pops up.
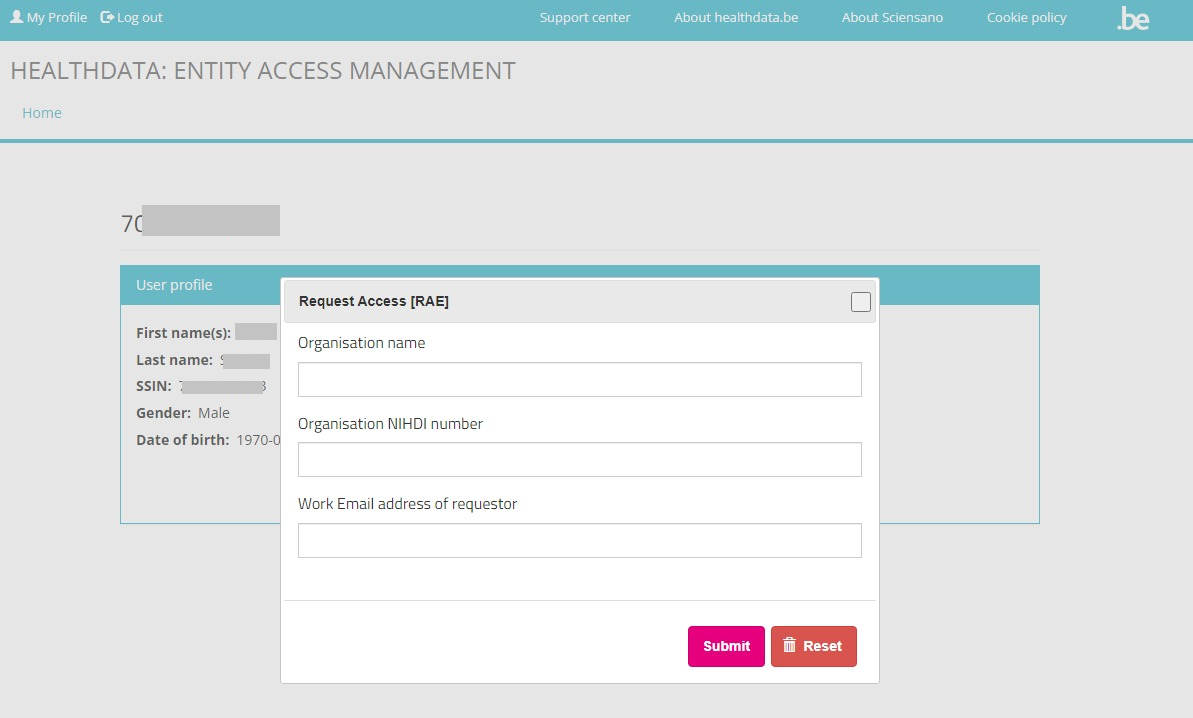
Fill in all requested fields and click on the Submit button.
After submission of the RAE form healthdata.be support carries out a background check considering your SPOC authority within the organization mentioned, and will send you a confirmation e-mail with a special token. Once you have received this token, return to the My Profile page and select the button Enter access token.
The Access token screen appears:

Fill in the NIHDI code for your organization and the access token you received per e-mail. After clicking on Submit, you will be redirected to the EAM portal page, where you again select GIVE ACCESS.
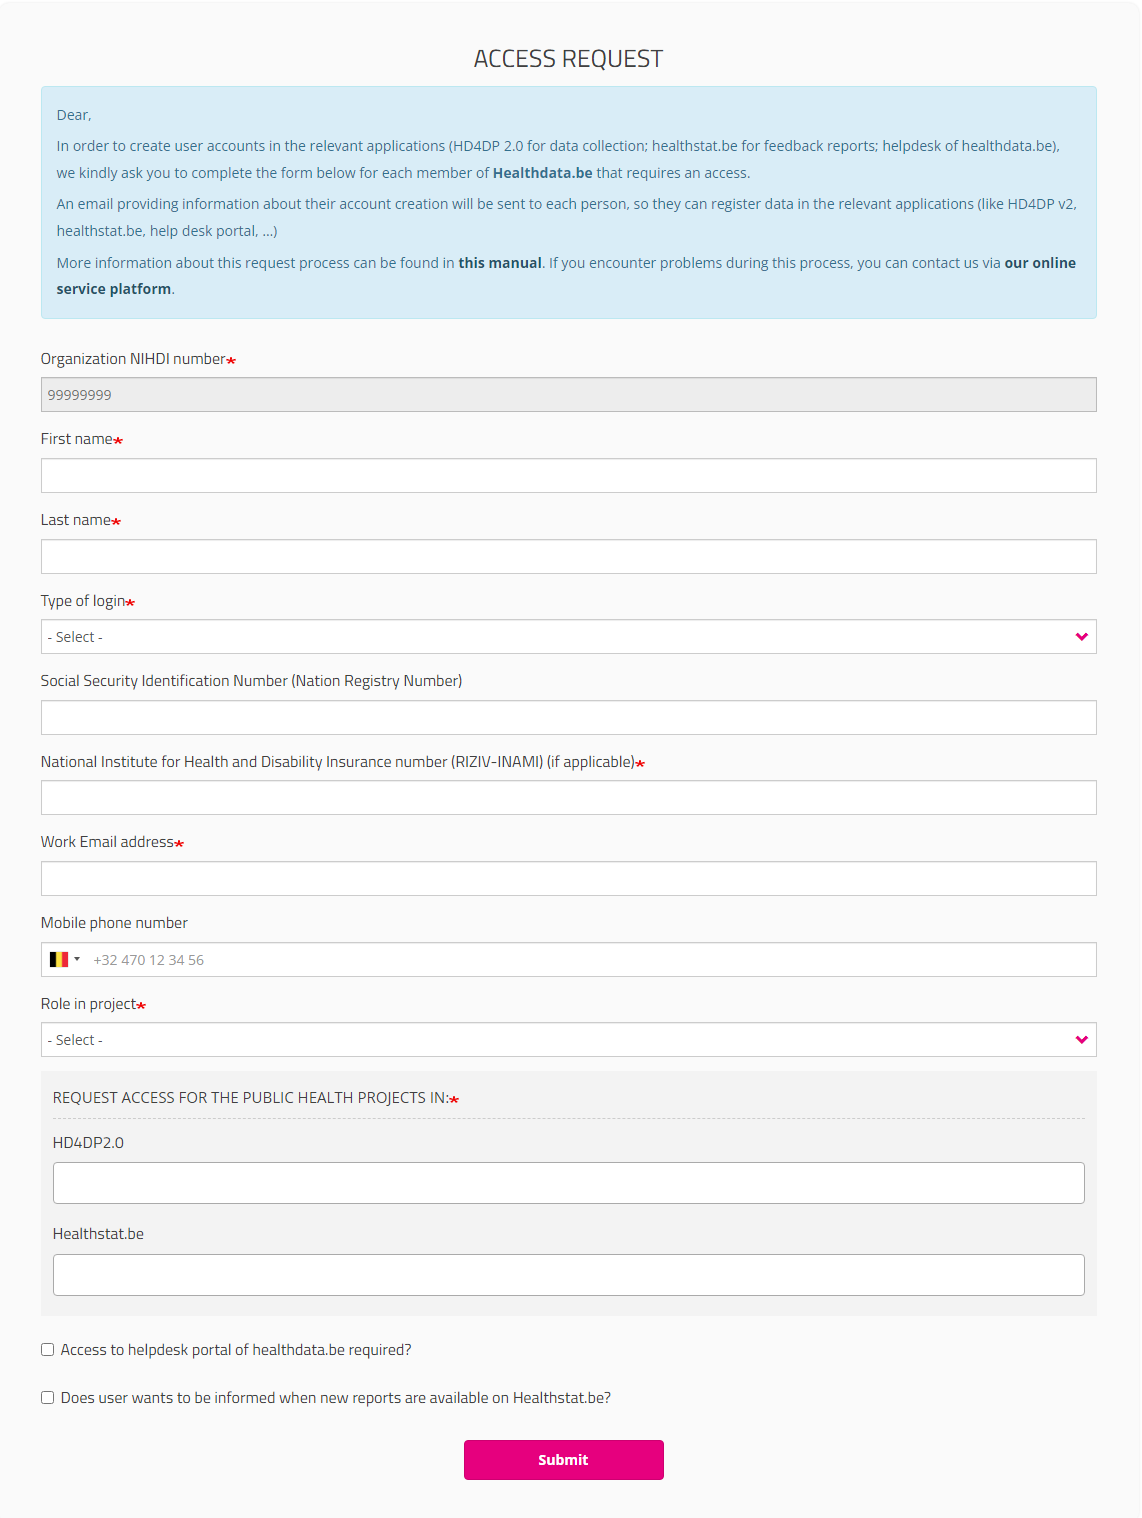
The ACCESS REQUEST form appears. By filling out the requested fields, a SPOC is able to give access to users within their organization who want to access a healthdata.be application (HD4DP2.0 or Healthstat).
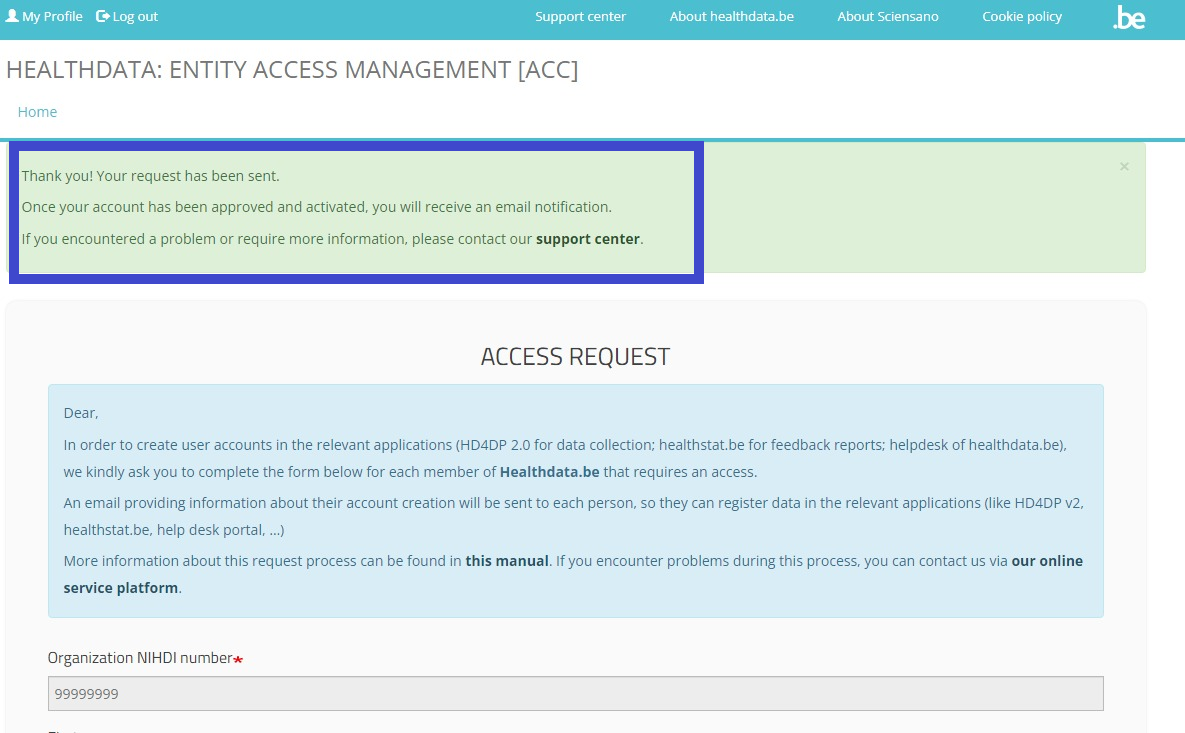
Once you have completed the Access Request form, click on the Submit button. When the submission was successful, you will receive a confirmation message.
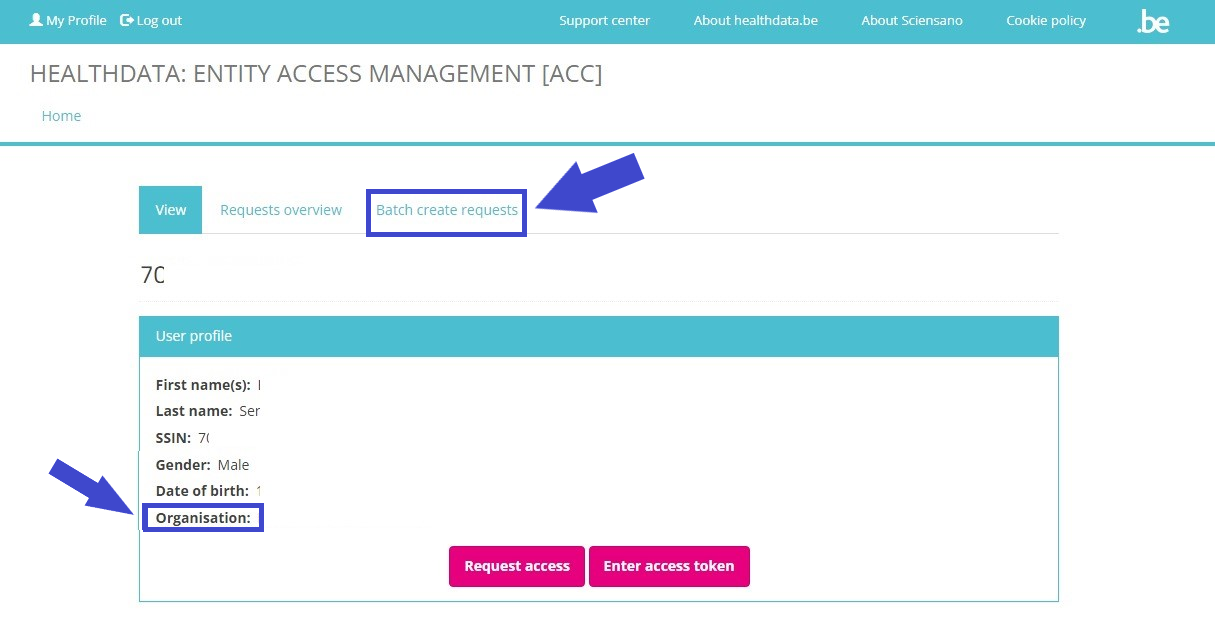
If you now return to My profile, you will see that it has been extended with the information "Responsible Access Entry" under User role(s). Also the tabs Profiles, Requests, Batch create requests and Edit have been added.
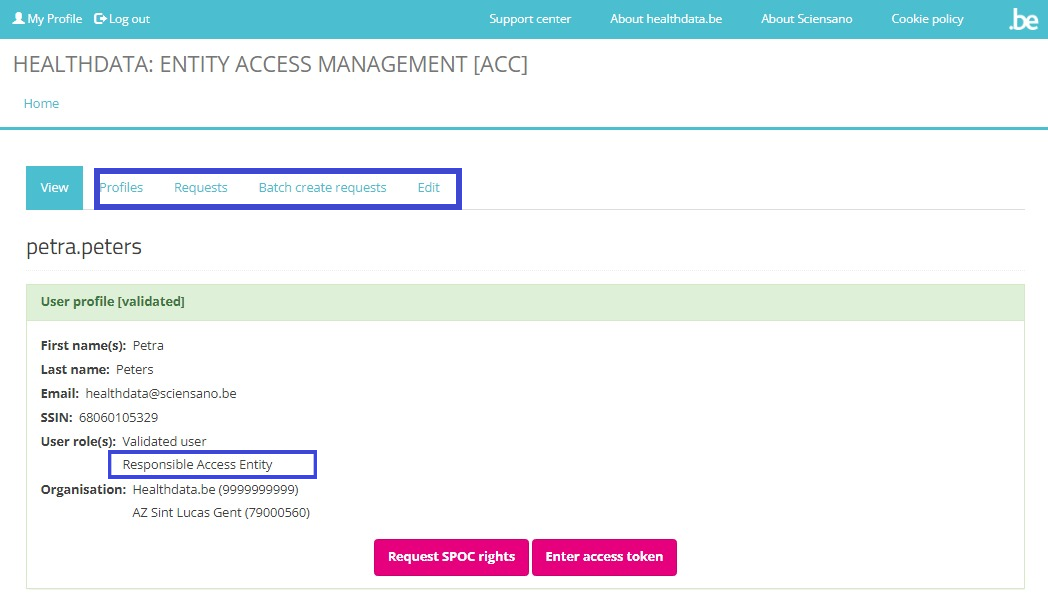
The Profiles tab of the validated SPOC profile offers the possibility to Search, Select and Sort profiles. Selected user profiles in the list can be Validated or Rejected via the Action drop-down menu.
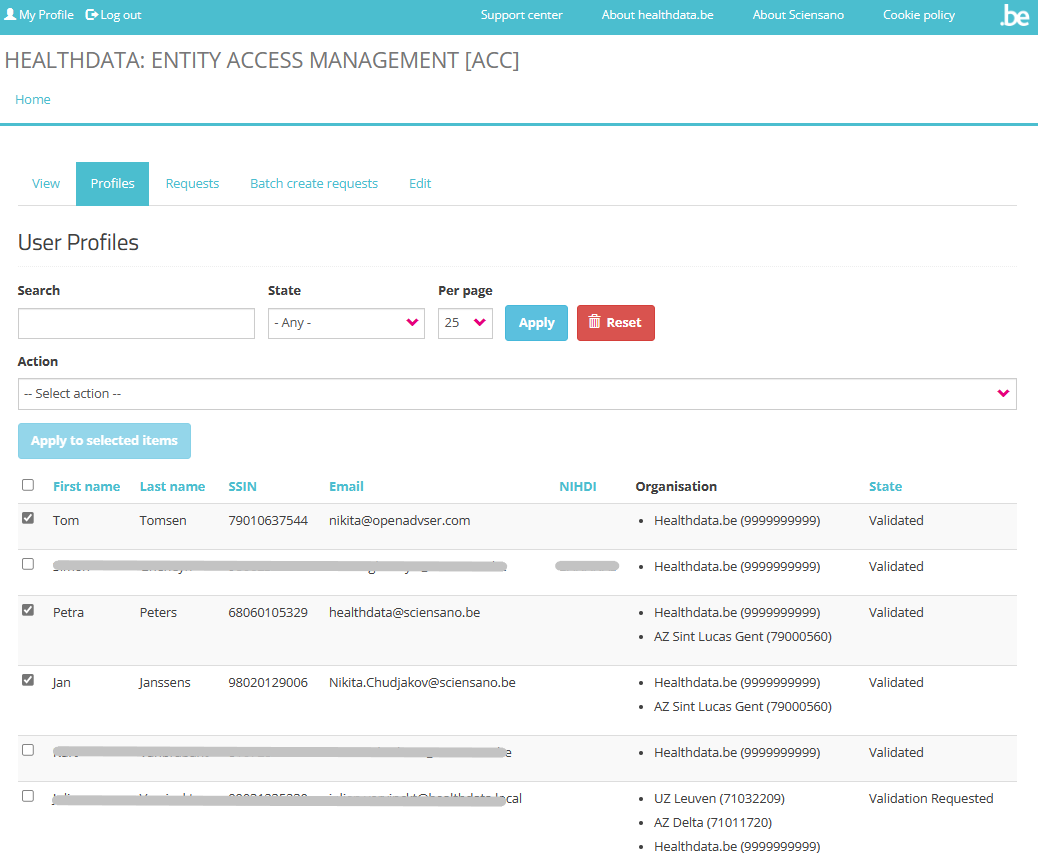
In the Requests tab the SPOC can manage the overview of requests. More information is to be found on SPOC actions upon a request.
See documentation under Give access to multiple users in batch for more information on the Batch create requests tab.
Saved user profile information can't be modified, unless upon action of the SPOC. The Edit tab offers the option to enter the NIHDI number, add organizations, modify the email address and toggle the state between Validated or Rejected. Select the Save button to install the new profile information.
International users
For international users a link to a special form will be provided:
https://eam.healthdata.be/forms/hd_eam_access_request_user_int
Selecting this link redirects you to a more extensive Request Access form. Fill in all required fields (indicated with a red asterisk *), make a selection in the mandatory drop-down lists and, optionally, tick the check boxes for additional help and/or information:
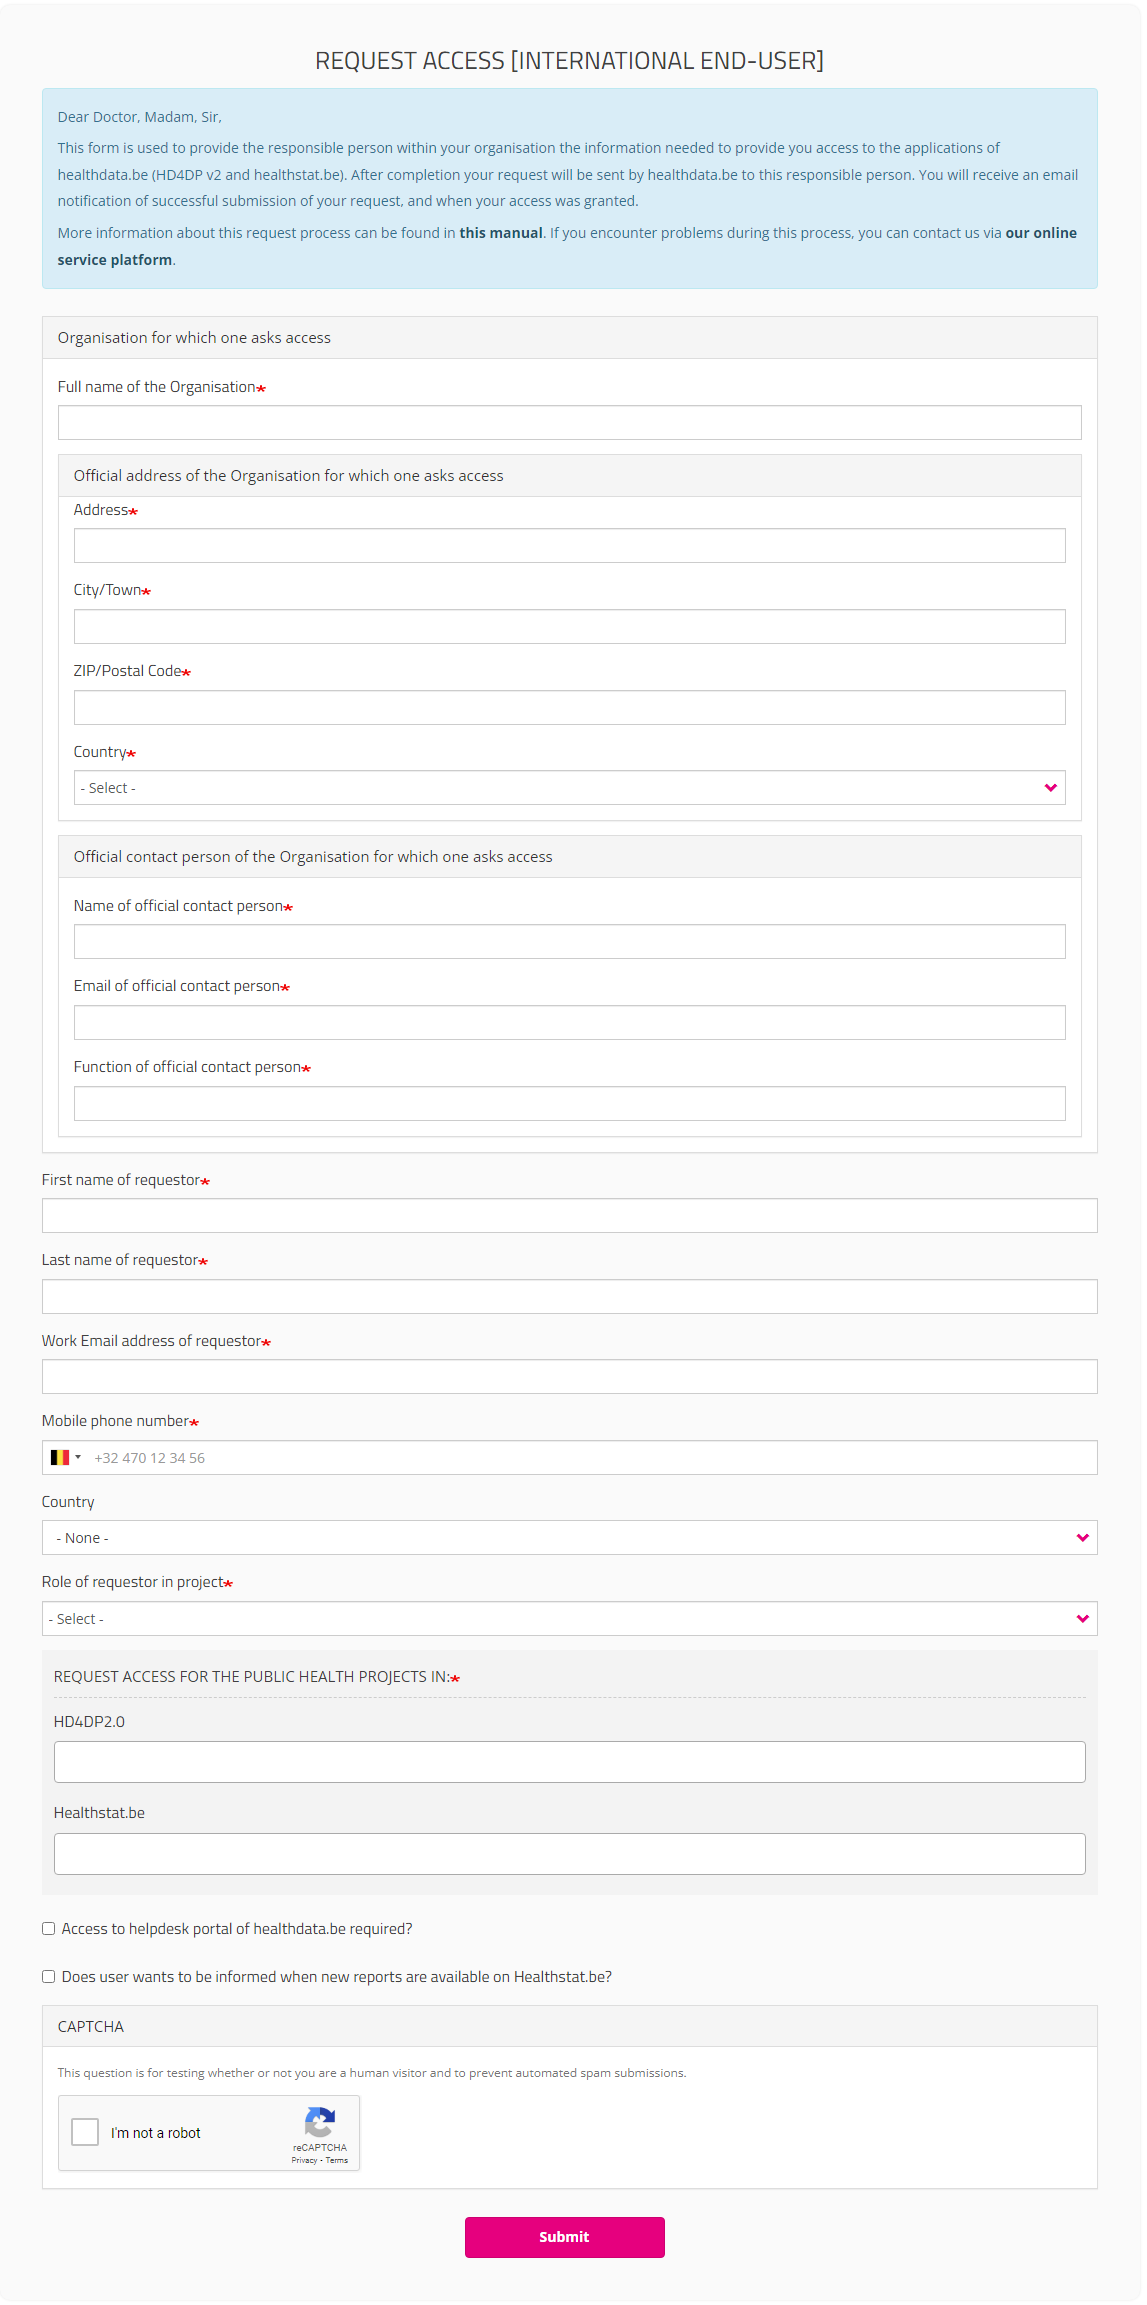
After submitting the form, an e-mail is sent to the Service Desk staff for an identification and authorization process. If the request is approved, the international user receives an e-mail with account information. International users, however, are not able to log in, nor can they consult overviews of requests at this moment.
Deze documentatie wordt regelmatig bijgewerkt. We proberen de informatie zo correct, volledig en zo duidelijk mogelijk weer te geven. Als u desondanks iets in de documentatie ziet dat niet correct is, niet overeenkomt met uw ervaring, of verdere verduidelijking vereist, maak dan een verzoek aan (type: verzoek om informatie) via ons portaal (https://sciensano.service-now.com/sp) of stuur ons een e-mail via support.healthdata@sciensano.be om dit documentatieprobleem te melden. Vergeet niet de URL of het webadres van de pagina met het documentatieprobleem te vermelden. Wij zullen de documentatie dan aanpassen. Bedankt!User roles in HD4DP v2
User roles in HD4DP v2Several user roles are possible in the HD4DP v2 application:
Local Study Lead: This role takes responsibility for the study or project within the participating healthcare organization. Often this is the head of the clinical department involved in the study or project. The Local Study Lead can:
- make registrations in HD4DP v2
- view all registrations made by colleagues (regardless of role) for the study or project
Local Study Associate (author): The Local Study Associate is a healthcare professional that participates in the study or project. He/she reports/records medical information towards the researcher using HD4DP v2 and thereby assumes responsibility on the correctness of the reported information. He/she is considered to be the author of the registration. For each author an author group will be created. This will be represented in the registration form. The Local Study Associate can:
- make registrations in HD4DP v2
- only see all registrations assigned to his/her author group, not those of other colleagues (other author groups) in the same healthcare organization participating in the same study or project
Local Study Support (co-author): A Local Study Associate can delegate registration to a Local Study Support. Often this is an administrative collaborator or staff of a department medical coding. The Local Study Associate is still considered the author of the registration; the Local Study Support is considered co-author. The Local Study Associate can view and change registrations made by Local Study Support. The Local Study Support can:
- make registrations in HD4DP v2
- only see all registrations assigned to his/her author group, not those of other colleagues (other author groups) in the same healthcare organization participating in the same study or project
By default, only 1 Local Study Lead is created by healthdata.be (Sciensano) for each project within each organization. This means that only 1 person can see all registrations made for that project within that organization. This policy prevents HD4DP v2 users to see personal and sensitive information from persons they do not have a therapeutic relationship with.
In case organizations create more then 1 Local Study Leads for a project within that organization, so that they all can see each others registrations, and thus personal and sensitive information from persons they do not have a therapeutic relationship with, the organizations are fully responsible and accountable for this policy deviation. Healthdata.be (Sciensano) cannot be held responsible or accountable for this policy deviation. Professionals wanting to participate in projects are kindly suggested to contact the Data Protection Officer (DPO) of their organization to consult them about this intended policy deviation.
Give access to an HD application for someone from your organization
Give access to an HD application for someone from your organizationTo give access to the applications of healthdata.be (like HD4DP v2 and healthstat.be), you need to click on GIVE ACCESS in the white text box on the EAM portal page.
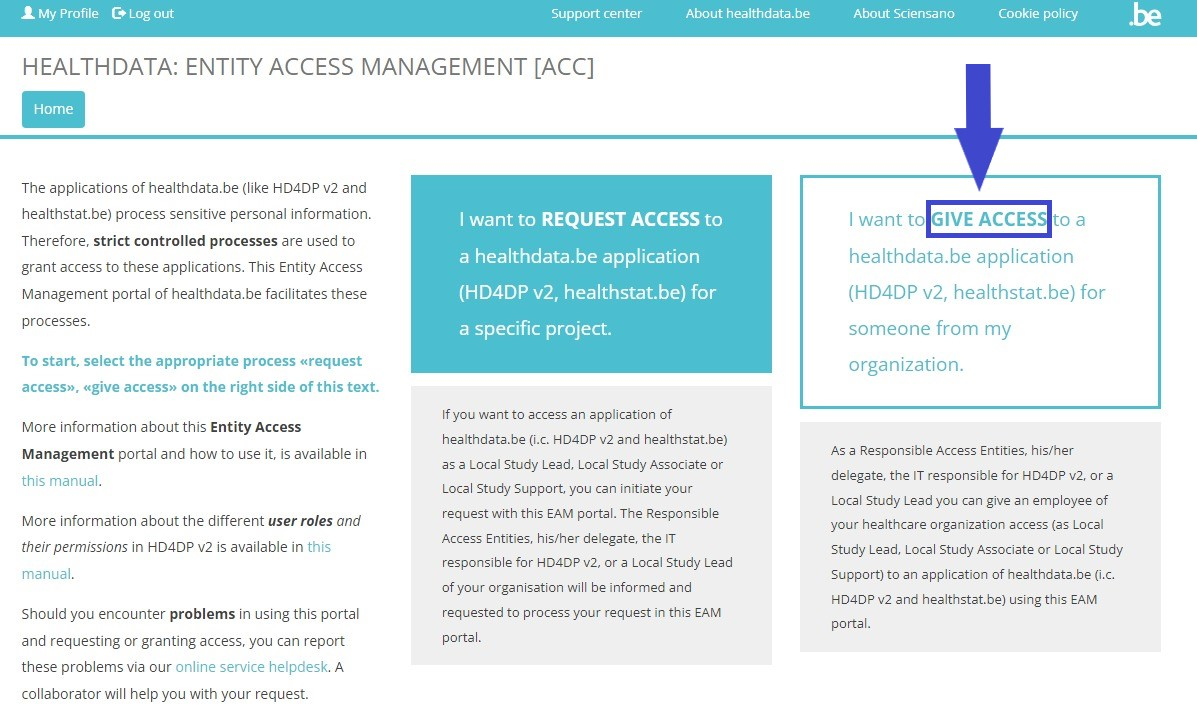
You can give access to
Give access to a single user
After selection of GIVE ACCESS on the EAM portal page, an ACCESS REQUEST form is shown.
Completing this form is similar to the process on the Request Access page for standard end-users. In the capacity of a SPOC, however, you will now fill in an Access Request form for a user within your organization.
Please fill in all required fields (indicated with a red asterisk *), make a selection in the mandatory drop-down lists and, optionally, tick the check boxes for additional help and/or information.
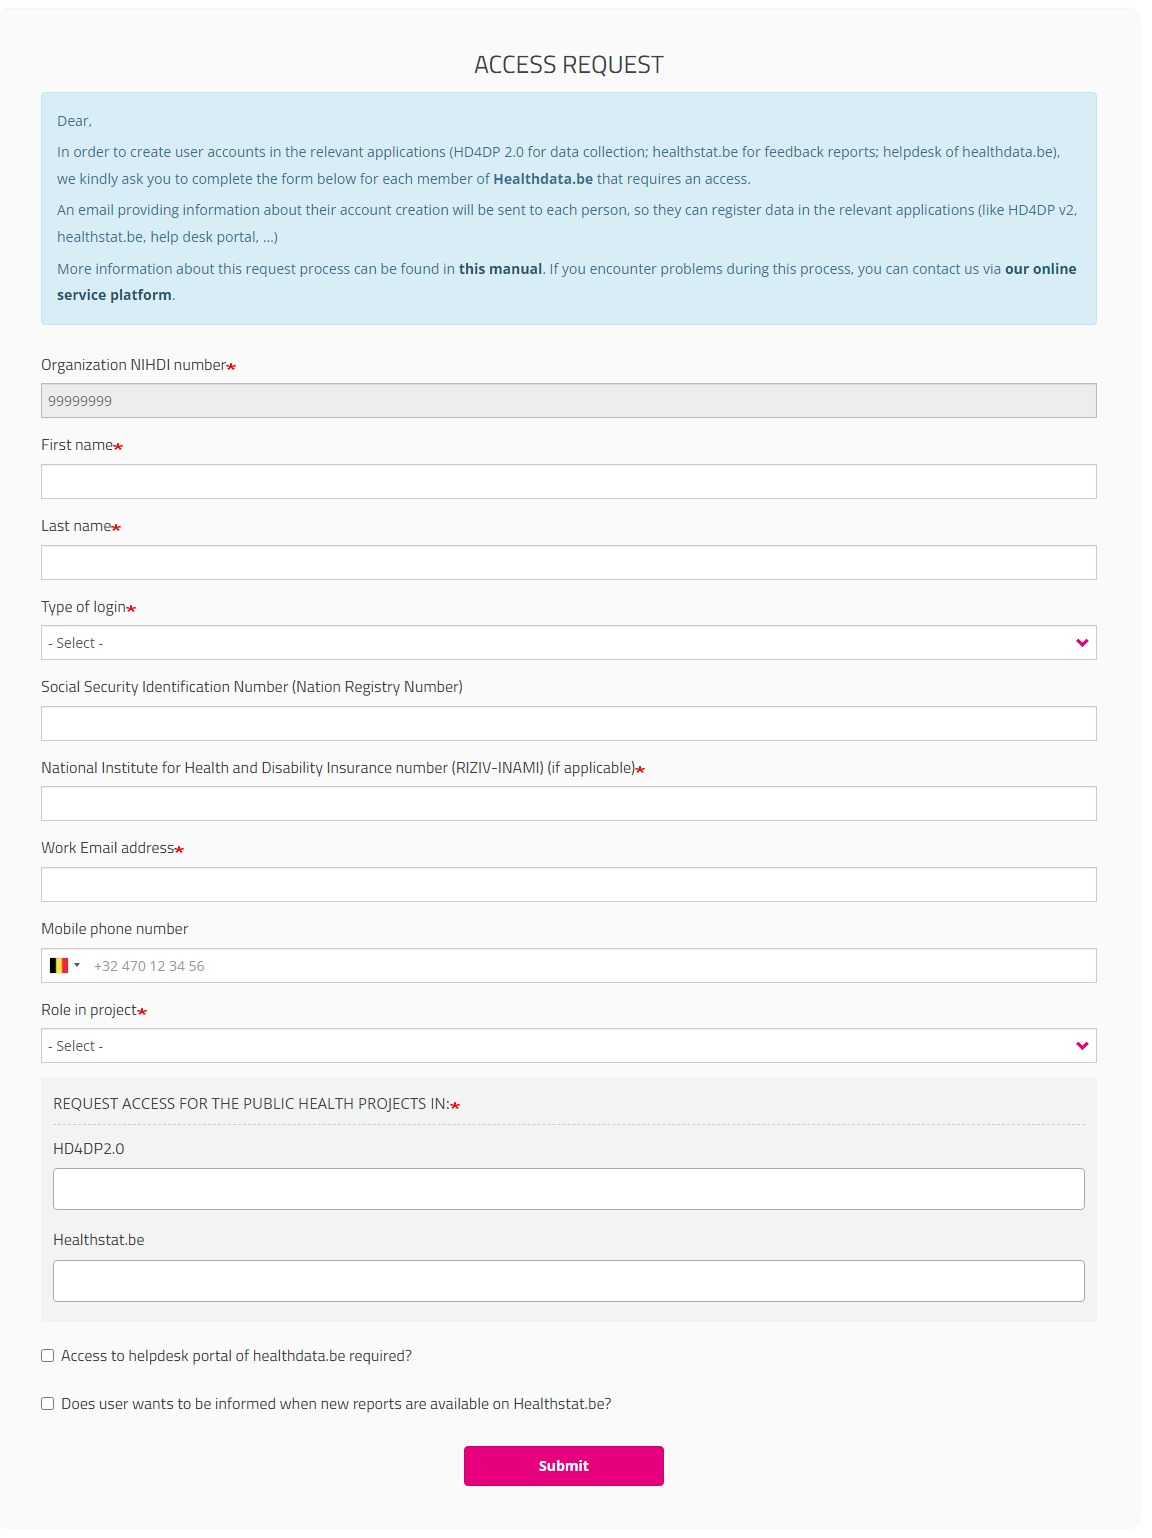
Organization NIHDI number
The NIHDI number of the organization is already provided, since your account is connected to this organization.
Role in project
When selecting Local Study Support, you will be asked to make a selection in the drop-down list of Author groups. These author groups are specified for the organization in question.
HD4DP2.0 field
Click in the field under HD4DP2.0 if you want to access the application to make registrations for the selected project:
Healthstat.be field
Click in the field under healthstat.be if you want to access the reporting of the selected project:
Once you have completed the access request form, click on the Submit button. When the submisson was successful, you will receive a confirmation message.
If you now return to My profile, the User profile is extended with the Organization name and code. And an extra tab Batch create requests has been added.
Continue to Give access to multiple users in batch in order to give access to multiple users in one operation.
Give access to multiple users in batch
The person whom has been assigned the SPOC role for the healthcare organization (HCO) is able to give access to multiple users in batch. The SPOC therefore needs to return to the User profile page and select the tab Batch create requests.
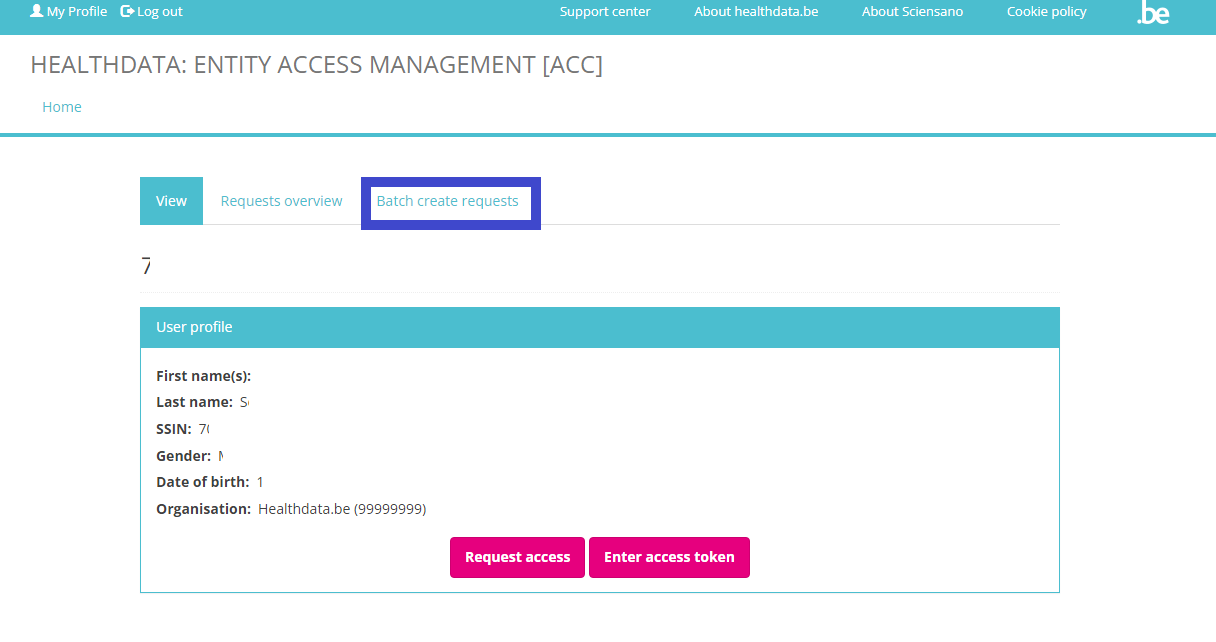
In the tab Batch create requests a CSV file can be selected via the file selection button.
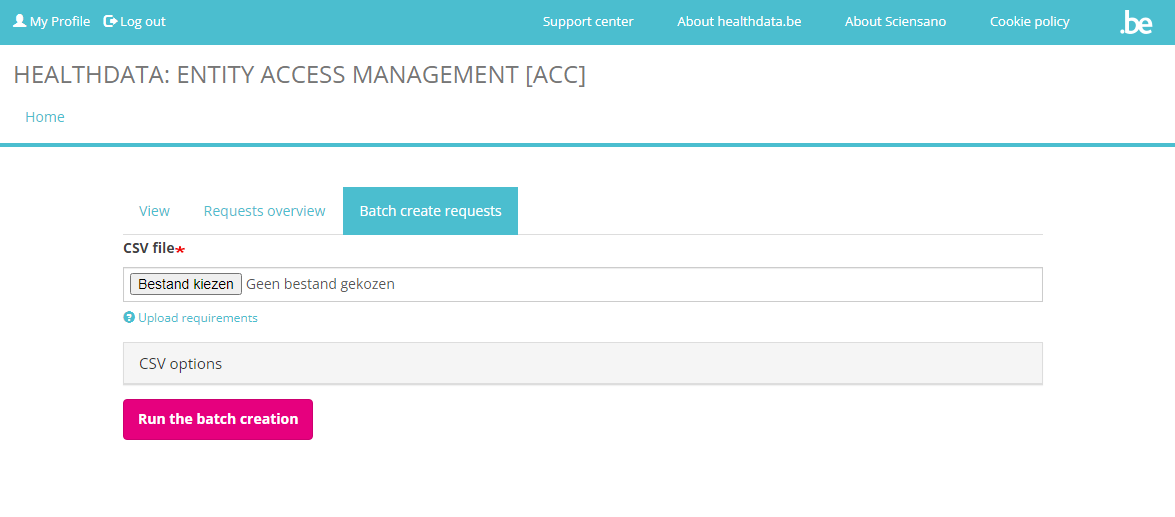
Upload the CSV file and click on the Run the batch creation button. An example of a CSV file structure is available here:
By doing so, a master request per line will be automatically generated, and then the information will be split into sub-requests (one per application or project) and saved in the healthdata.be DB2 for further processing.
A table schema (https://specs.frictionlessdata.io//table-schema/) to validate CSV looks as follows. An example file is available here: eam_csv_batch_requests_schema.json
User roles and corresponding values
To complete the “role”, 3 different choices are possible:
- 1= Local Study Lead: Only 1 Local Study Lead can be created by healthdata.be (Sciensano) for each registry within each organization.
- 2= Local Study Associate (= author). This will be the default role a user will receive, the reason why it was prefilled with “2”.
- 3= Local Study Support (= co-author). This role can be given if it is more suitable for the user. A Support will always need an Associate to which he/she will be assigned.
When selecting role 3 (= Local Study Support), the name of the ‘Local Study Associate’ is expected in the field “author_group”. To be filled in in the format <first_name last_name> of the Associate, with just 1 space (tab) between the two names).
When selecting role 2 (= Local Study Associate), the field author_group must be left empty.
This documentation is being updated regularly. We try to provide as correct, complete and clear as possible information on these pages. Nevertheless, if you see anything in the documentation that is not correct, does not match your experience or requires further clarification, please create a request (type : request for information) via our portal (https://sciensano.service-now.com/sp) or send us an e-mail via support.healthdata@sciensano.be to report this documentation issue. Please, do not forget to mention the URL or web address of the page with the documentation issue. We will then adjust the documentation as soon as possible. Thank you!Overview of the requests
Overview of the requestsAfter submission of the requests for access and receipt of the confirmation message, you are able to consult the validation process and other features of the requests via the tab Requests overview on the My Profile page.
Based on the scope of the requests overview, we can distinguish between
Overview of the requests for end-users
In order to view their own requests, end-users can open the My Profile page and click on the tab Requests overview.
The overview shown can be searched and sorted in the top row as needed (see figure below). End-users will only see a list of requests they have created for themselves.
Request UUID field
This field contains the unique ID’s of the requests. The occurence of the same unique ID in several rows indicates that this master request consists of several subrequests, each one per project and per application that has been selected in the request form. These subrequests are than saved in the healthdata.be DB2 for further processing.
Status field
The Status field indicates whether the request has been created (value “created”; meaning to be approved by the SPOC) or approved (value “approved_rae”; meaning the request was approved by the SPOC and will be ready for sharing credentials).
Role in project field
The values in this field are Local Study Lead, Local Study Associate, Local Study Support. More detailed information about these roles can be found in User roles in HD4DP v2.
Application field
This field contains the application you have selected in the Request Access (End-User) or Access Request form to access the public health projects: HD4DP2.0 or Healthstat.be.
Project code field
The value in this field is the Healthdata.be business project code. Entering this code in the publically accessible FAIR portal (fair.healthdata.be) results in the dataset for this project.
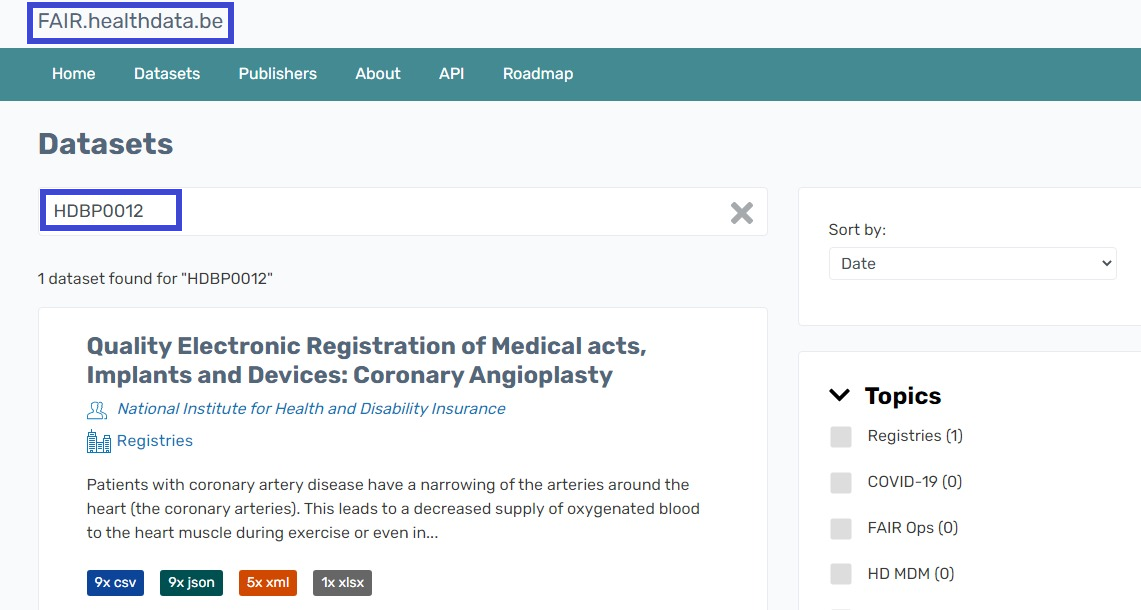
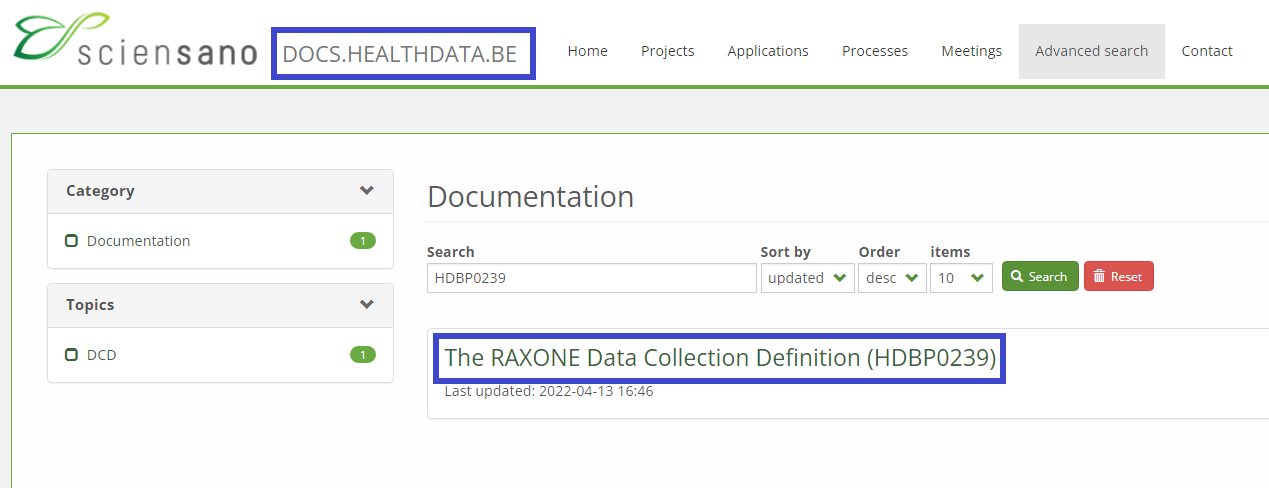
Or you can enter this code in the Advanced search field on the Healthdata.be docs pages to find the respective project’s documentation.
Overview of the requests for IT single points-of-contact (IT SPOC)
SPOCs have the capacity to view all requests for their organization.
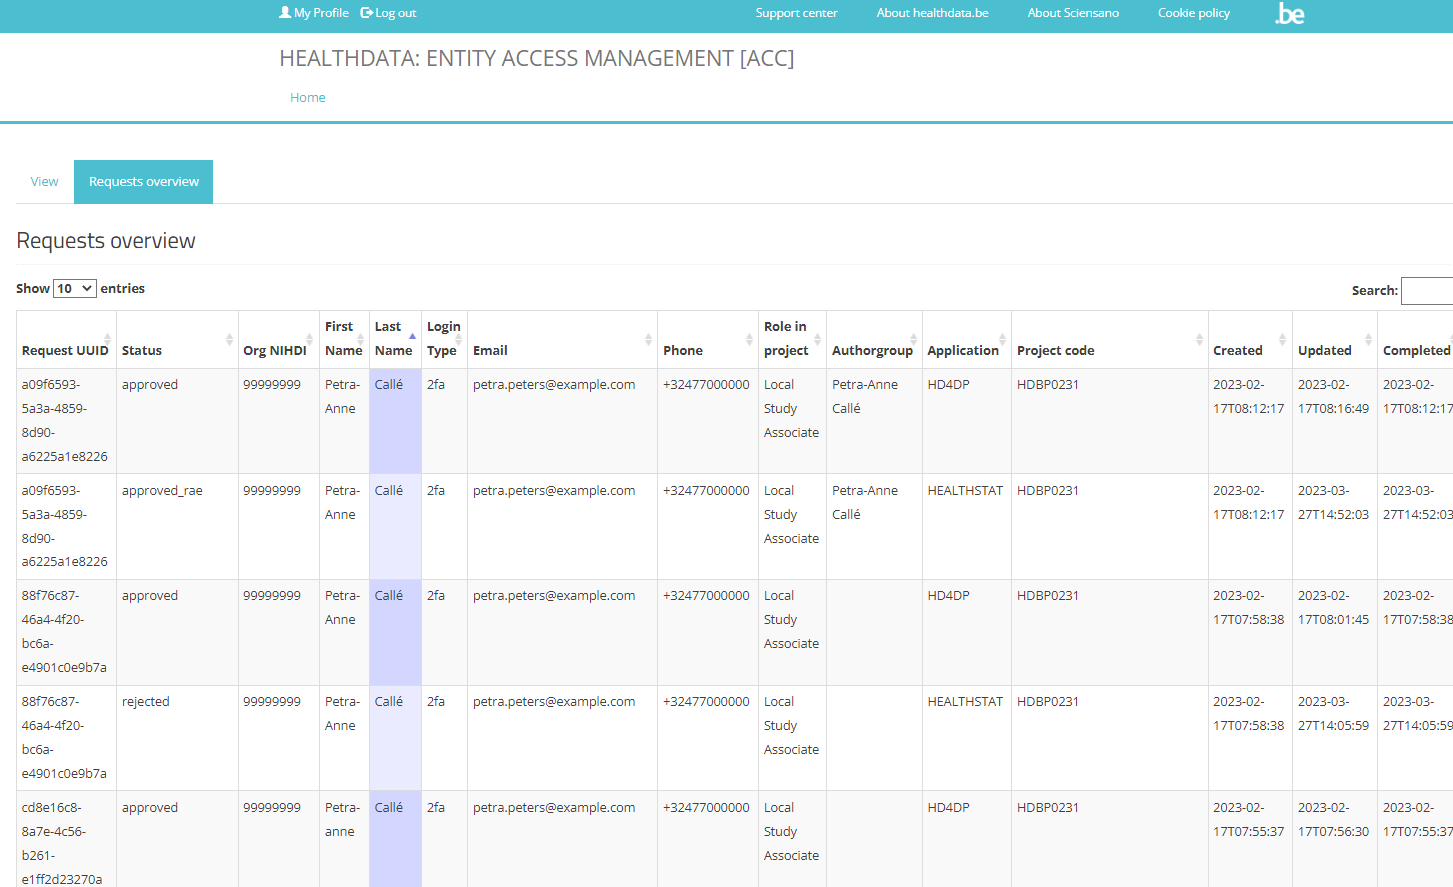
To view the Status of the request of the users of their affiliation, the SPOC needs to select the My Profile page and to click on the tab Requests overview (see screenshot below). Requests in this overview can be searched and sorted as needed.
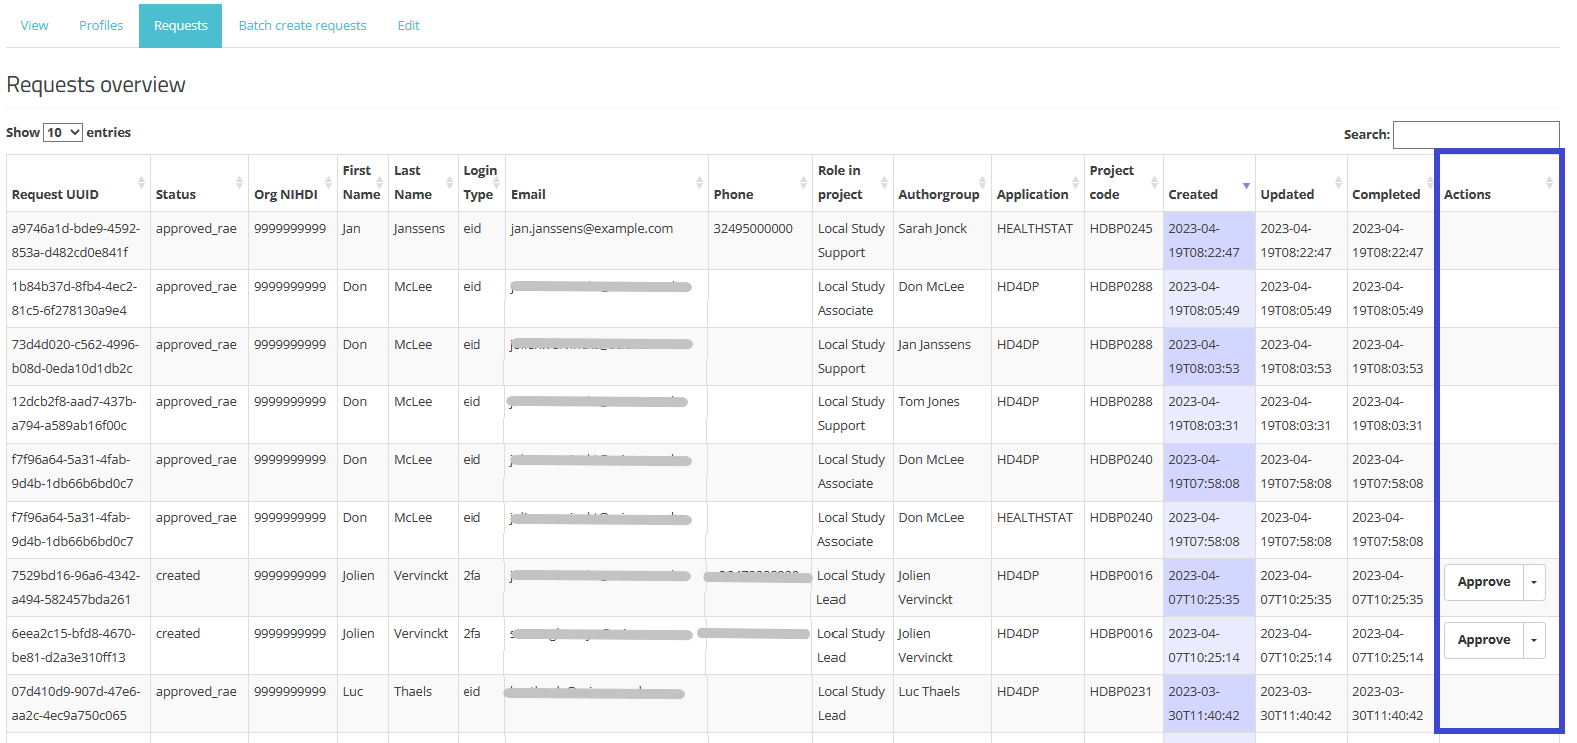
New: Actions field
This field describes the extra actions a SPOC can take, i.e. approve or reject requests. This functionality is explained in SPOC actions upon a request in more detail.
Request UUID field
This field contains the unique ID’s of the requests. The occurence of the same unique ID in several rows indicates that this master request consists of several subrequests, each one per project and per application that has been selected in the request form. These subrequests are than saved in the healthdata.be DB2 for further processing.
Status field
The Status field can only receive the status “approved_rae” since the request was made by the SPOC.
Role in project field
The values in this field are Local Study Lead, Local Study Associate, Local Study Support. More detailed information about these roles can be found in User roles in HD4DP v2.
Application field
This field contains the application you have selected in the Request Access (End-User) or Access Request form to access the public health projects: HD4DP2.0 or Healthstat.be.
Project code field
The value in this field is the Healthdata.be business project code. Entering this code in the publically accessible FAIR portal (fair.healthdata.be) results in the dataset for this project.
Or you can enter this code in the Advanced search field on the Healthdata.be docs pages to find the respective project’s documentation.
SPOC actions
SPOC actionsIn this article, we cover the different actions of a SPOC in more detail.
SPOC actions upon a request
SPOCs will be notified in case a request for access was made by a colleague, allowing them to review the overview table to manage all requests for their organization.
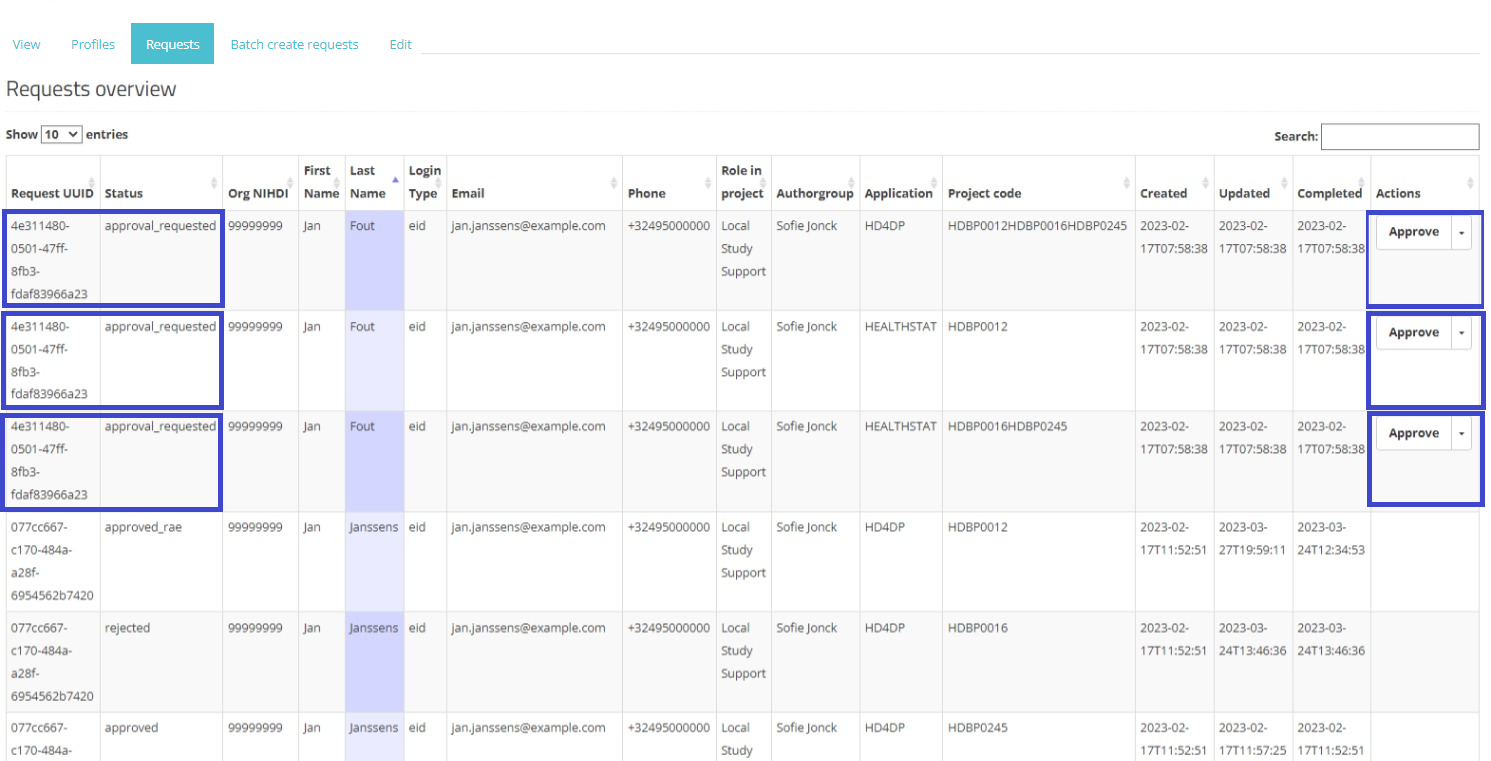
To open the overview table, the SPOC needs to navigate to "My Profile" followed by selection of the "Requests" tab. The overview of the requests appears (see below).
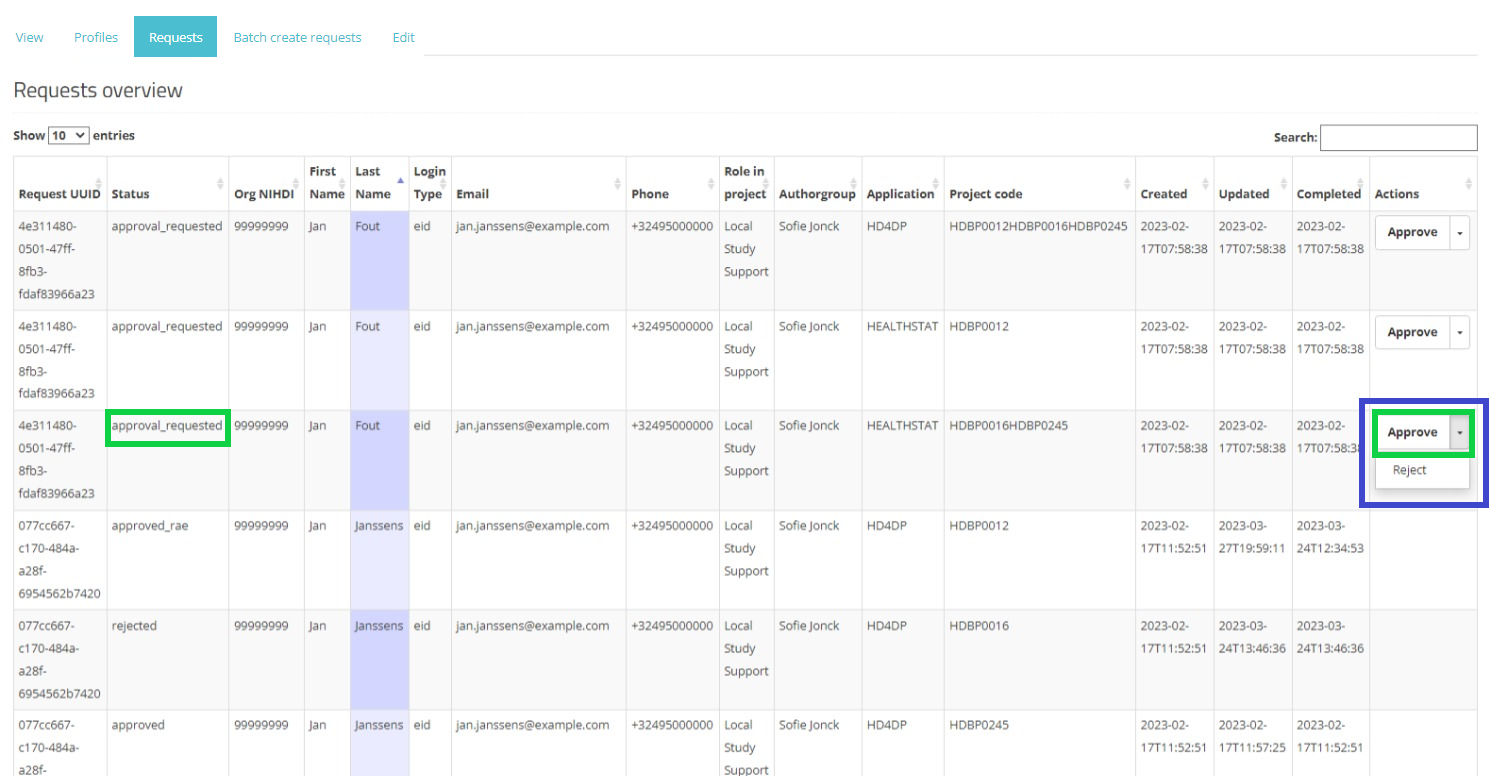
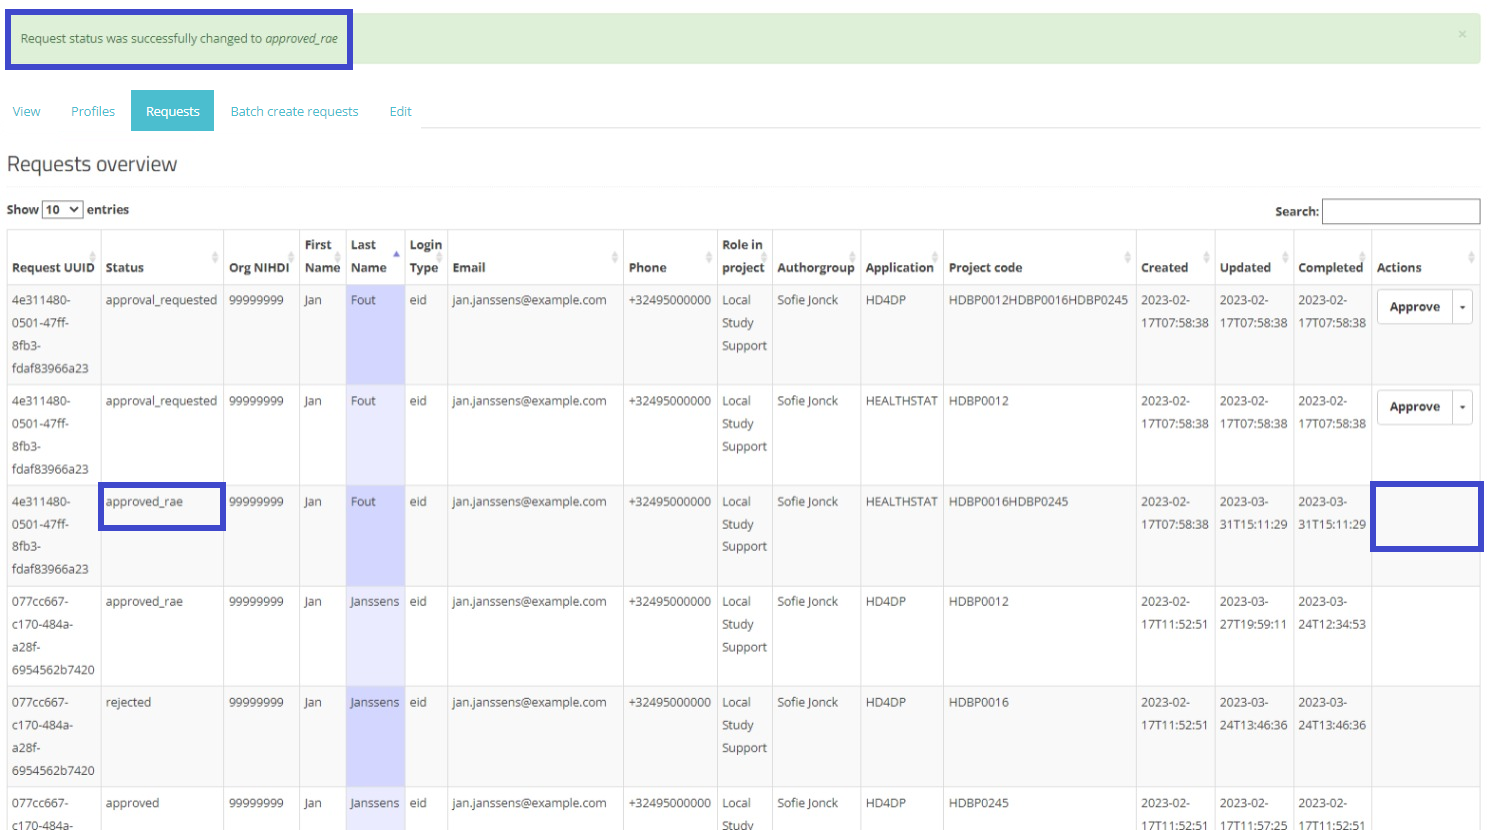
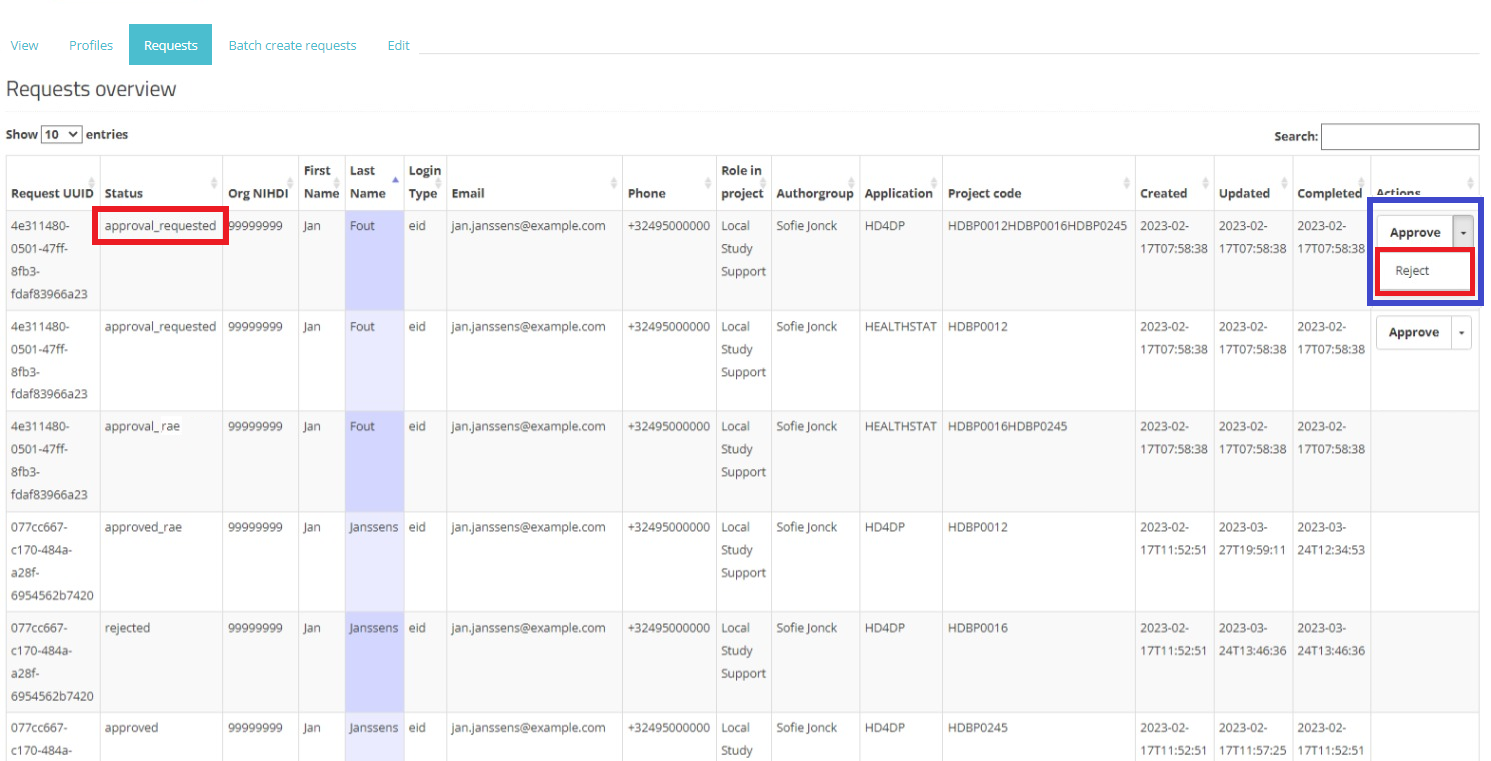
In the Actions field an Approve/Reject selection button is displayed next to each request with the status created or approval_requested (framed in blue). Two actions are possible now: the SPOC can either approve or reject the user's request.
When selecting Approve, and after confirmation of this action, the status of the request changes to "approved_rae" and the dates in both fields Updated and Completed are updated accordingly as demonstrated in the screenshots below. Once the registry goes in production the account will be created automatically and the credentials will be shared to the user by e-mail.
Approve action:
Pop-up confirmation query:
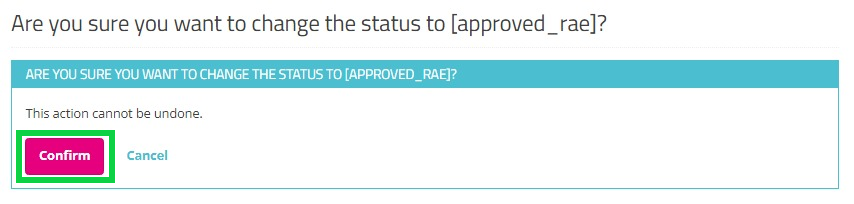
Approved:
When returning to the overview, you will notice that the status of the request has changed to "approved_rae". The Approve/Reject button in the Actions field has disappeared.
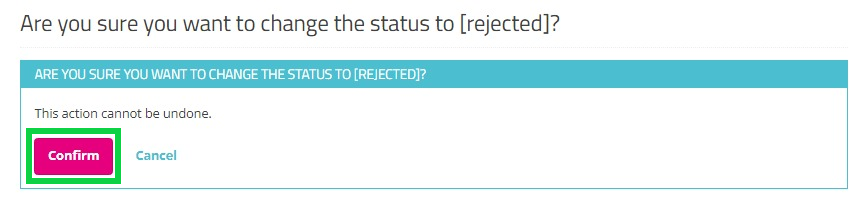
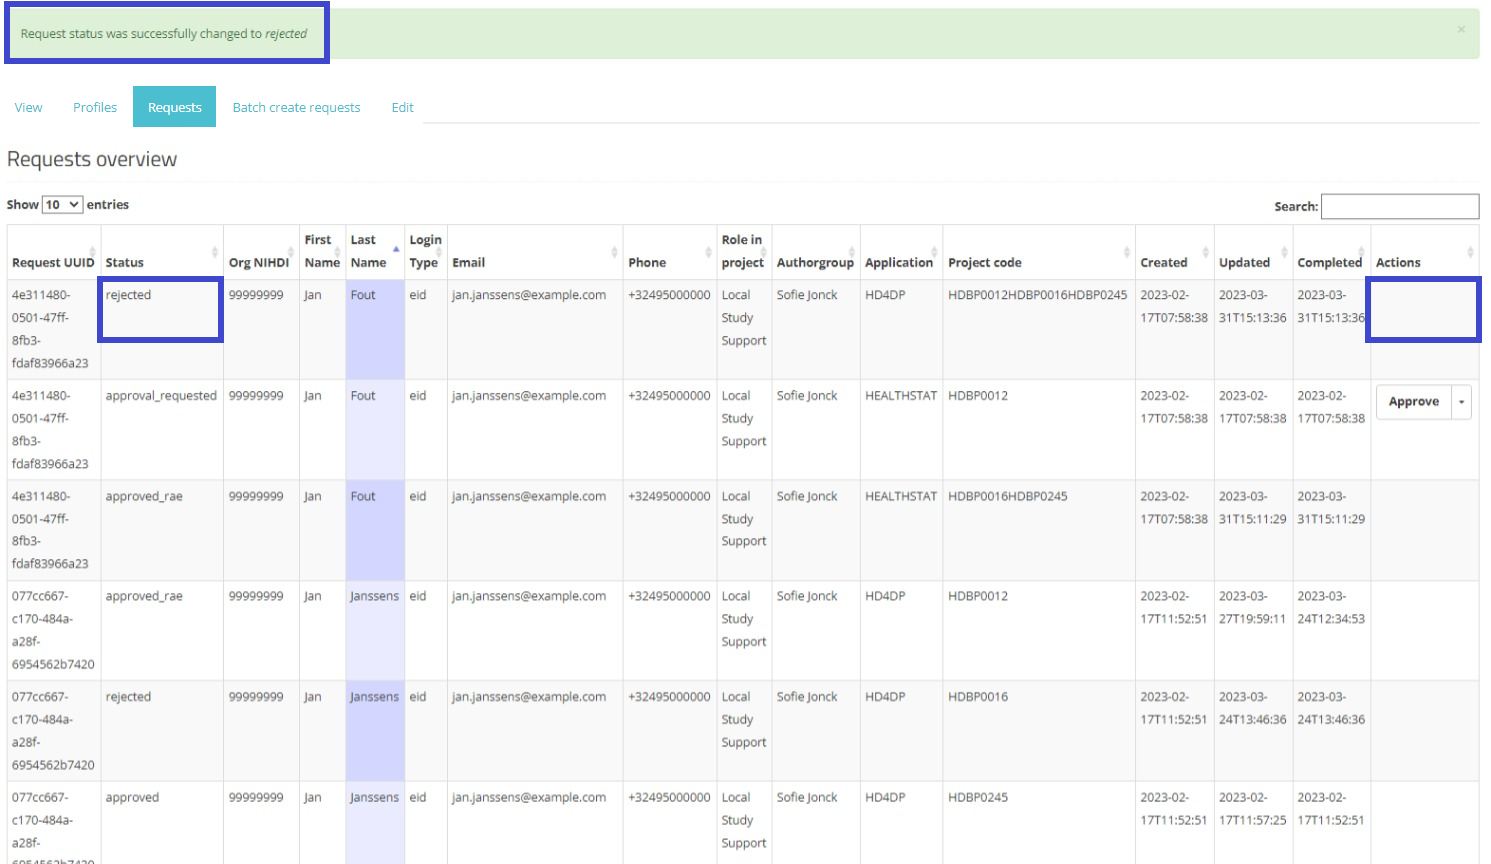
When selecting Reject, and after confirmation of this action, the request receives the status "rejected", the dates in the fields Updated and Completed are updated accordingly. A rejected request remains in the overview for information purposes. Compare following screens:
Reject action:
Pop-up confirmation query:
Rejected:
The requester will also be notified of the rejected request by e-mail:
Dear,
Your request for access to EAM was rejected.
Please contact your HD4DP SPOC for more information.
Best regards
Healthdata Support
Access the HD4DP v2 application
Access the HD4DP v2 applicationThere are two types of HD4DP v2: 1) an HD4DP v2 installed on the infrastructure of your organisation (or partner organisation), and 2) an HD4DP v2 that is available as a website (for organisations that do not have infrastructure for a local version).
Both types of HD4DP v2 can be accessed using a web browser.
To access the application HD4DP v2 (either local version or website version), you must first request an account. If you do not have an account yet, please read the article "Request an account for HD4DP v2" first.
Once your account has been created, you will receive an email with following information (note that the text between the [ ] will be adapted.):
Organisation: [RIZIV number - Name]
Login: [email]
Password: [password]
Application URL: [url]
With these credentials you can access the application HD4DP v2 of your organisation:

- Got to the url mentioned in the mail
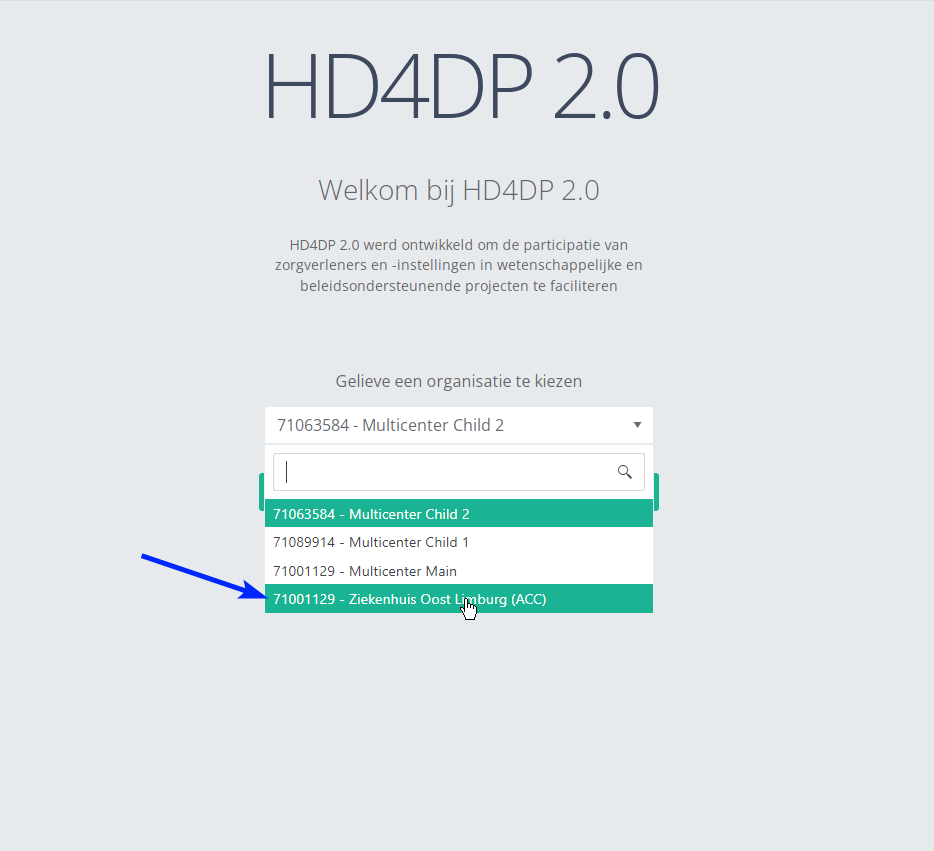
- Select "your organisation" from the list
- Your Organisation: [RIZIV number– Name]
- Click "Next"
- Fill in your "username" and "password"
- Click "Log in"
Navigate to the "Hand Hygiene" project
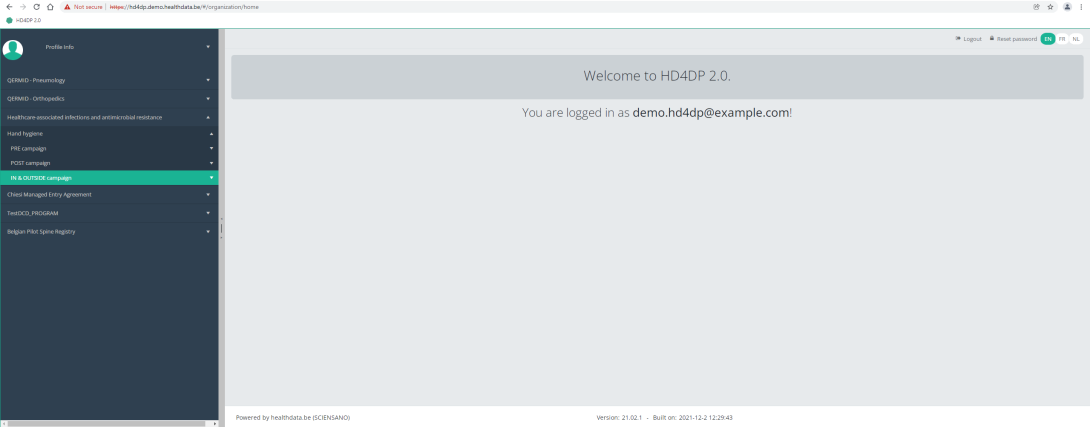
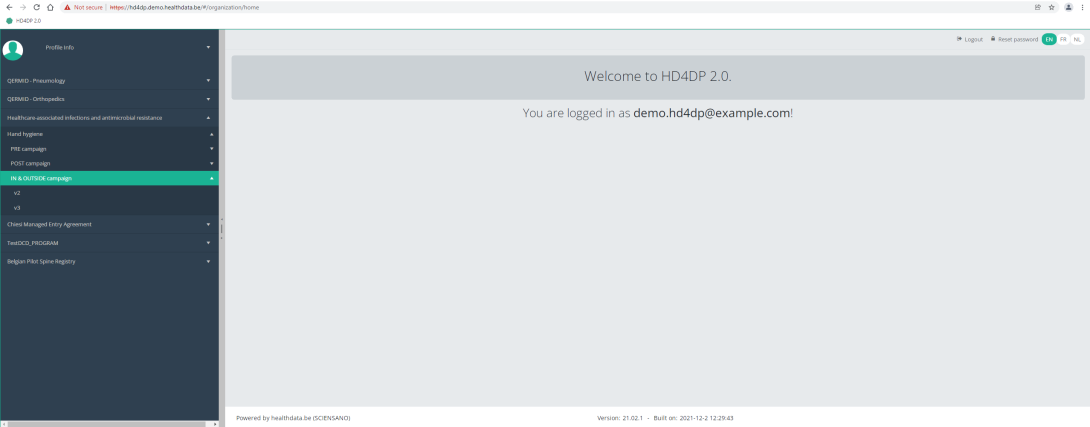
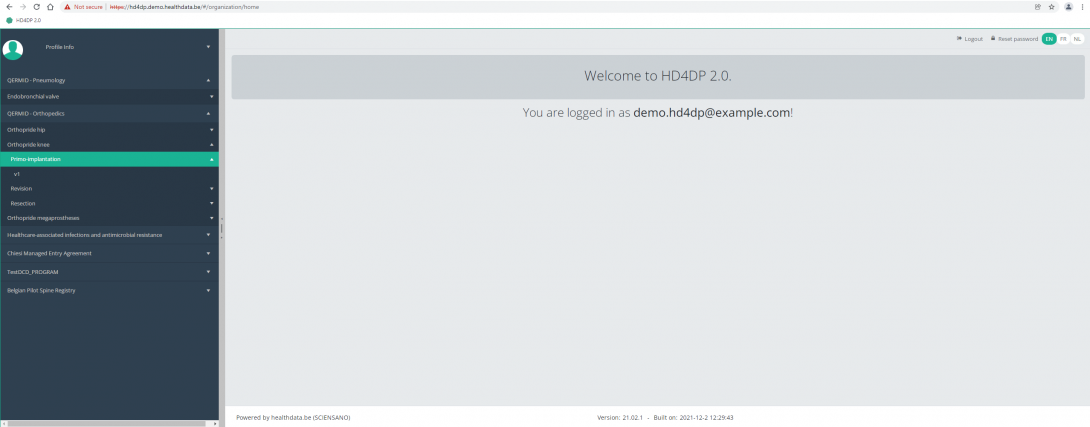
Navigate to the "Hand Hygiene" projectWhen logged in, you will see the Welcome page. In the left dark blue menu you can see all the study programs and projects you have access to.
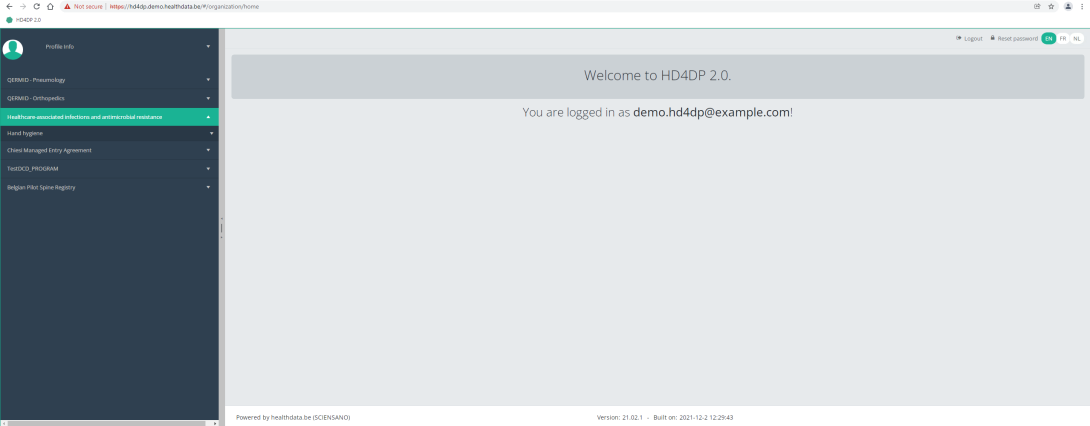
When you select the study program Healthcare-associated infections and antimicrobial resistance, you can see the study project Hand Hygiene.
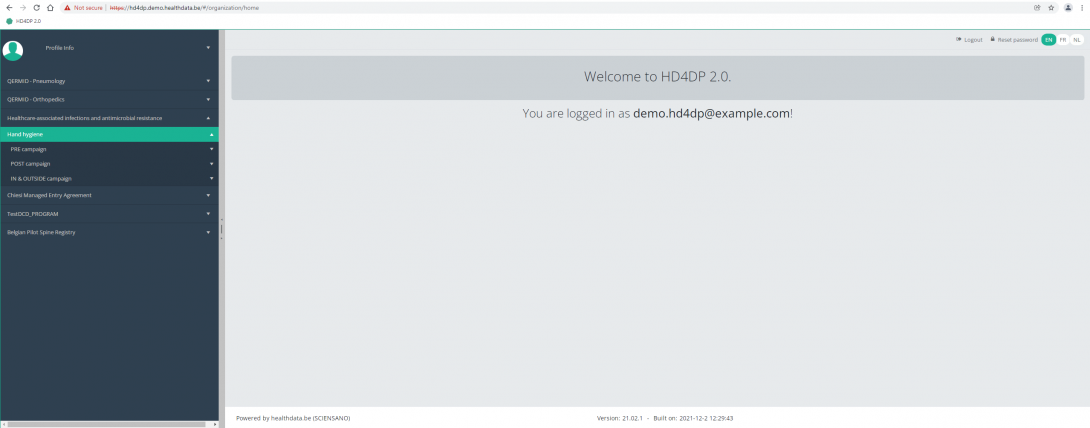
Select the study project Hand Hygiene.
You will see that the study project Hand Hygiene consists of three parts: PRE campaign, POST campaign and IN and OUT campaign.

Create a "Hand Hygiene" registration
Create a "Hand Hygiene" registrationThe study project Hand Hygiene consists of three sections: PRE campaign, POST campaign and IN and OUT campaign.
On the following pages we explain how you can register for each section.
Create a "Hand Hygiene" registration "PRE Campaign"
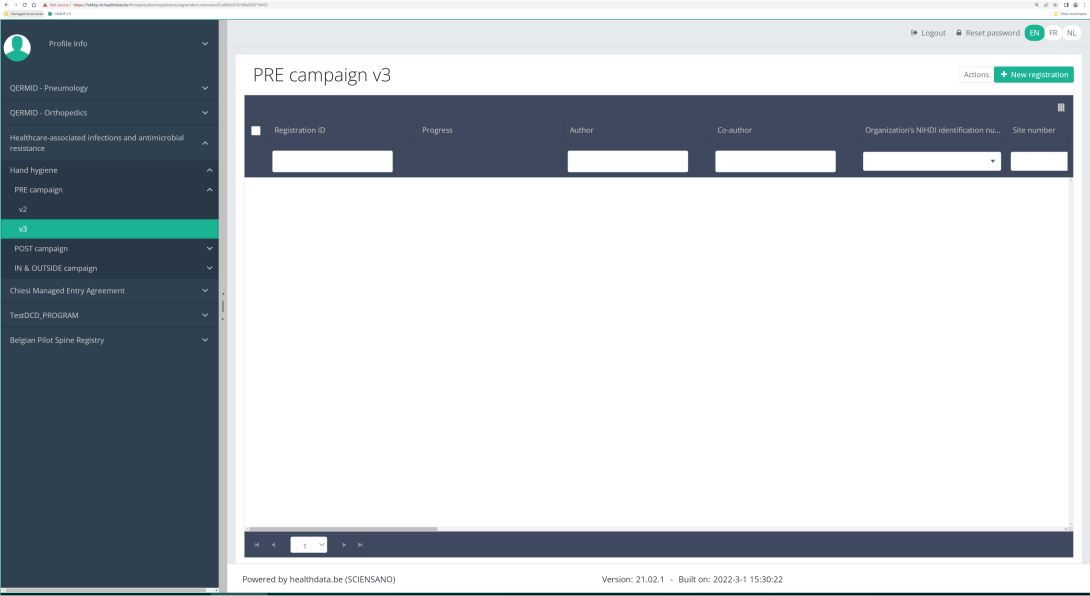
Create a "Hand Hygiene" registration "PRE Campaign"To create a "PRE Campaign" registration for the study project Hand Hygiene, select "PRE Campaign" in the dark blue left menu.

You will see the number of versions of this study section. In this case, there are two versions available: V2 and V3. Please always use the latest active version available.

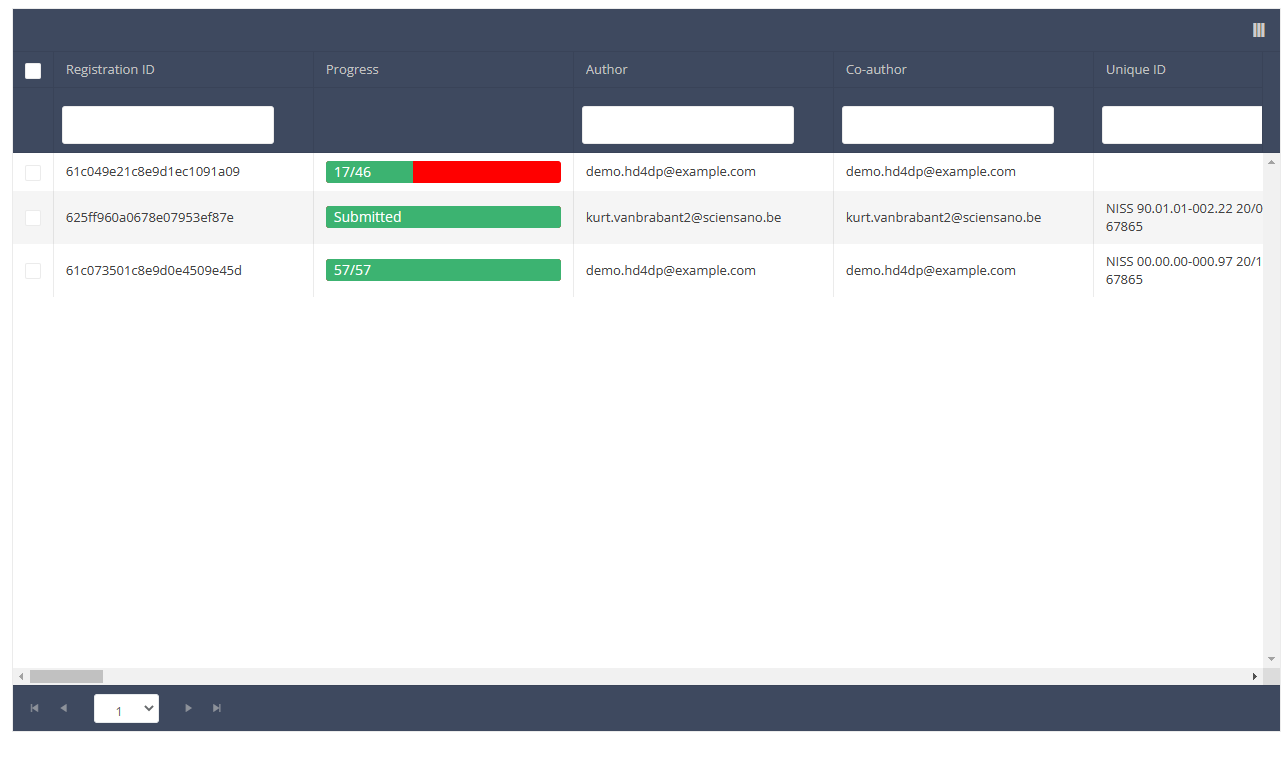
When you select the highest version of this study section for the first time, you will see an empty table in the main part of your screen. The table contains, among others, the following items: Registration ID, Progress, Author, Co-author, Unique ID, Business key, Registration code, National registry ID of the patient...
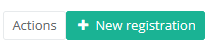
In the top right corner of the screen you can find a green button "+ New registration". Press this button.
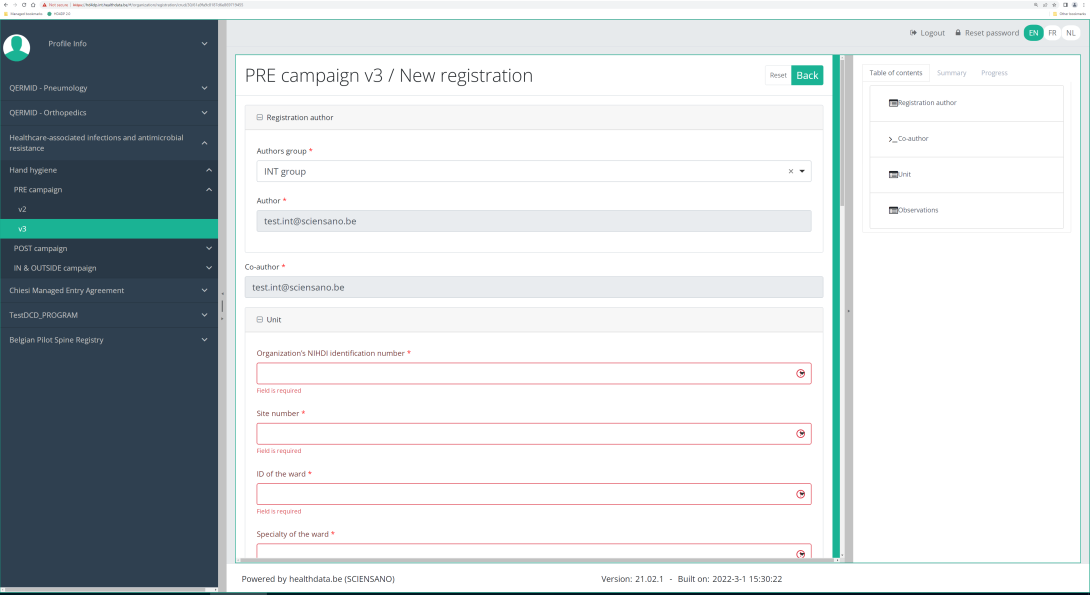
After pressing the button "+ New registration", the main screen will now be replaced with 2 sections: a study form (in the middle of the screen) and a Table of contents (on the right side of the screen).
By completing the study form, you will create a "PRE Campaign" registration for the study project Hand Hygiene.
The Table of contents indicates which sections you must complete. You can also use the table of contents to navigate through the study form: pressing a section in the table of contents will take you to this section in the study form.
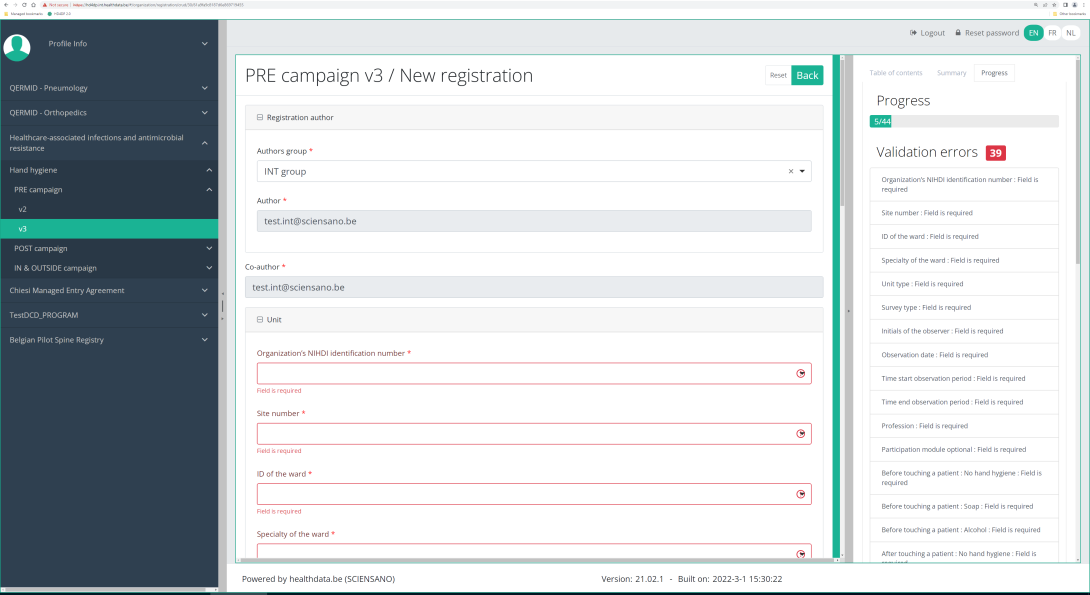
By pressing the tab "Progress" on the right side of the screen , the Table of contents will be replaced by a progress bar and a list of open validation errors.
You can use the list of open validation errors to navigate through the study form: pressing a validation error in the list will take you to this section in the study form.
Note the field "Organization's NIHDI identification number" only has to be filled-in for the 1st registration. It will be automatically pre-filled afterwards.
When the study form is completed and there are no validation errors, you can Save or Submit this registration. Notice that the Submit button is in clear green.
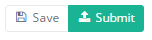
When the study form is completed but there are validation errors, you can Save but not Submit this registration. Notice that the Submit button is in dim green.

When the study form is saved or submitted, the screen switches to the overview table. Now, this table is not empty anymore but shows the saved or submitted registration.
If you save the registration, you can still change it. A submitted registration cannot be changed or deleted anymore.
Create a "Hand Hygiene" registration "IN and OUT Campaign"
Create a "Hand Hygiene" registration "IN and OUT Campaign"To create a "IN and OUT Campaign" registration for the study project Hand Hygiene, select "IN and OUT Campaign" in the dark blue left menu.
You will see the number of versions of this study section. In this case, there are two versions available: V2 and V3. Please always use the latest active version available.
When you select the highest version of this study section for the first time, you will see an empty table in the main part of your screen. The table contains, among others, the following items: Registration ID, Progress, Author, Co-author, Unique ID, Business key, Registration code, National registry ID of the patient...
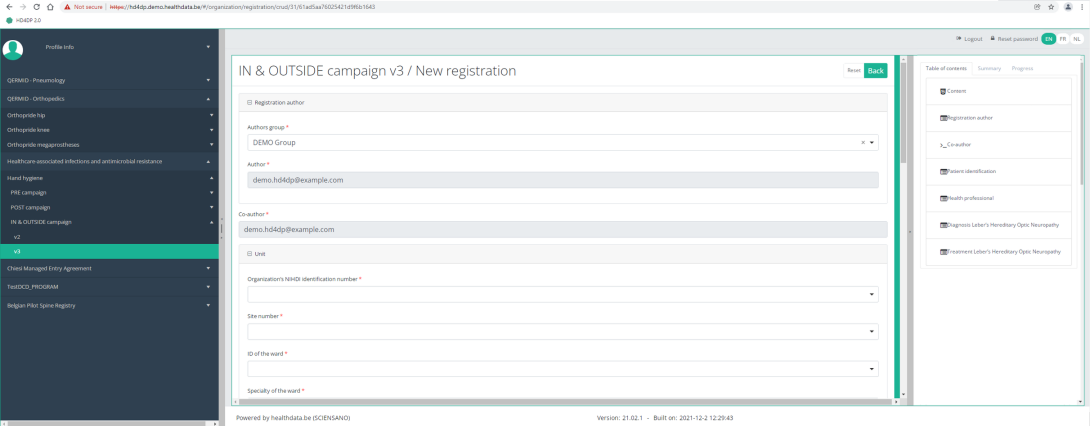
In the top right corner of the screen you can find a green button "+ New registration". Press this button.
After pressing the button "+ New registration", the main screen will now be replaced with 2 sections: a study form (in the middle of the screen) and a Table of contents (on the right side of the screen).
By completing the study form, you will create a "IN and OUT Campaign" registration for the study project Hand Hygiene.
The Table of contents indicates which sections you must complete. You can also use the table of contents to navigate through the study form: pressing a section in the table of contents will take you to this section in the study form.
By pressing the tab "Progress" on the right side of the screen , the Table of contents will be replaced by a progress bar and a list of open validation errors.
You can use the list of open validation errors to navigate through the study form: pressing a validation error in the list will take you to this section in the study form.
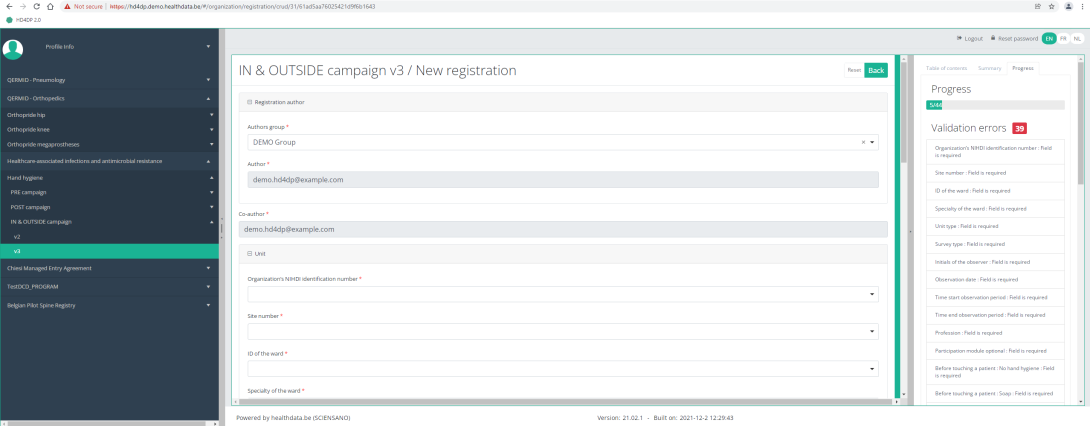
Note the field "Organization NIHDI identification number" only has to be filled-in for the 1st registration. It will be automatically pre-filled afterwards.
When the study form is completed and there are no validation errors, you can Save or Submit this registration. Notice that the Submit button is in clear green.
When the study form is completed but there are validation errors, you can Save but not Submit this registration. Notice that the Submit button is in dim green.
When the study form is saved or submitted, the screen switches to the overview table. Now, this table is not empty anymore but shows the saved or submitted registration.
If you save the registration, you can still change it. A submitted registration cannot be changed or deleted anymore.
Find a "Hand Hygiene" registration
Find a "Hand Hygiene" registrationThe study project Hand Hygiene consists of three sections: PRE campaign, POST campaign and IN and OUT campaign.
On the following pages we explain how you can find a registration for each section.
Find a "Hand Hygiene" registration "PRE Campaign"
Find a "Hand Hygiene" registration "PRE Campaign"When you select a version of this study section, you will see the summary table in the main part of your screen. This table contains, among other things: Registration ID, Progress, Author, Co-author, Unique ID, Business Key, Registration Code, National Patient Registry Number…
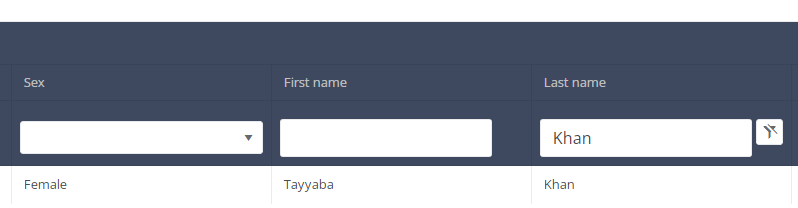
In the header of the summary table, you can use the filter below each column label. In the example below, the last name "Khan" has been entered in the filter (text field), so only the record with "Khan" is displayed.
Find a "Hand Hygiene" registration "POST Campaign"
Find a "Hand Hygiene" registration "POST Campaign"When you select a version of this study section, you will see the summary table in the main part of your screen. This table contains, among other things: Registration ID, Progress, Author, Co-author, Unique ID, Business Key, Registration Code, National Patient Registry Number…
In the header of the summary table, you can use the filter below each column label. In the example below, the last name "Khan" has been entered in the filter (text field), so only the record with "Khan" is displayed.
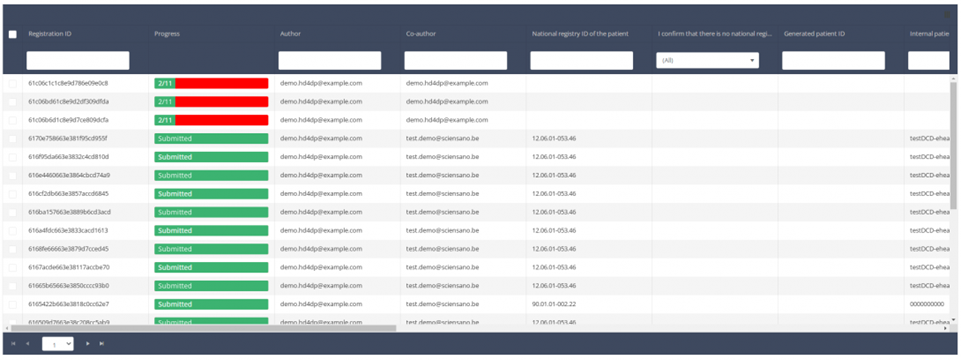
Find a "Hand Hygiene" registration "IN and OUT Campaign"
Find a "Hand Hygiene" registration "IN and OUT Campaign"When you select a version of this study section, you will see the summary table in the main part of your screen. This table contains, among other things: Registration ID, Progress, Author, Co-author, Unique ID, Business Key, Registration Code, National Patient Registry Number…
In the header of the summary table, you can use the filter below each column label. In the example below, the last name "Khan" has been entered in the filter (text field), so only the record with "Khan" is displayed.
Update a "Hand Hygiene" registration
Update a "Hand Hygiene" registrationThe study project Hand Hygiene consists of three sections: PRE campaign, POST campaign and IN and OUT campaign.
On the following pages we explain how you can update a registration for each section.
Update a "Hand Hygiene" registration "PRE Campaign"
Update a "Hand Hygiene" registration "PRE Campaign"A "PRE Campaign" registration can be updated as long as the registration has not yet been submitted. If the status of a registration is "Saved" , the registration can still be updated.
To update a "PRE Campaign" registration for the study project Hand Hygiene, select "PRE Campaign" in the dark blue left menu.
When you select a version of this study, you will see the summary table in the main body of your screen. The table includes the following items: Registration ID, Progress, Author, Co-author, Unique ID, Business Key, Registration Code, National registry number of the patient.…

Use the filters in the header of the table to find the registration you want to update.
Once you have found the registration, you can open the registration's study form by clicking on the corresponding row in the summary table.
You can complete missing fields and/or change previously completed fields in the survey form.
At the end of the survey form, you can Save or Submit the registration.
A registration can be updated as long as it has the status "Saved" and as long as the registration not has been submitted. A submitted registration cannot be updated or deleted again.
Update a "Hand Hygiene" registration "POST Campaign"
Update a "Hand Hygiene" registration "POST Campaign"A "POST Campaign" registration can be updated as long as the registration has not yet been submitted. If the status of a registration is "Saved" , the registration can still be updated.
To update a "POST Campaign" registration for the study project Hand Hygiene, select "POST Campaign" in the dark blue left menu.
When you select a version of this study, you will see the summary table in the main body of your screen. The table includes the following items: Registration ID, Progress, Author, Co-author, Unique ID, Business Key, Registration Code, National registry number of the patient.…
Use the filters in the header of the table to find the registration you want to update.
Once you have found the registration, you can open the registration's study form by clicking on the corresponding row in the summary table.
You can complete missing fields and/or change previously completed fields in the survey form.
At the end of the survey form, you can Save or Submit the registration.
A registration can be updated as long as it has the status "Saved" and as long as the registration not has been submitted. A submitted registration cannot be updated or deleted again.
Update a "Hand Hygiene" registration "IN and OUT Campaign"
Update a "Hand Hygiene" registration "IN and OUT Campaign"A "IN and OUT Campaign" registration can be updated as long as the registration has not yet been submitted. If the status of a registration is "Saved" , the registration can still be updated.
To update a "IN and OUT Campaign" registration for the study project Hand Hygiene, select "IN and OUT Campaign" in the dark blue left menu.
When you select a version of this study, you will see the summary table in the main body of your screen. The table includes the following items: Registration ID, Progress, Author, Co-author, Unique ID, Business Key, Registration Code, National registry number of the patient.…
Use the filters in the header of the table to find the registration you want to update.
Once you have found the registration, you can open the registration's study form by clicking on the corresponding row in the summary table.
You can complete missing fields and/or change previously completed fields in the survey form.
At the end of the survey form, you can Save or Submit the registration.
A registration can be updated as long as it has the status "Saved" and as long as the registration not has been submitted. A submitted registration cannot be updated or deleted again.
Delete a "Hand Hygiene" registration
Delete a "Hand Hygiene" registrationThe study project Hand Hygiene consists of three sections: PRE campaign, POST campaign and IN and OUT campaign.
On the following pages we explain how you can delete a registration for each section.
Delete a "Hand Hygiene" registration "PRE Campaign"
Delete a "Hand Hygiene" registration "PRE Campaign"A "PRE Campaign" registration can be deleted as long as the registration has not yet been submitted. If the status of a registration is "Open" , the registration can still be deleted.
To delete a "PRE Campaign" registration for the study project Hand Hygiene, select "PRE Campaign" in the dark blue left menu.
When you select a version of this course of study, you will see the summary table in the main body of your screen. The table includes the following items: Registration ID, Progress, Author, Co-author, Unique ID, Business Key, Registration Code, National registry number of the patient...

Use the filters in the header of the table to find the registration you want to delete.
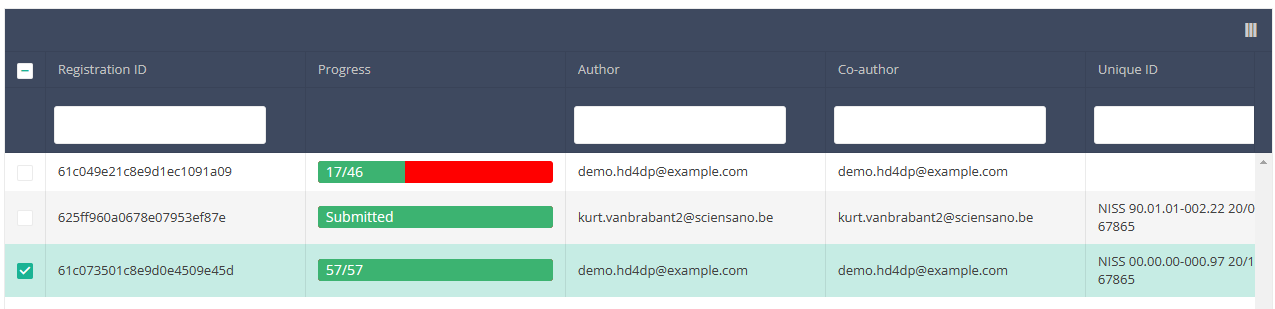
Once you have found the registration you want to delete, you must select the registration by checking the checkbox at the beginning of the row in the summary table.

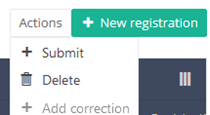
Then you need to press the "Actions" button at the top right of the summary table.
There are now two options, "Submit" and "Delete". Now press "Delete".
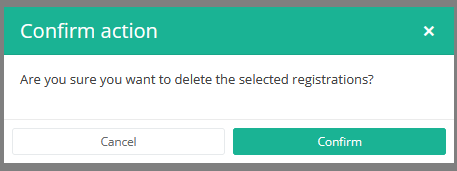
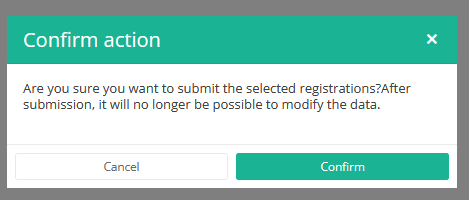
After you press "Delete," a pop-up message will appear asking you to confirm the deletion of the selected registration(s). If you are sure about this action, press "Confirm." If not, press "Cancel."
If you delete the registration, you cannot change its status or content.
The deleted registration will not be removed from the summary table. It remains present, but the status has changed from "Open" to "Deleted".
If you want to see only Open and Sent registrations, you can adjust the filter on the "Status" item in the summary table.
A registration can be deleted as long as the registration has not yet been submitted. If the status of a registration is "Open", the registration can still be deleted.
Delete a "Hand Hygiene" registration "POST Campaign"
Delete a "Hand Hygiene" registration "POST Campaign"A "POST Campaign" registration can be deleted as long as the registration has not yet been submitted. If the status of a registration is "Open" , the registration can still be deleted.
To delete a "POST Campaign" registration for the study project Hand Hygiene, select "POST Campaign" in the dark blue left menu.
When you select a version of this course of study, you will see the summary table in the main body of your screen. The table includes the following items: Registration ID, Progress, Author, Co-author, Unique ID, Business Key, Registration Code, National registry number of the patient...
Use the filters in the header of the table to find the registration you want to delete.
Once you have found the registration you want to delete, you must select the registration by checking the checkbox at the beginning of the row in the summary table.
Then you need to press the "Actions" button at the top right of the summary table.
There are now two options, "Submit" and "Delete". Now press "Delete".
After you press "Delete," a pop-up message will appear asking you to confirm the deletion of the selected registration(s). If you are sure about this action, press "Confirm." If not, press "Cancel."
If you delete the registration, you cannot change its status or content.
The deleted registration will not be removed from the summary table. It remains present, but the status has changed from "Open" to "Deleted".
If you want to see only Open and Sent registrations, you can adjust the filter on the "Status" item in the summary table.
A registration can be deleted as long as the registration has not yet been submitted. If the status of a registration is "Open", the registration can still be deleted.
Delete a "Hand Hygiene" registration "IN and OUT Campaign"
Delete a "Hand Hygiene" registration "IN and OUT Campaign"A "IN and OUT Campaign" registration can be deleted as long as the registration has not yet been submitted. If the status of a registration is "Open" , the registration can still be deleted.
To delete a "IN and OUT Campaign" registration for the study project Hand Hygiene, select "IN and OUT Campaign" in the dark blue left menu.
When you select a version of this course of study, you will see the summary table in the main body of your screen. The table includes the following items: Registration ID, Progress, Author, Co-author, Unique ID, Business Key, Registration Code, National registry number of the patient...
Use the filters in the header of the table to find the registration you want to delete.
Once you have found the registration you want to delete, you must select the registration by checking the checkbox at the beginning of the row in the summary table.
Then you need to press the "Actions" button at the top right of the summary table.
There are now two options, "Submit" and "Delete". Now press "Delete".
After you press "Delete," a pop-up message will appear asking you to confirm the deletion of the selected registration(s). If you are sure about this action, press "Confirm." If not, press "Cancel."
If you delete the registration, you cannot change its status or content.
The deleted registration will not be removed from the summary table. It remains present, but the status has changed from "Open" to "Deleted".
If you want to see only Open and Sent registrations, you can adjust the filter on the "Status" item in the summary table.
A registration can be deleted as long as the registration has not yet been submitted. If the status of a registration is "Open", the registration can still be deleted.
Submit a "Hand Hygiene" registration
Submit a "Hand Hygiene" registrationThe study project Hand Hygiene consists of three sections: PRE campaign, POST campaign and IN and OUT campaign.
On the following pages we explain how you can submit a registration for each section.
Submit a "Hand Hygiene" registration "PRE Campaign"
Submit a "Hand Hygiene" registration "PRE Campaign"A "PRE Campaign" registration can be submitted at the end of the creation process using the study form (see: Create a "Hand Hygiene" registration "PRE Campaign" ).
When the registration was completed using the study form, saved and there are no more validation errors, the registration can also be submitted via the overview table. This method can be useful to submit multiple registrations in the same action.
To submit a "PRE Campaign" registration for the study project Hand Hygiene using the overview table, select "PRE Campaign" in the dark blue left menu.
When you select a version of this course of study, you will see the summary table in the main body of your screen. The table includes the following items: Registration ID, Progress, Author, Co-author, Unique ID, Business Key, Registration Code, National registry number of the patient…
Use the filters in the header of the table to find the registration(s) you want to submit. For example, you can use the filters "Status" (set to "Open") and "Validation Errors" (set to "0") to find the registrations that are eligible for submission.

Once you have found the registration(s) you want to submit, you must select the registration(s) by checking the checkbox at the beginning of the row in the summary table.
Then you need to press the "Actions" button at the top right of the summary table.
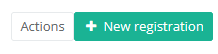
There are now two options, "Submit" and "Delete". Now press "Submit".

After you press "Submit," a pop-up message will appear asking you to confirm the submission of the selected registration(s). If you are sure about this action, press "Confirm." If not, press "Cancel."
Once you confirm the submission, you cannot change the content of the registration(s). Sent registrations can also no longer be deleted.
The sent registration remains present in the summary table, but the status has changed from "Open" to "Submitted".
If you want to see only "Open" registrations, you can adjust the filter on the "Status" item in the summary table.
A registration can be submitted at the end of the creation process using the study form (see: Create a [project] registration).
When the registration was completed using the study form, saved and there are no more validation errors, the registration can also be submitted via the overview table. This method can be useful to submit multiple registrations in the same action.
Submit a "Hand Hygiene" registration "POST Campaign"
Submit a "Hand Hygiene" registration "POST Campaign"A "POST Campaign" registration can be submitted at the end of the creation process using the study form (see: Create a "Hand Hygiene" registration "POST Campaign" ).
When the registration was completed using the study form, saved and there are no more validation errors, the registration can also be submitted via the overview table. This method can be useful to submit multiple registrations in the same action.
To submit a "POST Campaign" registration for the study project Hand Hygiene using the overview table, select "POST Campaign" in the dark blue left menu.
When you select a version of this course of study, you will see the summary table in the main body of your screen. The table includes the following items: Registration ID, Progress, Author, Co-author, Unique ID, Business Key, Registration Code, National registry number of the patient…
Use the filters in the header of the table to find the registration(s) you want to submit. For example, you can use the filters "Status" (set to "Open") and "Validation Errors" (set to "0") to find the registrations that are eligible for submission.
Once you have found the registration(s) you want to submit, you must select the registration(s) by checking the checkbox at the beginning of the row in the summary table.
Then you need to press the "Actions" button at the top right of the summary table.
There are now two options, "Submit" and "Delete". Now press "Submit".
After you press "Submit," a pop-up message will appear asking you to confirm the submission of the selected registration(s). If you are sure about this action, press "Confirm." If not, press "Cancel."
Once you confirm the submission, you cannot change the content of the registration(s). Sent registrations can also no longer be deleted.
The sent registration remains present in the summary table, but the status has changed from "Open" to "Submitted".
If you want to see only "Open" registrations, you can adjust the filter on the "Status" item in the summary table.
A registration can be submitted at the end of the creation process using the study form (see: Create a [project] registration).
When the registration was completed using the study form, saved and there are no more validation errors, the registration can also be submitted via the overview table. This method can be useful to submit multiple registrations in the same action.
Submit a "Hand Hygiene" registration "IN and OUT Campaign"
Submit a "Hand Hygiene" registration "IN and OUT Campaign"An "IN and OUT Campaign" registration can be submitted at the end of the creation process using the study form (see: Create a "Hand Hygiene" registration "IN and OUT Campaign").
When the registration was completed using the study form, saved and there are no more validation errors, the registration can also be submitted via the overview table. This method can be useful to submit multiple registrations in the same action.
To submit an "IN and OUT Campaign" registration for the study project Hand Hygiene using the overview table, select "In and OUT Campaign" in the dark blue left menu.
When you select a version of this course of study, you will see the summary table in the main body of your screen. The table includes the following items: Registration ID, Progress, Author, Co-author, Unique ID, Business Key, Registration Code, National registry number of the patient…
Use the filters in the header of the table to find the registration(s) you want to submit. For example, you can use the filters "Status" (set to "Open") and "Validation Errors" (set to "0") to find the registrations that are eligible for submission.
Once you have found the registration(s) you want to submit, you must select the registration(s) by checking the checkbox at the beginning of the row in the summary table.
Then you need to press the "Actions" button at the top right of the summary table.
There are now two options, "Submit" and "Delete". Now press "Submit".
After you press "Submit," a pop-up message will appear asking you to confirm the submission of the selected registration(s). If you are sure about this action, press "Confirm." If not, press "Cancel."
Once you confirm the submission, you cannot change the content of the registration(s). Sent registrations can also no longer be deleted.
The sent registration remains present in the summary table, but the status has changed from "Open" to "Submitted".
If you want to see only "Open" registrations, you can adjust the filter on the "Status" item in the summary table.
A registration can be submitted at the end of the creation process using the study form (see: Create a [project] registration).
When the registration was completed using the study form, saved and there are no more validation errors, the registration can also be submitted via the overview table. This method can be useful to submit multiple registrations in the same action.
Technical manual of the application HD4DP v2
Technical manual of the application HD4DP v2 Bart.ServaesHD4DP v2 S2S API
HD4DP v2 S2S APIThe HD4DP v2 S2S API is a unified Application Programming Interface (API) that will allow participating Healthcare Organizations (HCO) to submit DCDs data to HD4DP2.0 fully automated. In the manual of the application HD4DP v2 we provide detailed information about the S2S API:
- End-to-End process to submit DCD registrations
- API Endpoint for supporting the DCD submit process
- API Endpoint for searches DCD registrations
- MDM Field description - DB Model
- Swagger API
Important note: For code fields (fieldType = 'CODE') the id of the codeListValue item must be sent, not the code value or the label. In future releases it will be made possible to also send the code value.
Please read this documentation before its project specific use.
The study project Hand Hygiene consists of 3 DCD's:
- PRE Campaign
- POST Campaign
- IN & OUT Campaign
On the following pages we explain how to submit data for Hand Hygiene using the HD4DP v2 S2S API.
This documentation is being updated regularly. We try to provide as correct, complete and clear as possible information on these pages. Nevertheless, if you see anything in the documentation that is not correct, does not match your experience or requires further clarification, please create a request (type : request for information) via our portal (https://sciensano.service-now.com/sp) or send us an e-mail via support.healthdata@sciensano.be to report this documentation issue. Please, do not forget to mention the URL or web address of the page with the documentation issue. We will then adjust the documentation as soon as possible. Thank you!S2S API - Hand Hygiene - PRE Campaign
S2S API - Hand Hygiene - PRE CampaignDocumentation for System 2 System API on Architecture 2.0
Description of the service
API is the acronym for Application Programming Interface, which is a software intermediary that allows two applications to talk to each other.
In this case, the API is used to have the system of the Data Providers communicate with the system of HealthData.
The S2S API is a unified API that will allow clients (Data Providers) to submit DCDs data to HD4DP2.0 in fully automated way.
End point information (per DCD) + examples
| API | Response | Notes |
|---|---|---|
| /api/organizations | List of organizations. Client must select the right organizationId | Current existing end-point is: /api/installation/organizations We’ll create this new end-point with a different signature re-routing the call to this existing one or we will refactor the existing one to this new signature. |
| /api/dcd/menu/structure? organization-id={organizationId} | List of projects of the given organization, dcds of each project, dcdVersions of each dcd in a JSON format Client can get dcdId and dcdVersionId (optional) which are needed on following API calls. | |
| /api/dcd/payload/definition? dcd-id={dcdId}; <optional>version={version}; <optional>language-id={languageId} | List of all the fields of the form as well as their corresponding data-types that are allowed in the json data structure for the Payload | This field names values are the key properties in the formIO json config form. When we implement this new api end-point, we need to parse the json content in order to get the key properties. Given these field keys, we’ll get each field definition from new API end-points helpers: /api/dcd/field?field-id={fieldId} /api/dcd/codelist?codelist-id={codelistId} These ones are described in the next table. <optional parameter> version={version} : If this parameter is not provided, latest one is assumed <optional parameter> language-id = {languageId} : language id for the code_list example results. If this parameter is not provided, default language will be English. Current permitted values: en: English nl: Dutch fr: French Client must build this json object as the payload data to be sent based on this list of fields, on the last api call |
| /api/dcd/payload/example?dcd-id={dcdId}; <optional>version={version} | Example of payload in JSON format | Providing this API end-point in order to help the Client on the Payload build with an example <optional parameter> version={version} : If this parameter is not provided, latest one is assumed |
| /api/dcd/payload/submit? organization-id={organizationId}; dcd-id={dcdId}; <optional>version={version}; <optional>data-src-type={dataSrcType}; POST Payload | /api/dcd/payload/submit? organization-id={organizationId}; dcd-id={dcdId}; <optional>version={version}; <optional>data-src-type={dataSrcType}; POST Payload | Some implementation tasks is needed in here in order to return the result info (either succeed or failed). Similar like the one in HDConnectProxyRestTemplate.postCsv method, and the CsvExecutionResult object build. <optional parameter> version={version} : If this parameter is not provided, latest one is assumed. <optional parameter> data-src-type={dataSrcType} : permitted values: API CSV If this parameter is not provided, default values is <HD4DP>. |
| api/dcd/submit?organization-id={organizationtId};dcd-id={dcd-id};<optional>dcd-version-id={dcdVersionId};<optional>incl-submit-data={inclSubmitData}; <optional>incl-submit-results={inclSubmitResults}; GET method | List of submitted dcds data and/or their corresponding business keys or validation errors. | <optional parameter> dcd-version-id={dcdVersionId} : If this parameter is not provided, lastest one is assumed <optional parameter> incl-submit-data={inclSubmitData} : If this parameter is not provided, default values is <false> <optional parameter> incl-submit-results={inclSubmitResults} : If this parameter is not provided, default values is <true> |
HOW TO: Upload data using System 2 System
Steps To Upload data
1. IT services of data providers must setup their systems to be able to communicate with HD4DP v2 System 2 System API
A prerequisite to be able to use the Health Data's System 2 System API, is that the IT services of the hospitals must have the following in place before the systems can communicate:
- The endpoint/URL is protected by credentials for which the support services need to be contacted.
- End-to-end API process to submit DCD registrations in a fully automated manner.
- Support for searching submitted DCD registrations.
2. Prepare the JSON file (example file in this section)
To send DCD registrations to Health Data, the file must be in a .json file format.
- At the Data Provider's side, we must foresee a way to extract the JSON file from the electronic patient files and/or other local databases.
- Author group, Author and Coauthor:
- When the Author group, Author and Coauthor has been left out in the json file, the default Author group, Author and Coauthor will be used automatically.
- When the desired Author group, Author and Coauthor are specified in the json file, the following fields TX_AUTHOR_GR, TX_AUTHOR and TX_COAUTHOR must be added to the json file with their values respectively.
Example:
"TX_AUTHOR_GR": "Author Group",
"TX_AUTHOR": "author@example.com",
"TX_COAUTHOR": "coauthor@example.com",
Note:
The Author group, Author and Coauthor must exist and are well configured at the back-end of the system. TX_AUTHOR_GR can be a string that identifies the Author group to which this Author belongs. Commonly, the first name and last name are used to identify the TX_AUTHOR_GROUP. Be sure to avoid leading and trailing spaces when entering the Author group value.
- Make sure the name of the JSON file has the correct format:
HD_DCD_submjson_HDBPnumber_HDBPabbreviation_versionnumber_versionreleasedate
So for Hand Hygiene - PRE Campaign the format would be:
HD_DCD_submjson_HDBP0025_HH_HandHygiene-Pre-Campaign_01_18102022.json
EXAMPLES:
- Please find below an example file for Hand hygiene - PRE Campaign:
Disclaimer: The example files above are only provided as a guideline and do not contain real life data.
3. Uploading the JSON File
- The IT department of the Data Provider must provide a manner in their system to send the API requests containing DCD registrations in a JSON file format, the correct end-points must be addressed.
- In this case the end-point to upload the json file will be:
4. Validate the JSON Upload
4.1 Validation of the S2S API Upload via the response:
Verify in the same way the request was sent, that the returned response is containing a valid Business key.
If a valid Business key has been provided, the registration upload via System 2 System API was succesful.
4.2 Validation of the System 2 System API via HD4DP 2.0:
Step 1: Open the web application HD4DP 2.0.
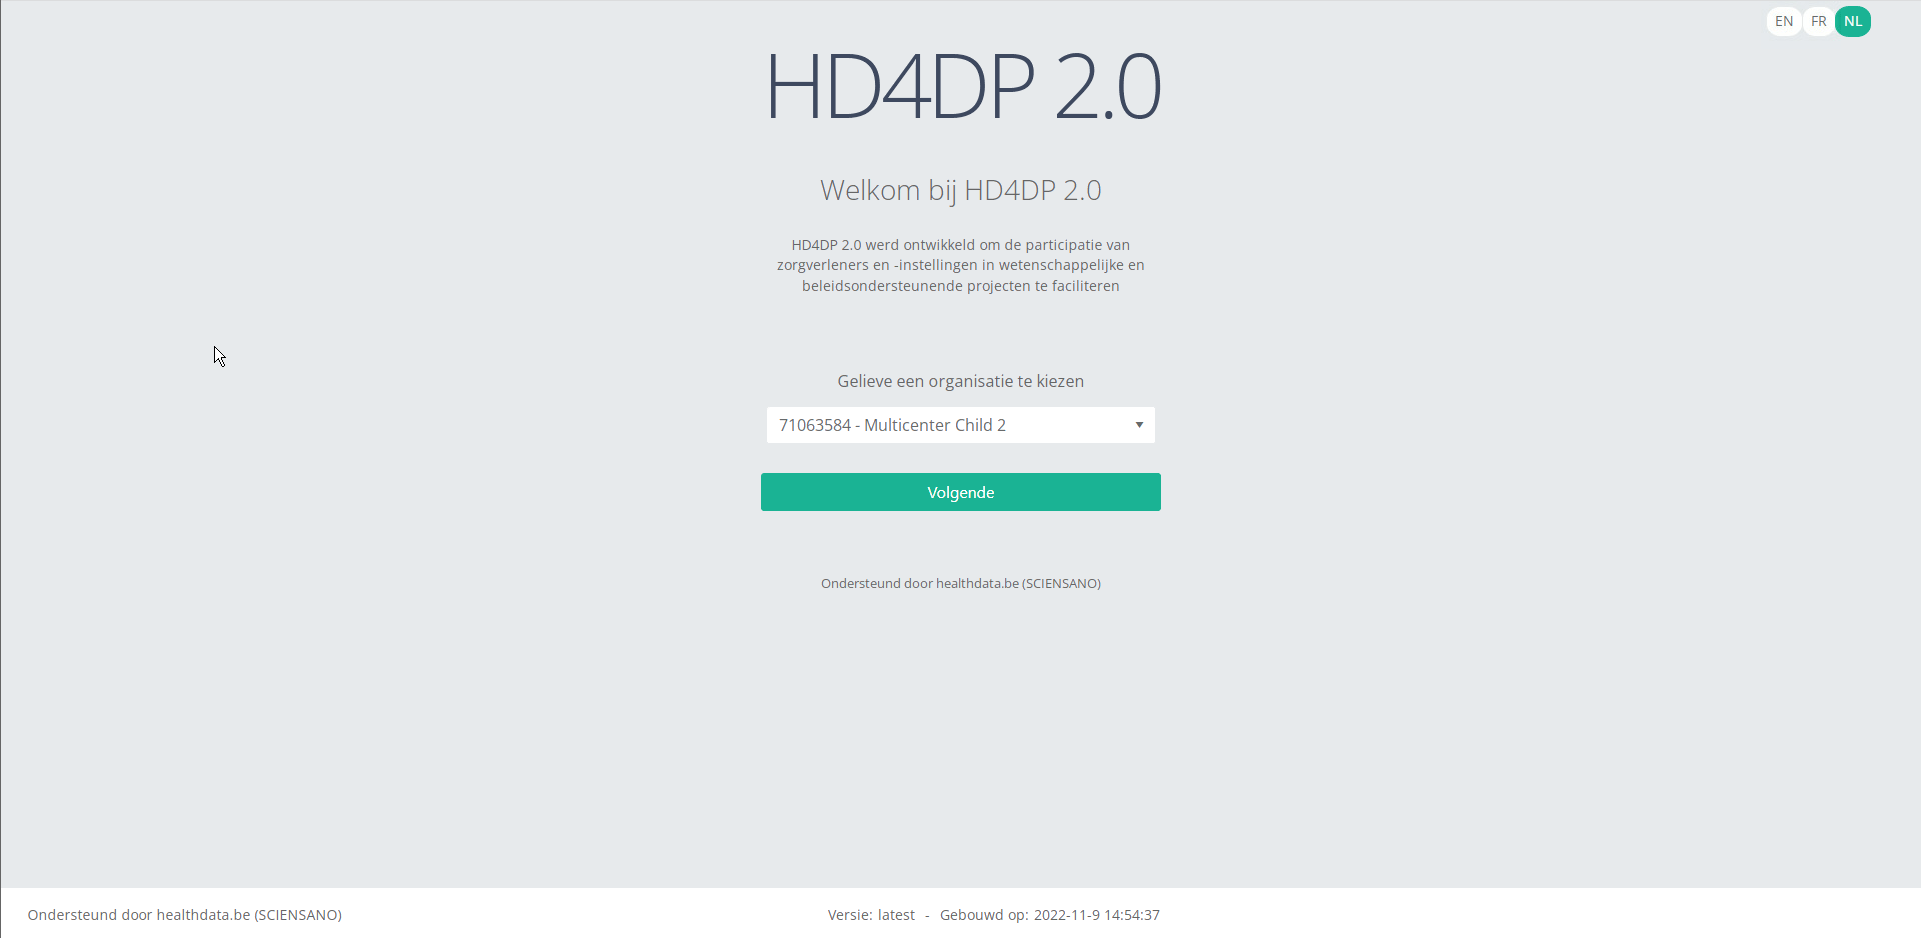
Step 2: Select the concerned organization in the dropdown list and click on Volgende (Next)
Step 3: Fill in the username and password, that has been provided by your IT Department or Healthdata team, and click on Log in to access the HD4DP 2.0 application.

Step 4: Navigate in the menu on the left-hand side panel to the desired DCD:
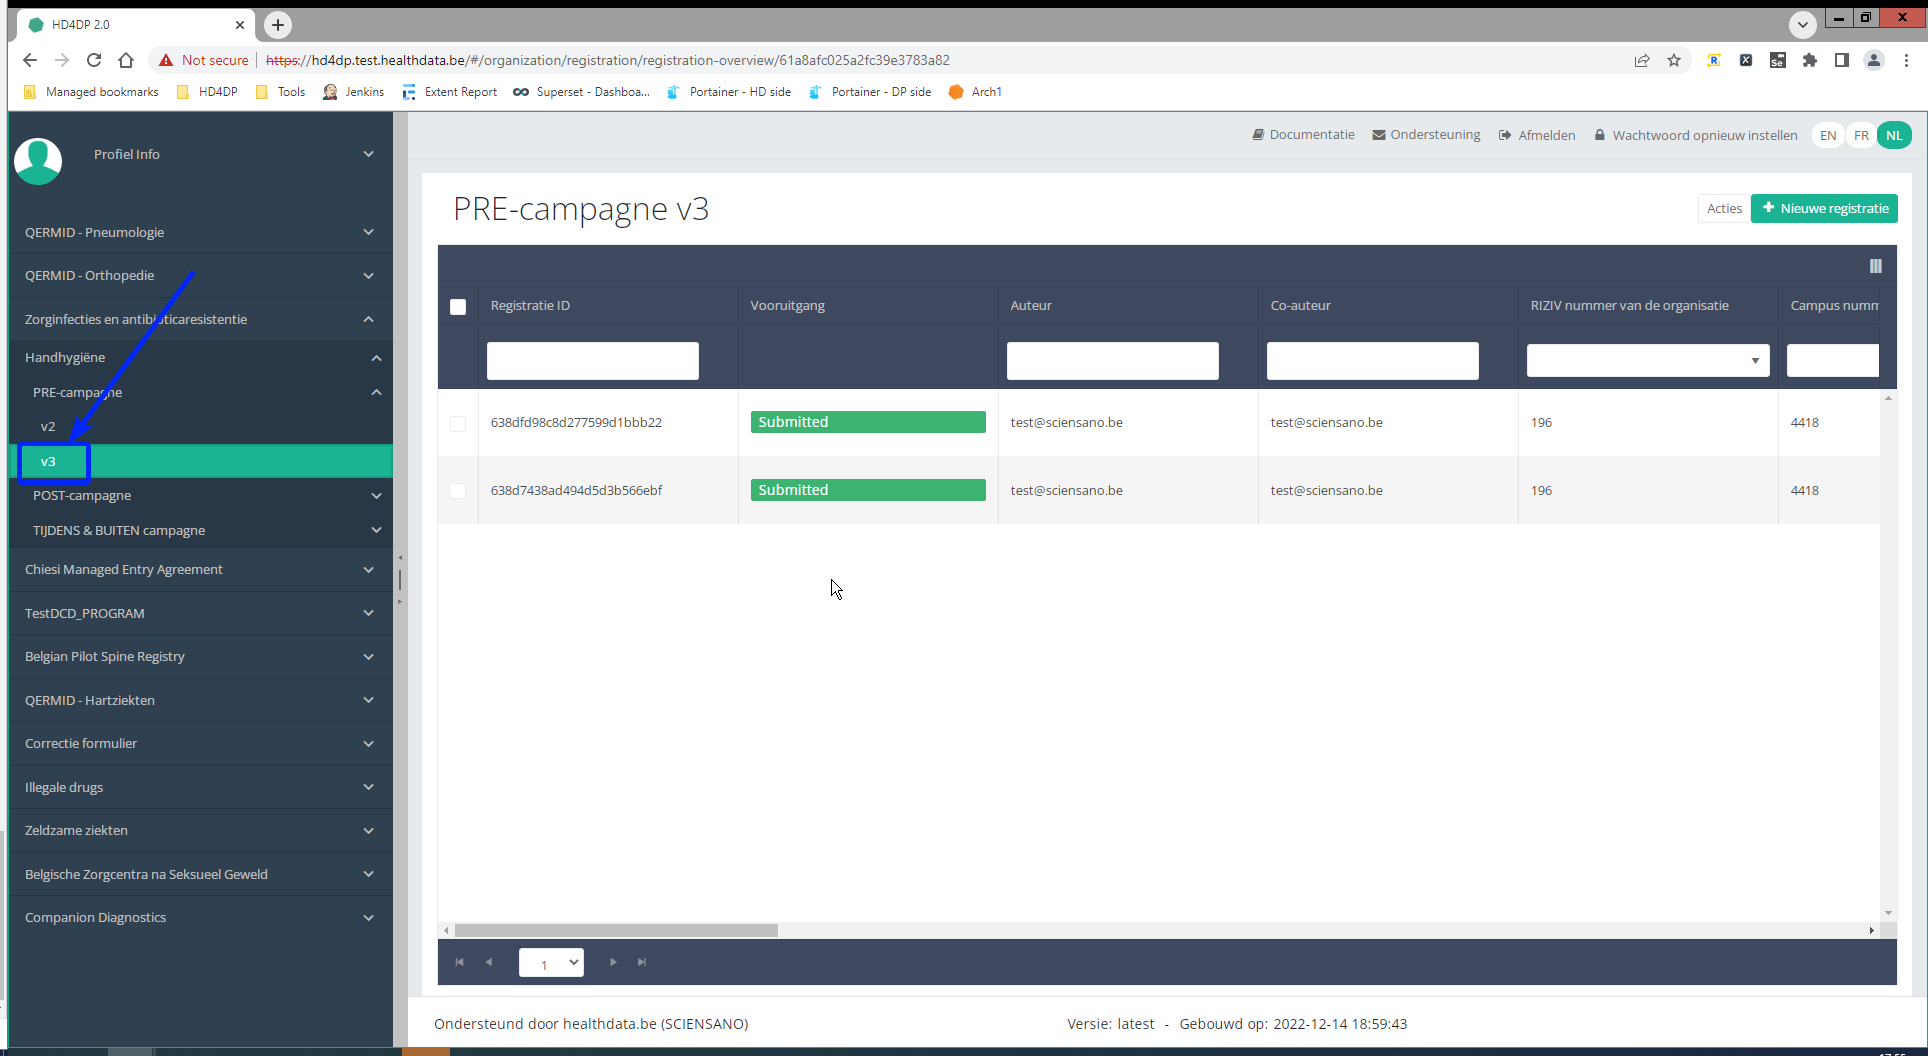
Step 5: Check that the uploaded registration(s) is/are displayed in the DCD overview:

S2S API for Hand Hygiene - POST Campaign
S2S API for Hand Hygiene - POST CampaignDocumentation for System 2 System API on Architecture 2.0
Description of the service
API is the acronym for Application Programming Interface, which is a software intermediary that allows two applications to talk to each other.
In this case, the API is used to have the system of the Data Providers communicate with the system of HealthData.
The S2S API is a unified API that will allow clients (Data Providers) to submit DCDs data to HD4DP2.0 in fully automated way.
End point information (per DCD) + examples
| API | Response | Notes |
|---|---|---|
| /api/organizations | List of organizations. Client must select the right organizationId | Current existing end-point is: /api/installation/organizations We’ll create this new end-point with a different signature re-routing the call to this existing one or we will refactor the existing one to this new signature. |
| /api/dcd/menu/structure? organization-id={organizationId} | List of projects of the given organization, dcds of each project, dcdVersions of each dcd in a JSON format Client can get dcdId and dcdVersionId (optional) which are needed on following API calls. | |
| /api/dcd/payload/definition? dcd-id={dcdId}; <optional>version={version}; <optional>language-id={languageId} | List of all the fields of the form as well as their corresponding data-types that are allowed in the json data structure for the Payload | This field names values are the key properties in the formIO json config form. When we implement this new api end-point, we need to parse the json content in order to get the key properties. Given these field keys, we’ll get each field definition from new API end-points helpers: /api/dcd/field?field-id={fieldId} /api/dcd/codelist?codelist-id={codelistId} These ones are described in the next table. <optional parameter> version={version} : If this parameter is not provided, latest one is assumed <optional parameter> language-id = {languageId} : language id for the code_list example results. If this parameter is not provided, default language will be English. Current permitted values: en: English nl: Dutch fr: French Client must build this json object as the payload data to be sent based on this list of fields, on the last api call |
| /api/dcd/payload/example?dcd-id={dcdId}; <optional>version={version} | Example of payload in JSON format | Providing this API end-point in order to help the Client on the Payload build with an example <optional parameter> version={version} : If this parameter is not provided, latest one is assumed |
| /api/dcd/payload/submit? organization-id={organizationId}; dcd-id={dcdId}; <optional>version={version}; <optional>data-src-type={dataSrcType}; POST Payload | /api/dcd/payload/submit? organization-id={organizationId}; dcd-id={dcdId}; <optional>version={version}; <optional>data-src-type={dataSrcType}; POST Payload | Some implementation tasks is needed in here in order to return the result info (either succeed or failed). Similar like the one in HDConnectProxyRestTemplate.postCsv method, and the CsvExecutionResult object build. <optional parameter> version={version} : If this parameter is not provided, latest one is assumed. <optional parameter> data-src-type={dataSrcType} : permitted values: API CSV If this parameter is not provided, default values is <HD4DP>. |
| api/dcd/submit?organization-id={organizationtId};dcd-id={dcd-id};<optional>dcd-version-id={dcdVersionId};<optional>incl-submit-data={inclSubmitData}; <optional>incl-submit-results={inclSubmitResults}; GET method | List of submitted dcds data and/or their corresponding business keys or validation errors. | <optional parameter> dcd-version-id={dcdVersionId} : If this parameter is not provided, lastest one is assumed <optional parameter> incl-submit-data={inclSubmitData} : If this parameter is not provided, default values is <false> <optional parameter> incl-submit-results={inclSubmitResults} : If this parameter is not provided, default values is <true> |
HOW TO: Upload data using System 2 System
Steps To Upload data
1. IT services of data providers must setup their systems to be able to communicate with HD4DP v2 System 2 System API
A prerequisite to be able to use the Health Data's System 2 System API, is that the IT services of the hospitals must have the following in place before the systems can communicate:
- The endpoint/URL is protected by credentials for which the support services need to be contacted.
- End-to-end API process to submit DCD registrations in a fully automated manner.
- Support for searching submitted DCD registrations.
2. Prepare the JSON file (example file in this section)
To send DCD registrations to Health Data, the file must be in a .json file format.
- At the Data Provider's side, we must foresee a way to extract the JSON file from the electronic patient files and/or other local databases.
- Author group, Author and Coauthor:
- When the Author group, Author and Coauthor has been left out in the json file, the default Author group, Author and Coauthor will be used automatically.
- When the desired Author group, Author and Coauthor are specified in the json file, the following fields TX_AUTHOR_GR, TX_AUTHOR and TX_COAUTHOR must be added to the json file with their values respectively.
Example:
"TX_AUTHOR_GR": "Author Group",
"TX_AUTHOR": "author@example.com",
"TX_COAUTHOR": "coauthor@example.com",
Note:
The Author group, Author and Coauthor must exist and are well configured at the back-end of the system. TX_AUTHOR_GR can be a string that identifies the Author group to which this Author belongs. Commonly, the first name and last name are used to identify the TX_AUTHOR_GROUP. Be sure to avoid leading and trailing spaces when entering the Author group value.
- Make sure the name of the JSON file has the correct format:
HD_DCD_submjson_HDBPnumber_HDBPabbreviation_versionnumber_versionreleasedate
So for Hand Hygiene - POST Campaign the format would be:
HD_DCD_submjson_HDBP0025_HH_HandHygiene-Post-Campaing_01_18102022.json
EXAMPLES:
- Please find below an example file for Hand hygiene - POST Campaign:
Disclaimer: The example files above are only provided as a guideline and do not contain real life data.
3. Uploading the JSON File
- The IT department of the Data Provider must provide a manner in their system to send the API requests containing DCD registrations in a JSON file format, the correct end-points must be addressed.
- In this case the end-point to upload the json file will be:
4. Validate the JSON Upload
4.1 Validation of the S2S API Upload via the response:
Verify in the same way the request was sent, that the returned response is containing a valid Business key.
If a valid Business key has been provided, the registration upload via System 2 System API was succesful.
4.2 Validation of the System 2 System API via HD4DP 2.0:
Step 1: Open the web application HD4DP 2.0.
Step 2: Select the concerned organization in the dropdown list and click on Volgende (Next)
Step 3: Fill in the username and password, that has been provided by your IT Department or Healthdata team, and click on Log in to access the HD4DP 2.0 application.
Step 4: Navigate in the menu on the left-hand side panel to the desired DCD:

Step 5: Check that the uploaded registration(s) is/are displayed in the DCD overview:
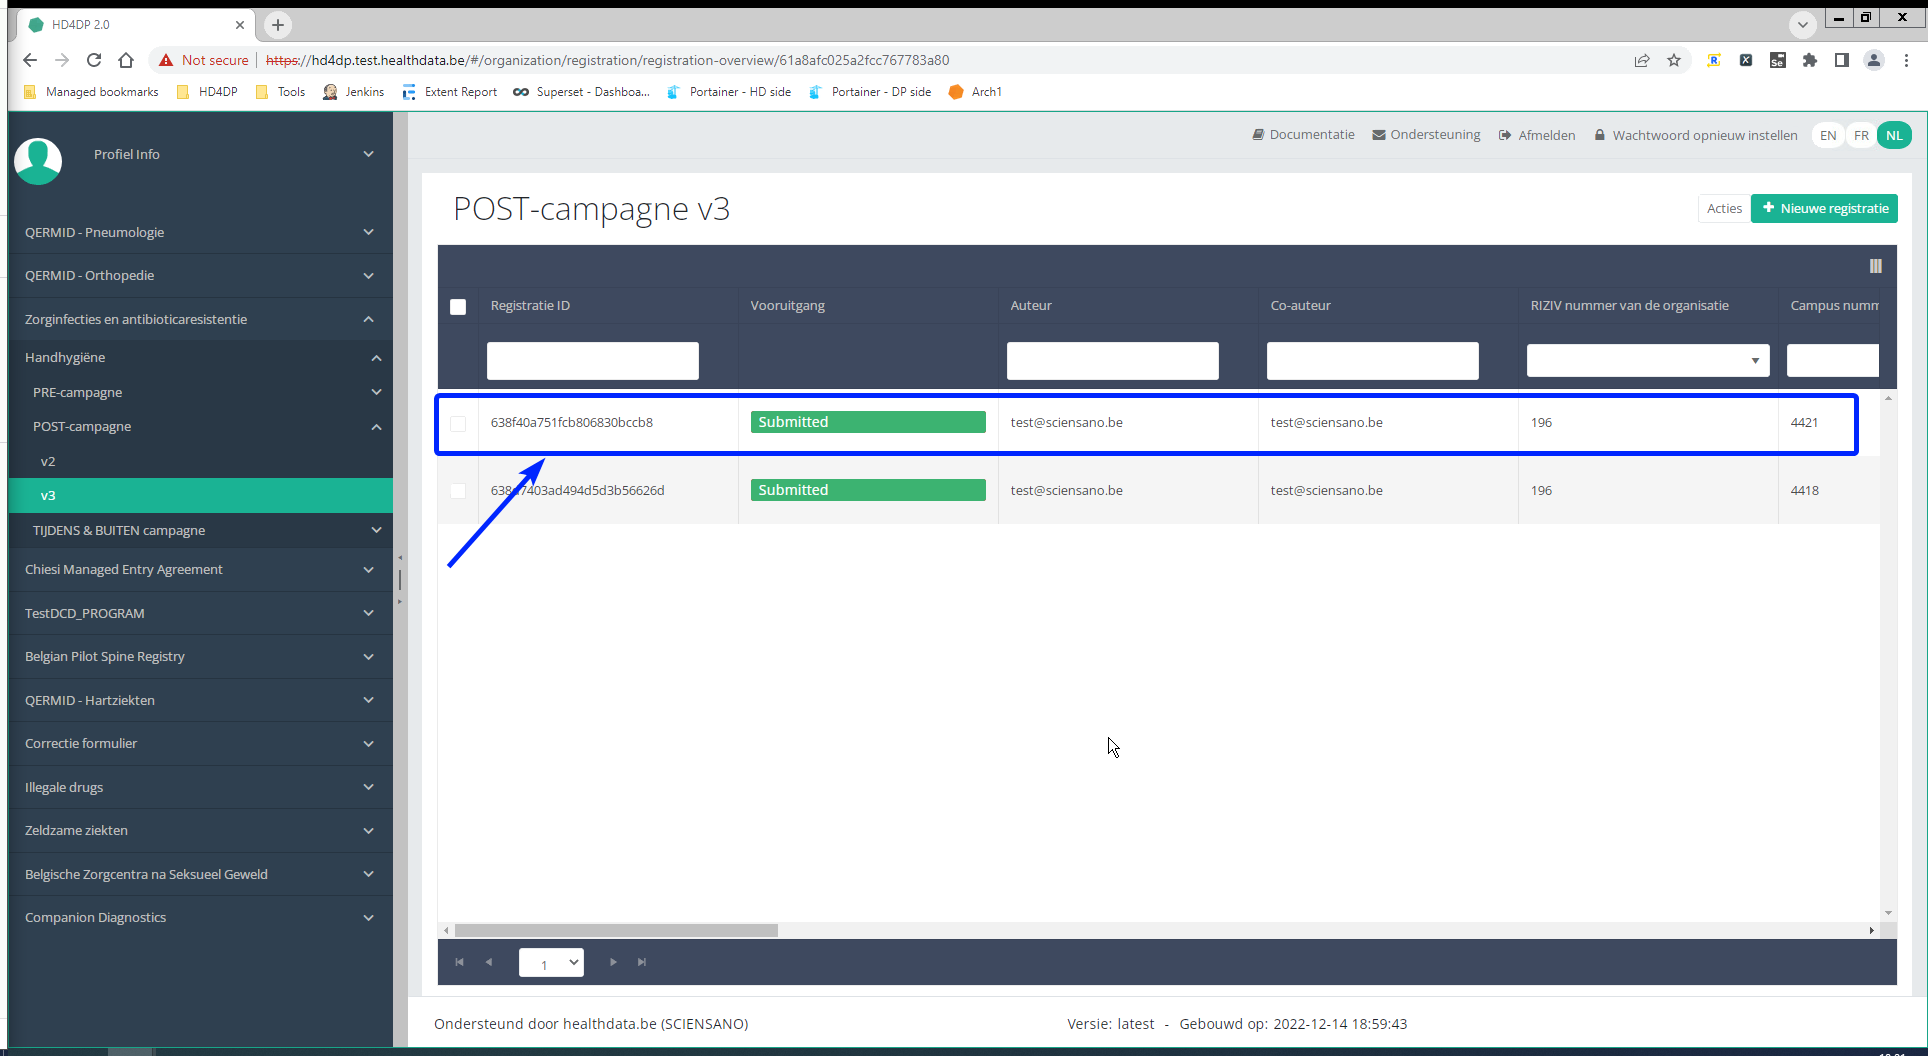
S2S API for Hand Hygiene - IN and OUT Campaign
S2S API for Hand Hygiene - IN and OUT CampaignDocumentation for System 2 System API on Architecture 2.0
Description of the service
API is the acronym for Application Programming Interface, which is a software intermediary that allows two applications to talk to each other.
In this case, the API is used to have the system of the Data Providers communicate with the system of HealthData.
The S2S API is a unified API that will allow clients (Data Providers) to submit DCDs data to HD4DP2.0 in fully automated way.
End point information (per DCD) + examples
| API | Response | Notes |
|---|---|---|
| /api/organizations | List of organizations. Client must select the right organizationId | Current existing end-point is: /api/installation/organizations We’ll create this new end-point with a different signature re-routing the call to this existing one or we will refactor the existing one to this new signature. |
| /api/dcd/menu/structure? organization-id={organizationId} | List of projects of the given organization, dcds of each project, dcdVersions of each dcd in a JSON format Client can get dcdId and dcdVersionId (optional) which are needed on following API calls. | |
| /api/dcd/payload/definition? dcd-id={dcdId}; <optional>version={version}; <optional>language-id={languageId} | List of all the fields of the form as well as their corresponding data-types that are allowed in the json data structure for the Payload | This field names values are the key properties in the formIO json config form. When we implement this new api end-point, we need to parse the json content in order to get the key properties. Given these field keys, we’ll get each field definition from new API end-points helpers: /api/dcd/field?field-id={fieldId} /api/dcd/codelist?codelist-id={codelistId} These ones are described in the next table. <optional parameter> version={version} : If this parameter is not provided, latest one is assumed <optional parameter> language-id = {languageId} : language id for the code_list example results. If this parameter is not provided, default language will be English. Current permitted values: en: English nl: Dutch fr: French Client must build this json object as the payload data to be sent based on this list of fields, on the last api call |
| /api/dcd/payload/example?dcd-id={dcdId}; <optional>version={version} | Example of payload in JSON format | Providing this API end-point in order to help the Client on the Payload build with an example <optional parameter> version={version} : If this parameter is not provided, latest one is assumed |
| /api/dcd/payload/submit? organization-id={organizationId}; dcd-id={dcdId}; <optional>version={version}; <optional>data-src-type={dataSrcType}; POST Payload | /api/dcd/payload/submit? organization-id={organizationId}; dcd-id={dcdId}; <optional>version={version}; <optional>data-src-type={dataSrcType}; POST Payload | Some implementation tasks is needed in here in order to return the result info (either succeed or failed). Similar like the one in HDConnectProxyRestTemplate.postCsv method, and the CsvExecutionResult object build. <optional parameter> version={version} : If this parameter is not provided, latest one is assumed. <optional parameter> data-src-type={dataSrcType} : permitted values: API CSV If this parameter is not provided, default values is <HD4DP>. |
| api/dcd/submit?organization-id={organizationtId};dcd-id={dcd-id};<optional>dcd-version-id={dcdVersionId};<optional>incl-submit-data={inclSubmitData}; <optional>incl-submit-results={inclSubmitResults}; GET method | List of submitted dcds data and/or their corresponding business keys or validation errors. | <optional parameter> dcd-version-id={dcdVersionId} : If this parameter is not provided, lastest one is assumed <optional parameter> incl-submit-data={inclSubmitData} : If this parameter is not provided, default values is <false> <optional parameter> incl-submit-results={inclSubmitResults} : If this parameter is not provided, default values is <true> |
HOW TO: Upload data using System 2 System
Steps To Upload data
1. IT services of data providers must setup their systems to be able to communicate with HD4DP v2 System 2 System API
A prerequisite to be able to use the Health Data's System 2 System API, is that the IT services of the hospitals must have the following in place before the systems can communicate:
- The endpoint/URL is protected by credentials for which the support services need to be contacted.
- End-to-end API process to submit DCD registrations in a fully automated manner.
- Support for searching submitted DCD registrations.
2. Prepare the JSON file (example file in this section)
To send DCD registrations to Health Data, the file must be in a .json file format.
- At the Data Provider's side, we must foresee a way to extract the JSON file from the electronic patient files and/or other local databases.
- Author group, Author and Coauthor:
- When the Author group, Author and Coauthor has been left out in the json file, the default Author group, Author and Coauthor will be used automatically.
- When the desired Author group, Author and Coauthor are specified in the json file, the following fields TX_AUTHOR_GR, TX_AUTHOR and TX_COAUTHOR must be added to the json file with their values respectively.
Example:
"TX_AUTHOR_GR": "Author Group",
"TX_AUTHOR": "author@example.com",
"TX_COAUTHOR": "coauthor@example.com",
Note:
The Author group, Author and Coauthor must exist and are well configured at the back-end of the system. TX_AUTHOR_GR can be a string that identifies the Author group to which this Author belongs. Commonly, the first name and last name are used to identify the TX_AUTHOR_GROUP. Be sure to avoid leading and trailing spaces when entering the Author group value.
- Make sure the name of the JSON file has the correct format:
HD_DCD_submjson_HDBPnumber_HDBPabbreviation_versionnumber_versionreleasedate
So for Hand Hygiene - IN and OUT Campaign the format would be:
HD_DCD_submjson_HDBP0025_HH_HandHygiene-Inside-Outside-Campaing_01_18102022.json
EXAMPLES:
- Please find below an example file for Hand hygiene - IN and OUT Campaign:
Disclaimer: The example files above are only provided as a guideline and do not contain real life data.
3. Uploading the JSON File
- The IT department of the Data Provider must provide a manner in their system to send the API requests containing DCD registrations in a JSON file format, the correct end-points must be addressed.
- In this case the end-point to upload the json file will be:
4. Validate the JSON Upload
4.1 Validation of the S2S API Upload via the response:
Verify in the same way the request was sent, that the returned response is containing a valid Business key.
If a valid Business key has been provided, the registration upload via System 2 System API was succesful.
4.2 Validation of the System 2 System API via HD4DP 2.0:
Step 1: Open the web application HD4DP 2.0.
Step 2: Select the concerned organization in the dropdown list and click on Volgende (Next)
Step 3: Fill in the username and password, that has been provided by your IT Department or Healthdata team, and click on Log in to access the HD4DP 2.0 application.
Step 4: Navigate in the menu on the left-hand side panel to the desired DCD:

Step 5: Check that the uploaded registration(s) is/are displayed in the DCD overview:

HD4DP v2 csv upload
HD4DP v2 csv uploadThe CSV upload functionality enables the import of multiple parameters from a set of patients in one go into HD4DP2.0. The CSV file is based on an extract of the electronic patient files and/or other local databases.
Currently there is no user interface in HD4DP2.0 for the upload of CSV files. If a data provider wants to upload a CSV file, it has to be dropped at a specific location. These files will be picked up and processed periodically. The files should be “final”, meaning that no application is writing to them. The pick-up location will be identical for all registries.
Pre-registry handling will be based on a naming convention of the CSV file.
Refer to the page(s) hereunder for DCD specific CSV Upload documentation.
CSV Upload for "Hand Hygiene" registration "PRE Campaign"
CSV Upload for "Hand Hygiene" registration "PRE Campaign"Documentation for CSV Upload on Architecture 2.0
Description of the service
The CSV Upload functionality gives the possibility to import multiple parameters from a set of patients in one time into HD4DP 2.0. The csv file is based on an extract of the electronic patient files and/or other local databases.
Currently there is no user interface in HD4DP 2.0 for uploading csv files. If a data provider wants to upload a csv file, the file has to be dropped at a specific location. These files will be picked up and processed periodically. The files should be “final”, meaning that no application is writing to them. The pick-up location will be identical for all registries.
Pre-registry handling will be based on a naming-convention of the csv file.
HOW TO: Upload data using CSV Upload
Steps To Upload data
1. Prepare the csv file (example file in this section)
- Extract the csv file from the electronic patient files and/or other local databases.
- Author group, Author and Coauthor:
- When the Author Group, Author and Coauthor have been left out in the csv file, the default Author group, Author and Coauthor will be used automatically.
- When the desired Author Group, Author and Coauthor are specified in the csv file, the following headers TX_AUTHOR_GR, TX_AUTHOR and TX_COAUTHOR must be added to the csv file with their values respectively.
Example:
TX_AUTHOR_GR;TX_AUTHOR;TX_COAUTHOR Author Group;author@example.com;coauthor@example.comNote:
The Author group, Author and Coauthor must exist and are well configured at the back-end of the system. TX_AUTHOR_GR can be a string that identifies the Author group to which this Author belongs. Commonly, the first name and last name are used to identify the TX_AUTHOR_GROUP. Be sure to avoid leading and trailing spaces when entering the Author group value.
- Similarly, add the filename 'STATUS' in an additional column. Add the value 'draft' in case a manual submission of the record is requested.
If not, the record will be submitted without manual intervention. - Make sure the name of the CSV file has the correct format:
HD_DCD_submcsv_HDBPnumber_HDBPabbreviation_versionnumber_versionreleasedate
So for Hand hygiene - PRE Campaign the format would be:
HD_DCD_submcsv_HDBP0025_HH_HandHygiene-Pre-Campaing_01_14112022.csv
EXAMPLES:
- Please find below an example file for Hand hygiene - PRE Campaign:
Disclaimer: The example files above are only provided as a guideline and do not contain real life data.
2. Uploading the csv file
Step 1: Open the sftp tool like WinSCP
Step 2: Get the credentials (Host name, Port number, User name and Password) from the IT department of the Data Provider, to log on to the sftp server located on the Data Provider side.
Step 3: Fill in the credentials into the Login screen and click on Login to be able to access the different upload folders:
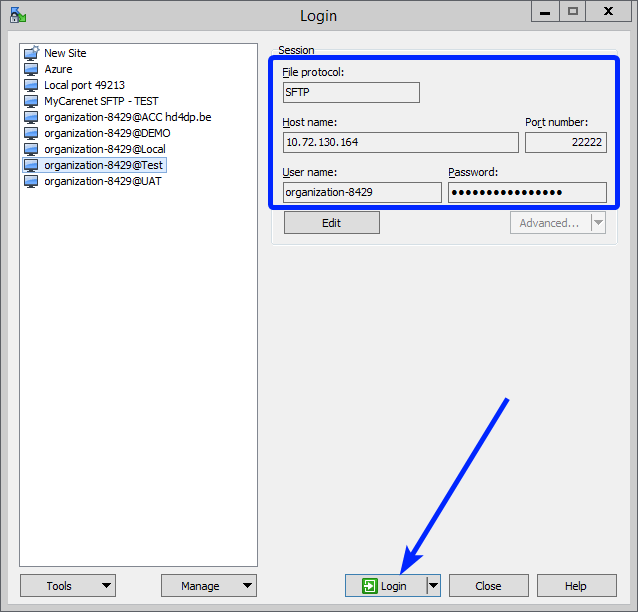
Note: a warning might be given, just click on Update
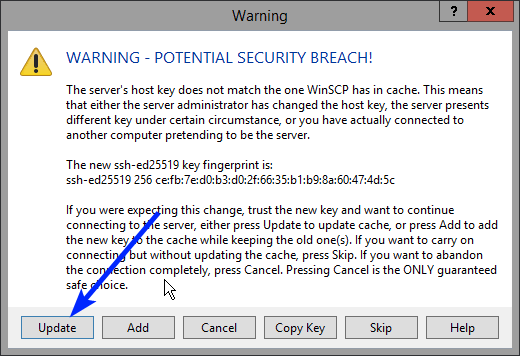
Now the CSV Upload folder structure is displayed on the right-hand side panel:
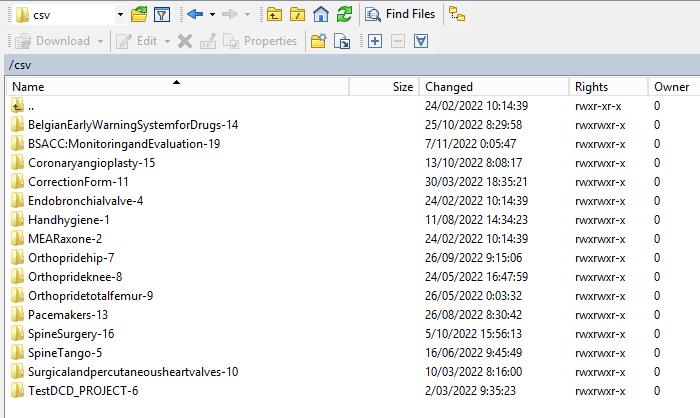
Step 4: Select the project folder Handhygiene-1 and open it by double-clicking on it:
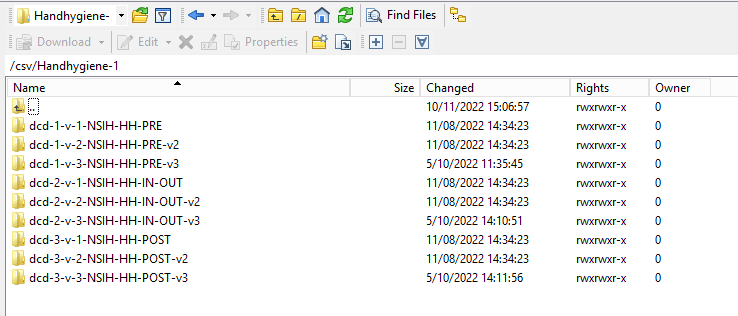
Step 5: Double-click on the DCD folder to open it:
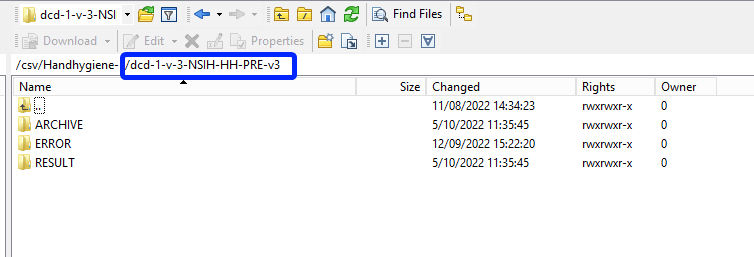
Step 6: Now go to the folder on the left-hand side panel where the CSV file to be uploaded is located:
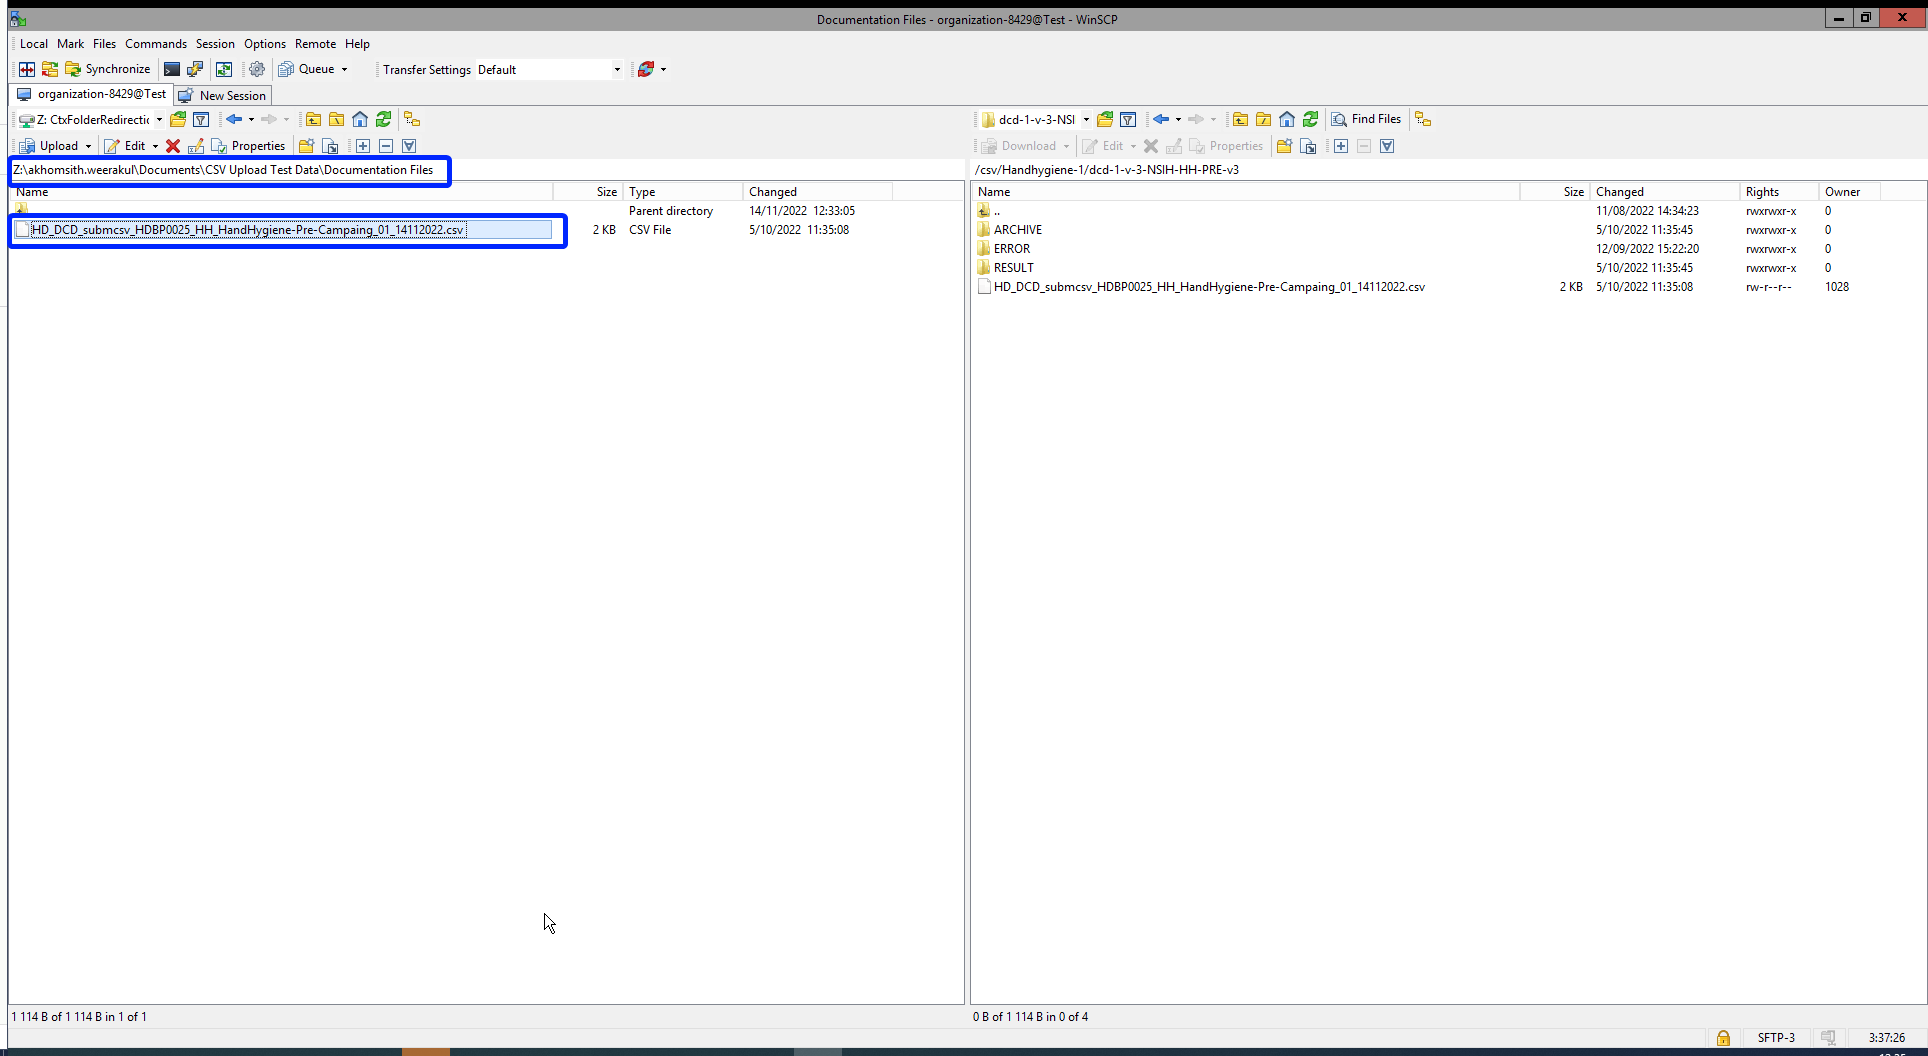
Step 7: Drag the CSV file to be uploaded from the left-hand side panel into the folder on the right-hand side panel:
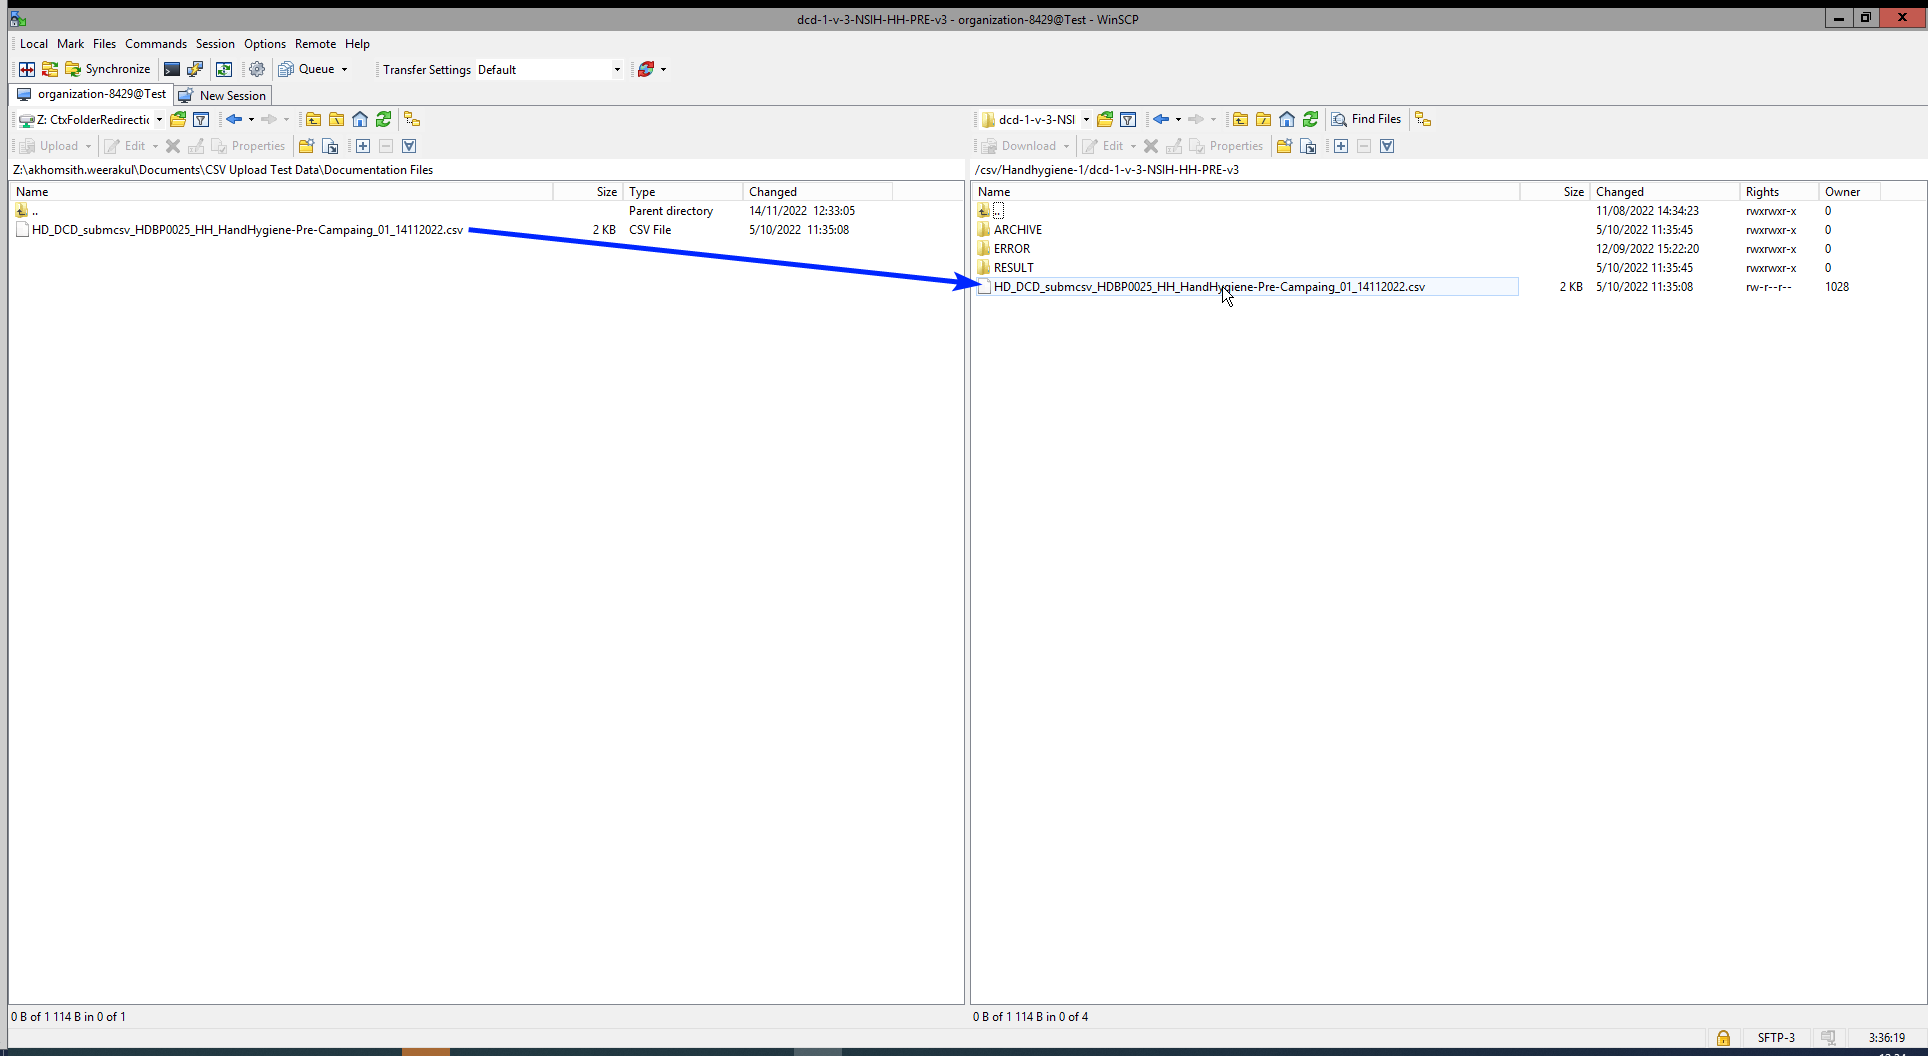
Step 8: Wait until the polling system of the CSV Uploader has picked up the CSV file and has processed it.
Once the CSV file has been processed it will disappear from the folder, when we refresh the page manually!
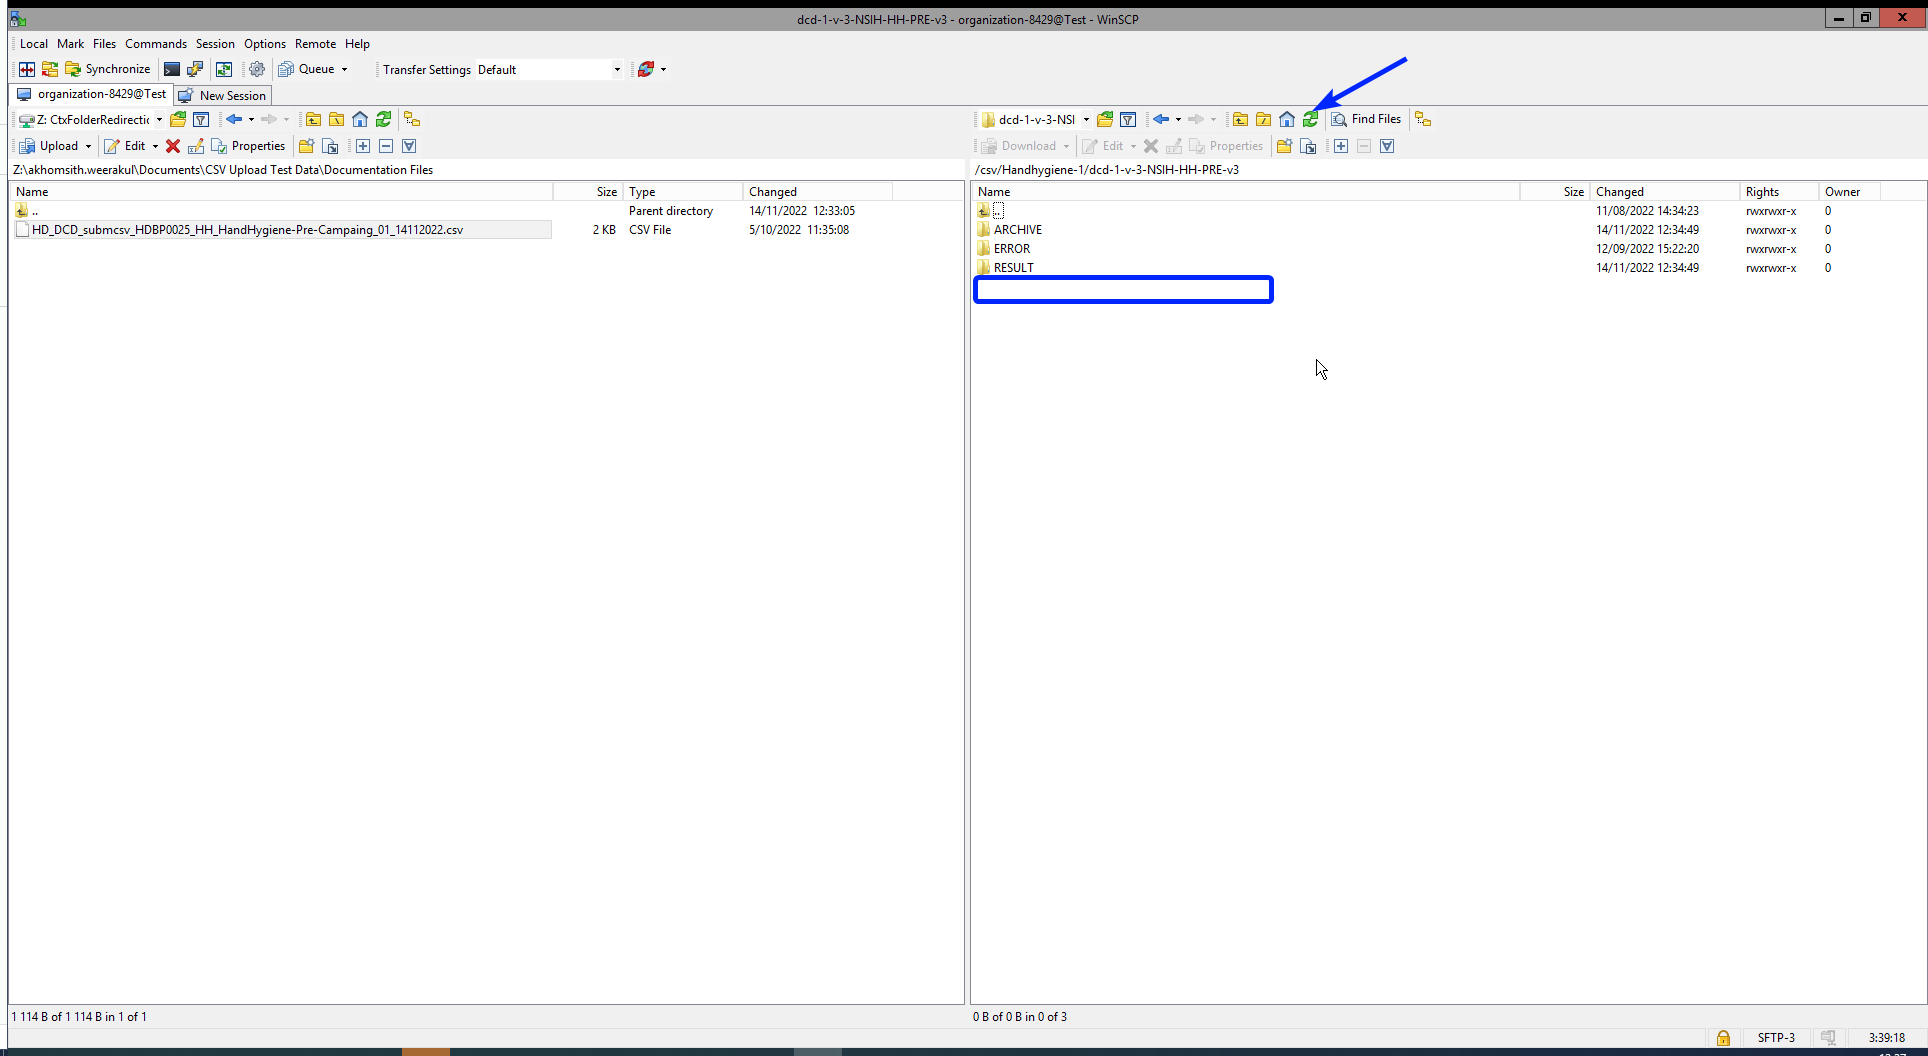
3. Validate csv upload
Once the csv file has been processed 3 folders will be created (if they haven't been created already) in the DCD folder:
- ARCHIVE (after a csv file has been processed, the original csv file will be saved in this folder)
- RESULT (when the csv file is placed in this folder, it means that the csv file has been processed, a file will be created or (or appended, if the file already existed) with the result of the upload of the csv file).
All the errors that are described in this file are business related, which means that they are technically correct, but in violation with the business rules or contain wrong values for that field. - ERROR (when the csv file is placed in this folder, it means that a technical error has occurred like the csv file contained erroneous formatting. The csv file won't get processed and an error file will be created with the errors and reason why the csv file couldn't be processed)
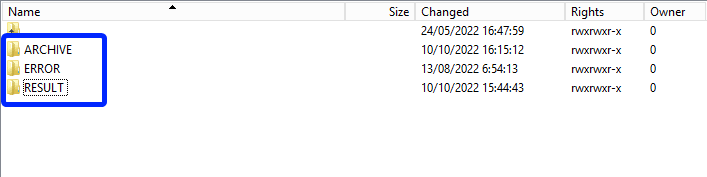
3.1 Validation of the csv upload via sftp tool:
Step 1: Double-click on the ERROR folder to open it, click on the refresh button and verify that there is no error file present.

Step 2: Return to the DCD folder. Now double-click on the RESULT folder to open it, click on the refresh button and verify that the result file is present.

Step 3: Double-click on the result file to open it.

Step 4: If there are multiple records in the result file, scroll to the entry of the current csv upload by looking at the upload date (Started at dd/mm/yyyy hh:mm).
Verify the result file that the upload was successful by searching for the word SUCCESS and having a look at the Status. This Status must contain: Success;Success Count:1;Error Count:0
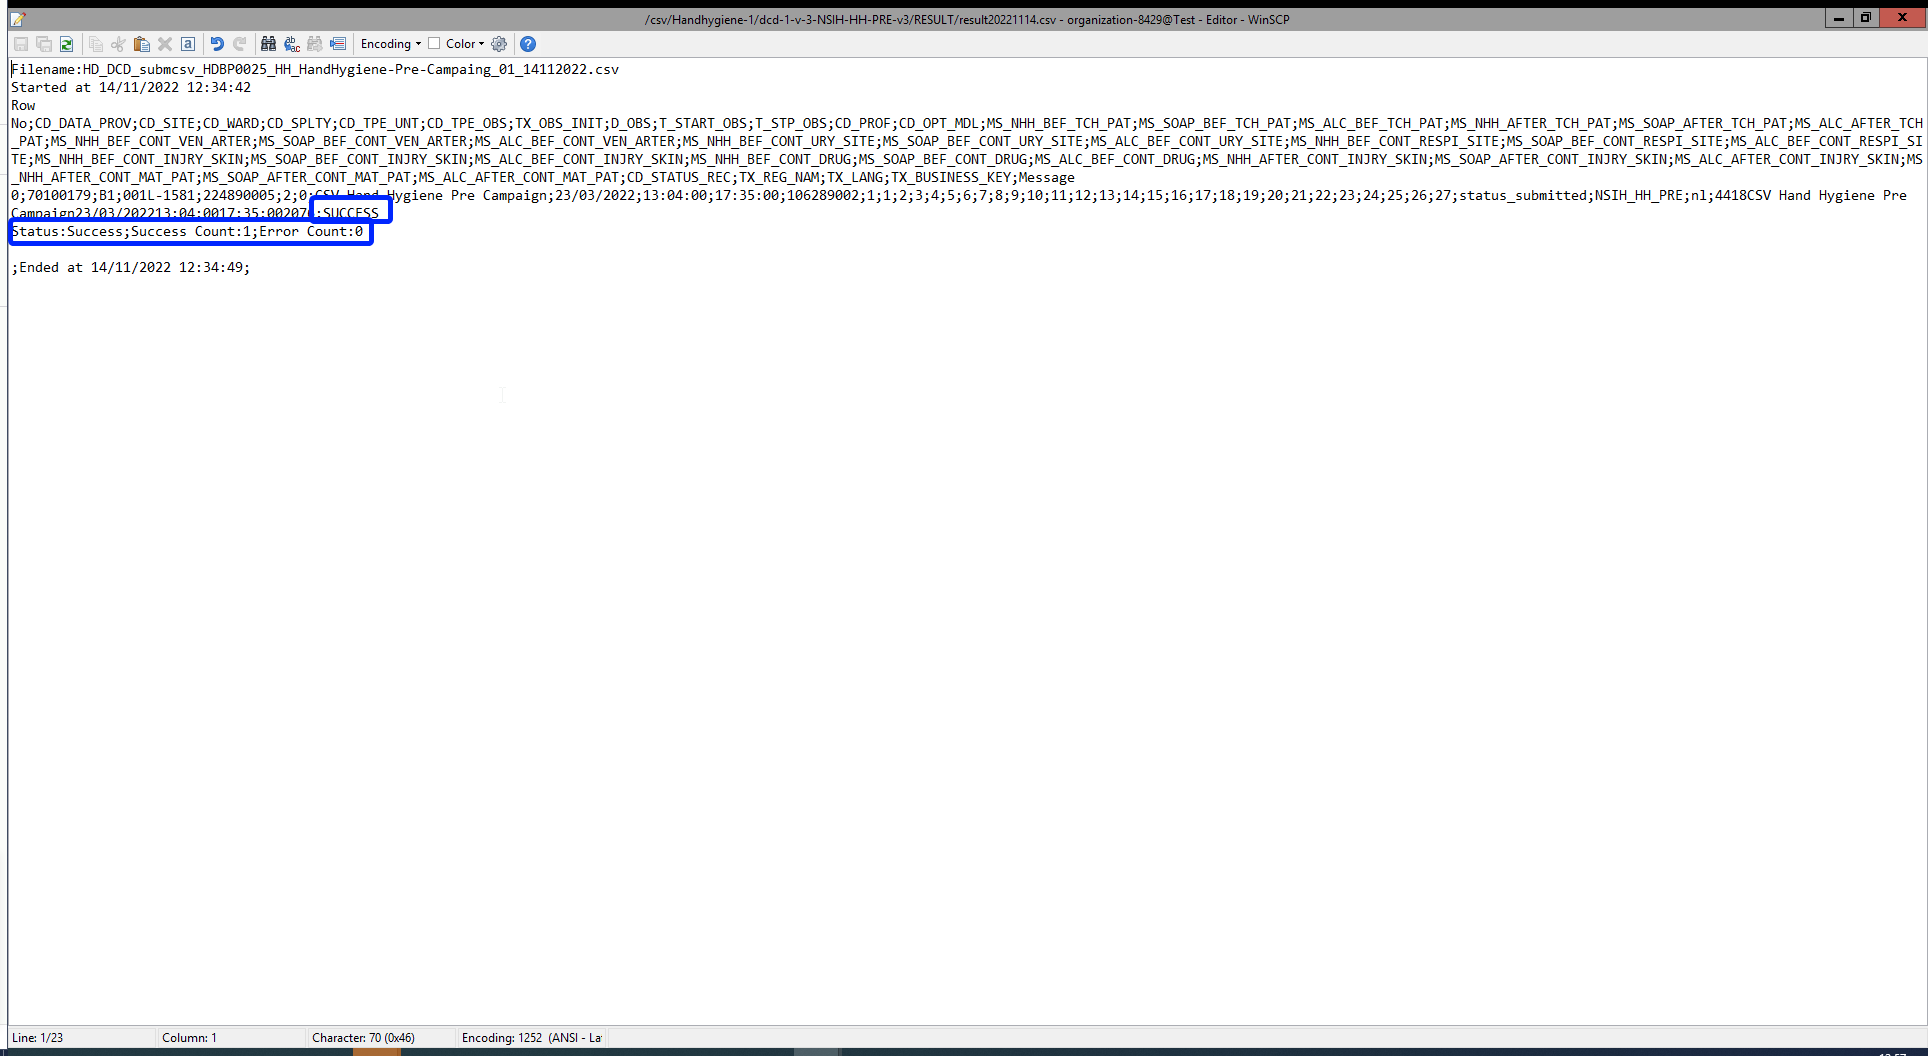
3.2 Validation of the csv upload via HD4DP 2.0:
Step 1: Open the web application HD4DP 2.0.
Step 2: Select the concerned organization in the dropdown list and click on Volgende (Next)
Step 3: Fill in the username and password, that has been provided by your IT Department or Healthdata team, and click on Log in to access the HD4DP 2.0 application.
Step 4: Navigate in the menu on the left-hand side panel to the desired DCD:
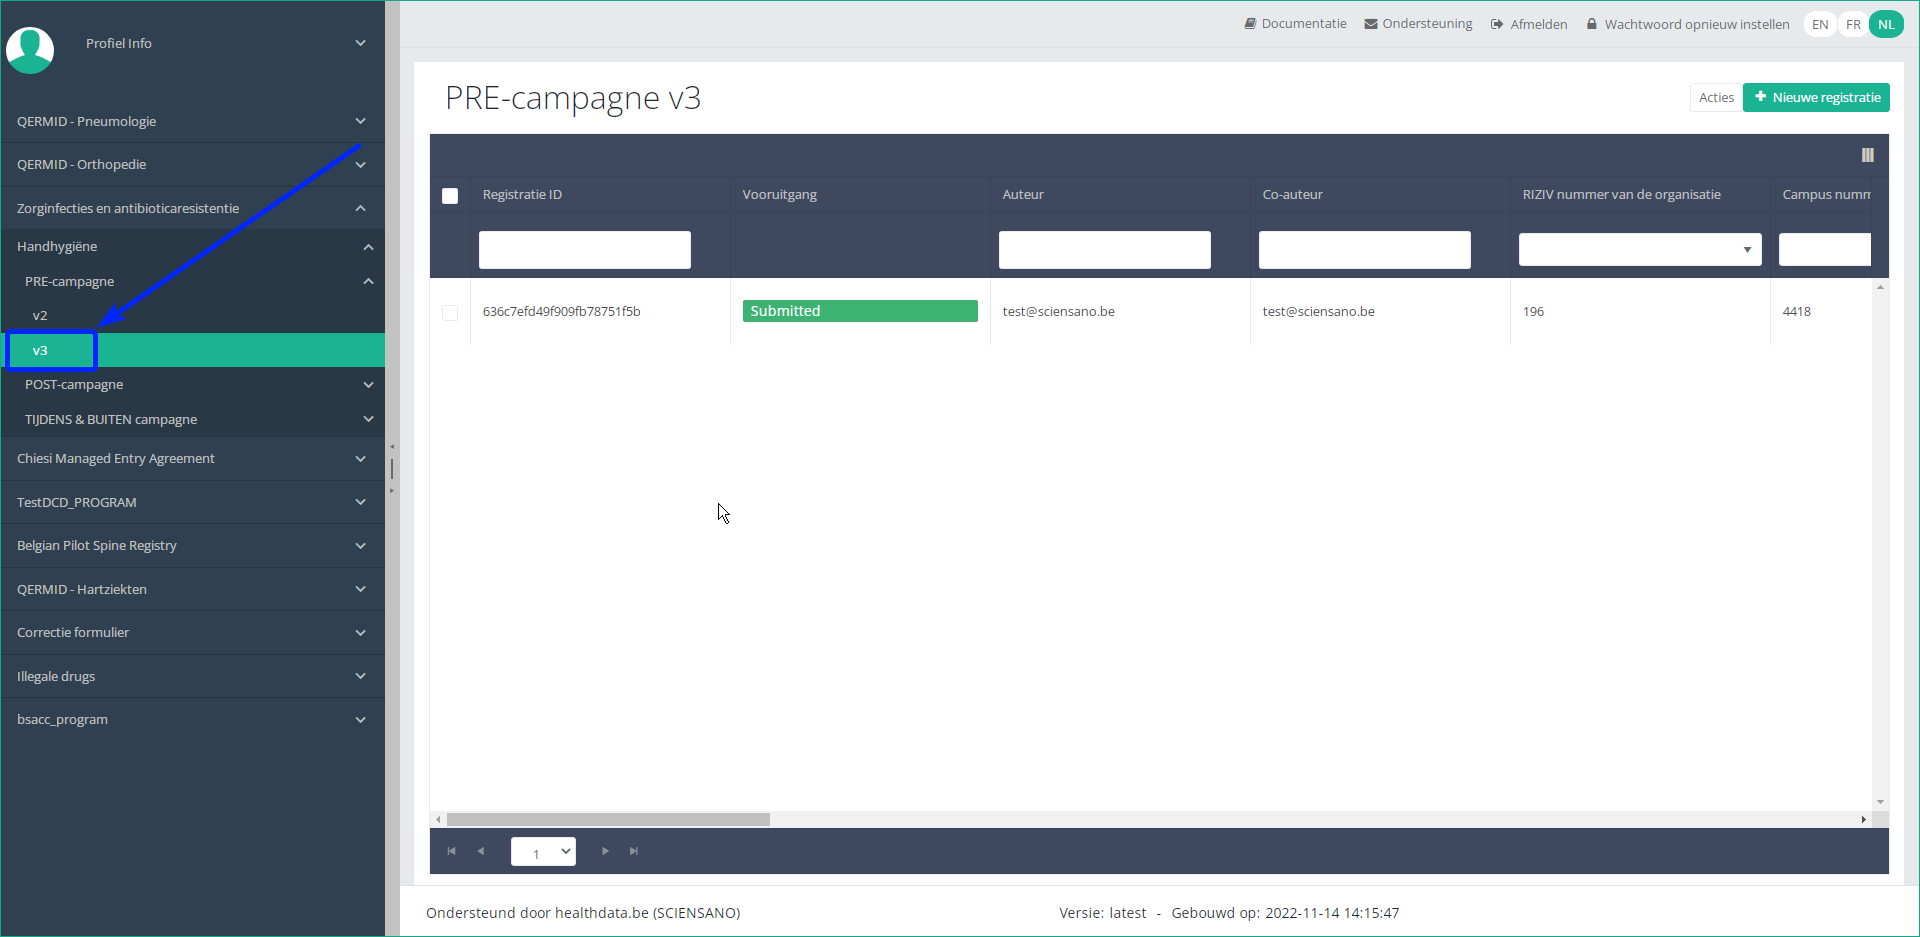
Step 5: Check that the uploaded DCD(s) is/are displayed in the DCD overview
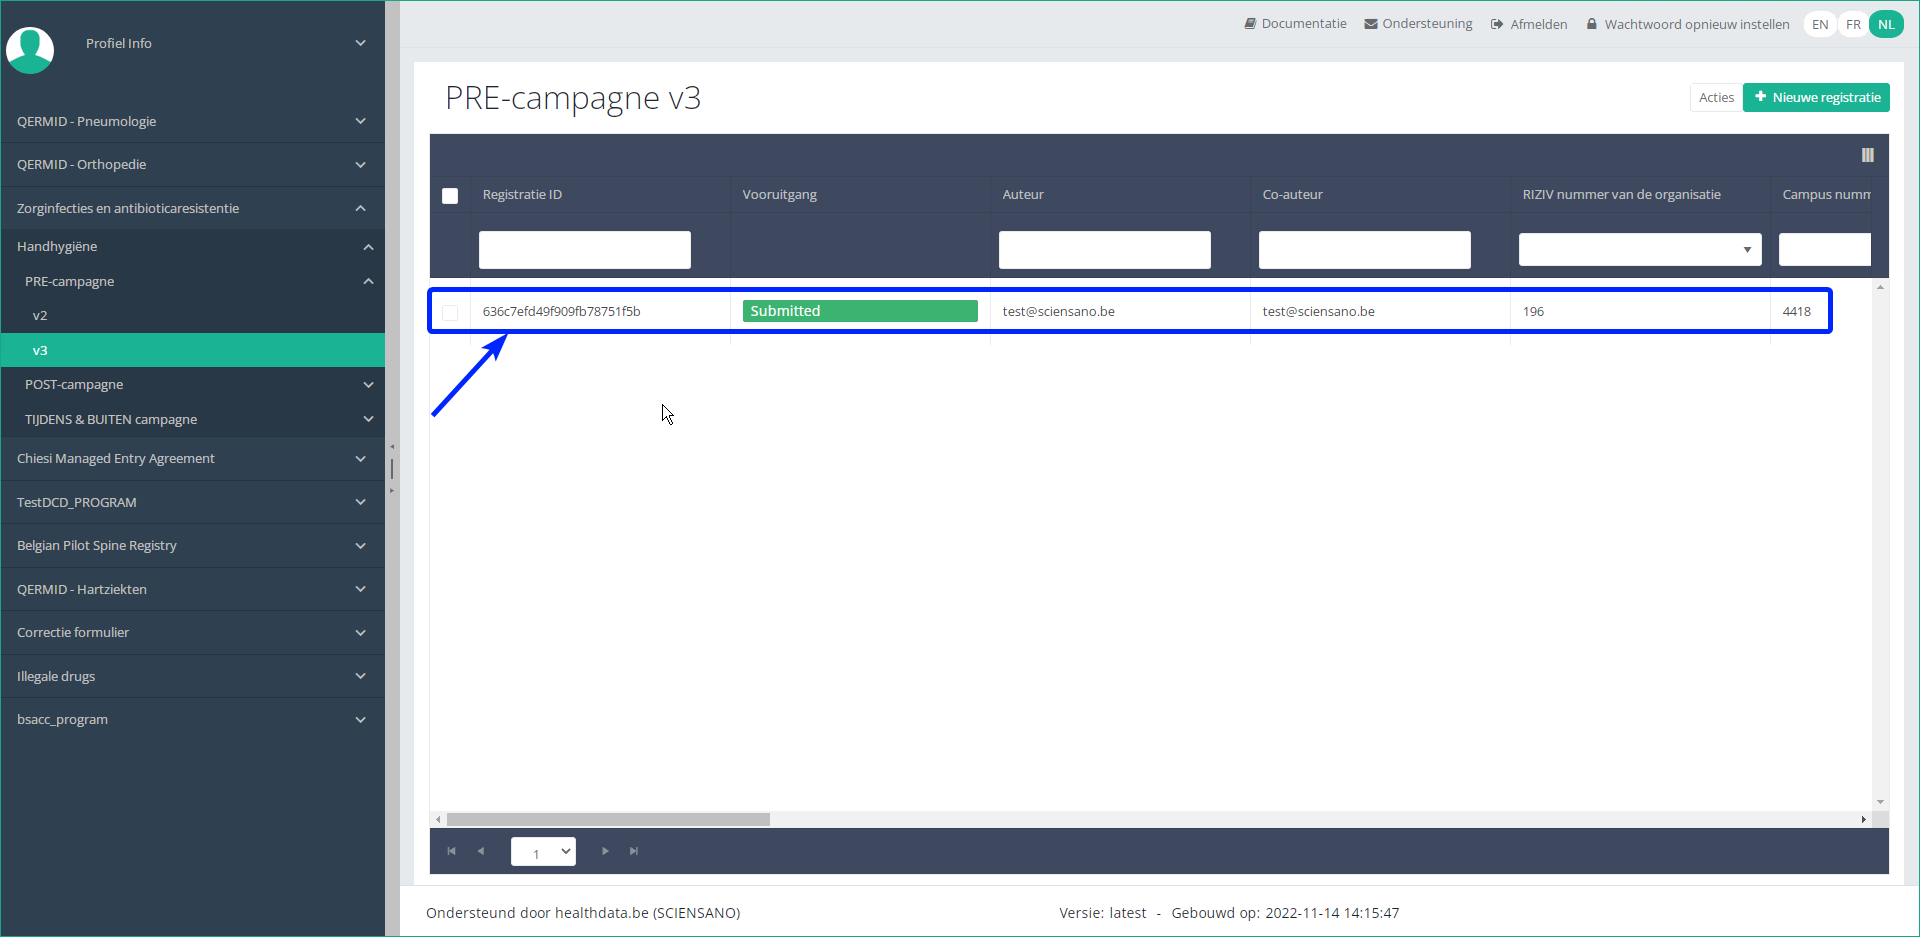
CSV Upload for "Hand Hygiene" registration "POST Campaign"
CSV Upload for "Hand Hygiene" registration "POST Campaign"Documentation for CSV Upload on Architecture 2.0
Description of the service
The CSV Upload functionality gives the possibility to import multiple parameters from a set of patients in one time into HD4DP 2.0. The csv file is based on an extract of the electronic patient files and/or other local databases.
Currently there is no user interface in HD4DP 2.0 for uploading csv files. If a data provider wants to upload a csv file, the file has to be dropped at a specific location. These files will be picked up and processed periodically. The files should be “final”, meaning that no application is writing to them. The pick-up location will be identical for all registries.
Pre-registry handling will be based on a naming-convention of the csv file.
HOW TO: Upload data using CSV Upload
Steps To Upload data
1. Prepare the csv file (example file in this section)
- Extract the csv file from the electronic patient files and/or other local databases.
- Author group, Author and Coauthor:
- When the Author Group, Author and Coauthor have been left out in the csv file, the default Author group, Author and Coauthor will be used automatically.
- When the desired Author Group, Author and Coauthor are specified in the csv file, the following headers TX_AUTHOR_GR, TX_AUTHOR and TX_COAUTHOR must be added to the csv file with their values respectively.
Example:
TX_AUTHOR_GR;TX_AUTHOR;TX_COAUTHOR Author Group;author@example.com;coauthor@example.comNote:
The Author group, Author and Coauthor must exist and are well configured at the back-end of the system. TX_AUTHOR_GR can be a string that identifies the Author group to which this Author belongs. Commonly, the first name and last name are used to identify the TX_AUTHOR_GROUP. Be sure to avoid leading and trailing spaces when entering the Author group value.
- Similarly, add the filename 'STATUS' in an additional column. Add the value 'draft' in case a manual submission of the record is requested.
If not, the record will be submitted without manual intervention. - Make sure the name of the CSV file has the correct format:
HD_DCD_submcsv_HDBPnumber_HDBPabbreviation_versionnumber_versionreleasedate
So for Hand hygiene - POST Campaign the format would be:
HD_DCD_submcsv_HDBP0025_HH_HandHygiene-Post-Campaing_01_18102022.csv
EXAMPLES:
- Please find below an example file for Hand hygiene - POST Campaign:
Disclaimer: The example files above are only provided as a guideline and do not contain real life data.
2. Uploading the csv file
Step 1: Open the sftp tool like WinSCP
Step 2: Get the credentials (Host name, Port number, User name and Password) from the IT department of the Data Provider, to log on to the sftp server located on the Data Provider side.
Step 3: Fill in the credentials into the Login screen and click on Login to be able to access the different upload folders:
Note: a warning might be given, just click on Update
Now the CSV Upload folder structure is displayed on the right-hand side panel:
Step 4: Select the project folder Handhygiene-1 and open it by double-clicking on it:
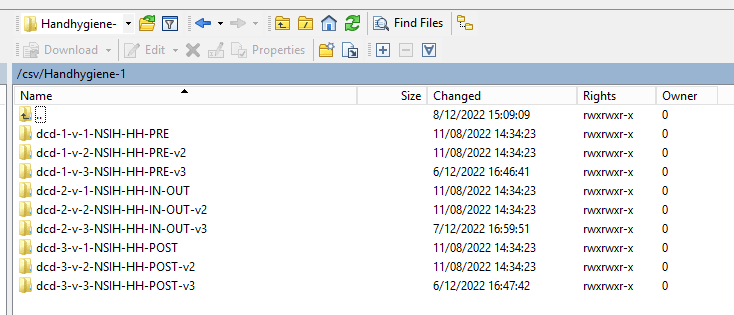
Step 5: Double-click on the DCD folder to open it:
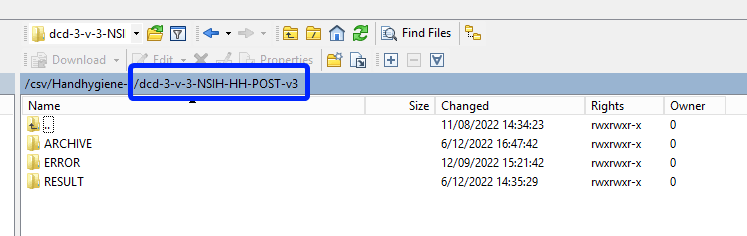
Step 6: Now go to the folder on the left-hand side panel where the CSV file to be uploaded is located:
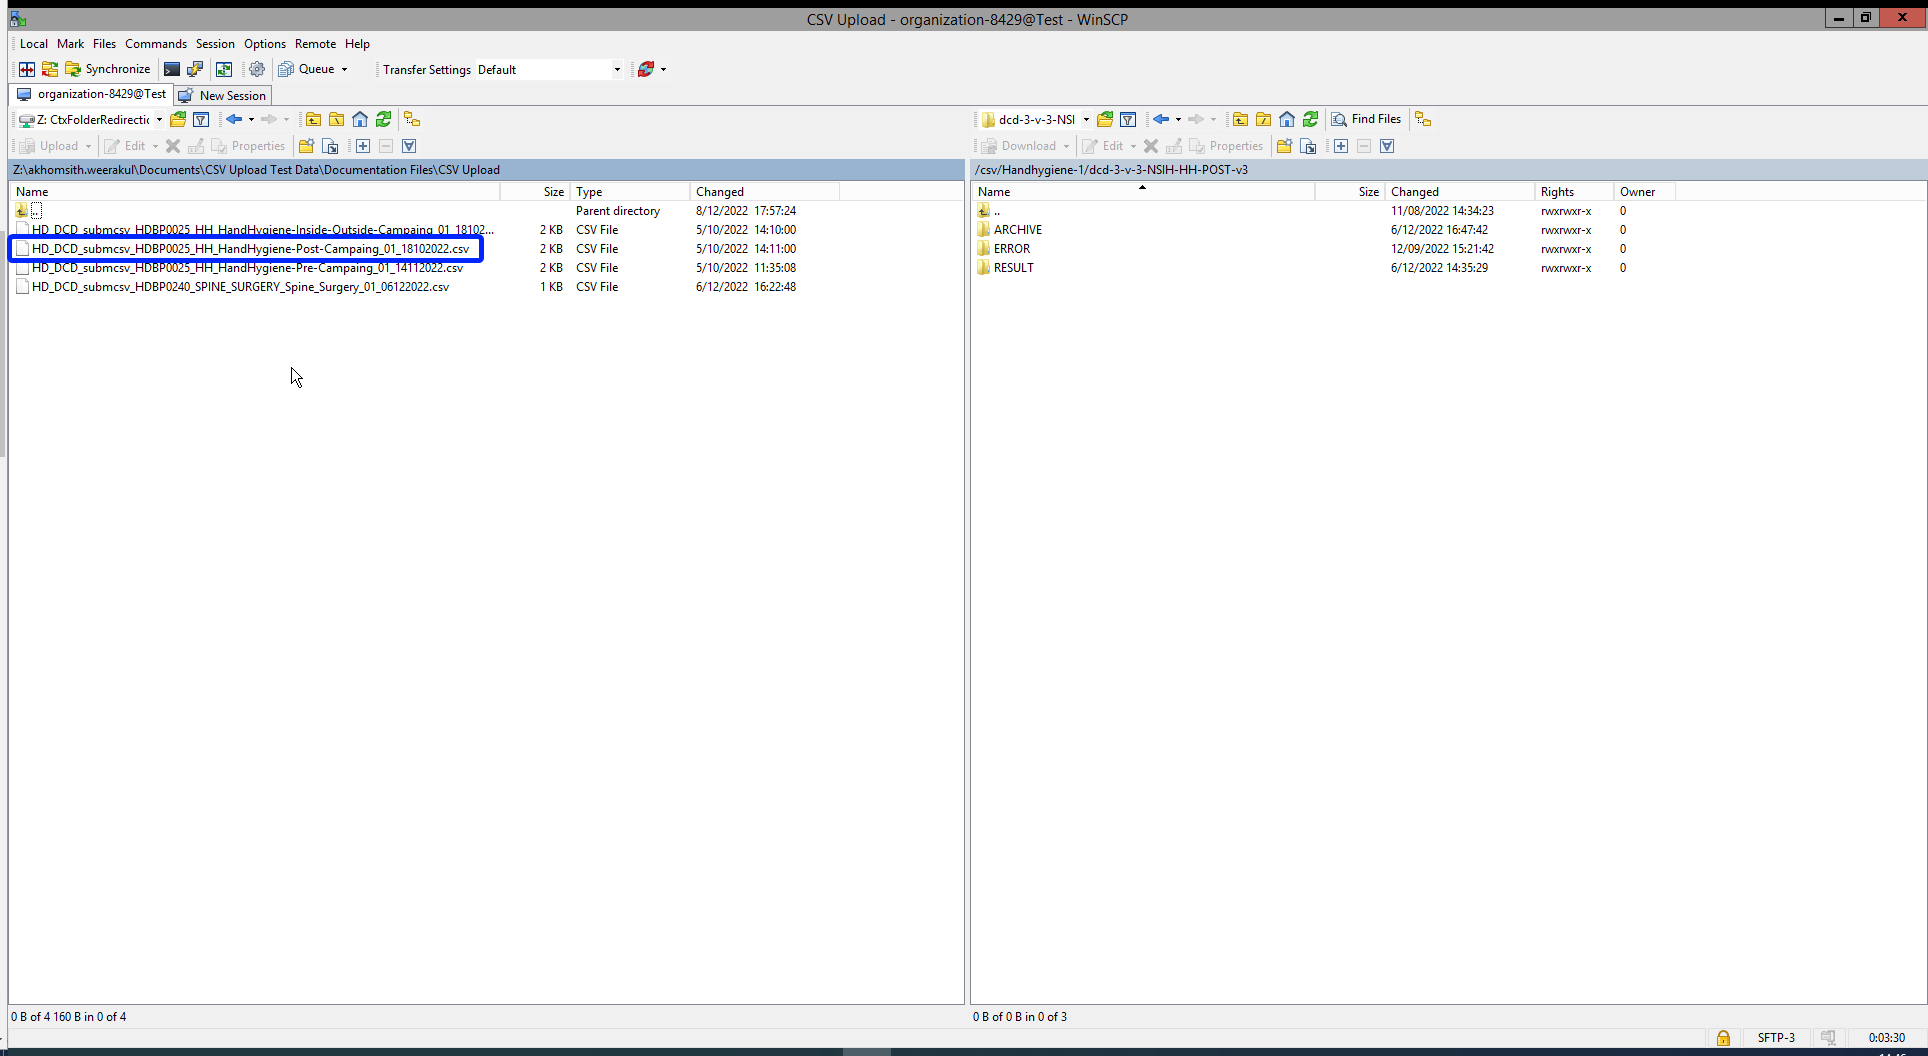
Step 7: Drag the CSV file to be uploaded from the left-hand side panel into the folder on the right-hand side panel:
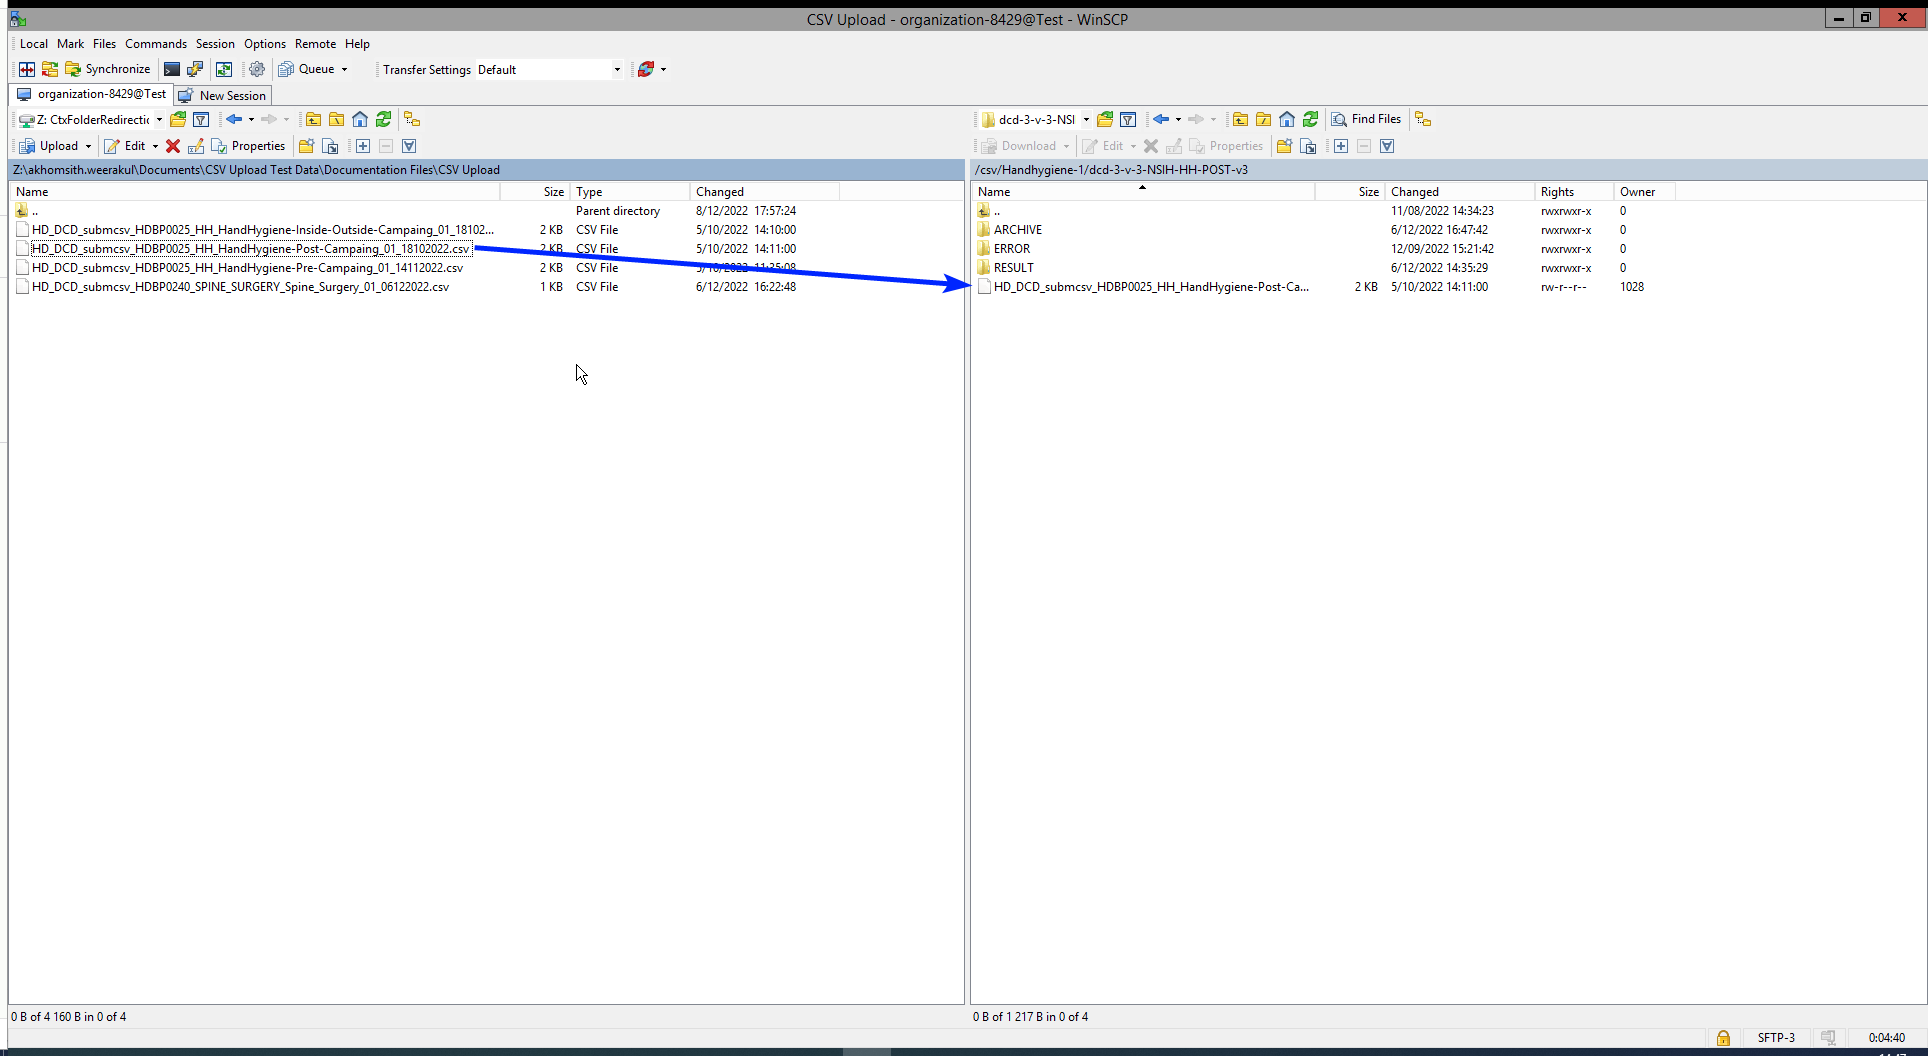
Step 8: Wait until the polling system of the CSV Uploader has picked up the CSV file and has processed it.
Once the CSV file has been processed it will disappear from the folder, when we refresh the page manually!

3. Validate csv upload
Once the csv file has been processed 3 folders will be created (if they haven't been created already) in the DCD folder:
- ARCHIVE (after a csv file has been processed, the original csv file will be saved in this folder)
- RESULT (when the csv file is placed in this folder, it means that the csv file has been processed, a file will be created or (or appended, if the file already existed) with the result of the upload of the csv file).
All the errors that are described in this file are business related, which means that they are technically correct, but in violation with the business rules or contain wrong values for that field. - ERROR (when the csv file is placed in this folder, it means that a technical error has occurred like the csv file contained erroneous formatting. The csv file won't get processed and an error file will be created with the errors and reason why the csv file couldn't be processed)
3.1 Validation of the csv upload via sftp tool:
Step 1: Double-click on the ERROR folder to open it, click on the refresh button and verify that there is no error file present.
Step 2: Return to the DCD folder. Now double-click on the RESULT folder to open it, click on the refresh button and verify that the result file is present.
Step 3: Double-click on the result file to open it.

Step 4: If there are multiple records in the result file, scroll to the entry of the current csv upload by looking at the upload date (Started at dd/mm/yyyy hh:mm).
Verify the result file that the upload was successful by searching for the word SUCCESS and having a look at the Status. This Status must contain: Success;Success Count:1;Error Count:0
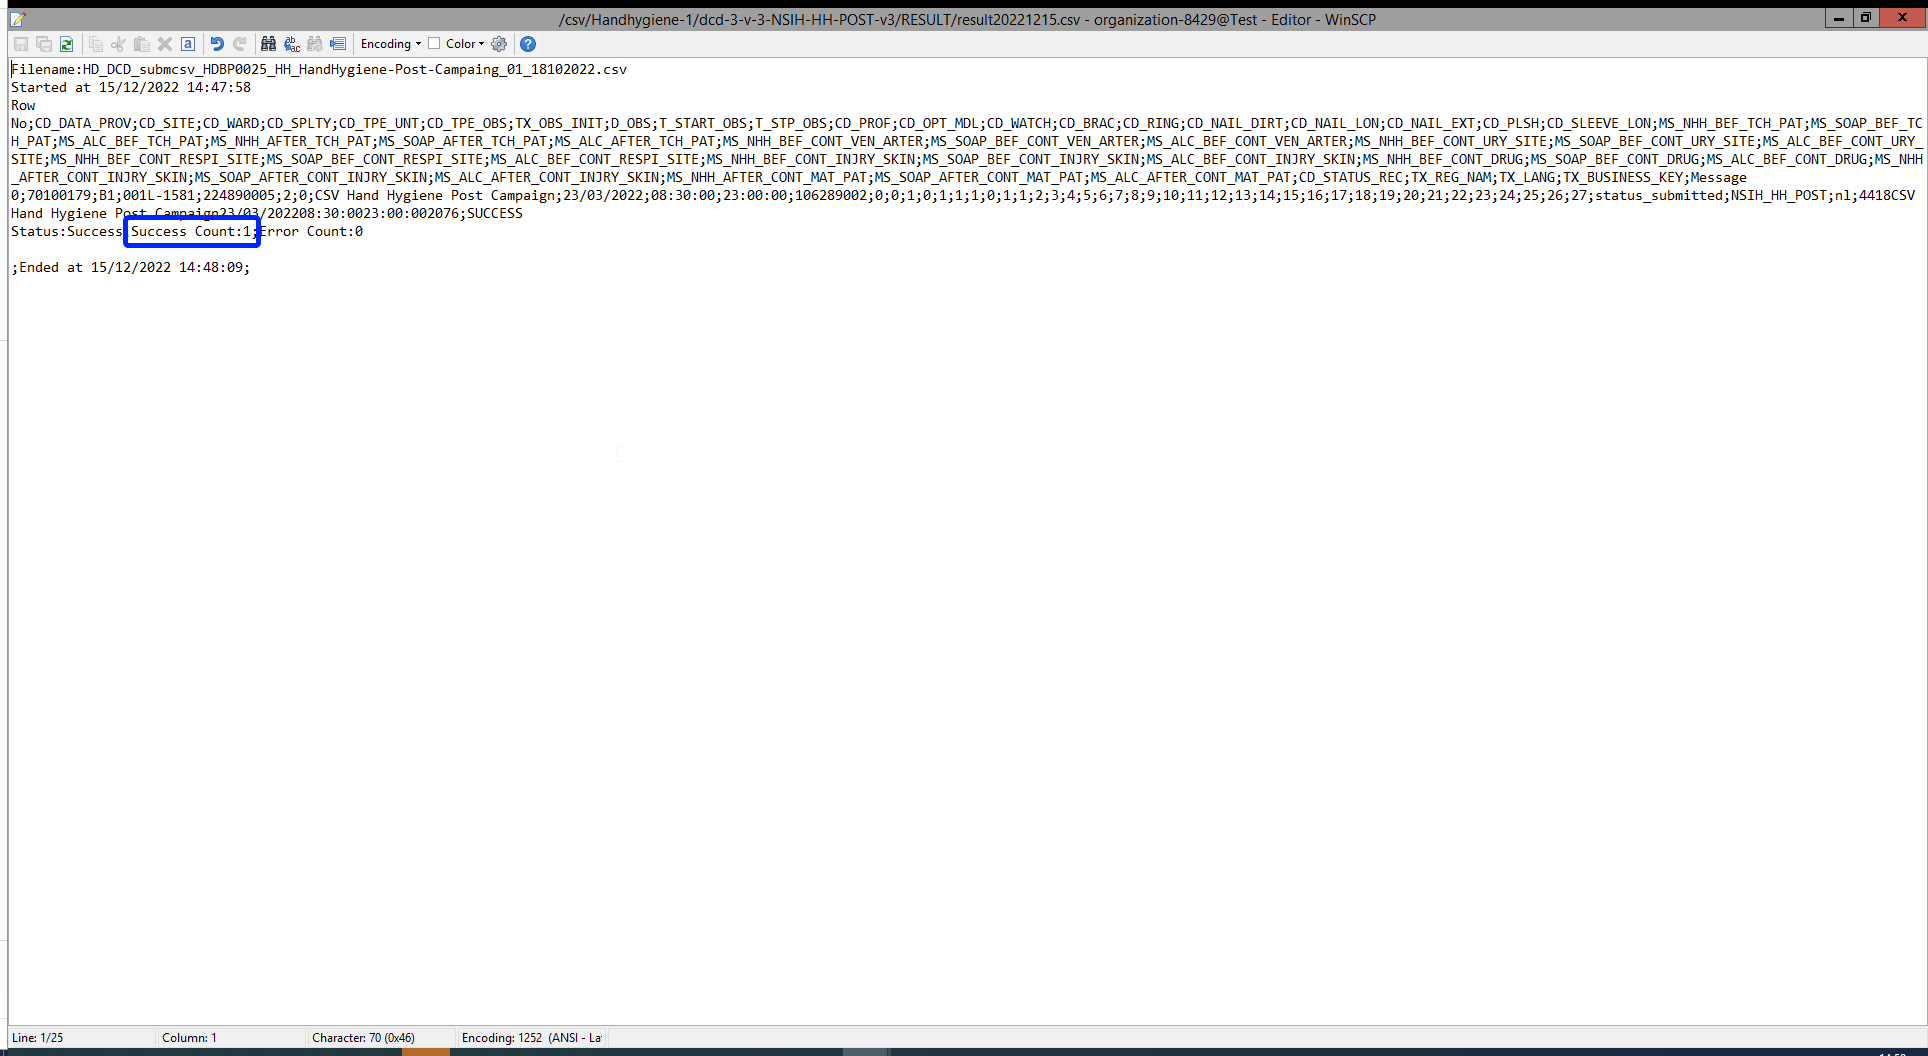
3.2 Validation of the csv upload via HD4DP 2.0:
Step 1: Open the web application HD4DP 2.0.
Step 2: Select the concerned organization in the dropdown list and click on Volgende (Next)
Step 3: Fill in the username and password, that has been provided by your IT Department or Healthdata team, and click on Log in to access the HD4DP 2.0 application.
Step 4: Navigate in the menu on the left-hand side panel to the desired DCD:

Step 5: Check that the uploaded DCD(s) is/are displayed in the DCD overview
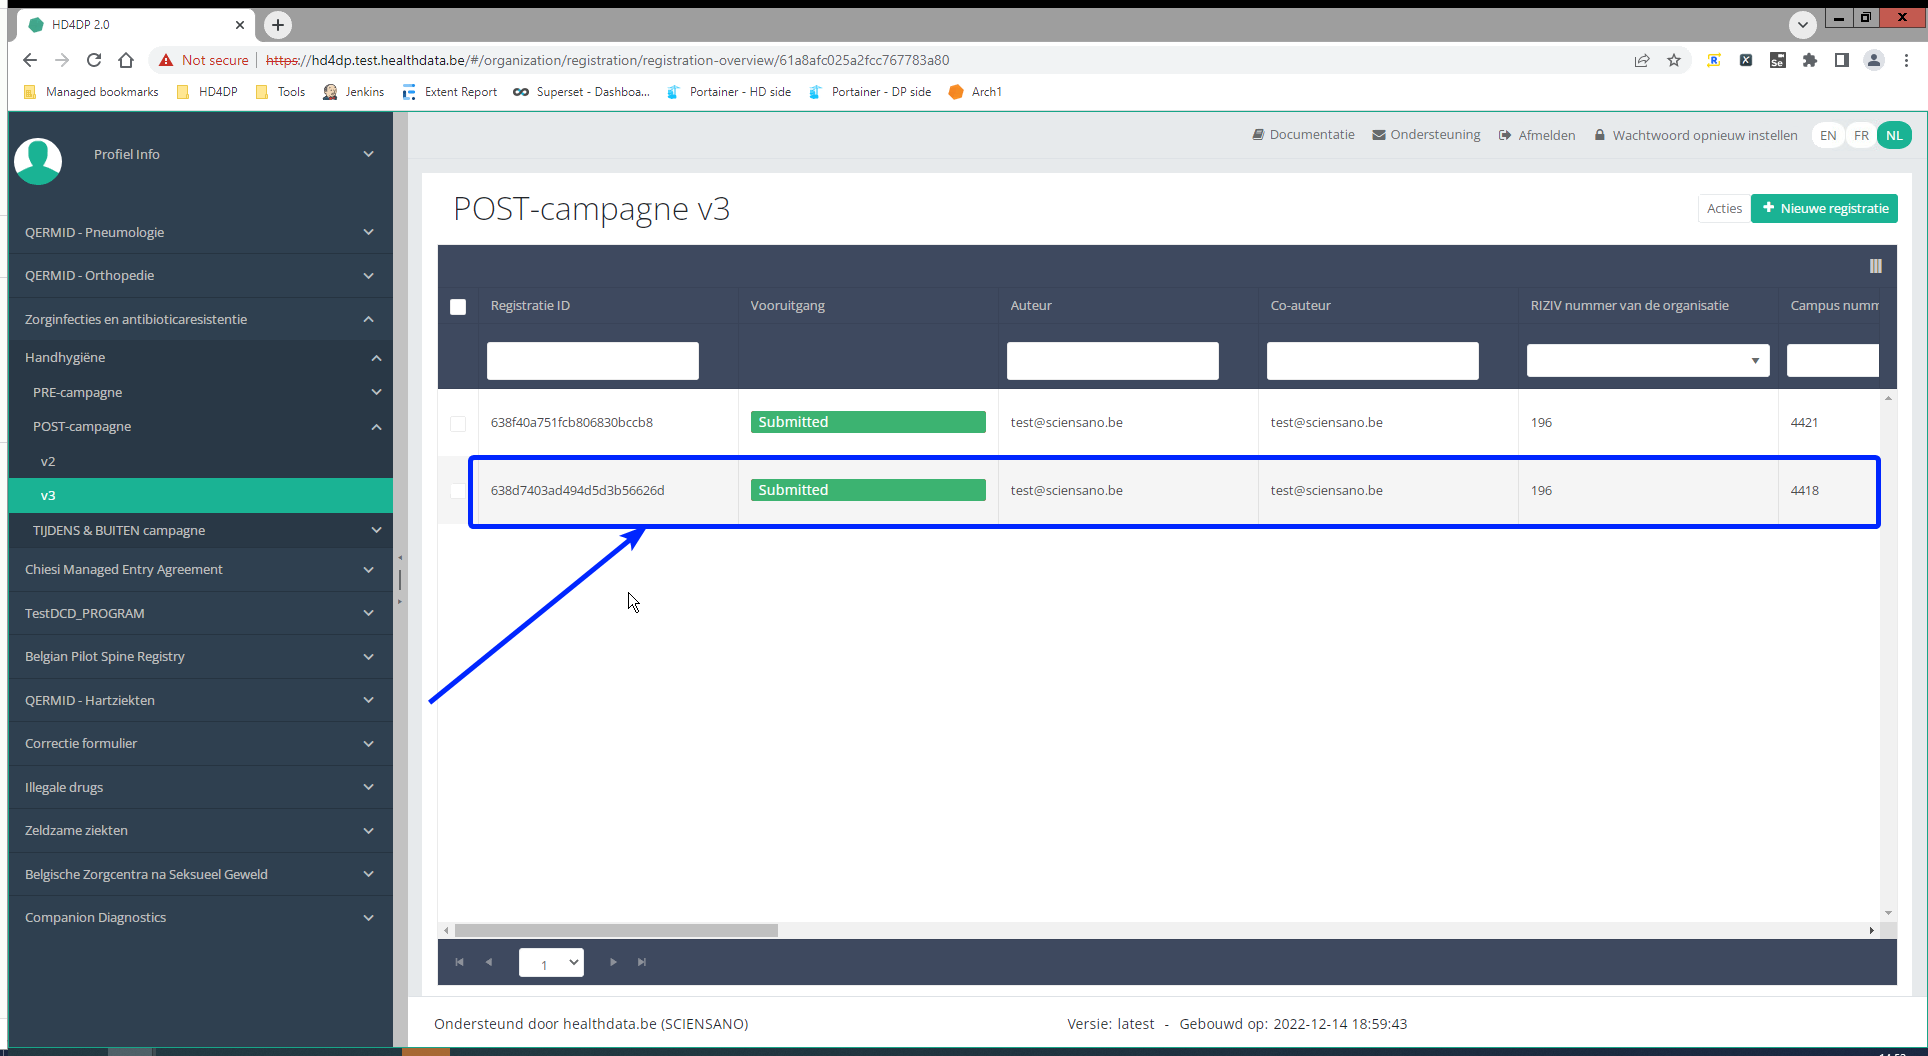
CSV Upload for "Hand Hygiene" registration "IN and OUT Campaign"
CSV Upload for "Hand Hygiene" registration "IN and OUT Campaign"Documentation for CSV Upload on Architecture 2.0
Description of the service
The CSV Upload functionality gives the possibility to import multiple parameters from a set of patients in one time into HD4DP 2.0. The csv file is based on an extract of the electronic patient files and/or other local databases.
Currently there is no user interface in HD4DP 2.0 for uploading csv files. If a data provider wants to upload a csv file, the file has to be dropped at a specific location. These files will be picked up and processed periodically. The files should be “final”, meaning that no application is writing to them. The pick-up location will be identical for all registries.
Pre-registry handling will be based on a naming-convention of the csv file.
HOW TO: Upload data using CSV Upload
Steps To Upload data
1. Prepare the csv file (example file in this section)
- Extract the csv file from the electronic patient files and/or other local databases.
- Author group, Author and Coauthor:
- When the Author Group, Author and Coauthor have been left out in the csv file, the default Author group, Author and Coauthor will be used automatically.
- When the desired Author Group, Author and Coauthor are specified in the csv file, the following headers TX_AUTHOR_GR, TX_AUTHOR and TX_COAUTHOR must be added to the csv file with their values respectively.
Example:
TX_AUTHOR_GR;TX_AUTHOR;TX_COAUTHOR Author Group;author@example.com;coauthor@example.comNote:
The Author group, Author and Coauthor must exist and are well configured at the back-end of the system. TX_AUTHOR_GR can be a string that identifies the Author group to which this Author belongs. Commonly, the first name and last name are used to identify the TX_AUTHOR_GROUP. Be sure to avoid leading and trailing spaces when entering the Author group value.
- Similarly, add the filename 'STATUS' in an additional column. Add the value 'draft' in case a manual submission of the record is requested.
If not, the record will be submitted without manual intervention. - Make sure the name of the CSV file has the correct format:
HD_DCD_submcsv_HDBPnumber_HDBPabbreviation_versionnumber_versionreleasedate
So for Hand hygiene IN and OUT Campaign the format would be:
HD_DCD_submcsv_HDBP0025_HH_HandHygiene-Inside-Outside-Campaing_01_18102022.csv
EXAMPLES:
- Please find below an example file for Hand hygiene IN and OUT Campaign:
Disclaimer: The example files above are only provided as a guideline and do not contain real life data.
2. Uploading the csv file
Step 1: Open the sftp tool like WinSCP
Step 2: Get the credentials (Host name, Port number, User name and Password) from the IT department of the Data Provider, to log on to the sftp server located on the Data Provider side.
Step 3: Fill in the credentials into the Login screen and click on Login to be able to access the different upload folders:
Note: a warning might be given, just click on Update
Now the CSV Upload folder structure is displayed on the right-hand side panel:
Step 4: Select the project folder Handhygiene-1 and open it by double-clicking on it:

Step 5: Double-click on the DCD folder to open it:
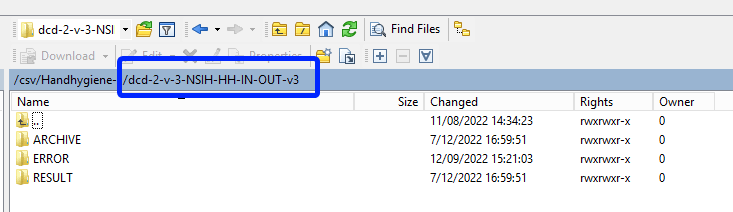
Step 6: Now go to the folder on the left-hand side panel where the CSV file to be uploaded is located:
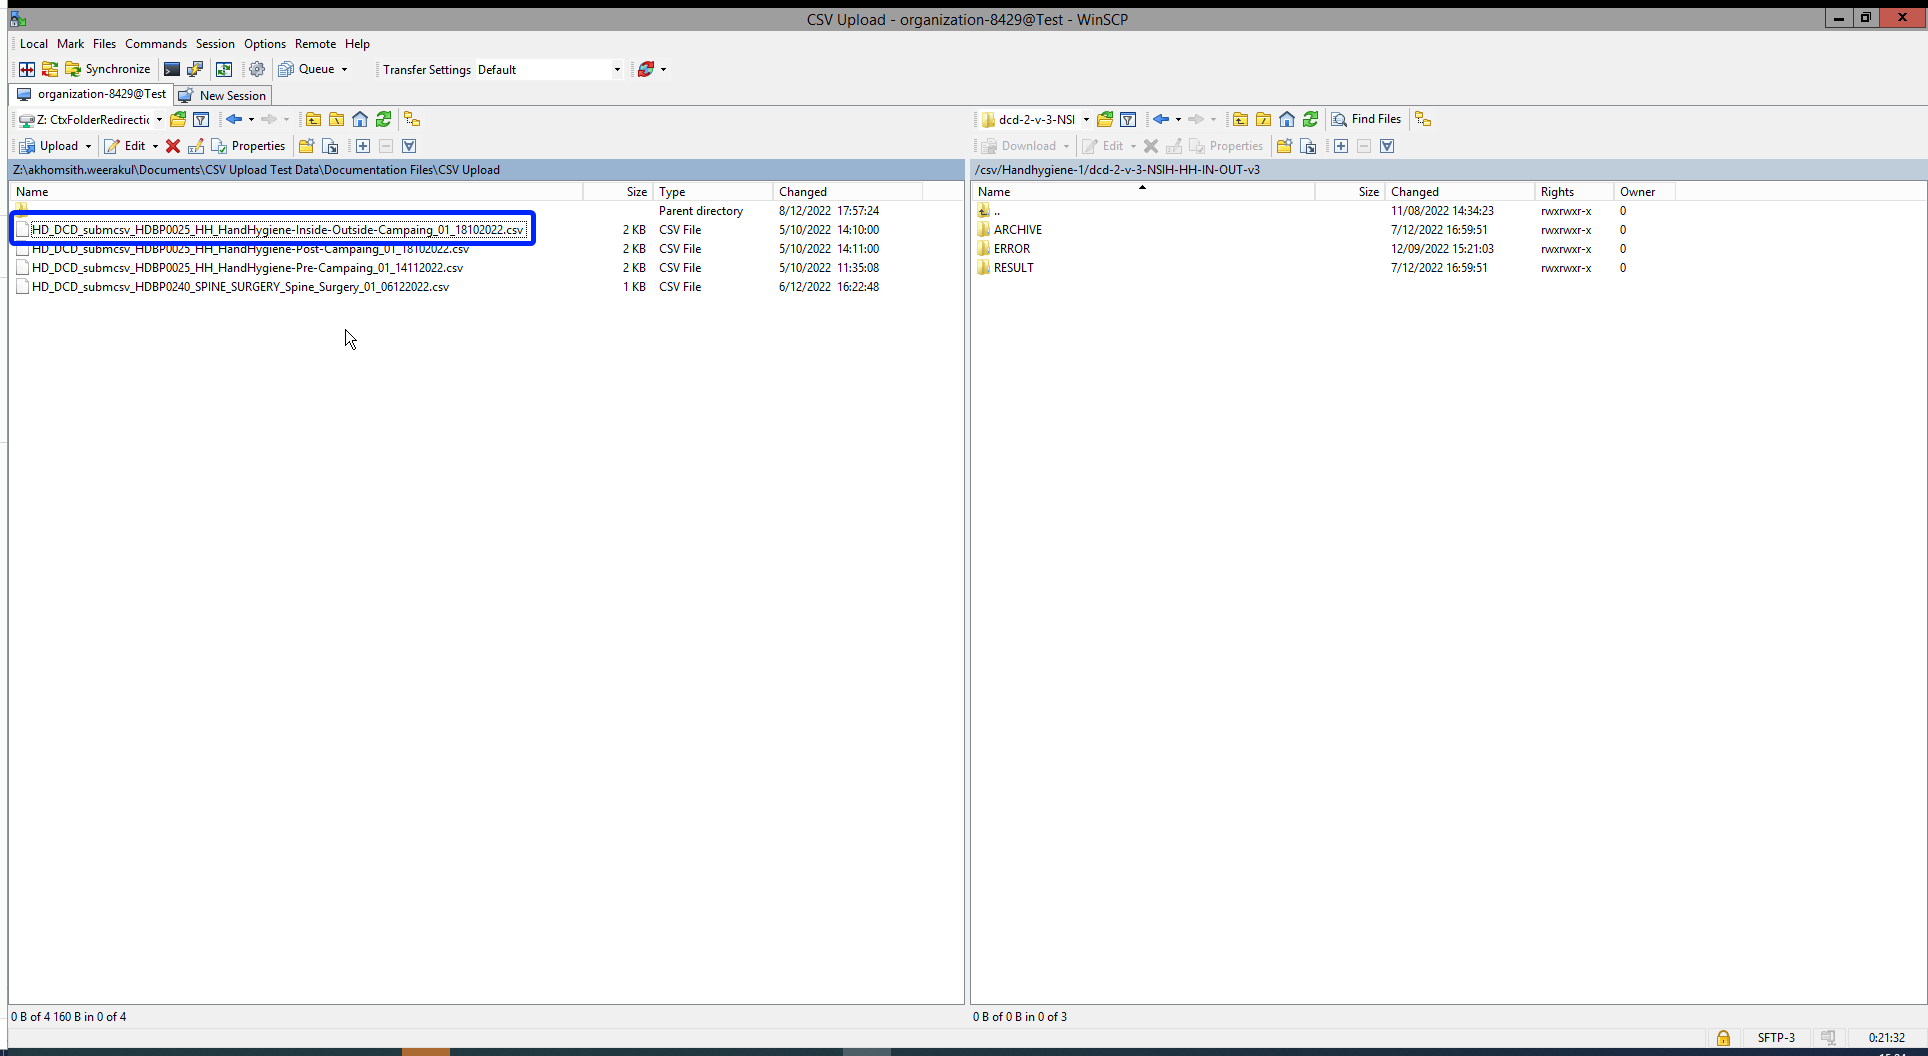
Step 7: Drag the CSV file to be uploaded from the left-hand side panel into the folder on the right-hand side panel:
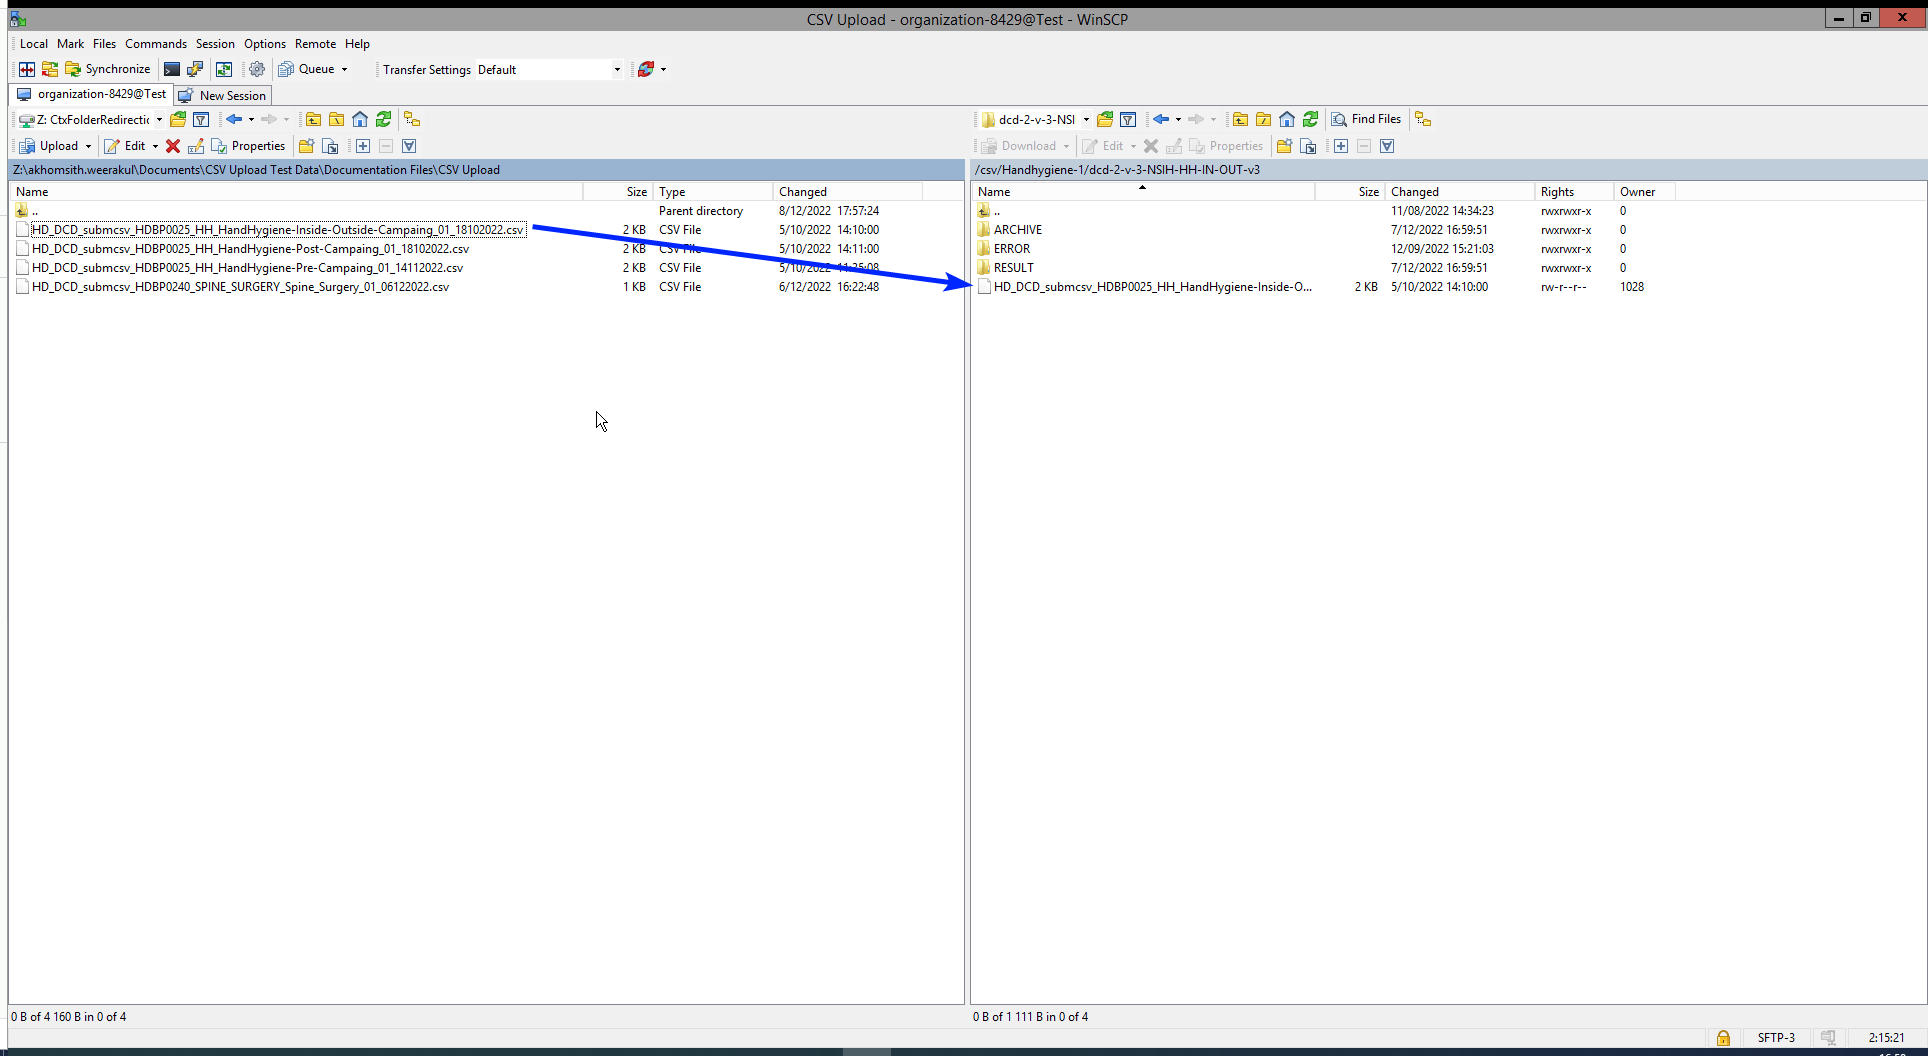
Step 8: Wait until the polling system of the CSV Uploader has picked up the CSV file and has processed it.
Once the CSV file has been processed it will disappear from the folder, when we refresh the page manually!
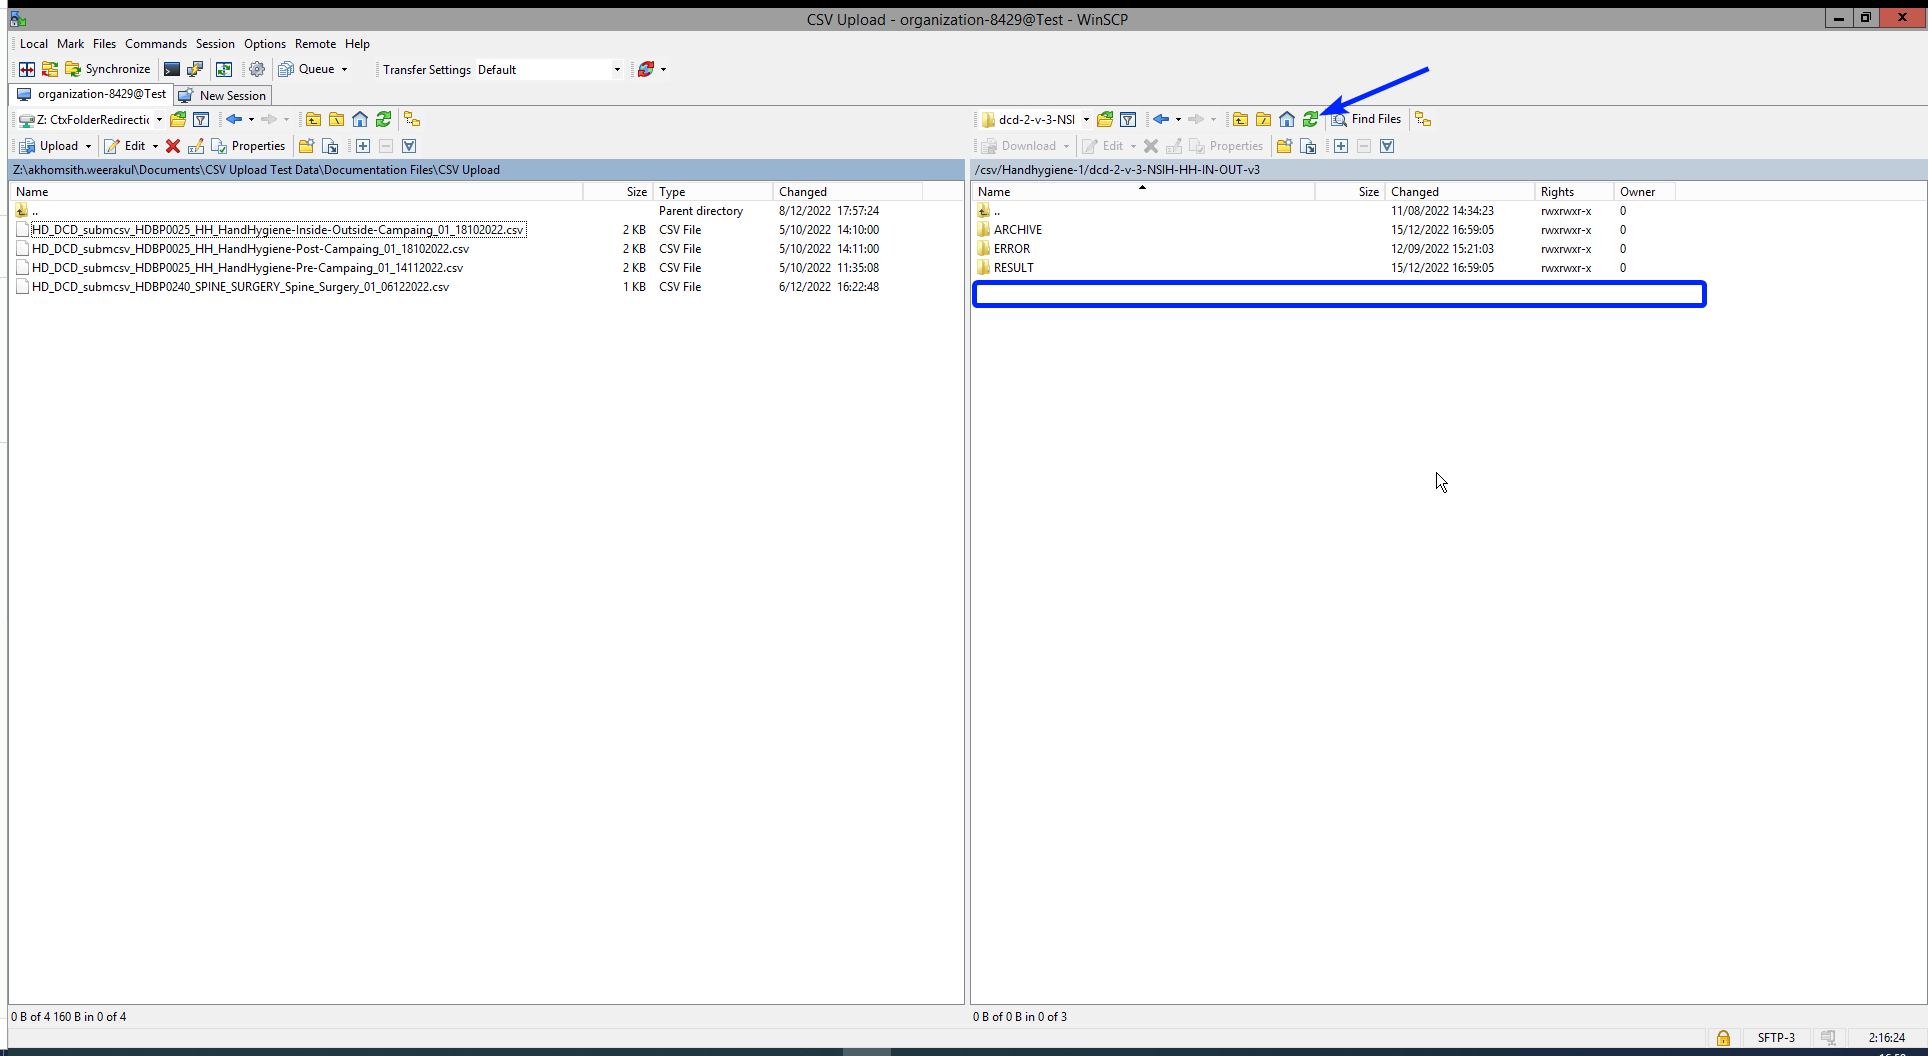
3. Validate csv upload
Once the csv file has been processed 3 folders will be created (if they haven't been created already) in the DCD folder:
- ARCHIVE (after a csv file has been processed, the original csv file will be saved in this folder)
- RESULT (when the csv file is placed in this folder, it means that the csv file has been processed, a file will be created or (or appended, if the file already existed) with the result of the upload of the csv file).
All the errors that are described in this file are business related, which means that they are technically correct, but in violation with the business rules or contain wrong values for that field. - ERROR (when the csv file is placed in this folder, it means that a technical error has occurred like the csv file contained erroneous formatting. The csv file won't get processed and an error file will be created with the errors and reason why the csv file couldn't be processed)
3.1 Validation of the csv upload via sftp tool:
Step 1: Double-click on the ERROR folder to open it, click on the refresh button and verify that there is no error file present.
Step 2: Return to the DCD folder. Now double-click on the RESULT folder to open it, click on the refresh button and verify that the result file is present.
Step 3: Double-click on the result file to open it.
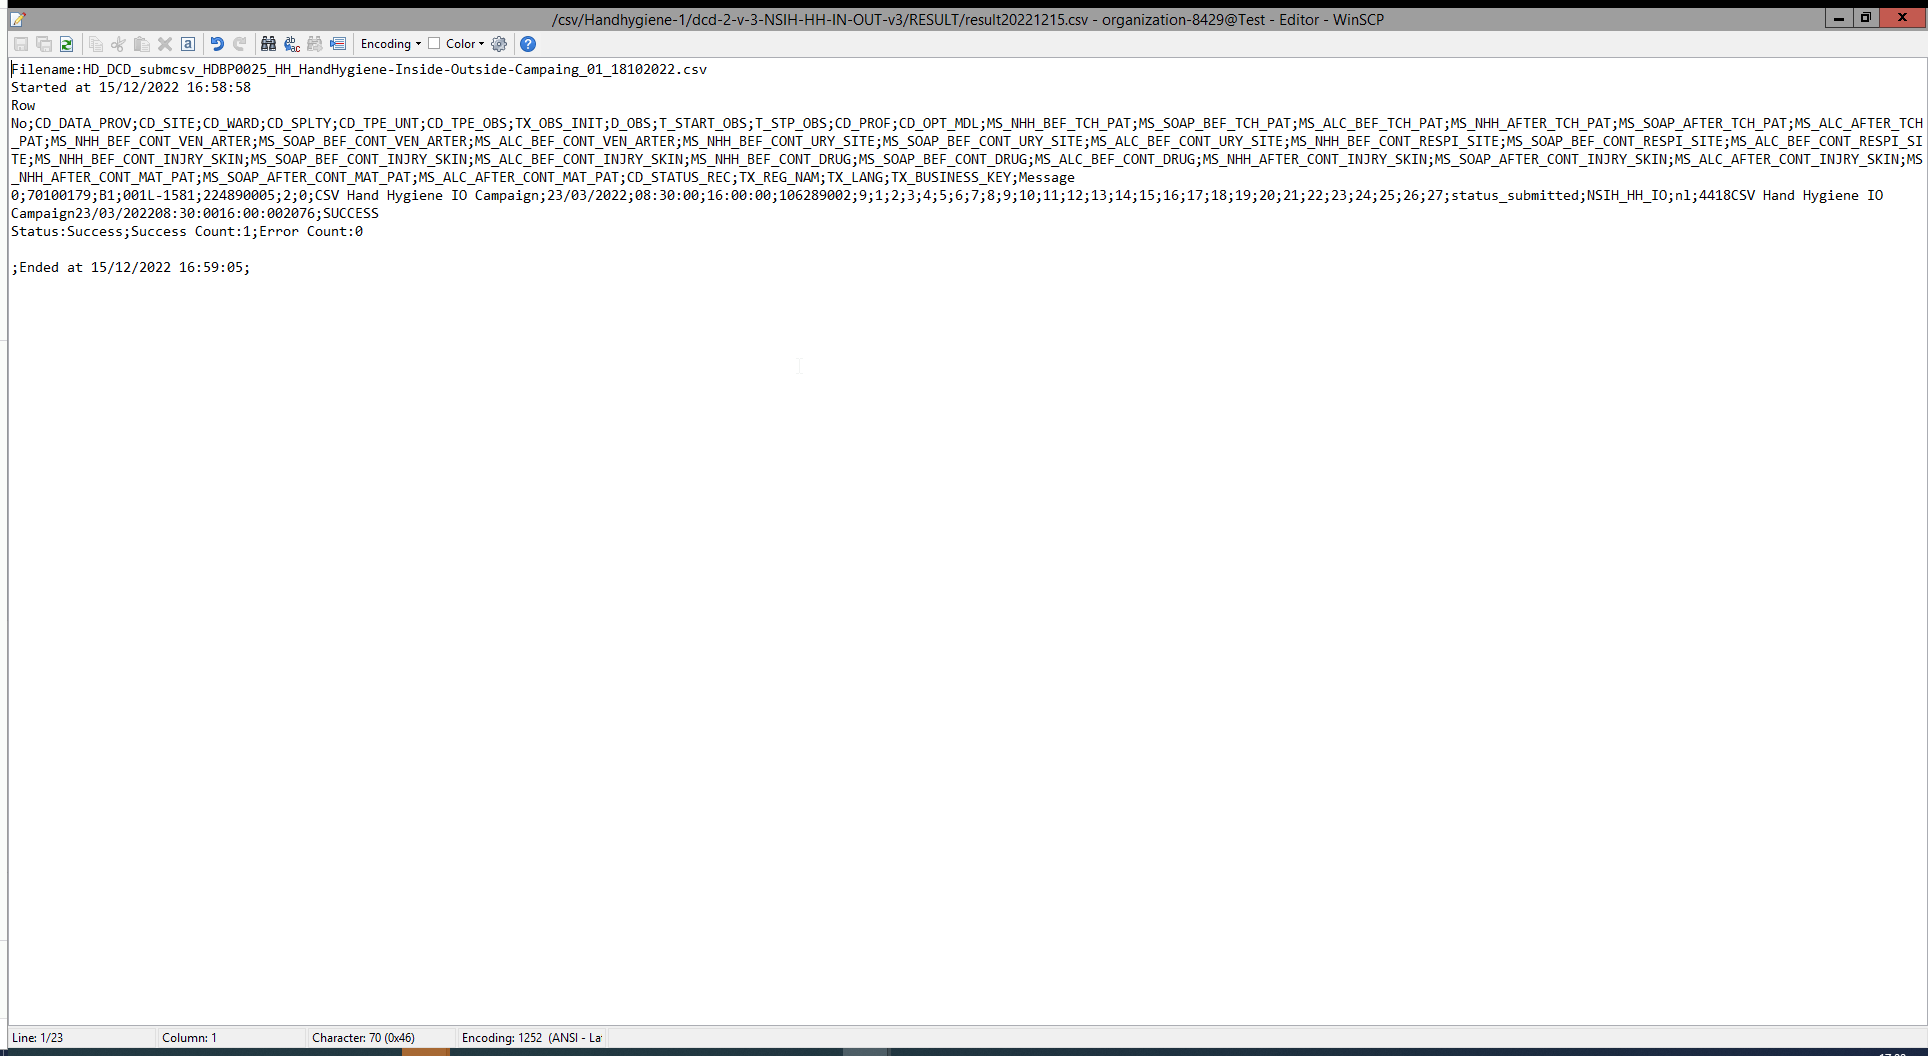
Step 4: If there are multiple records in the result file, scroll to the entry of the current csv upload by looking at the upload date (Started at dd/mm/yyyy hh:mm).
Verify the result file that the upload was successful by searching for the word SUCCESS and having a look at the Status. This Status must contain: Success;Success Count:1;Error Count:0
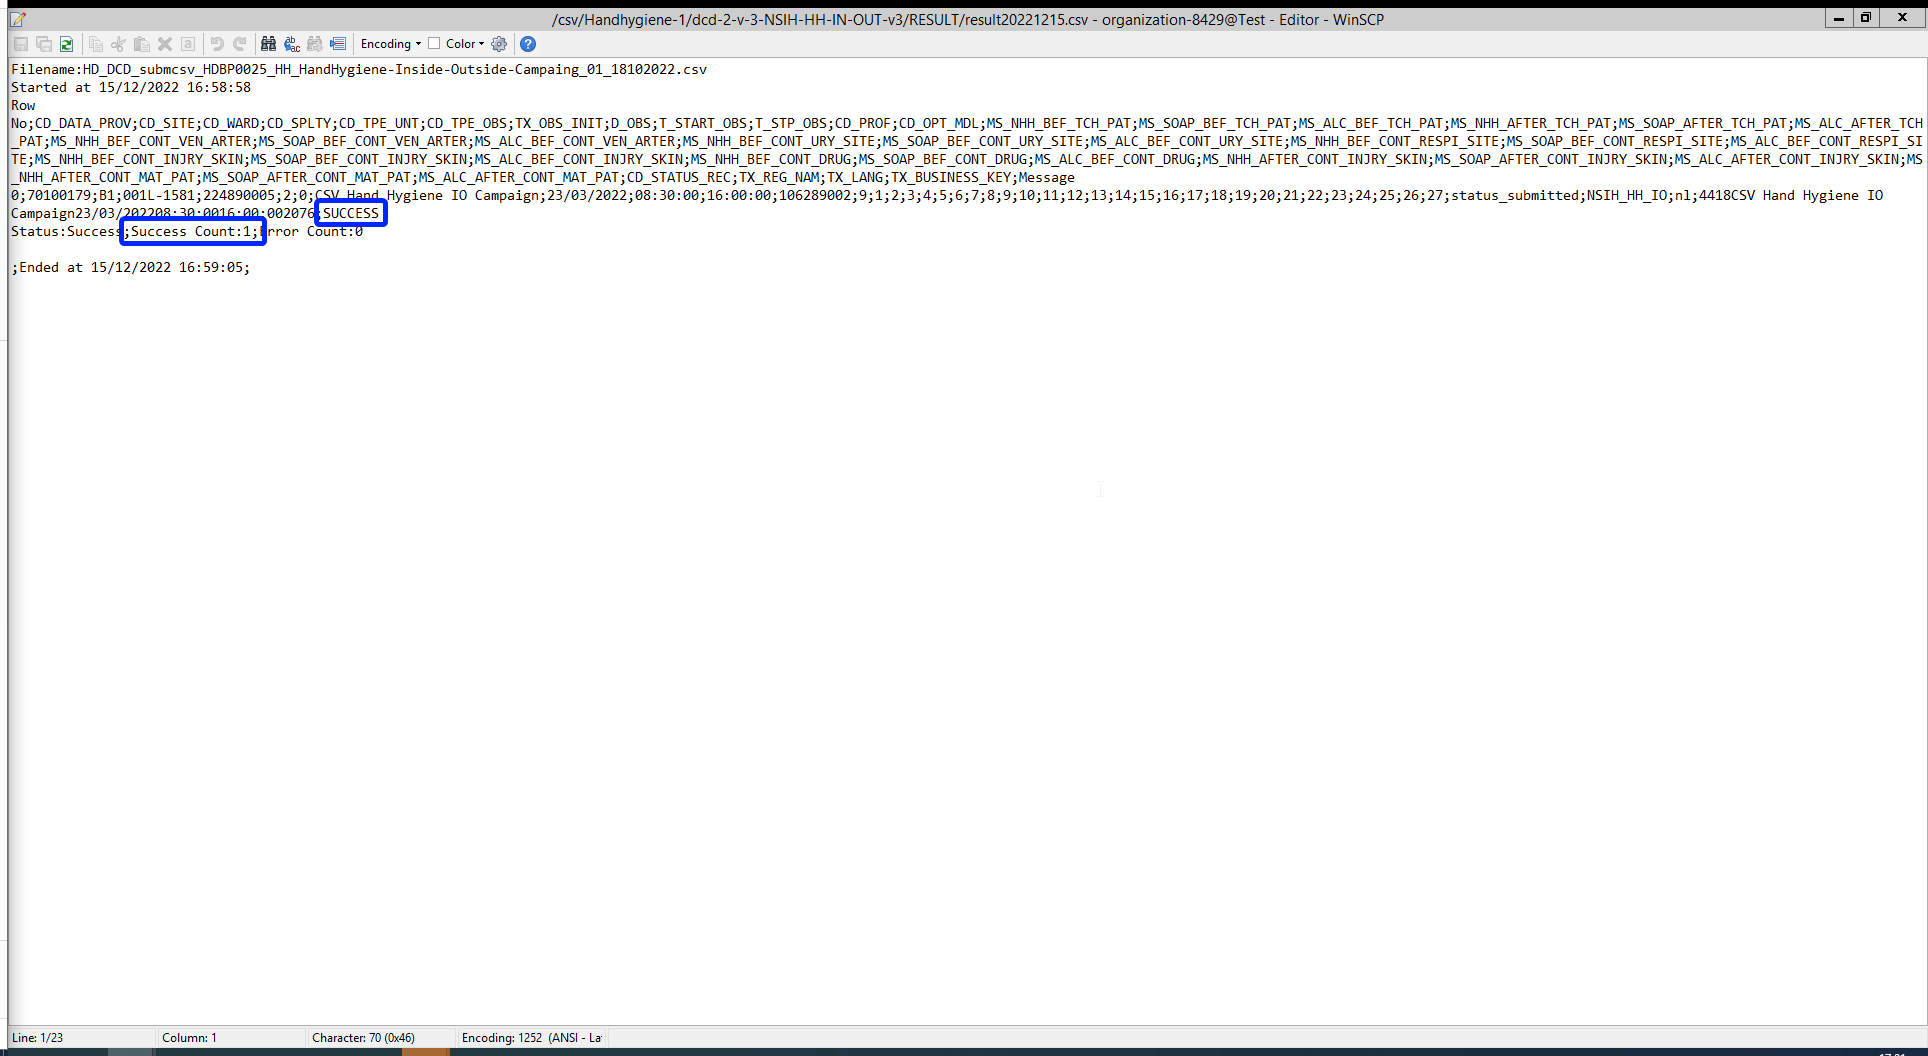
3.2 Validation of the csv upload via HD4DP 2.0:
Step 1: Open the web application HD4DP 2.0.
Step 2: Select the concerned organization in the dropdown list and click on Volgende (Next)
Step 3: Fill in the username and password, that has been provided by your IT Department or Healthdata team, and click on Log in to access the HD4DP 2.0 application.
Step 4: Navigate in the menu on the left-hand side panel to the desired DCD:
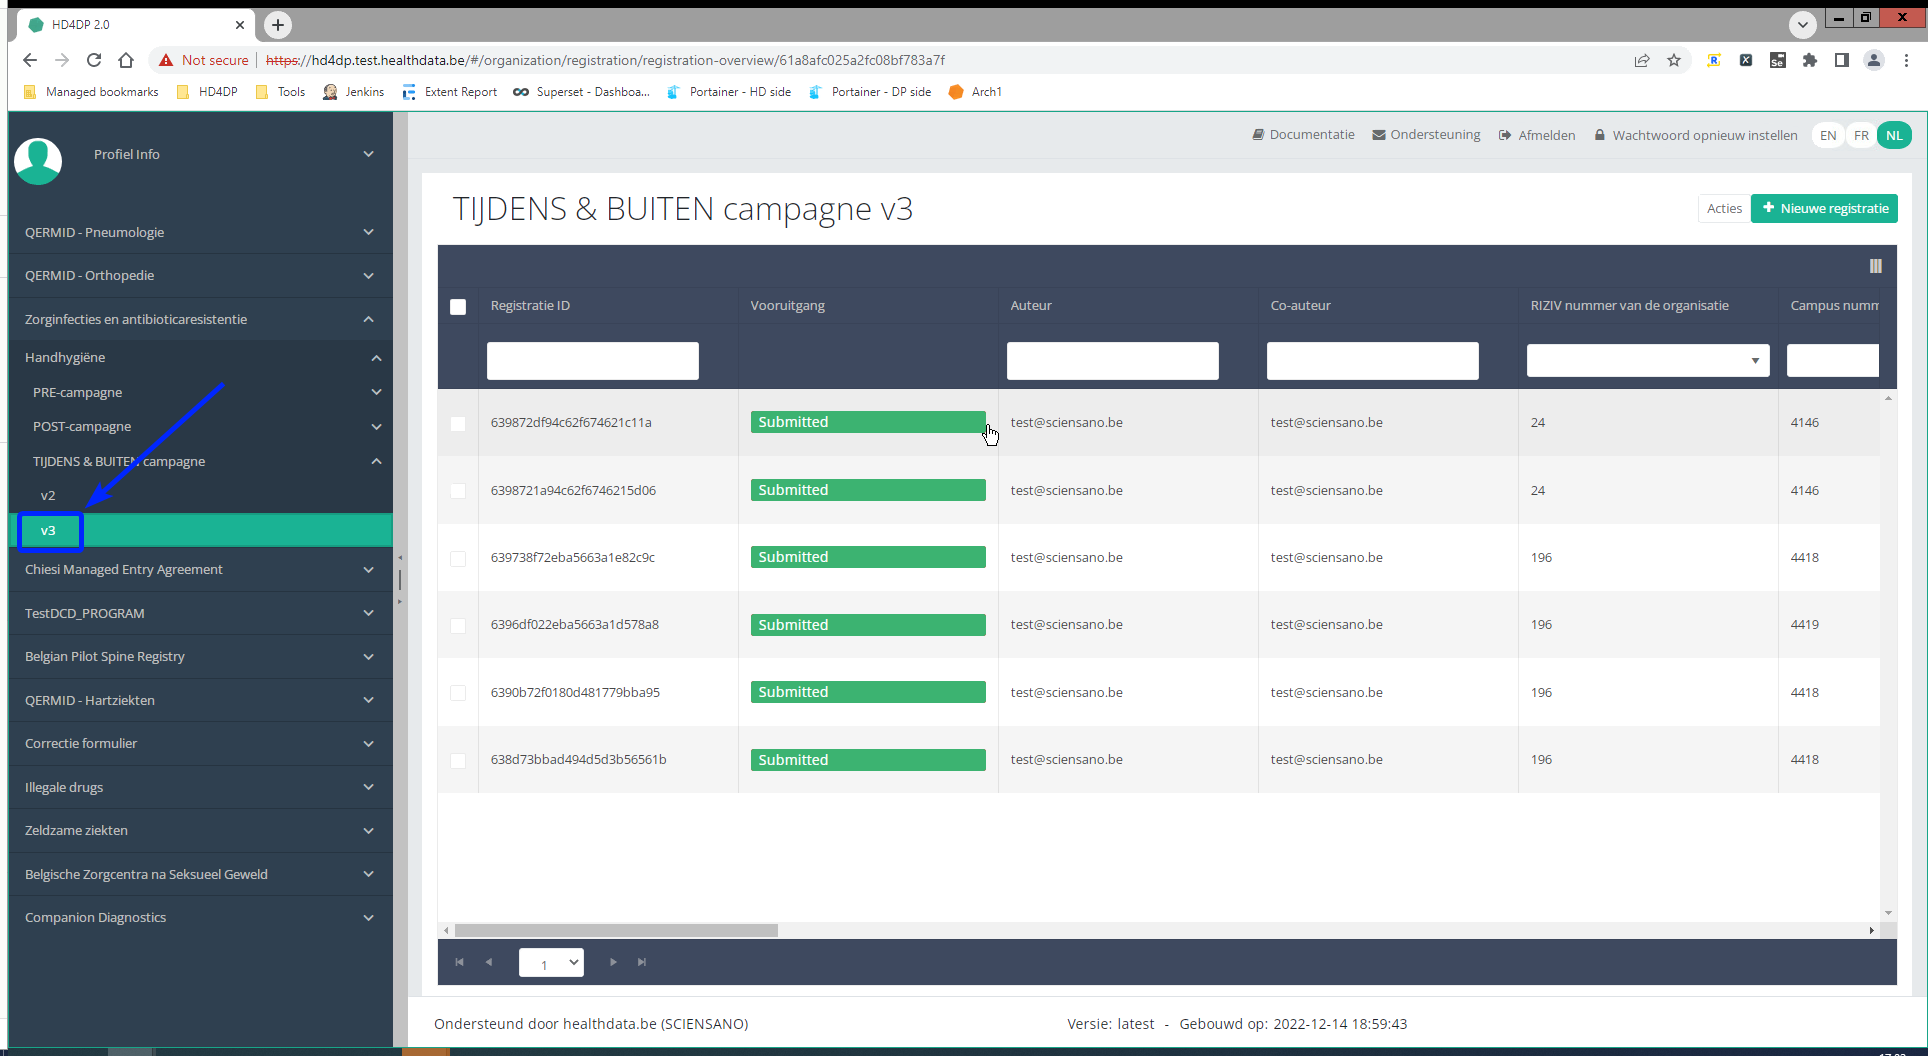
Step 5: Check that the uploaded DCD(s) is/are displayed in the DCD overview
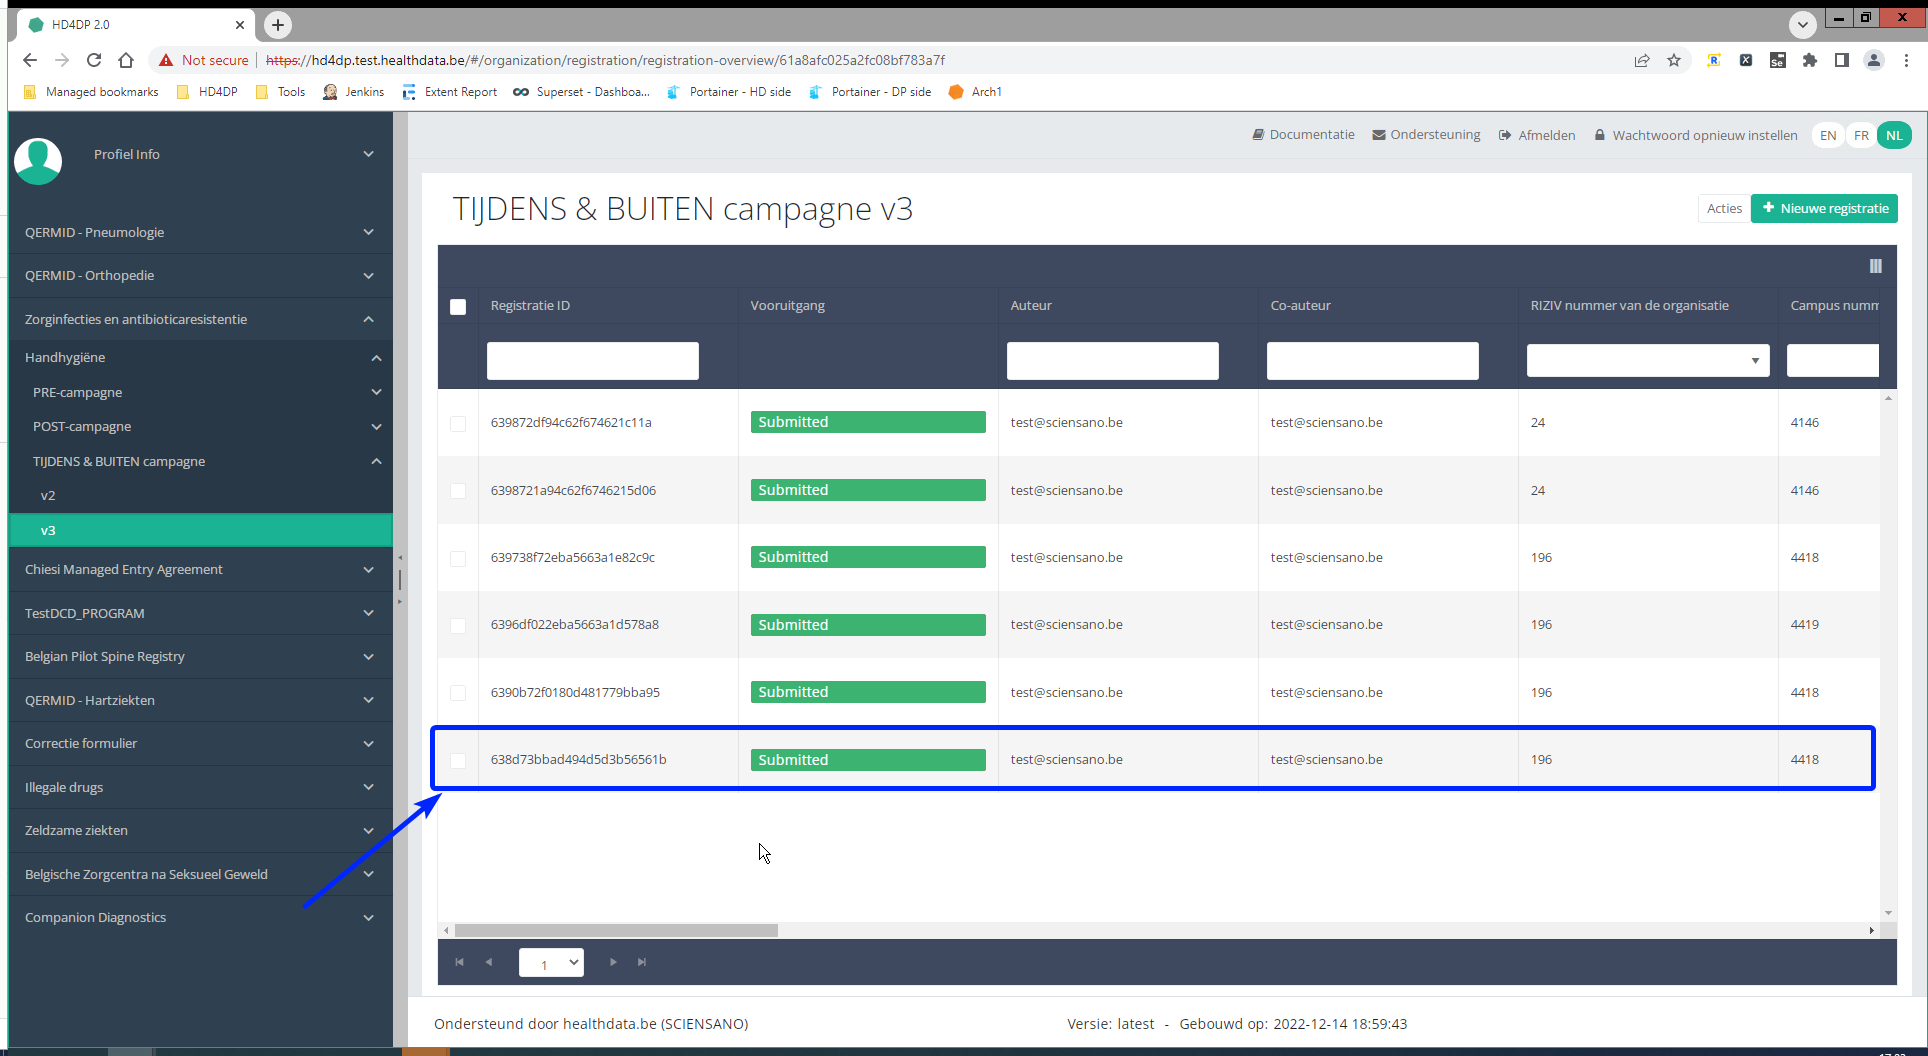
How to update your HCP's internal organization
How to update your HCP's internal organizationThe opportunity is created to the Belgian Healthcare Providers (HCP) to view and change the internal organization of departments (so-called wards) known by healthdata.be and used within the different data collections taking place via healthdata.be.
If the situation within your HCP has evolved and you want it to be reflected in the different data collections taking place via healthdata.be, 2 global steps:
- Get an overview of the current known situation at healthdata.be.
- Send a request to update to the new situation.
Remark: Keep in mind that changing the ward lists will have impact on the eventual reports generated. A change in wards will not be done retrospectively.
E.g. if a ward has changed his name, in the report visualizing data of that ward, both names of the wards need to be selected to see data from before the name changed.
1. Get an overview of the current known situation at healthdata.be
To get an overview of the current known departments of your organisation:
- Go to the following page in this manual: "List of HCP's internal organization"
- Find the Excel file corresponding to your own HCP.
- Download the Excel file.
- In the tab 'SITE-WARD' you will find an overview of all known departments (wards) of the corresponding site.
2. Send a request to update to the new situation
To send a request to update the new situation:
- Add an action on the line of the ward you want to change on the tab 'SITE-WARD' in the column 'Requested action':
- Delete a ward:
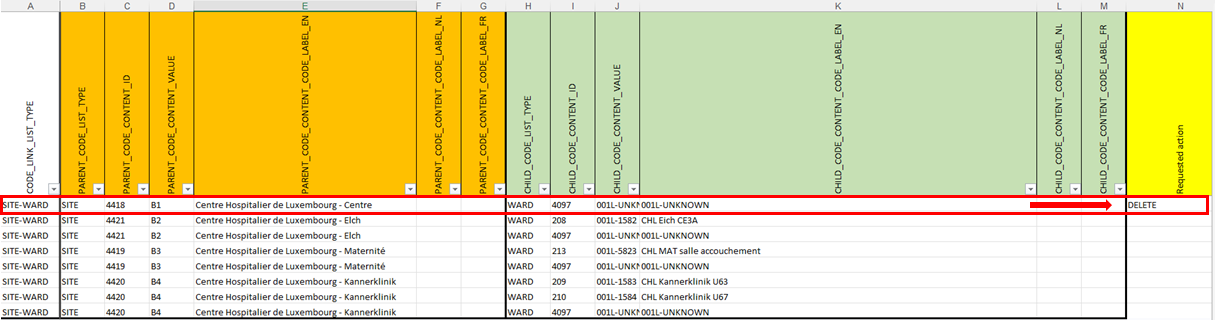
- Add a ward:
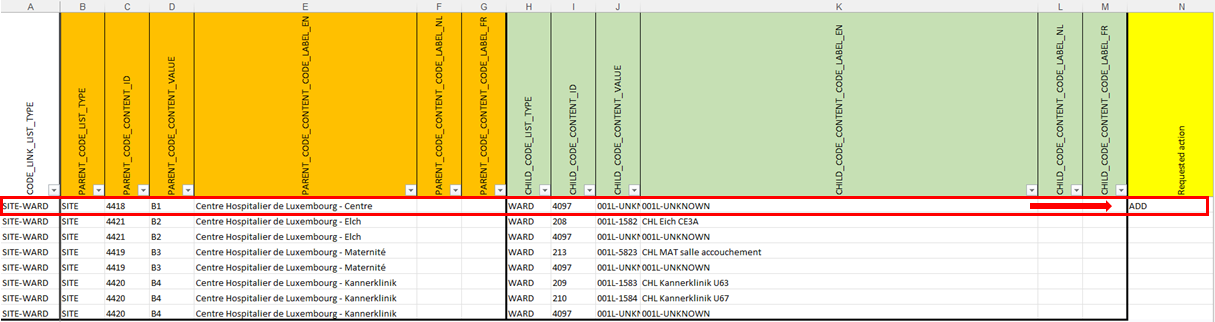
- Rename a ward (in practice this will trigger a Delete and Add action) (Note: if it concerns correction of spelling errors, the same code can be maintained. If the rename reflects a change in combination of wards or has a different meaning, a new code needs to be foreseen by the HCP).
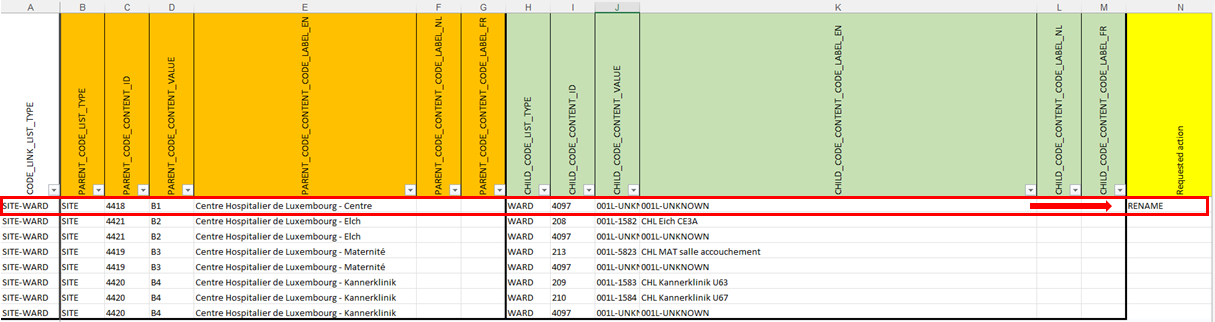
- Please note that if wards are deleted or renamed, this will affect all ongoing registries. Since some registries still collect older data, please make sure that the deleted/renamed wards are not needed anymore in any register.
- Please fill in as many fields possible, to make sure the processing of the changes can be done smoothly. Mandatory fields:
- PARENT_CODE_CONTENT_ID
- PARENT_CODE_CONTENT_VALUE
- PARENT_CODE_CONTENT_CODE_LABEL_EN
- CHILD_CODE_CONTENT_VALUE
- CHILD_CODE_CONTENT_CODE_LABEL_EN
- Requested action
- The code of the WARD in the healthdata.be application will be taken from the field CHILD_CODE_CONTENT_VALUE and consists of the three digits representing the recognition number of the HCP followed by the internal ward code or identifier.
- Submit the updated Excel file to healthdata.be via our service portal (https://sciensano.service-now.com) and your request will be treated as soon as possible.
- Through the ticket created in our service portal you can follow-up on your request and you will be notified when the changes are implemented.
Retrieve Hand Hygiene data from the local database of HD4DP v2
Retrieve Hand Hygiene data from the local database of HD4DP v2Warning
The person with the login for the local database of "HD4DP v2 local" has access to all the data stored in the database. This means that the personal data of the patients will be VISIBLE to that user.Requirements
URL Local DWH Database: postgresql://<server_ip>:5432/localdwh. If this is not the case, the IT department hosting HD4DP v2 needs to open the port and allow traffic to this port.
URL NIPPIN Database: postgresql://<server_ip>:5432/nippin
Username/Password: The service desk of healthdata.be will forward, via a secure link, the username and password.
Client: Download one of the clients that support PostgreSQL . A list is available here.
"data_collection_name" in local database
- "data_collection_name" =
Query examples
With the "data_collection_name" and the following information, you will be able to link multiple tables with each other.
- local_dwhmessage_key_value: Key value table with more information about the registration
- msg_document_id: document id of your message located in local_dwhmessage table
- document_id: document id of your registration
- local_dwhmessage: table where you can find all the registrations
- local_dwhmessage_key_value_plus: Extra table to define attribute type and value of a key value
- key_value_id: Key value id linked to the id of the local_dwh_message_key_value
- local_dwhmessage_key_value:
"local_dwhmessage_key_value" column "msg_document_id" refer to the "document_id" of "local_dwhmessage".
"local_dwhmessage_key_value_plus" column "key_value_id" refer to the id of "local_dwhmessage_key_value".
Query 1: Get all registrations from the last 15 days.
SELECT * from local_dwhmessage WHERE data_collection_name = 'add data_collection_name' and created_on > current_date - interval '15' day;Query 2: Get all registrations and key value.
SELECT * from local_dwhmessage as ldm left join local_dwhmessage_key_value as ldmkv on ldmkv.msg_document_id = ldm.document_id WHERE ldm.data_collection_name = 'add data_collection_name';Query 3: Get all registrations, key value and key value plus from.
SELECT * from local_dwhmessage as ldm left join local_dwhmessage_key_value as ldmkv on ldmkv.msg_document_id = ldm.document_id left join local_dwhmessage_key_value_plus as ldmkvp on ldmkvp.key_value_id = ldmkv.id WHERE ldm.data_collection_name = 'add data_collection_name';This documentation is under construction. We try to provide as correct, complete and clear as possible information on these pages. Nevertheless, if you see anything in the documentation that is not correct, does not match your experience or requires further clarification, please send us an email via support.healthdata@sciensano.be to report this documentation issue. Please, do not forget to mention the URL or web address of the page with the documentation issue. We will then adjust the documentation as soon as possible. Thank you!HD4DP v2 Online Acceptance Environment
HD4DP v2 Online Acceptance EnvironmentIntroduction
To support development and validation of data transfers using S2S API or CSV upload, a central Online Acceptance Environment is available for the IT services or IT partners of data providers. It is meant to replace the locally installed acceptance environments at the side of the data providers. With the Online Acceptance Environment the three types of data transfer can be tested and validated: data transfer via an API platform, via an SFTP client and via manual input in the study form.
In order to keep the acceptance environment light, it is redeployed once a week, deleting all data that were entered for testing. The data are stored locally and will not be sent to Healthdata.be infrastructure. The testing is limited to the upload to the HD4DP v2 application.
Application URLs and port
- Front-End Application URL: https://hd4dp.acceptance.healthdata.be
- SFTP URL: sftp.acceptance.healthdata.be and port 2220
- S2S API: https://hd4dp.acceptance.healthdata.be/proxy/api/dcd/payload/submit?organization-id=00&dcd-id=00&version=1
Navigate to and access the Online Acceptance Environment
The Online Acceptance Environment can be found on https://hd4dp.acceptance.healthdata.be, which is a publically accessible URL.
On the homepage you are requested to select your organization from the drop-down list in order to proceed.
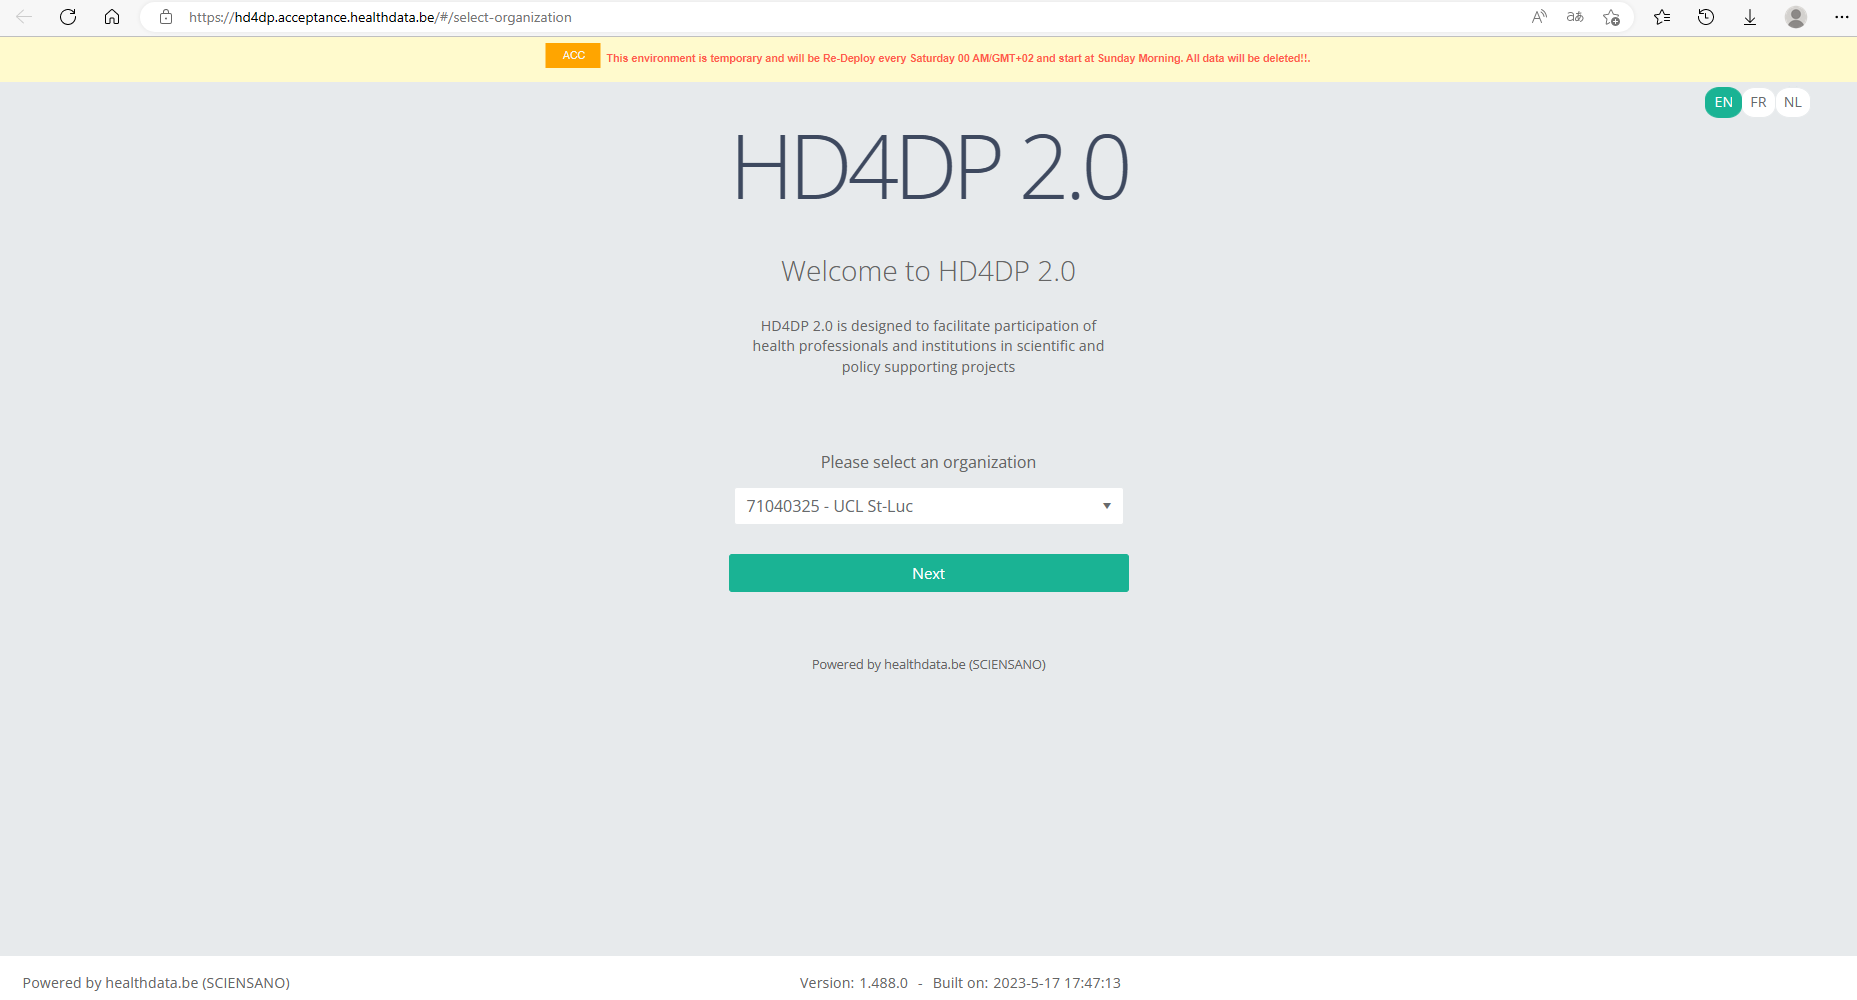
Log in with the credentials you have received upon request. The username is test@sciensano.be for all users.
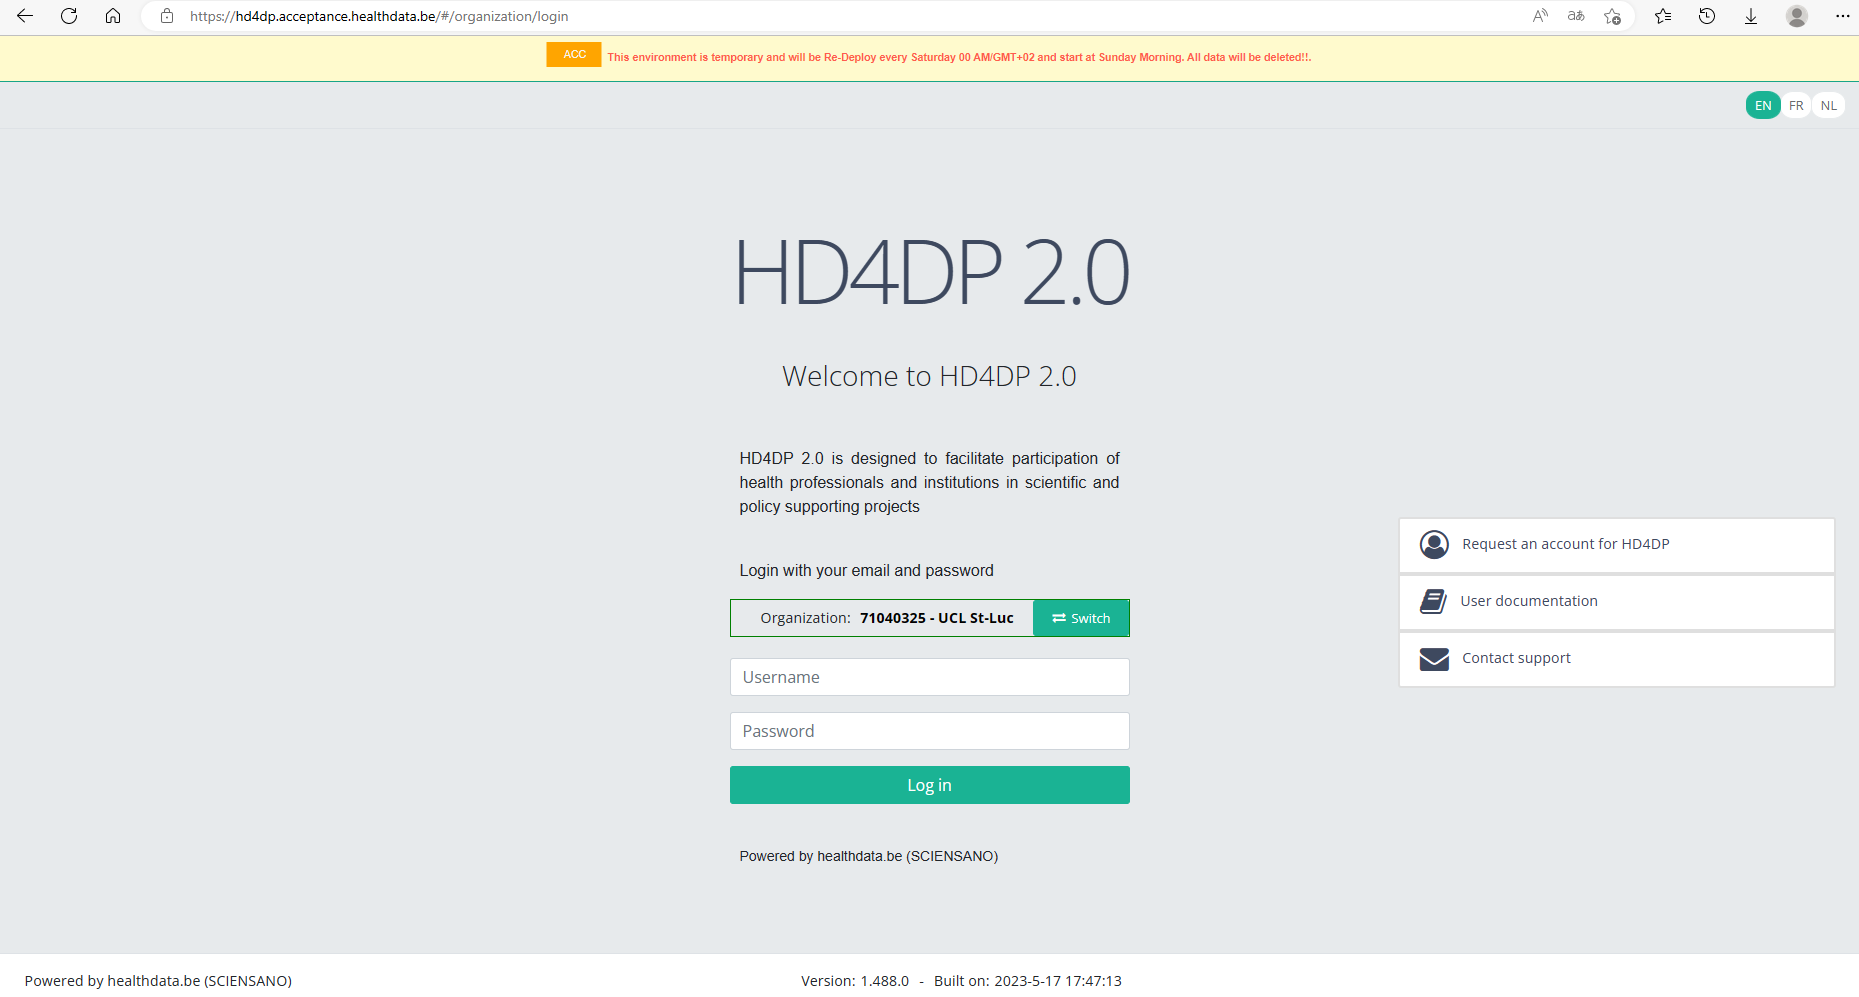
Since the list of organizations to choose from is limited, you might not find your organization in it. In that case we advise you to request your credentials through our service portal at https://sciensano.service-now.com/sp via the Request something tab and subsequently the Request for Information box.
When requesting an account for this acceptance environment you will receive 3 types of credentials:
⦁ credentials to log in to the front end of the online acceptance environment
⦁ credentials to use the API (-> authorization tab in Postman)
⦁ credentials for the SFTP server you use to test the CSV Upload
Once logged in, the layout looks very familiar: to the left you will find the navigation panel with all running projects and projects that have passed the user acceptance testing (UAT) phase. Note that the list of projects featuring in our Online Acceptance Environment is not filtered out for the organization you have selected.
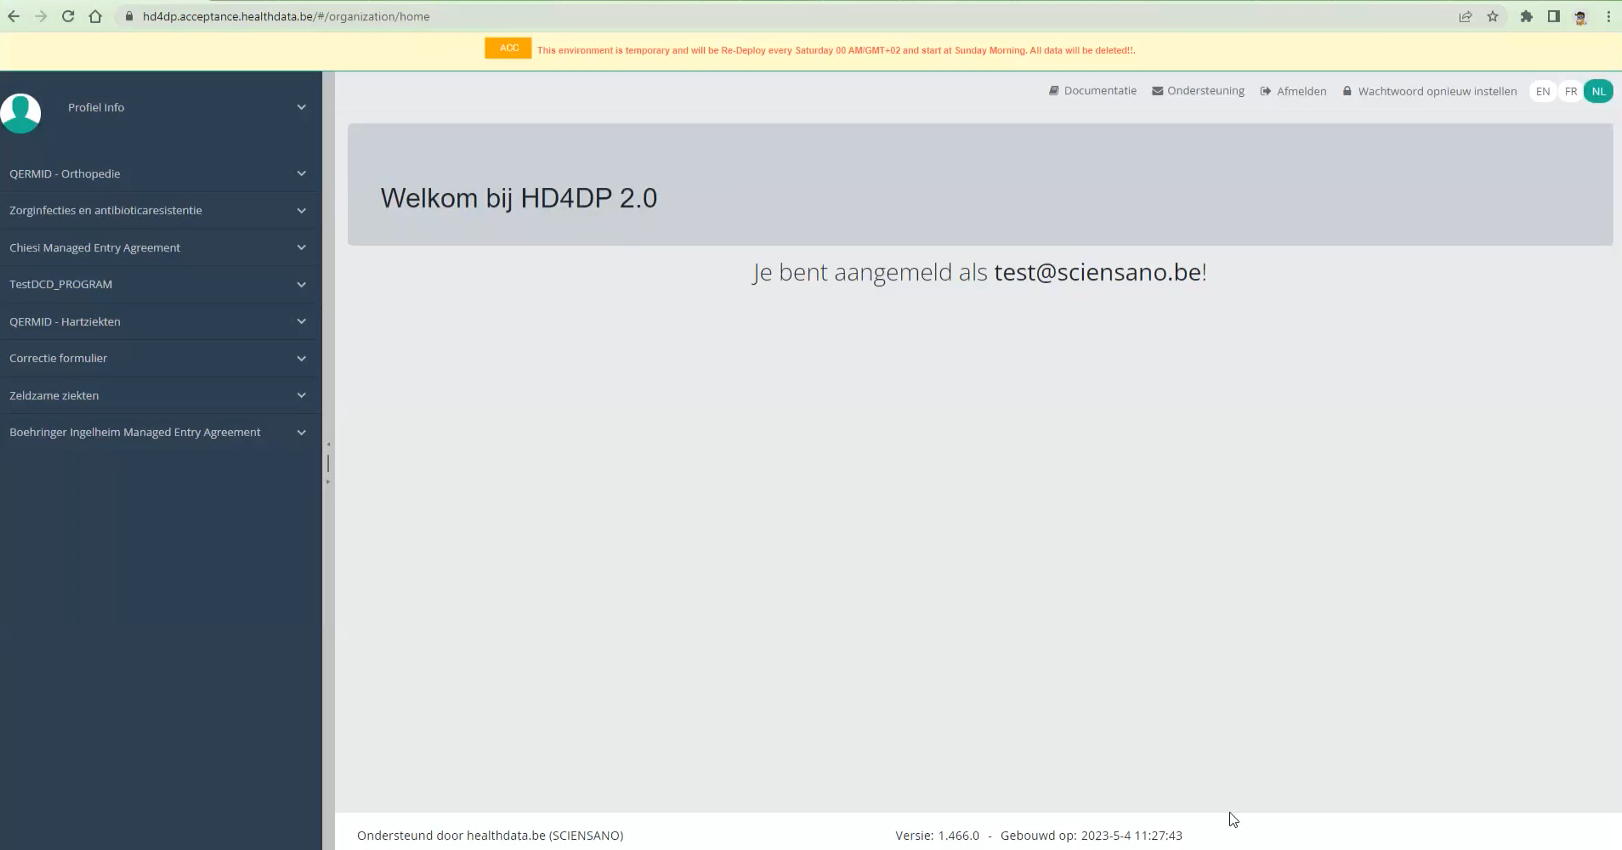
The data transfer methods
As mentioned above, the Online Acceptance Environment enables the testing of the uploads for the following three types of data transfer. They are described in order of preference underneath:
Data transfer via an API platform
The data are extracted directly from the EPD systems and sent to HD4DP v2 local using S2S API before they are sent to healthdata.be. This transfer method requires the use of an API development platform, such as Postman (freely available).
The endpoint (URL) to send your payload to for testing is
https://hd4dp.acceptance.healthdata.be/proxy/api/dcd/payload/submit
This endpoint is to be completed with some parameters, such as the ID of an organization, the ID of a dcd, the version number:
https://hd4dp.acceptance.healthdata.be/proxy/api/dcd/payload/submit?organization-id=6&dcd-id=18&Version=1
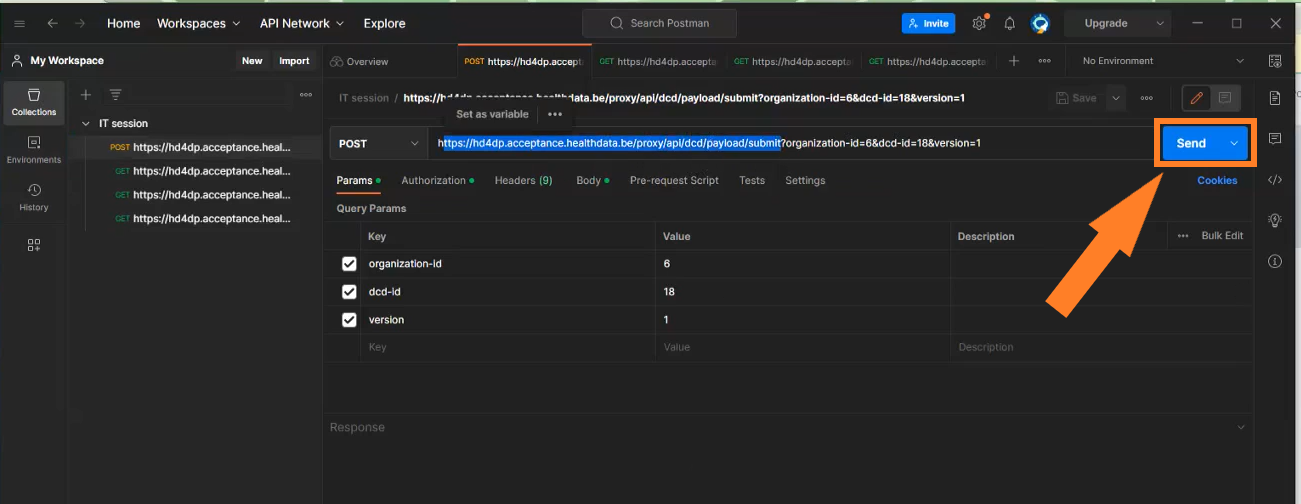
Click on the Send button to post the payload. A succesful submission is indicated with the status message “202 Accepted”. This can also be checked visually in the front end of the Online Acceptance Environment.
The field Data source in the top selection bar indicates whether the data were transferred via S2S API, CSV Upload or manually with HD4DP.
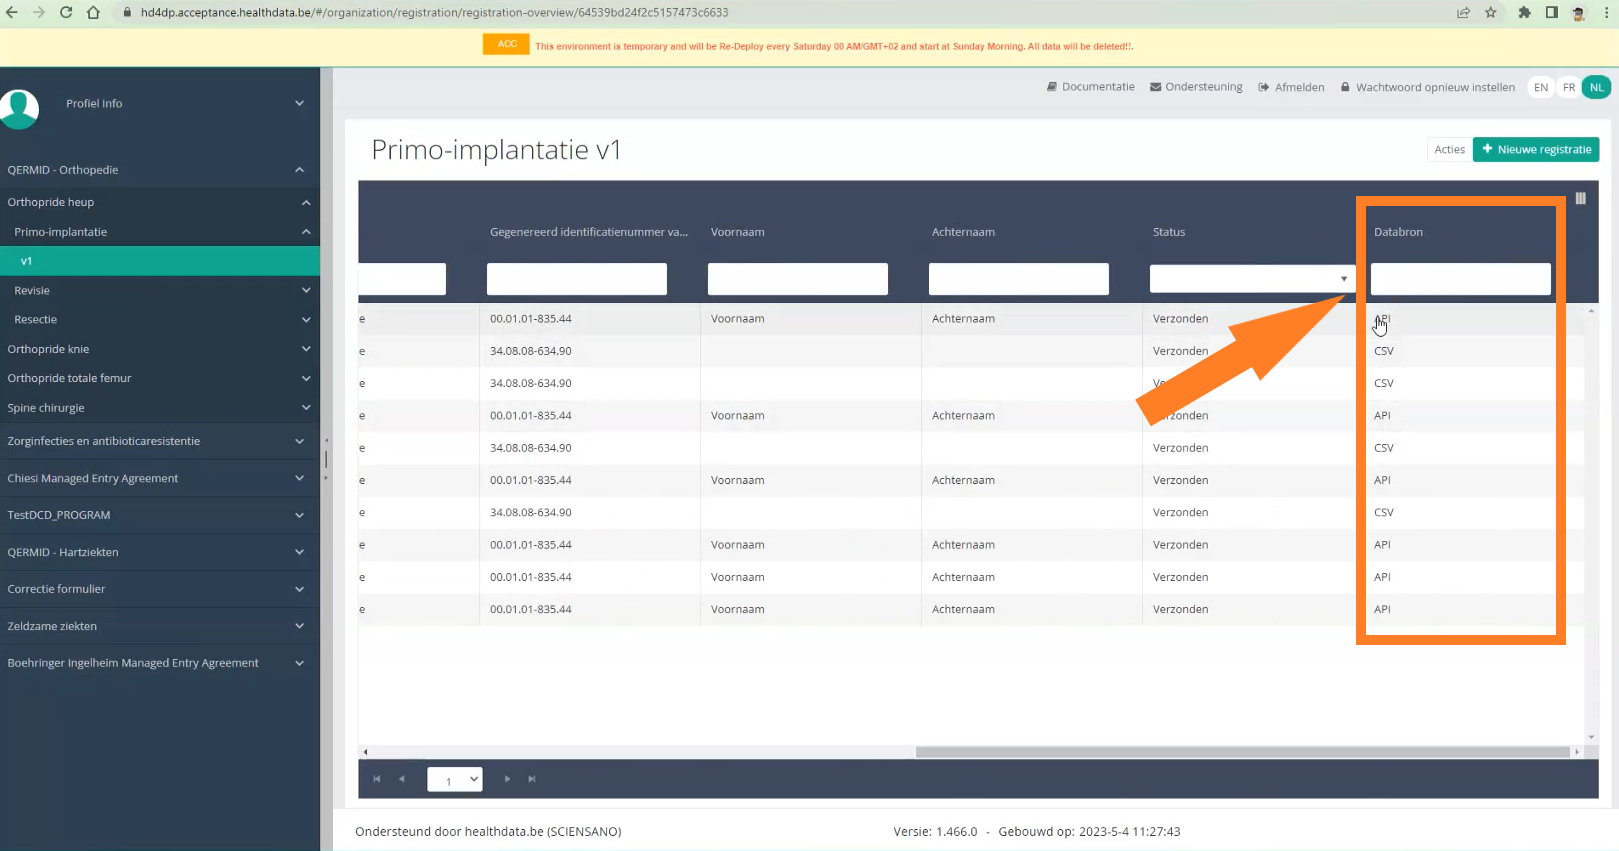
In the production environment records sent through API are sent directly to the healthdata.be infrastructure (status “Submitted” in the Progress field).
Next to posting payloads (POST) you can also retrieve information (GET). Examples of such "calls":
- The call https://hd4dp.acceptance.healthdata.be/proxy/api/organization (see below) will return an organization id:
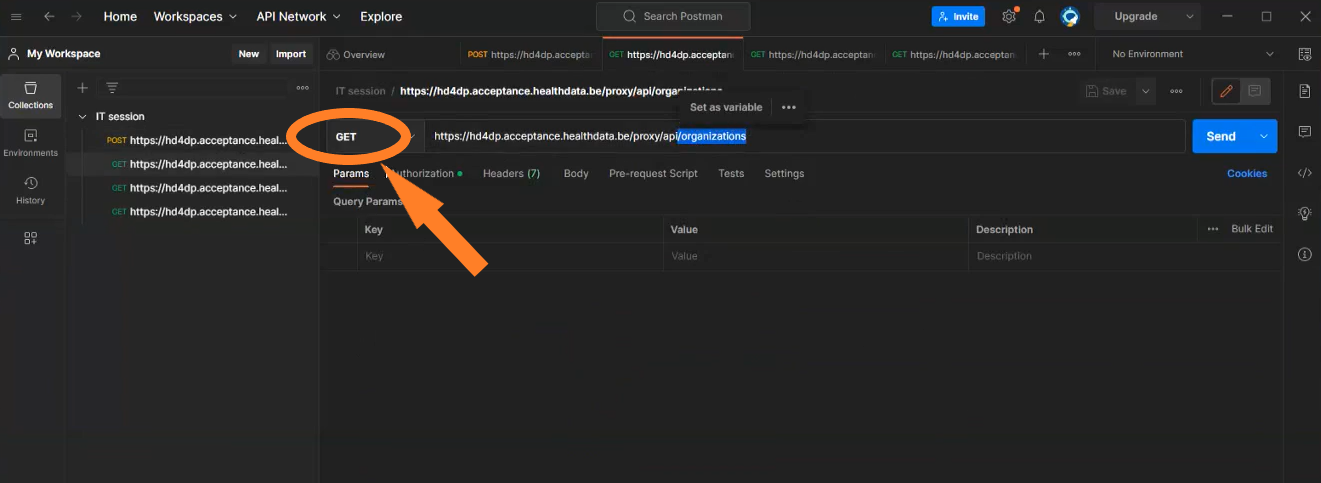
- The call https://hd4dp.acceptance.healthdata.be/proxy/api/dcd/menu/structure?organization-id=6 (see below) will return the menu structure with all projects your organization is registered for.
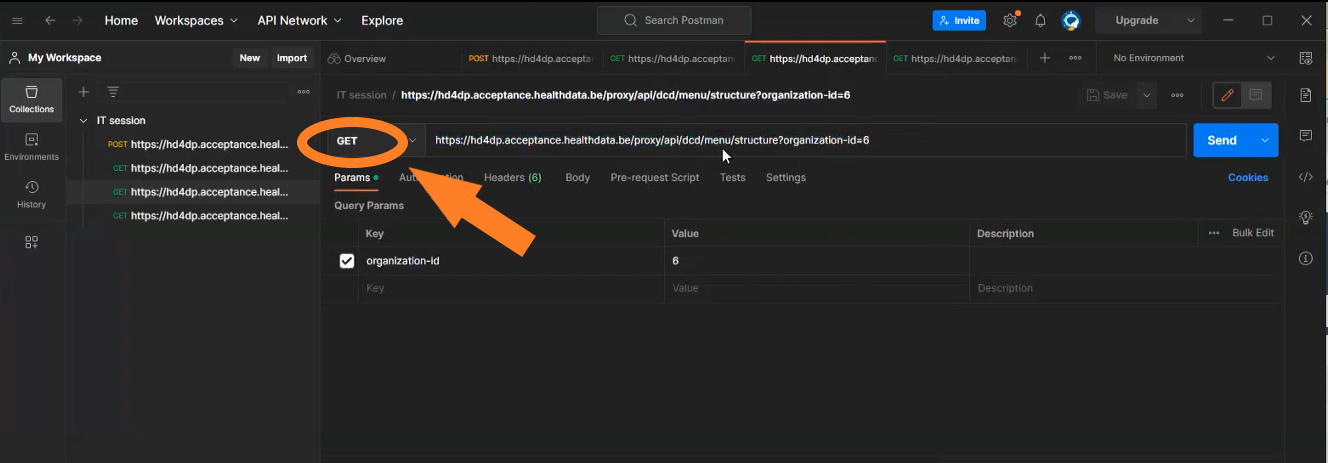
More information about the API data transfer can be found at https://docs.healthdata.be/documentation/hd4dp-v2-health-data-data-providers/hd4dp-v2-s2s-api
Data transfer via an SFTP client
The csv upload is the second type of data transfer. The data are transferred to an SFTP server and subsequently picked up by the healthdata.be system. This transfer method requires the use of an SFTP client, such as WinSCP (freely available).
When logging in to WinSCP, you will need to navigate to the correct csv folder : csv/<project>/<dcd>. Here you need to drag and drop the csv you want to upload from the left panel to the right panel. The CSV file will now be picked up by the polling system of the CSV Uploader, which checks for new CSV files every minute.
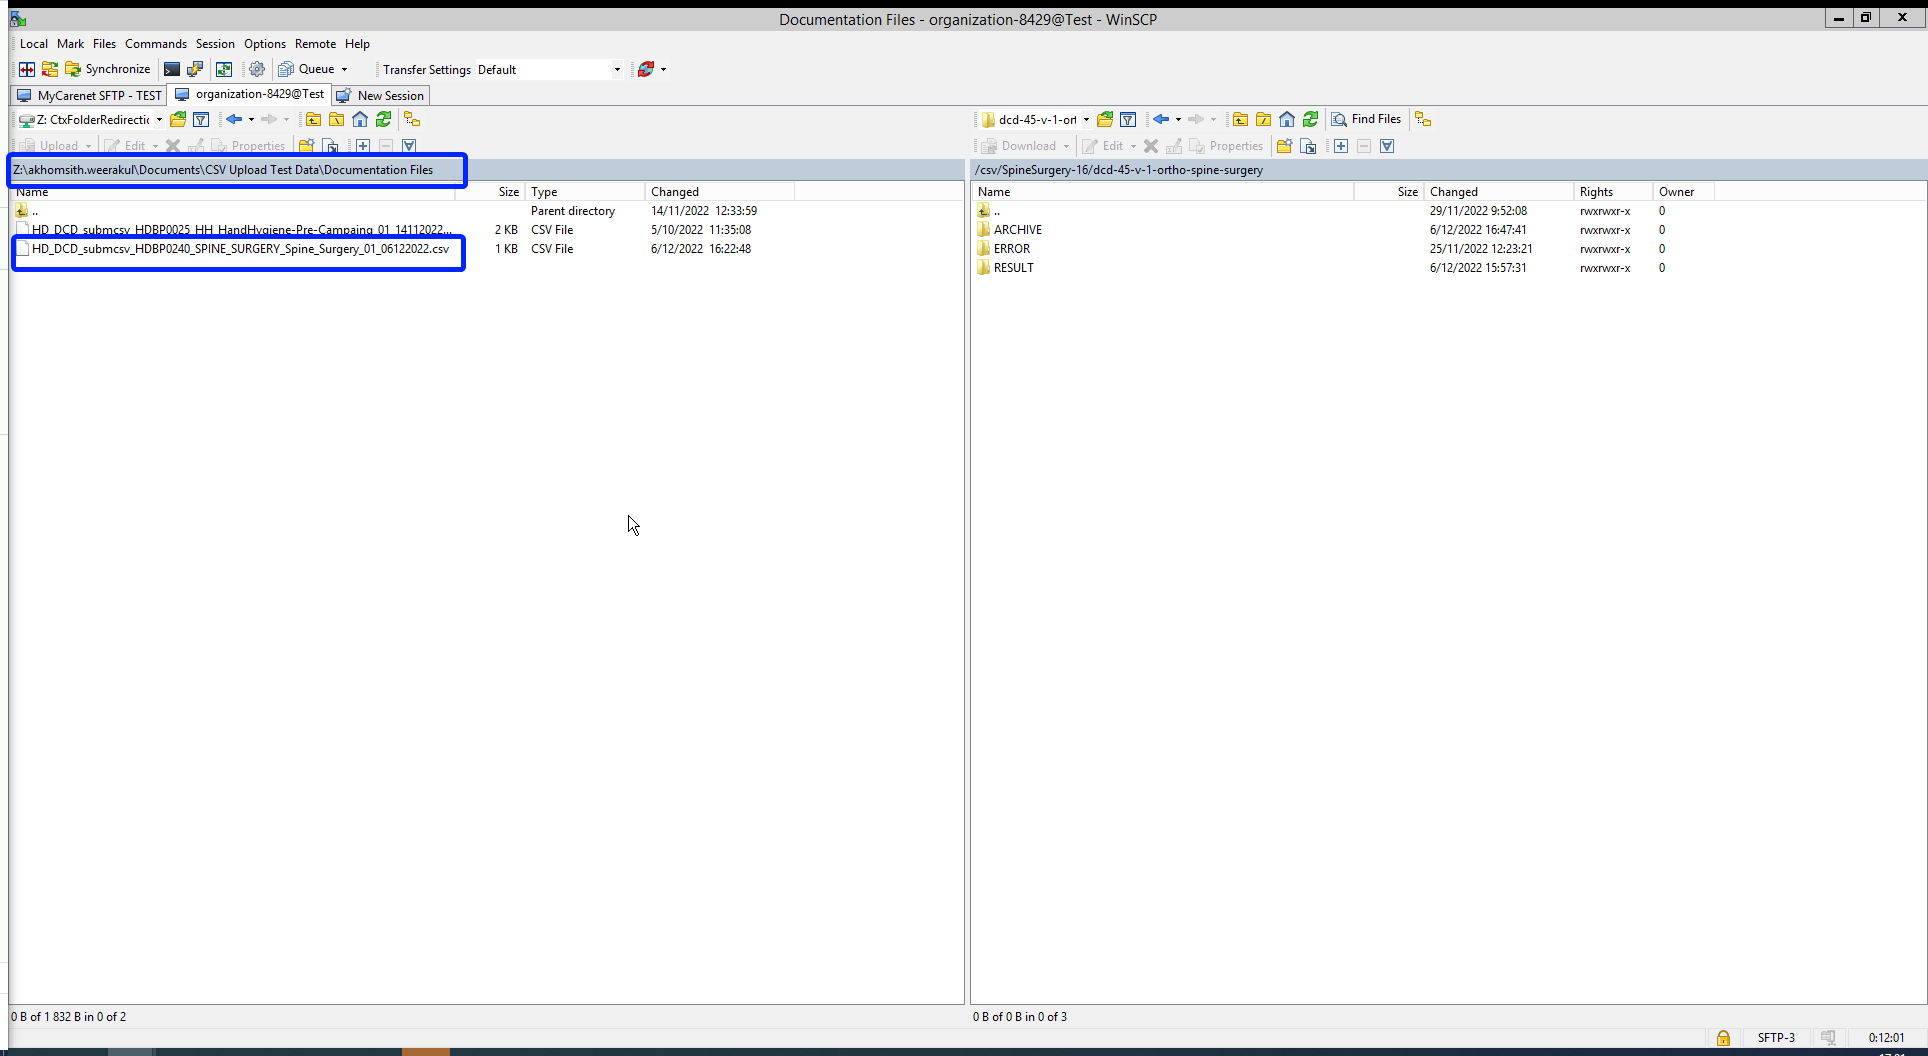
The folders Archive and Result will only be created after the first CSV file has been uploaded for testing.
The Result folder shows a log file containing CSV Upload reports. The status Error Count shows technical errors such as incorrect name, code …
CSV files that were uploaded in Architecure 1 can be reused in Architecture 2. Prerequisite for this is the addition of necessary fields that are typical for Architecture 2, e.g.:
- Author Group (TX_AUTHOR_GR)
- Author (TX_AUTHOR)
- Coauthor (TX_COAUTHOR).
To further facilitate the process of reusing CSV files a mapping table with old and new CSV names is provided.
Next to adding fields, you can also leave out fields, which is indicated in the log file reports as a warning.
Once again the back-end process can be checked in the study forms on the front-end interface. You want to refresh the window to update to the newest status.
More information about the CSV data transfer can be found at https://docs.healthdata.be/documentation/hd4dp-v2-health-data-data-providers/hd4dp-v2-csv-upload.
Manual input in the study form
The third data transfer method is the form entry, carried out manually. For this you can use a common browser such as Google Chrome. This method can also be used to validate data sent via S2S API or CSV Upload.
Requesting access
Requesting accessA request for access to the online acceptance environment will be made available in the Entity Access Management tool available via eam.healthdata.be. See also https://docs.healthdata.be/EAM
This feature is foreseen to be added to the EAM portal during the summer of 2023. In the meantime or when the EAM portal should be unavailable, you can use the service portal to request access to the online acceptance environment by creating an incident and clearly mentioning you are an IT Department or IT partner of a data provider requesting access to the online acceptance environment.
More information on how to create an incident in the service portal is available on https://docs.healthdata.be/documentation/hd4dp-v2-health-data-data-providers/how-report-incident
You will receive 3 types of credentials:
- Credentials for the HD4DP2 web form application.
- Credentials for the API data transfer.
- Credentials for the SFTP server to upload CSV files.
MongoDb Postgres Backup Restore & Retention
MongoDb Postgres Backup Restore & RetentionTo make sure the data is persistent on both Hd side and DP side the backup plan was confirmed and developed and tested as well, the postgres and the Mongodb will be taken the whole backup on the daily basis, this will be taken care of the timer-service that has been recently introduced.
Last 30 days Backup will be kept in the same server share or in the local path, to enable the backup we have introduced the new ansible role called “mongo-postgres-backup”, and to invoke the backup option the following variables needs to be defined on the “Host_var” file on hd-inventory to the specific deployment.
Enabling the backup part on the target server: As soon as the ansible role added to the respective playbook and the above backup type added to the hd-inventory host vars to the main/master branch, this can be enabled automatically on the hd-updater daily run or manually triggering the hd-updater on the target side server.
- When DP do not have the external share, then it’s better to keep the backup of the postgres-mongodb dumps, on different directory on the same server. To enable this backup type, we must add the below variable on to the respective host-vars in the hd-inventory.
backup_mount_type: "VmBackup"
----Default backup path is "/hd4dp-backup"
2. When DP do not have both external share and Vm backup , then it’s better to keep backup of the postgres-mongodb dumps, on different directory on the same server. To enable this backup type, we have to add the below variable on to the respective host-vars in the hd-inventory.
backup_mount_type : "local"
local_mount_path : /tmpBackup
3. When DP have External share (samba) then the below variable needs to be added to the respective hd-inventory host_var file.
backup_mount_type: "samba"
backup_mount_type: “samba”
samba_bkup_username: “user_name”
samba_bkup_domain: “example.com”
4. When DP provides External share (nfs) then the below variable needs to be added to the respective hd-inventory host_var file.
backup_mount_type: "nfs"
nfs_bkup_src: "0.0.0.0:/nfs/mount-share"
----Default backup path is "/hd4dp-backup"
Restore:
AS of the agreed approach is to restore the backup-dump manually by using the retention-script (restore_mongodb.sh & restore_postgresdb.sh) it can be found on the target server “/opt/hd-all/hd-backup”, by default it will restore the latest backup but if we wish to restore the particular date back this can be given as a input parameter refer below.
Restore Script Path on the target serever:
/opt/hd-all/hd-backup
Mongo Restore Input param:
"Provide bkp file with full path name for restore e.g. ${local_mount_path}/hd4dp-backup/mongodbBackup/mongo-20220510_2004.tar.gz" & ) to the script.
Mongo restore script:
restore_mongodb.sh
Postrges restore input Param:
"Provide bkp file with fullpath name for pg_wal restore e.g. ${local_mount_path}/hd4dp-backup/postgresBackup/pg_wal_latest.tar.gz"
“Provide bkp file with fullpath name for pg_wal restore e.g. {local_mount_path}/hd4dp-backup/postgresBackup/base_latest.tar.gz
Postgres restore script:
restore_postgresdb.sh
Note:
The postgres backup service timer will be scheduled by 15:00 aprox, the Mongodb backup service timer will be scheduled by 22:00, backup retention will perform few basic checks ex it will check if the space is sufficient to store the current day backup.
Apache Superset
Apache SupersetThe person with the login can see all the data stored in the database. This means the personal data of the patient is VISIBLE to that user.
Superset
Sciensano uses Apache Superset to provide the Data provider with a user-friendly UI for data exploration and visualization from the Local DWH database. Superset allows the user to export data into a CSV, and create their own queries, …
Prerequirements
URL: https://superset.<domain> or http://<ip>:3030 is available. If this is not the case, your IT department needs to open the port or add the domain to the DNS server.
Username/Password: Our Servicedesk will forward, via a secure link, the username and password.
Login
Superset is available on the local installation via the URL: https://superset.<domain> or via http://<ip>:3030.
Use the credentials provided by the servicedesk of Healthdata.
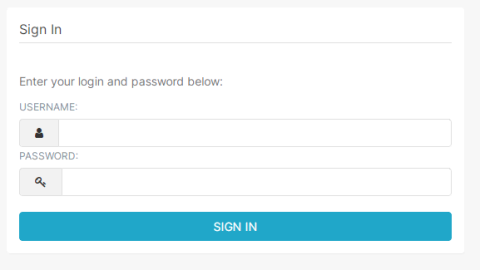
Home page
The first time you login to the application, an empty home folder will be shown. The more you use the application, the more tiles will be shown in your home dashoard. You see multiple subcategories like Favorite, Mine and Examples.
Favorite will show all the Dashboards, Charts or Queries you marked as a favorite.
Mine will show all the Dashboards, Charts or Queries you have created.
Examples leave it as is. You don't need to use this.
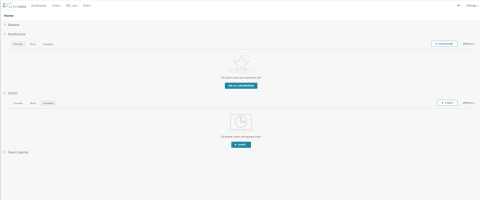
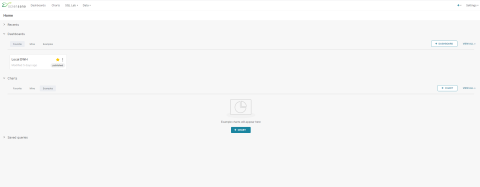
Dashboards
Dashboards are created under the dashboard menu (on the top menu). A list of shared and personal dashboard will be visible.
Default the dashboard Local DWH will be visible at first login.

Local DWH
The local DWH dashboard will provide you a dashboard with some information on how particular features are working inside Superset and an option to show registrations based on the data collection name.
Remark: if you are not able to see the Filters column, click on the "wifi" icon or arrow on the left side of your screen.
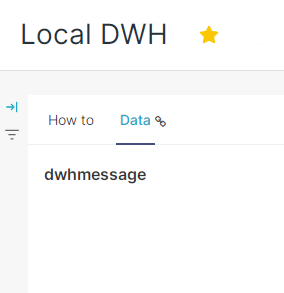
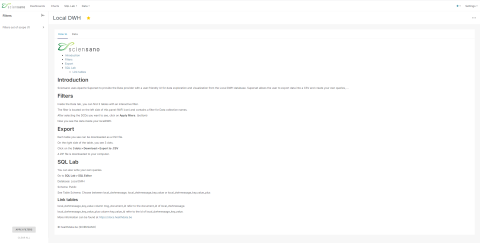
Under the Data tab you will see 3 tables that are empty. With the filter (on the left side), you need to select what you want to see. You can select more Data collection at once and click on Apply FILTERS (bottom of the page).
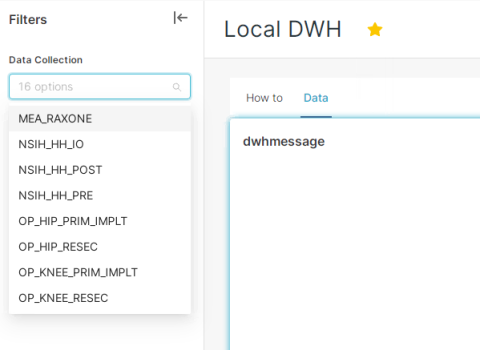
After applying the filter, the data is now visible.
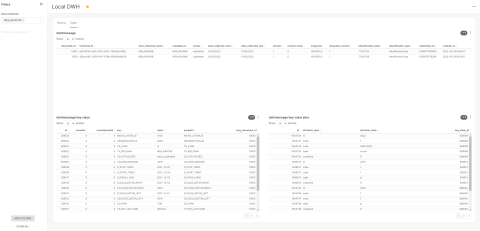
You can easily download each table by clicking on the 3 dots next to the filter icon in table:
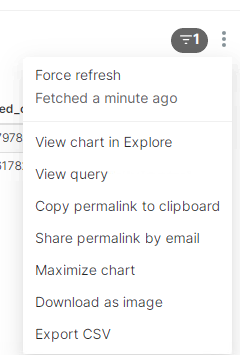
A zip file will be created with the data provided in the table.
Remark: only the last 10000 records will be visible in the table. Downloading a higher amount of data can be done via the SQL Lab editor.
SQL Editor
The SQL Editor allows you to run your own query on the database.
Go to SQL Lab > SQL editor
On the left side you can choose the database, the schema and the table.
Database Local DWH is the database you want to use. Use the Public schema and select one of the tables. You can choose between local_dwhmessage, local_dwhmessage_key_value and local_dwhmessage_key_value_plus.
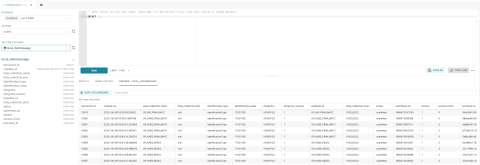
The preview of the data is something you are not able to export. You still need to write your own query before you can export data from the database. You can limit the number of records (with a max of 100 000 records at once). After running your query, the button DOWNLOAD TO CSV will become available.
Remark: you can save your query by clicking on SAVE AS. With a proper name and description you can easily find the query back in you home or under SQL LAB > Saved Queries.
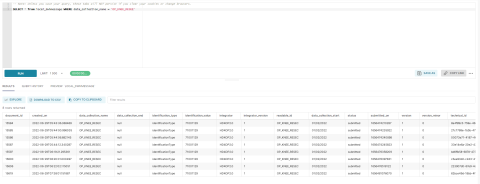
Query examples
With the following information, you will be able to link multiple tables with eachother.
local_dwhmessage_key_value column msg_document_id refer to the document_id of local_dwhmessage.
local_dwhmessage_key_value_plus column key_value_id refer to the id of local_dwhmessage_key_value.
Query 1: Get all registrations from Orthopride Knee resection from the last 15 days.
SELECT * from local_dwhmessage WHERE data_collection_name = 'OP_KNEE_RESEC' and created_on > current_date - interval '15' day;Query 2: Get all registrations and key value from Orthopride Knee resection.
SELECT * from local_dwhmessage as ldm left join local_dwhmessage_key_value as ldmkv on ldmkv.msg_document_id = ldm.document_id WHERE data_collection_name = 'OP_KNEE_RESEC';Query 3: Get all registrations, key value and key value plus from Orthopride Knee resection.
SELECT * from local_dwhmessage as ldm left join local_dwhmessage_key_value as ldmkv on ldmkv.msg_document_id = ldm.document_id left join local_dwhmessage_key_value_plus as ldmkvp on ldmkvp.key_value_id = ldmkv.id WHERE data_collection_name = 'OP_KNEE_RESEC';HD4DP v2 Support Services
HD4DP v2 Support ServicesThe Service Desk of healthdata.be (Sciensano) helps users of our applications and services and deals with requests and problems when they arise.
The Service Desk focuses on those services run by our IT Services (HD4DP, HD4RES, healthstat.be,...) and helps you with accounts and passwords. For questions about the content and objective(s) of the projects, we kindly refer to the managing research organizations.
For most efficient processing of your request, we advise you to use our service portal: https://sciensano.service-now.com/sp.
Please find below our support window hours:
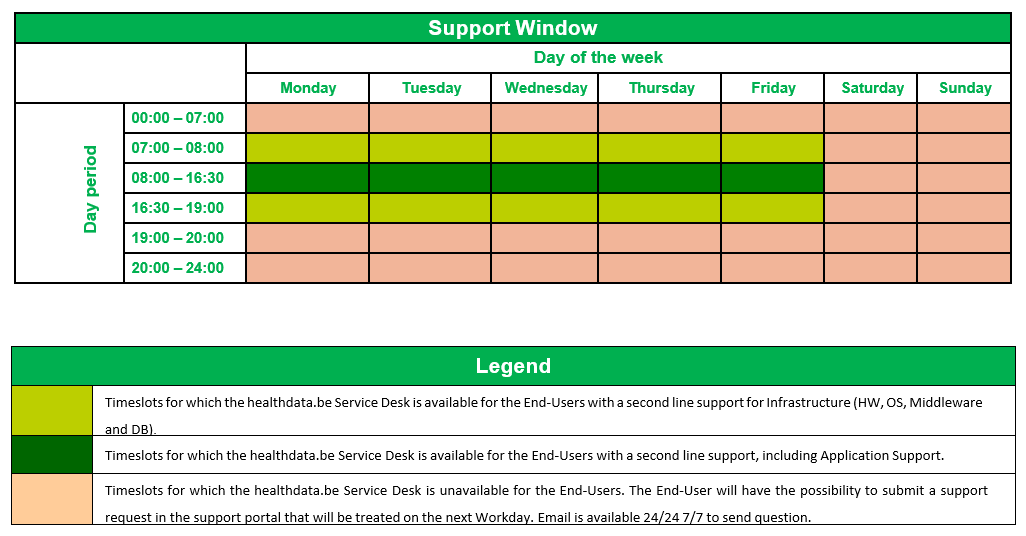
How to report an incident
How to report an incidentTEST2
The healthdata.be service (Sciensano) processes each incident report according to a standard operating procedure (SOP). A public version of this SOP "HD Incident Management Process" is also available on this portal docs.healthdata.be.
To submit an incident related to projects and applications in production and facilitated or managed by Sciensano's healthdata.be service, you must first log into the HD Service and Support portal: https://sciensano.service-now.com/sp
After the login step, you will arrive at the main page of the portal.

On the main page, you must select "Get Help".
A new page with the title "Create an incident" will appear.
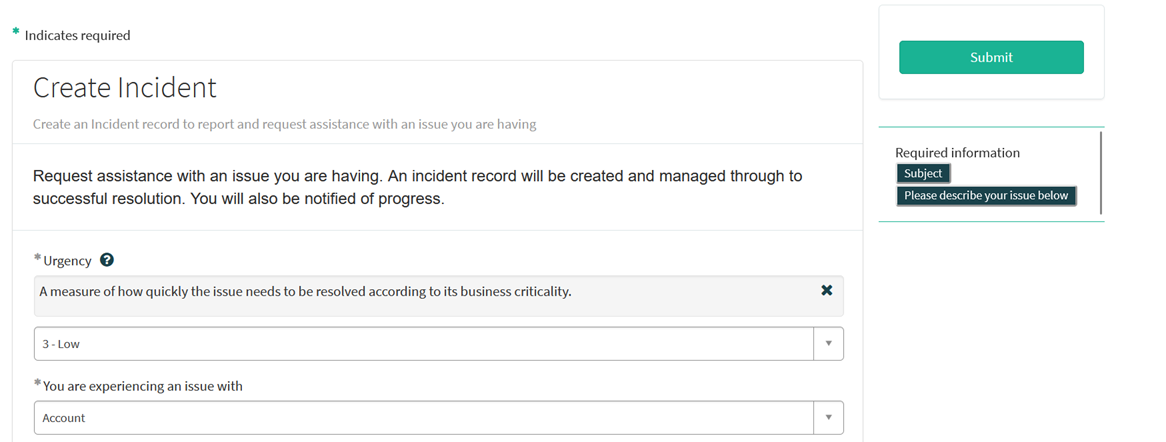
You can now document your incident or problem by providing the following information:
Please indicate the urgency of resolving your issue based on its criticality to the business.
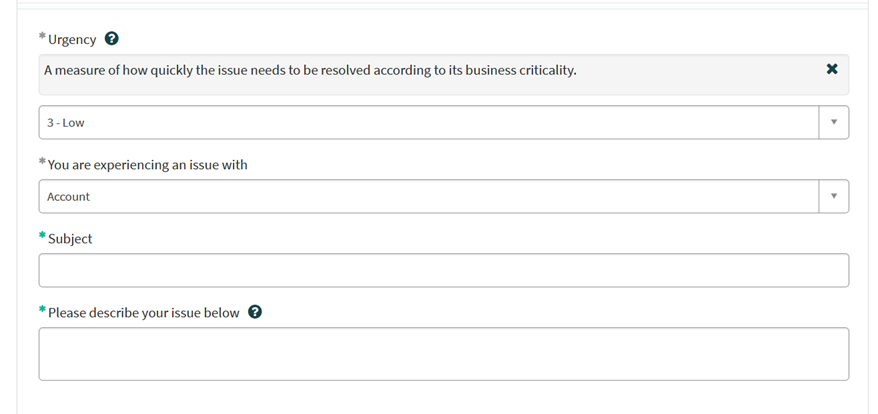
Please indicate the type of problem you are experiencing.

When the problem type "Application" is selected, two additional fields appear: "Project Name" and "Application".

Please select the appropriate information.
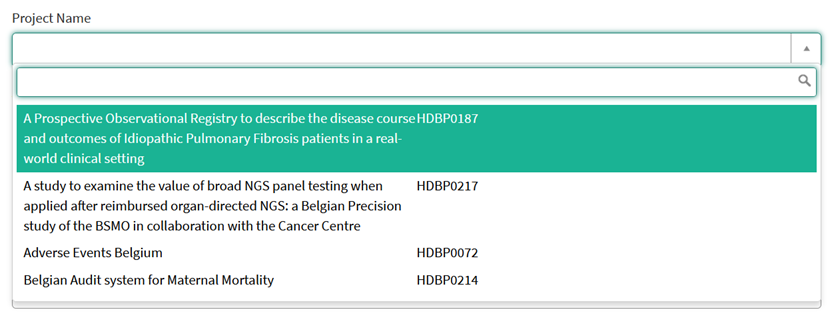
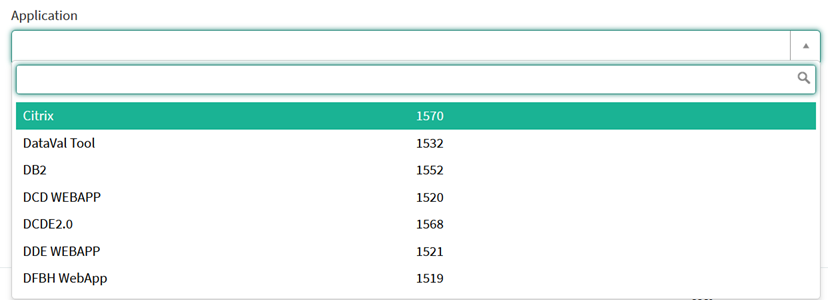
Please describe clearly and briefly (1 sentence) the subject of your problem.

Please describe the problem in detail. The following aspects are important for us to understand and solve the problem:
- a description of the actions you want to perform but fail to perform (e.g. provide us with a field name, a validation rule, a button, etc.)
- a description (if possible) of the sequential steps you follow to use the service or the application of healthdata.be for which you need support;
- a brief description of the technical problem you are experiencing (e.g. error messages)

We strongly recommend that you add a screenshot describing the problem (IMPORTANT: do not provide us with patient data!).
You can add the screenshot by clicking on "Add attachments".
On the right side of the form, the mandatory information items of the incident form are listed. When these fields are completed, their names disappear from the "required information" box.
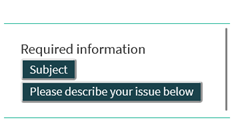
The form can only be submitted if all required fields are filled in, by pressing the green "Submit" button.
If all required fields have not been completed, a warning message will appear at the top of the form.

In addition, missing mandatory fields will be highlighted in green.
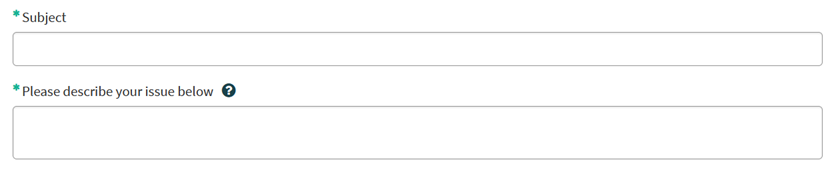
When the incident form has been successfully submitted, a preview of your submission appears in a new screen.
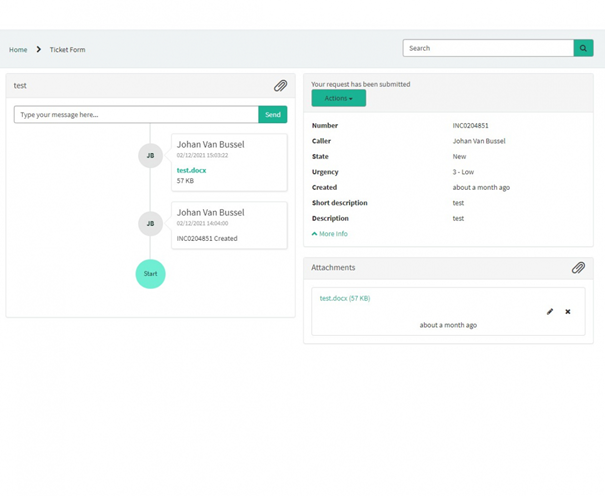
On the right side of the screen you will find the details, including the incident number.
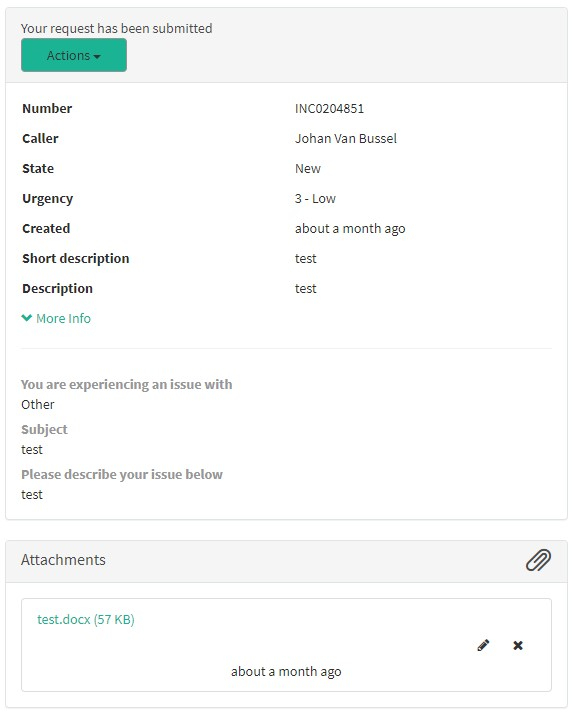
On the left side of the screen, you will find a chronology of your incident processing, starting with your creation.

The Hand Hygiene data reporting and visualisation
The Hand Hygiene data reporting and visualisationOrganizations and/or individuals that perform the data reporting and visualization
- Healthcare-associated infections and antimicrobial resistance (Sciensano)
Applications provided by healthdata.be for the data reporting and visualization
The following applications provided by healthdata.be for the data reporting and visualization
- healthstat.be
- fair.healthdata.be (documentation in progress)
In the next sections, we will describe these applications in more detail.
Note: Access to healthstat.be for non-Belgian residents is not possible yet. However, it will be as soon as healthstat.be version 3.0 is deployed in production.
Applications for the data reporting and visualization
Applications for the data reporting and visualizationThe following applications are provided by healthdata.be for the data reporting and visualization:
- healthstat.be
- fair.healthdata.be
- Metabase component of HD4DP v2
In the next sections, we will describe these applications in more detail.
healthstat.be v3
healthstat.be v3Healthstat.be is the data visualization platform of the healthdata.be project, which is part of the national Action Plans eHealth (2013-2018; 2019-2021; 2022-2024). Here, the researchers publish tables, figures and maps they made based on the data they have collected among Belgian hospitals, laboratories, physicians, and patients. With these reports, researchers want to give health professionals, healthcare institutions, patients, governments and the general public an up-to-date insight into the prevalence of certain diseases, their causes and impact, and the effectiveness of their treatment.
Healthstat.be is a service of Sciensano the Belgian Scientific Institute of Public Health, and funded by the National Institute for Health and Disability Insurance.
In developing healthstat.be, many measures were taken to ensure the protection of the privacy of the patient, the caregiver and the medical confidentiality. For example, no personal information like name, date of birth or national registry number is available on healthstat.be. Also, the user access management for the detailed reports is managed by the eHealth-platform. Because of all these measures, this approach received an authorization from the Sectoral Committee Health of the Privacy Commission.
Request an account for healthstat.be v3 (non-Belgian residents)
Request an account for healthstat.be v3 (non-Belgian residents)The applications of healthdata.be (like HD4DP v2 and healthstat.be) process sensitive personal information. Therefore, strict controlled processes are used to grant access to these applications. The Entity Access Management (EAM) portal of healthdata.be facilitates these processes. In this article we describe how non-Belgian residents have to use it.
Go to https://eam.healthdata.be/forms/hd_eam_access_request_user_int. The following form will appear. Please fill in all fields with a red asterisk *:
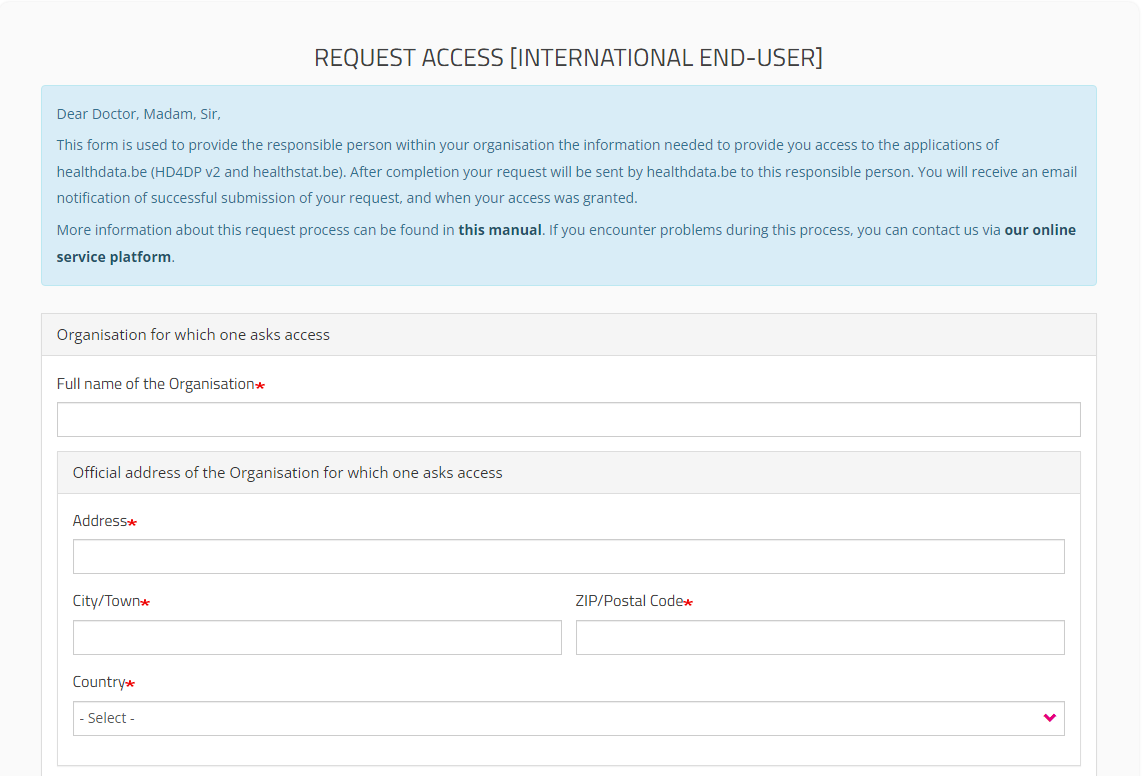
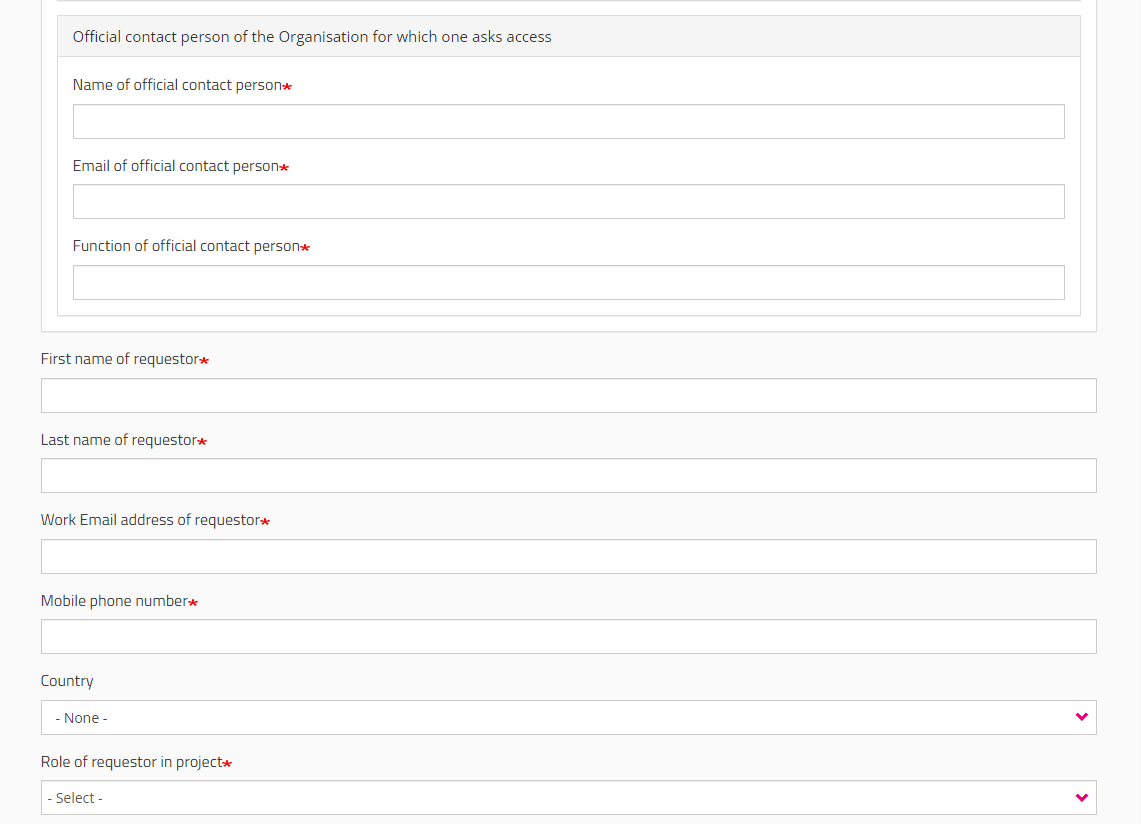
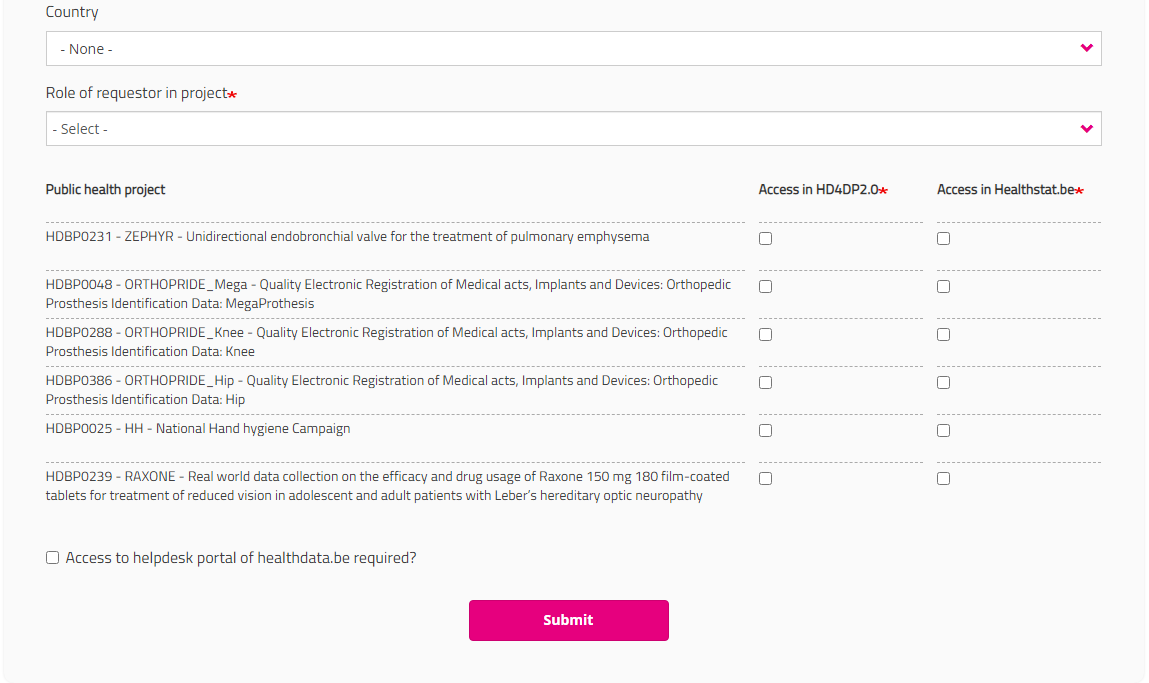
Note: You must indicate your Role in the project (Local Study Lead, Local Study Associate or Local Study Support). Your role determines your access options in HD4DP2 for this project. Read more about User roles in HD4DP v2.
Check the boxes of the Public health projects you wish to request access to.
Select HD4DP2.0 if you want to access the application to make recordings for the selected project.
Select Healthstat.be if you want to access the reporting of the selected project.
Click the Submit button when you have completed the form.
Once you have successfully completed the access request form, you will receive a confirmation message.
Your request will be forwarded to an employee of your organization who is authorized to grant you access. After he has approved your request, your account will be immediately created by healthdata.be. The whole procedure can take 2 working days. We will inform you once the account is active.
This documentation is being updated regularly. We try to provide as correct, complete and clear as possible information on these pages. Nevertheless, if you see anything in the documentation that is not correct, does not match your experience or requires further clarification, please send us an email via support.healthdata@sciensano.be to report this documentation issue. Please, do not forget to mention the URL or web address of the page with the documentation issue. We will then adjust the documentation as soon as possible. Thank you!Access healthstat.be v3 (non-Belgian residents)
Access healthstat.be v3 (non-Belgian residents)Open a web browser in order to access the healthstat.be portal and navigate to http://v3.healthstat.be.
The Welcome page of the portal will appear.
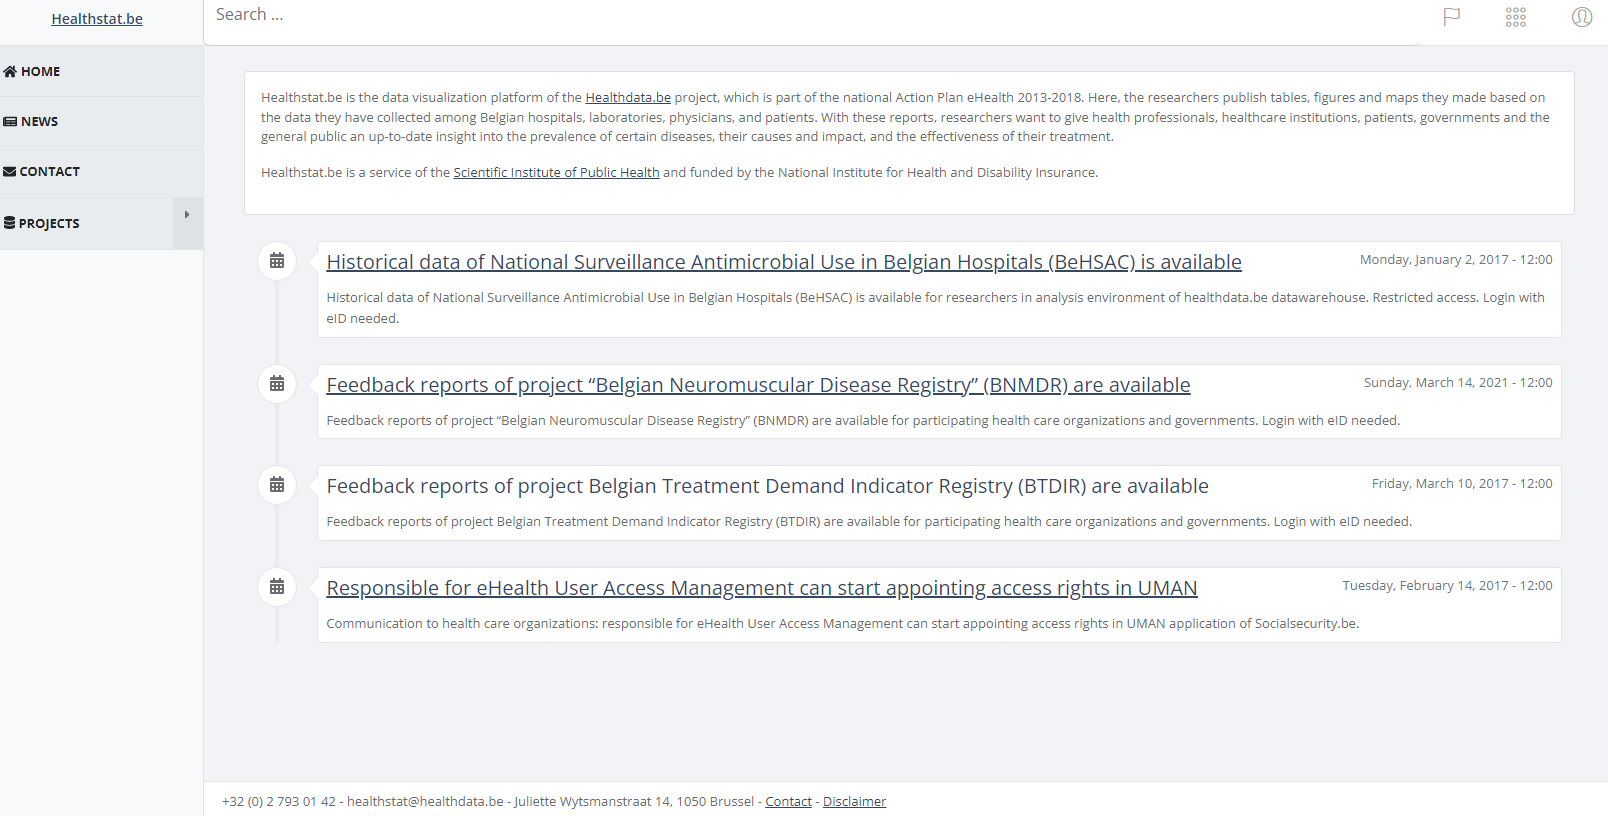
In the upper right corner you notice the icons for Language selection, several Support functions and Login.

Click on the login icon and subsequently on Log in.
A new window will open up, providing several options to Sign in to your account:
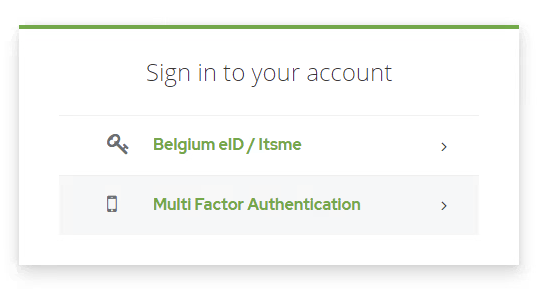
As a non-Belgian resident you can only access healthstat.be through Multi Factor Authentication (MFA).
First time login
Select the option Multi Factor Authentication:
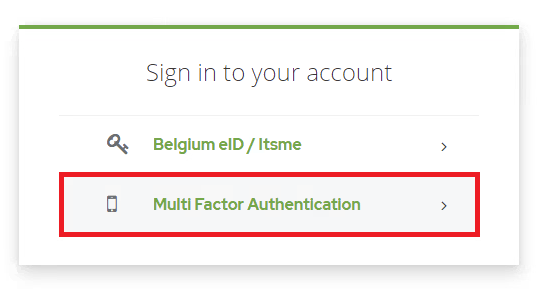
Use your e-mail address to login:

The first time you will be prompted to create a password.
Adhere to the following password requirements:
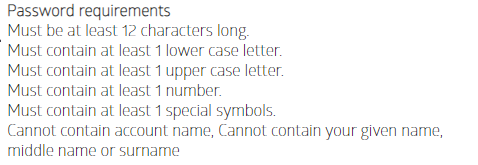
:
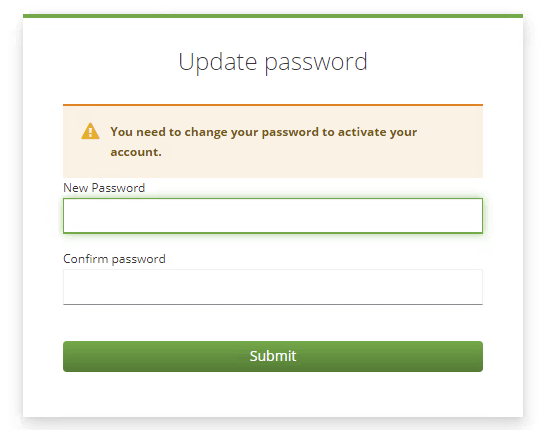
Confirm your password:
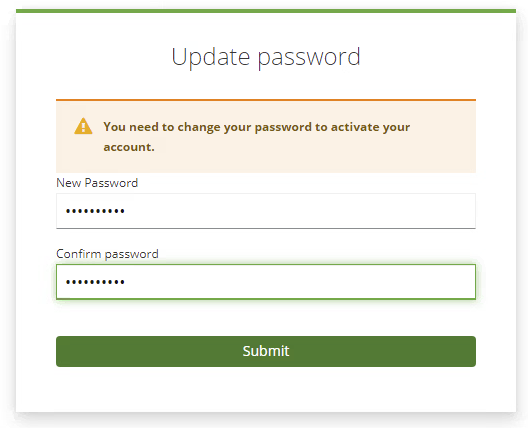
If the password does not match the password policies you will receive following message:
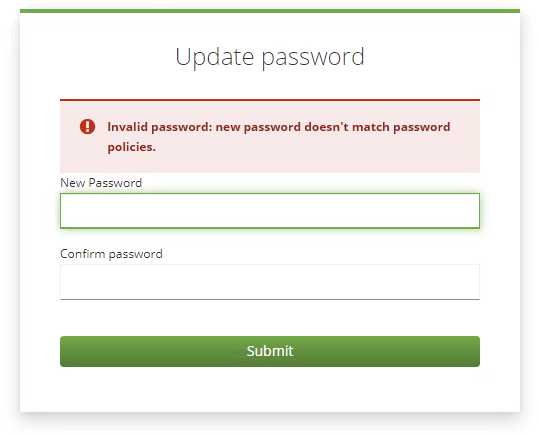
After providing a correct password that matches the policies, a verification e-mail is send to your e-mail address:

Click on the link in the e-mail to finalise the login process and to activate your account:
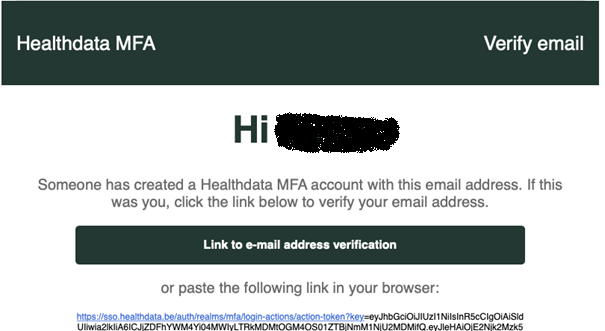
Regular Login
Select the option Multi Factor Authentication:
Use your e-mail address to login:
Enter your password:

You now receive a Healthdata verification code in your e-mailbox. Enter it in the respective field below:
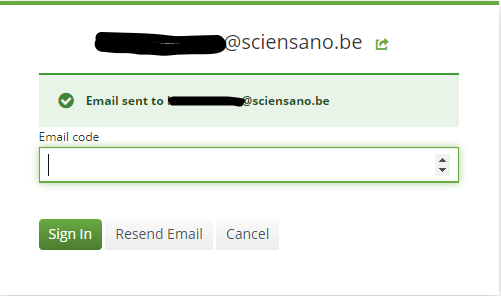
You are ready to consult the reports:
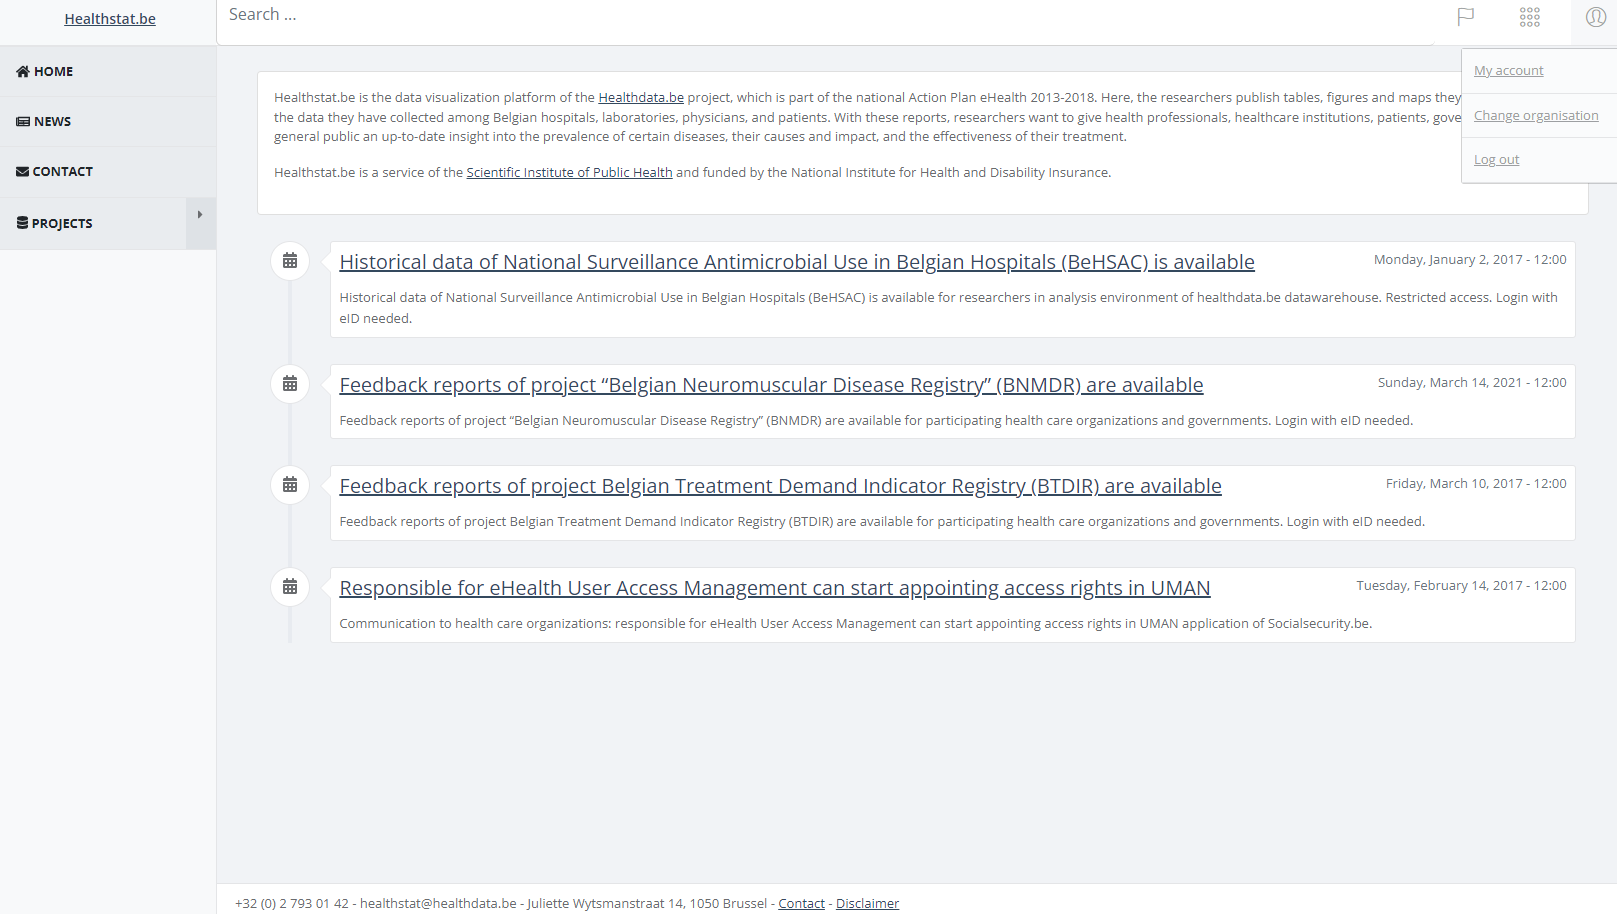
Navigate to Hand Hygiene reports (HSv3)
Navigate to Hand Hygiene reports (HSv3)When logged in, you will see the Welcome page of the healthstat.be portal. Click on the Login icon in the upper right corner and select My account.
A window opens up displaying a list of available reports.

The "Compliance" report
The "Compliance" reportIn the following instructions, we explain the different steps to create a Compliance report.
Select the desired report in the list. In this case "Compliance".

The Parameters form will be displayed. Select for each field the option of your interest.
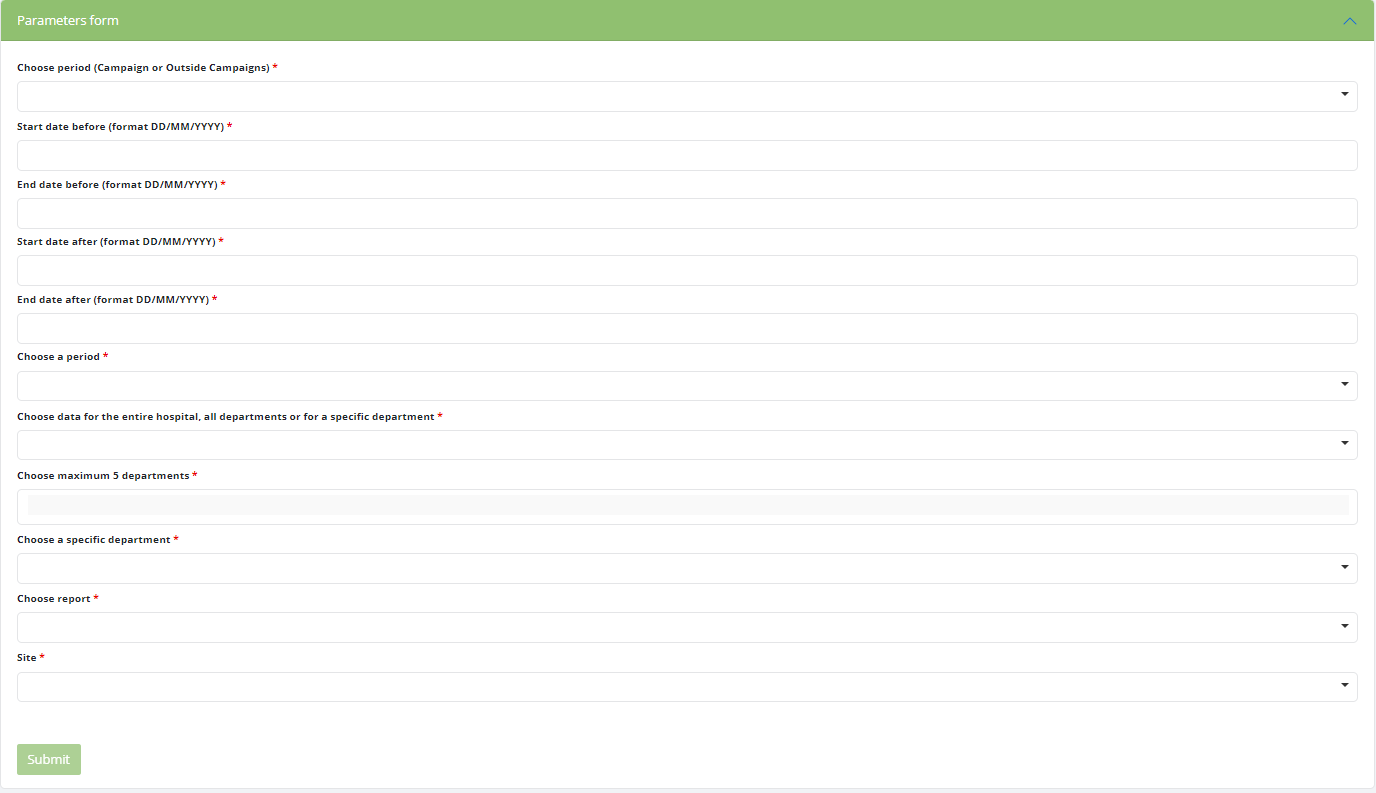
The form will adapt according to the options you select in the respective fields.
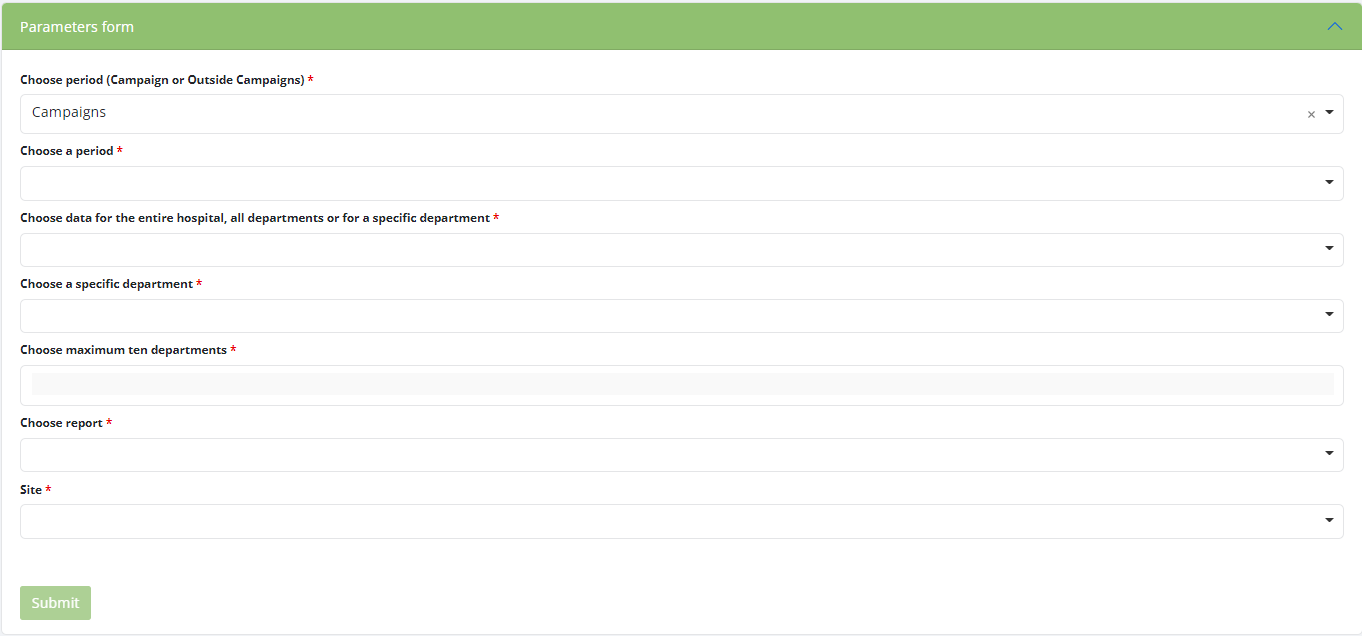
Fill out all fields and click on the Submit button.
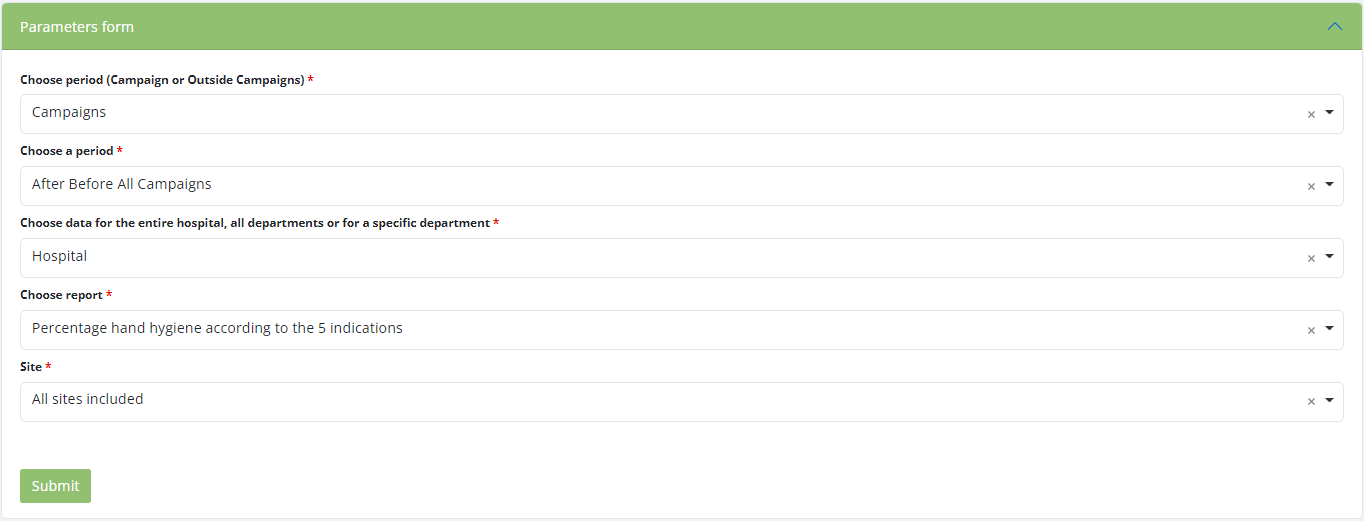
The reports will be displayed as a graph or a table as desired.
Graph:
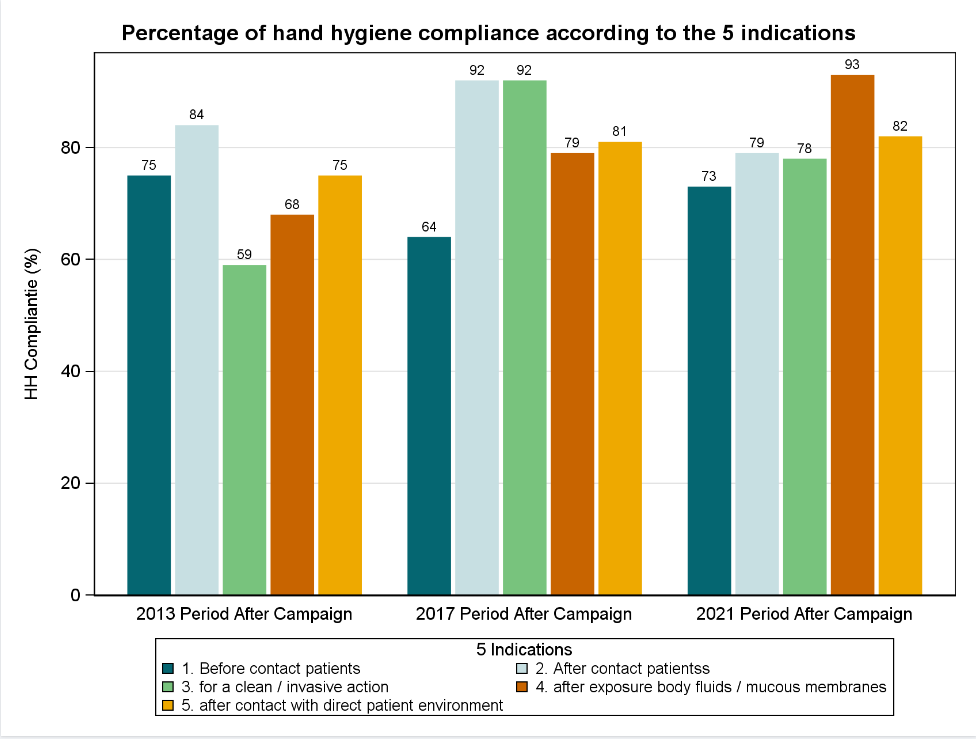
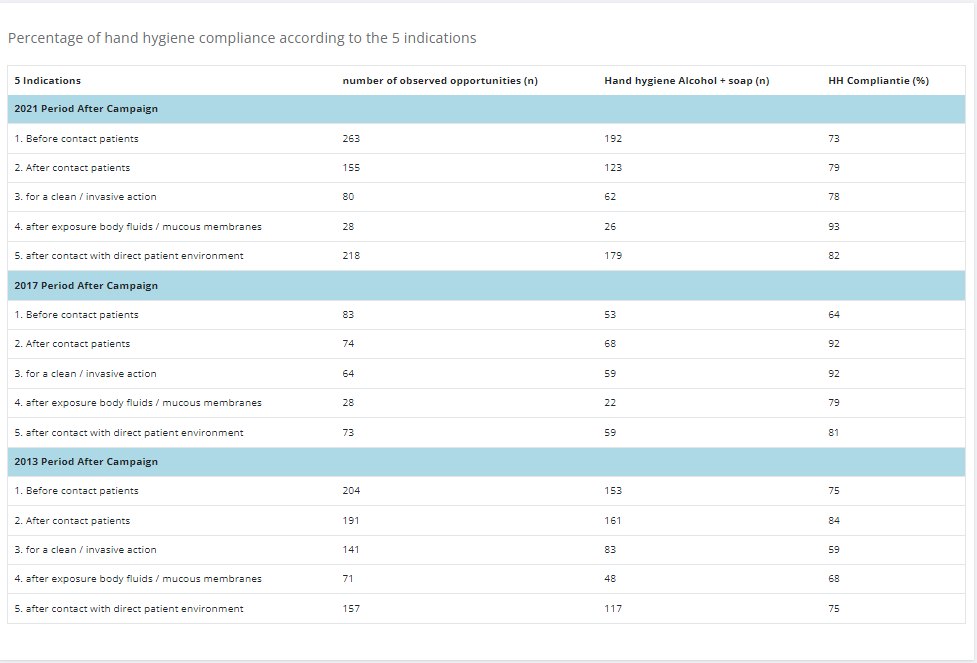
The data are refreshed every 15 minutes and can sometimes cause unavailability of the reports. If this happens, please wait a few minutes and try again.
The "Basis condition" report
The "Basis condition" reportIn the following instructions, we explain the different steps to create a Compliance report.
Select the desired report in the list. In this case "Conditions de base" (Basic condition).
The Parameters form will be displayed. Select for each field the option of your interest.
The form will adapt according to the options you select in the respective fields.
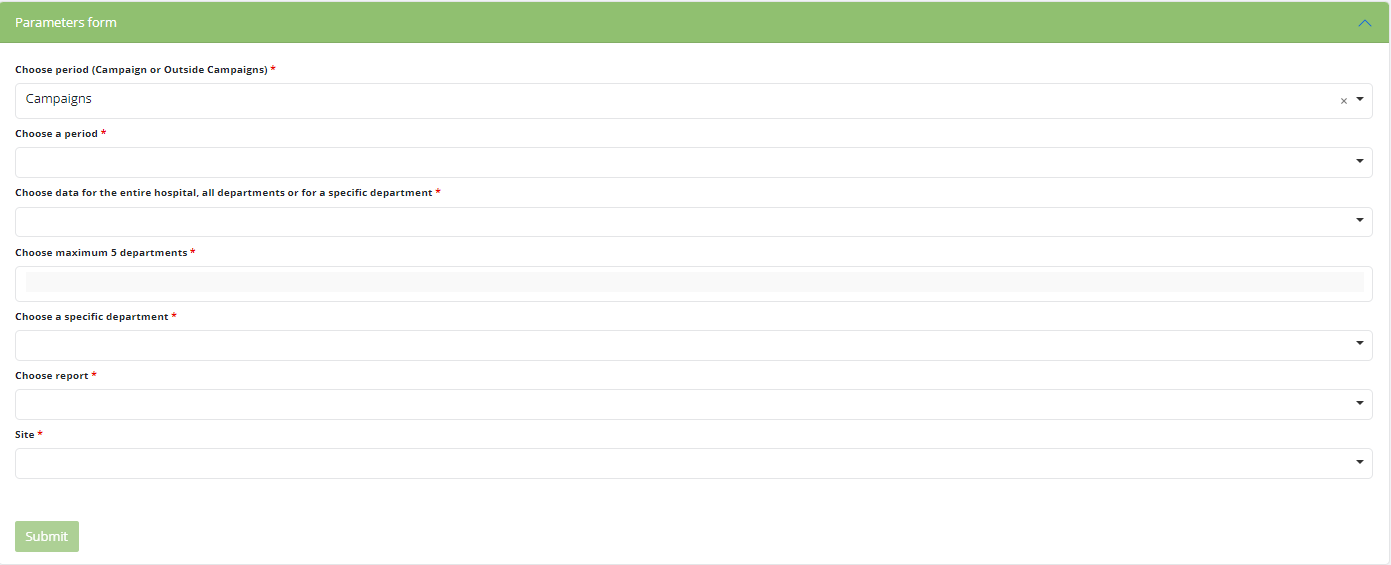
Fill out all fields and click on the Submit button.
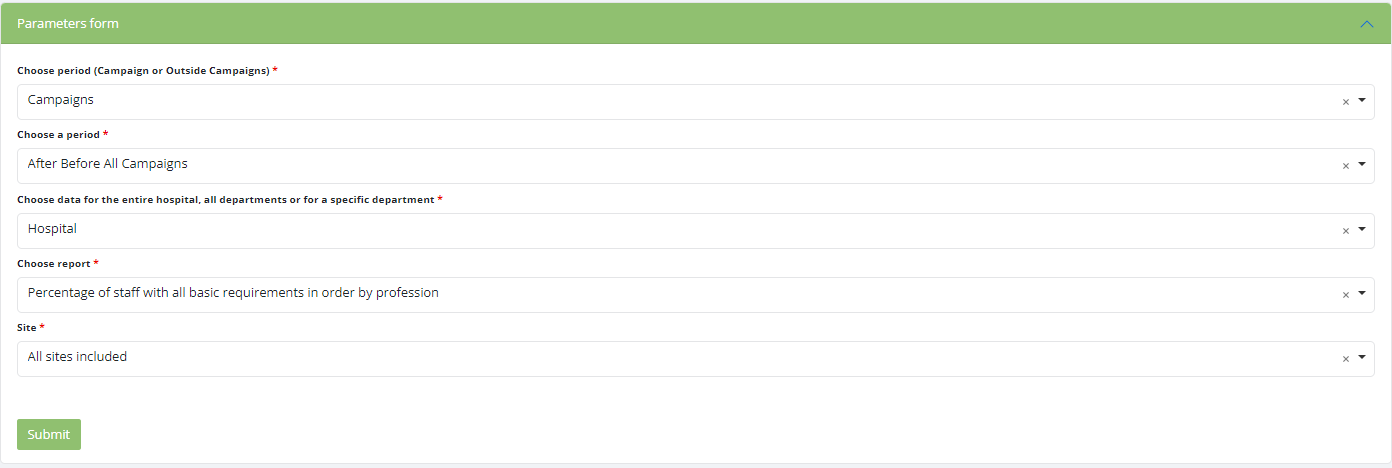
The reports will be displayed as a graph or a table as desired.
Graph:
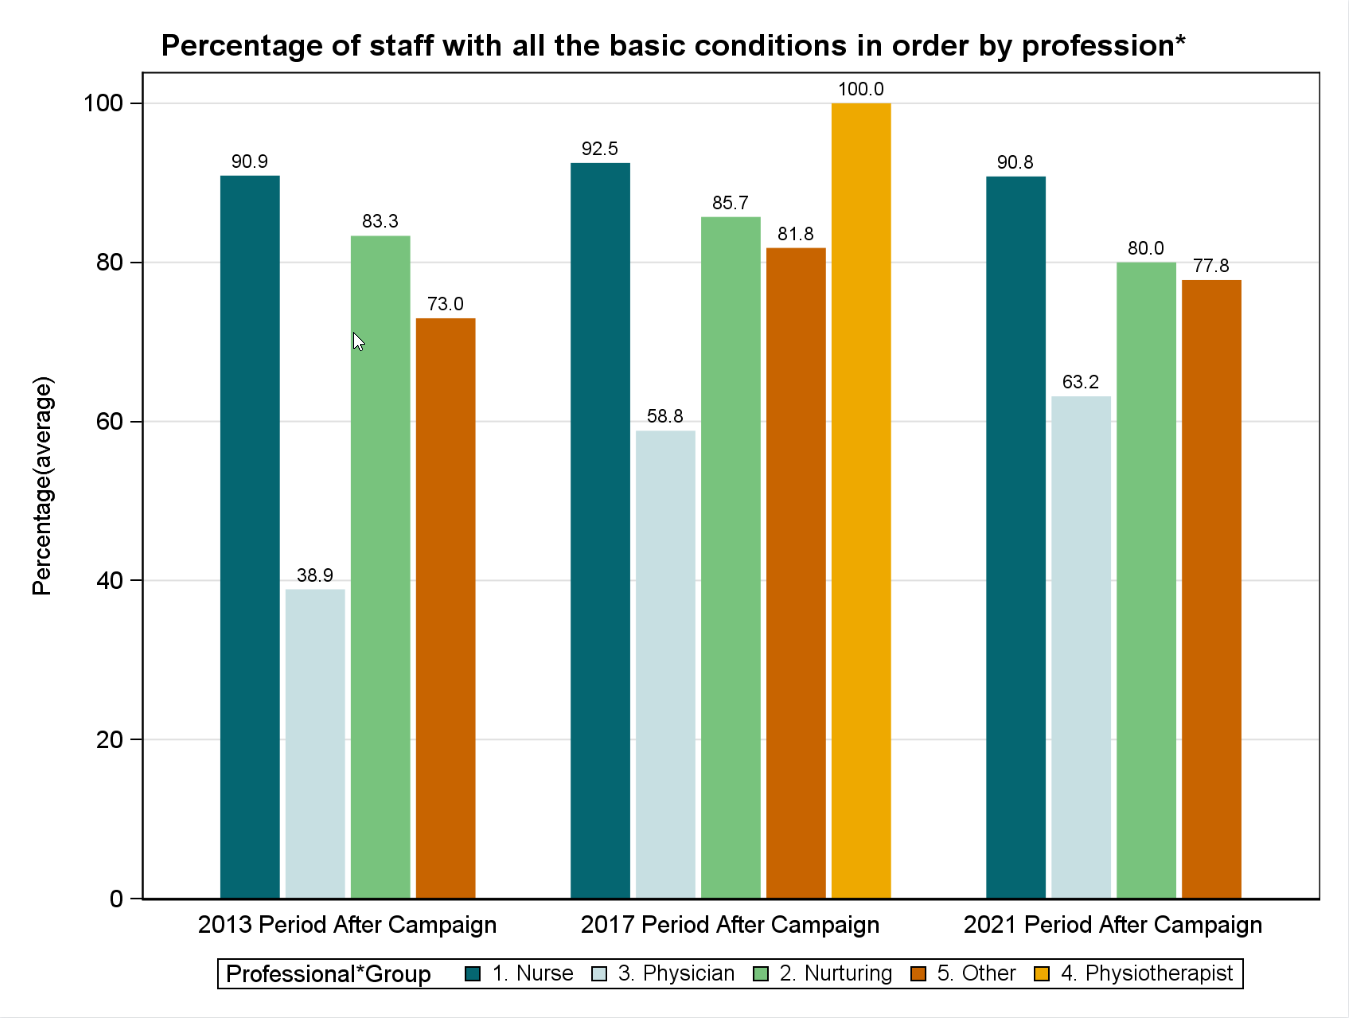
Table:
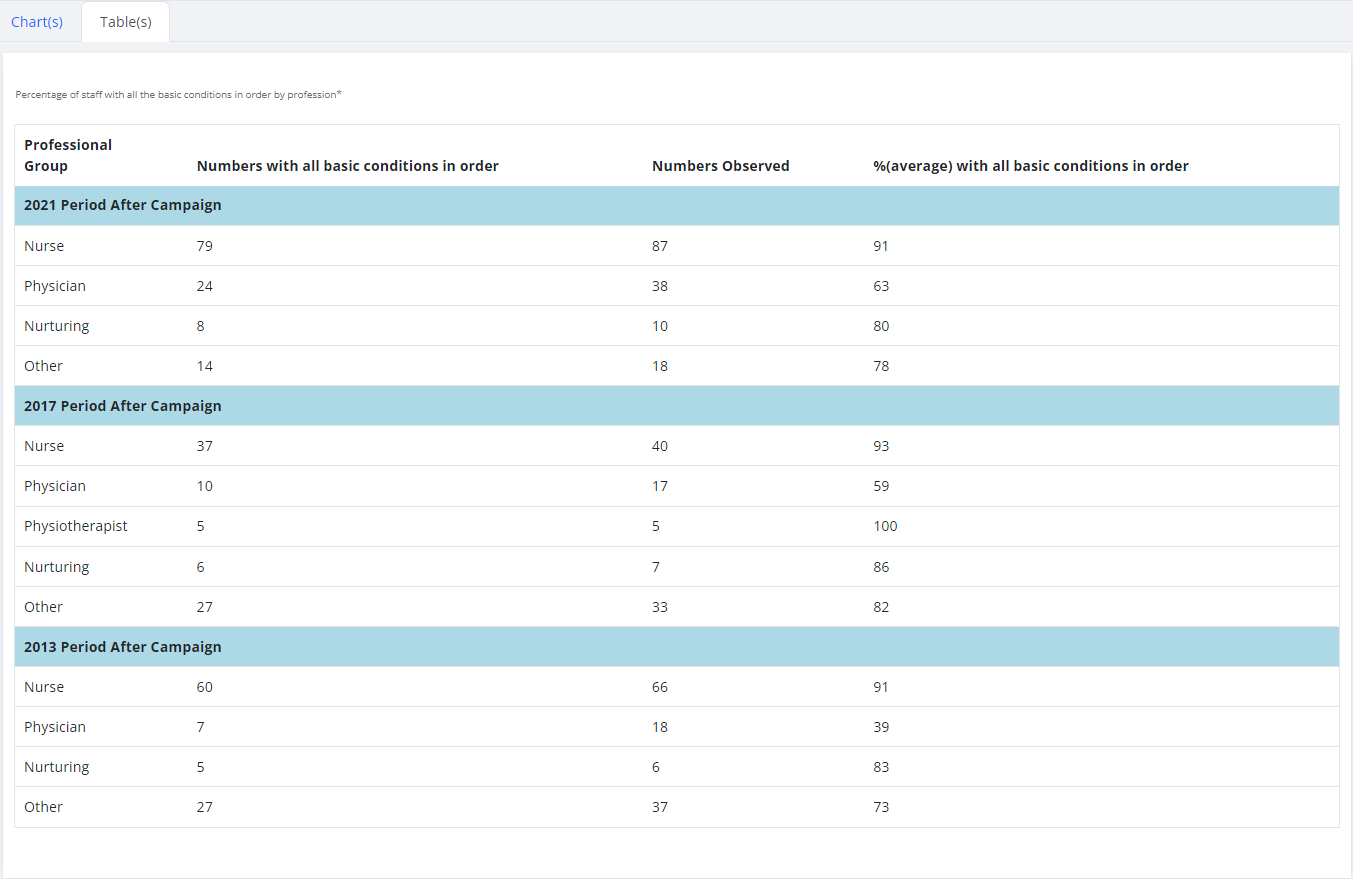
The data are refreshed every 15 minutes and can sometimes cause unavailability of the reports. If this happens, please wait a few minutes and try again.
Healthstat.be Support Services
Healthstat.be Support ServicesThe Service Desk of healthdata.be (Sciensano) helps users of our applications and services and deals with requests and problems when they arise.
The Service Desk focuses on those services run by our IT Services (HD4DP, HD4RES, healthstat.be, ...) and helps you with accounts and passwords. For questions about the content and objective(s) of the projects, we kindly refer to the managing research organizations.
In case of an incident (technical issues only), we advise you to send an e-mail to support.healthdata@sciensano.be.
In case of business or content question/feedback: please contact your business SPOC.
Please find below our support window hours:
Support Service of healthdata.be
Support Service of healthdata.beThe Service Desk of healthdata.be (Sciensano) helps users of our applications and services and deals with requests and problems when they arise.
The Service Desk focuses on those services run by our IT Services (HD4DP, HD4RES, healthstat.be,...) and helps you with accounts and passwords. For questions about the content and objective(s) of the projects, we kindly refer to the managing research organizations.
For most efficient processing of your request, we advise you to use our service portal: https://sciensano.service-now.com/sp.
Please find below our support window hours:
How to report an incident
How to report an incidentTEST2
The healthdata.be service (Sciensano) processes each incident report according to a standard operating procedure (SOP). A public version of this SOP "HD Incident Management Process" is also available on this portal docs.healthdata.be.
To submit an incident related to projects and applications in production and facilitated or managed by Sciensano's healthdata.be service, you must first log into the HD Service and Support portal: https://sciensano.service-now.com/sp
After the login step, you will arrive at the main page of the portal.
On the main page, you must select "Get Help".
A new page with the title "Create an incident" will appear.
You can now document your incident or problem by providing the following information:
Please indicate the urgency of resolving your issue based on its criticality to the business.
Please indicate the type of problem you are experiencing.
When the problem type "Application" is selected, two additional fields appear: "Project Name" and "Application".
Please select the appropriate information.
Please describe clearly and briefly (1 sentence) the subject of your problem.
Please describe the problem in detail. The following aspects are important for us to understand and solve the problem:
- a description of the actions you want to perform but fail to perform (e.g. provide us with a field name, a validation rule, a button, etc.)
- a description (if possible) of the sequential steps you follow to use the service or the application of healthdata.be for which you need support;
- a brief description of the technical problem you are experiencing (e.g. error messages)
We strongly recommend that you add a screenshot describing the problem (IMPORTANT: do not provide us with patient data!).
You can add the screenshot by clicking on "Add attachments".
On the right side of the form, the mandatory information items of the incident form are listed. When these fields are completed, their names disappear from the "required information" box.
The form can only be submitted if all required fields are filled in, by pressing the green "Submit" button.
If all required fields have not been completed, a warning message will appear at the top of the form.
In addition, missing mandatory fields will be highlighted in green.
When the incident form has been successfully submitted, a preview of your submission appears in a new screen.
On the right side of the screen you will find the details, including the incident number.
On the left side of the screen, you will find a chronology of your incident processing, starting with your creation.
Archive
Archive Bart.ServaesSlide decks of the demo session of 11/05/2022
Slide decks of the demo session of 11/05/2022HD4DP v2 csv upload (old version)
HD4DP v2 csv upload (old version)Process to upload the csv file of DCDs
Uploading the csv file into the correct DCD folder
The Support team of healthdata.be (Sciensano) will provide the Data Providers an SFTP user and password of the Upload folders of healthdata.be (Sciensano). With these credentials the IT Services of the Data Providers will be able to connect to the Upload folders of healthdata.be (Sciensano).
The main folder structure of the csv upload folder will look as such:

Each folder consists of sub folders which contains the DCD.
Find below an overview of the DCD's that can be uploaded.
- Handhygiene-1:
- PRE campaign
- POST campaign
- IN & OUTSIDE campaign
- MEARaxone-2
- meaRaxone
- Endobronchialvalve-4 (Zephyr):
- Primo-implantation
- Replacement
- Follow-up
- Orthopridehip-7:
- Primo-implantation
- Revision
- Resection
- Orthoprideknee-8:
- Primo-implantation
- Revision
- Resection
- Orthopridetotalfemur-9:
- Primo-implantation
- Revision
- Resection
- For Spine Tango that will be:
- Intake
- Conservative treatment
- Surgery
- Patient questionnaire
- For Surgical and percutaneous heart valves that will be:
- Implantation
- Follow-up
- TestDCD_PROJECT-6
- testDCD01
- testDCD02
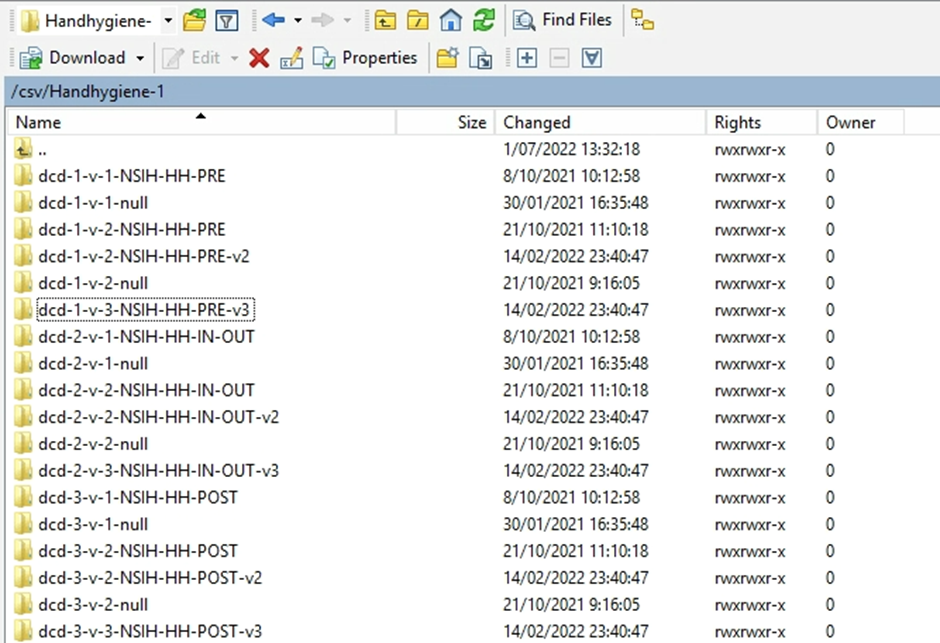
This example shows the different DCDs of an Orthopride Knee project
The csv files will be placed in the folders of the DCD which we want to upload. We double click on the folder of the dcd and the structure will be either empty, whether filled with folders containing the following names:
- ARCHIVE (after a csv file has been processed, the original csv file will be saved in this folder)
- RESULT (when the csv file has been processed, a file will be created or append with the result of the upload of the csv file)
- ERROR (when the csv file contains erroneous formatting, the csv file won't get processed and an error file will be created or append with the errors and reason why the csv file couldn't be processed)
Example: I want to upload an Orthopride Knee Primo-Implantation dcd, so I will place the orthopride knee primo implantation csv file into the dcd-21-v-1-kneePrimoImplantation folder.
- Open the dcd-21-v-1-kneePrimoImplantation folder
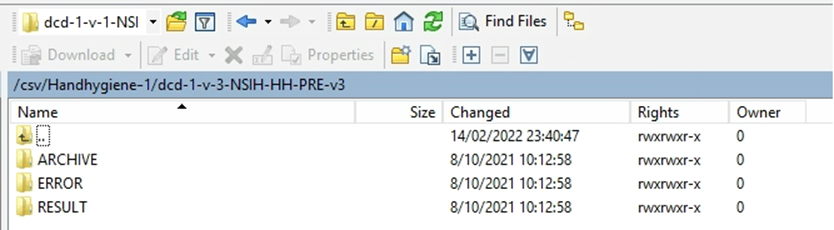
- Put the orthopride knee primo implantation csv file into the folder
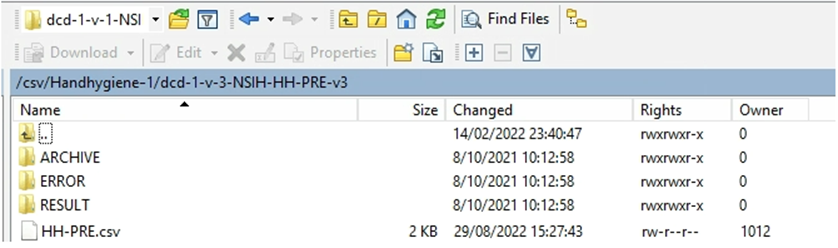
- Wait until the file has been processed (the file will disappear from this folder if it has been processed - don't forget to click on the refresh button)
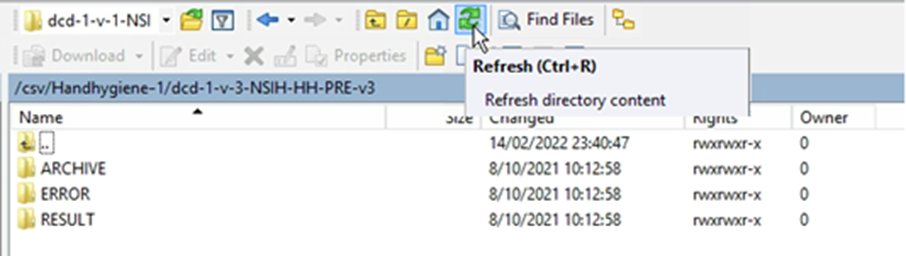
- Go into the RESULT folder and refresh the folder to update the file with the latest changes
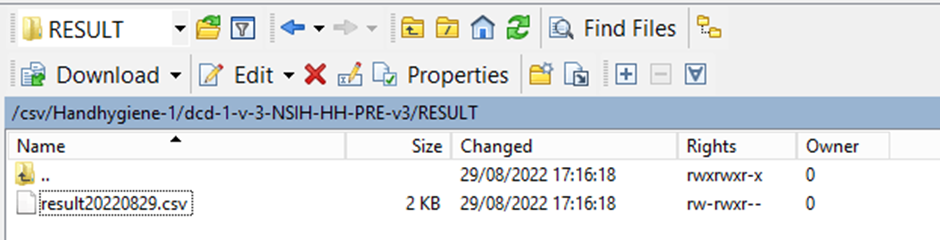
- Double click the file to open it and to read the result of the upload process

The status is the most important line that indicates whether the upload was a success or not.
Verification of the upload process is also possible in the application HD4DP2. After login to HD4DP2 go to relevant DCD and check the processed data.
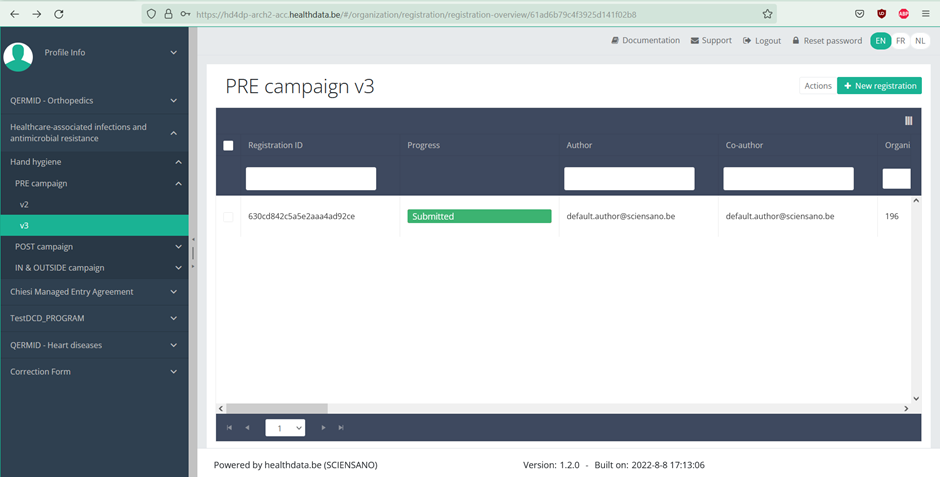
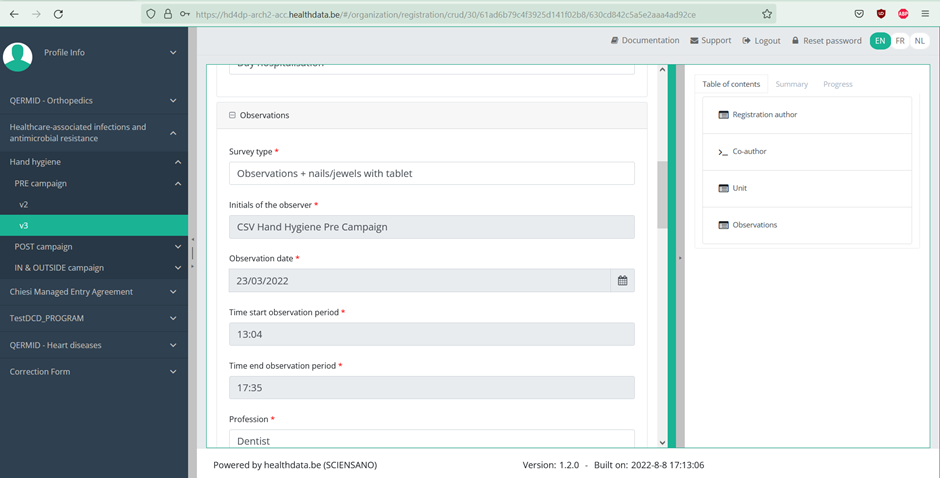
CSV creation: some points of attention
Formats
Some formats are specific :
- Dates : should be dd/mm/yyyy
- Boolean : true / false
- Codes : the value of the code (not the translation)
- Multi codes : there is only one column per field. So when a select box is set as multiple, values have to be separated by a "|". e.g. : 68452|68453|68454
- Repeatable blocks : in some DCDs, a complete block of fields is repeatable. In that case, value have to be separated by a ";".
- e.g. : A block is containing 3 fields : A (Lob), B (Type klep) and C (Aantal kleppen).
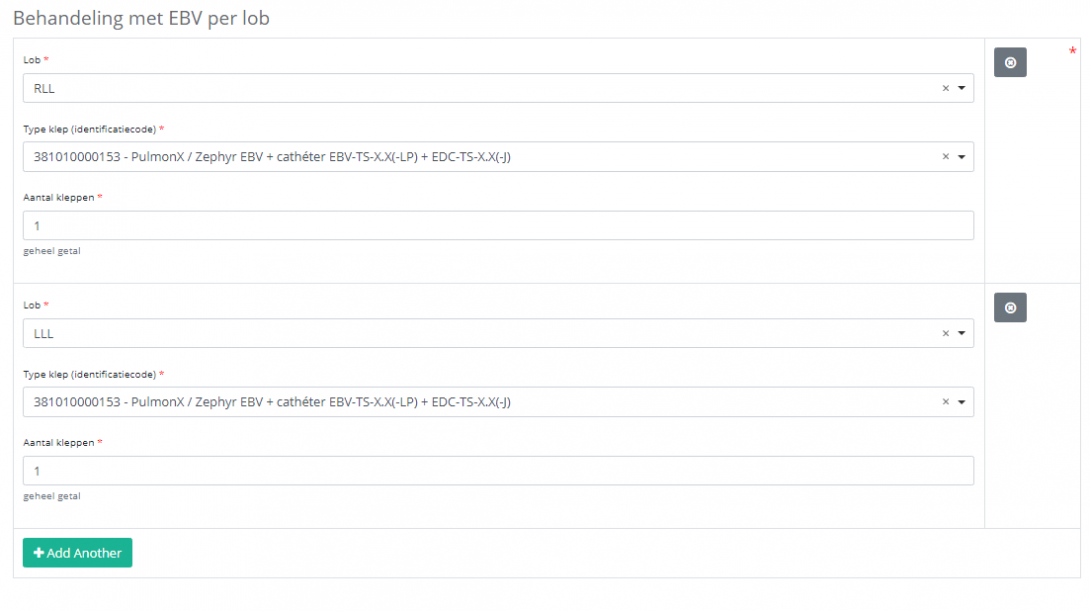
The block is repeated once by clicking on "Add another" button. In the CSV, there is still one column for each field.
If for the first block, values are :
- A -> 68545 (=RLL)
- B -> 13245 (=38101000053)
- C -> 1
and for the second block, values are :
- A -> 68548 (=LLL)
- B -> 13245 (=38101000053)
- C -> 1
In the CSV file it will result in the following :
- Column A : 68545;68548
- Column B : 13245;13245
- Column C : 1;1
It is possible to mix multi select values and repeatables blocks (if a multi select box is inside a block component that could be repeated). This will end as :
If for the first block, values are :
- A -> 68545|68944|68946
- B -> 1
- C -> 2
and for the second block, values are :
- A -> 78945|78950
- B -> 3
- C -> 4
In the CSV file it will result in the following :
- Column A : 68545|68944|68946;78945|78950
- Column B : 1;3
- Column C : 2;4