In this procedure we describe how to transfer stable data from the old version of HD4DP to the new version of the Data Collection Definition (DCD) for the project BCFR.
This procedure contains 4 steps:
- Export from HD4DP a CSV file containing the stable data from the old data collection version (excluding patients no more in follow-up);
- Adapt the CSV content (if needed);
- Upload the CSV via SFTP server;
- Validate CSV Upload.
Export from HD4DP a CSV file containing the stable data from the old data collection version (excluding patients no more in follow-up)
The user must follow the steps for importing the CSV file containing the stable data:
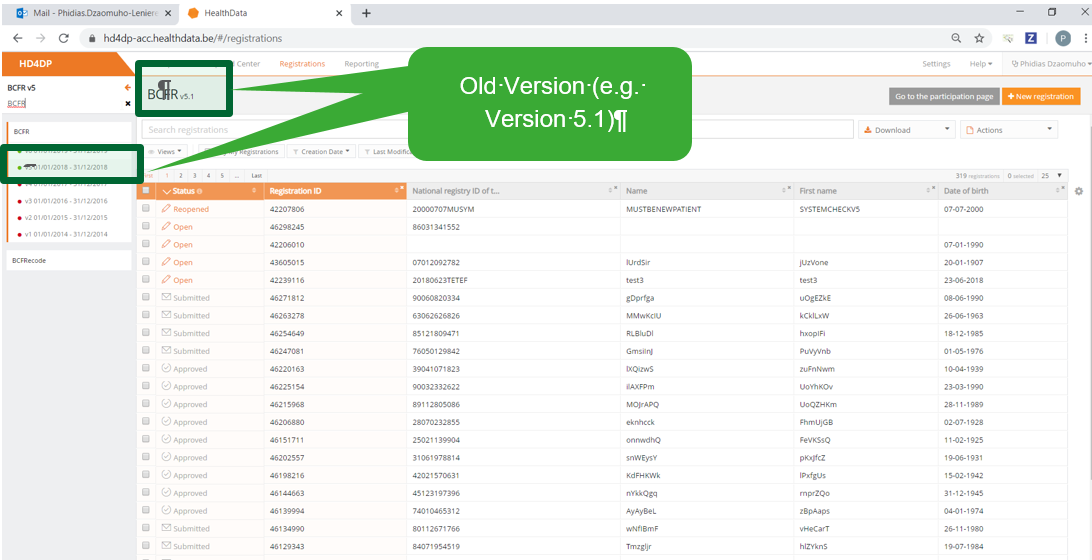
- Log in to the application HD4DP v1.
- Select the old version of the Register BCFR (e.g. Version 5 in views below; also applicable for version 8 for data 2021)
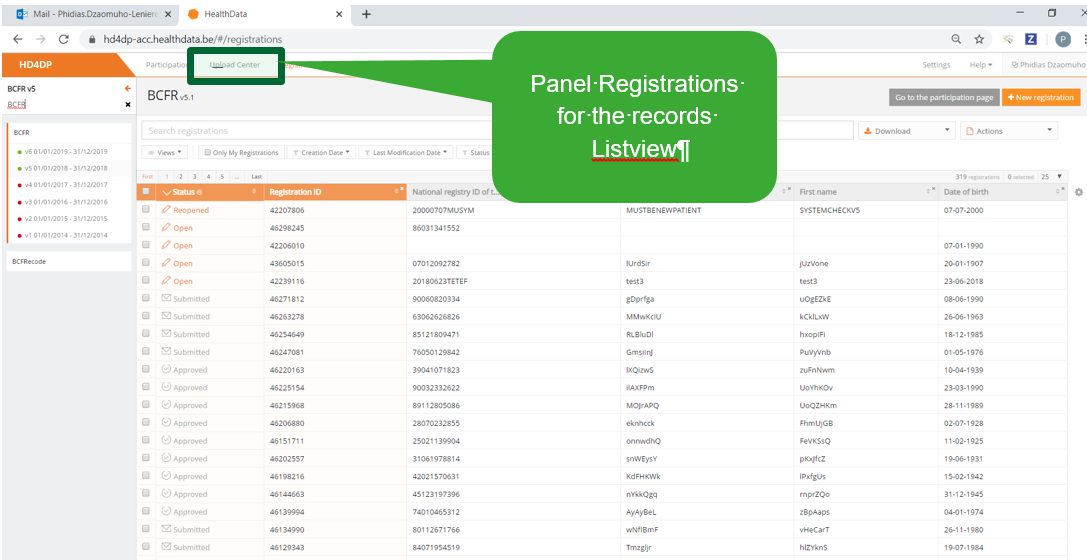
- Go to the panel ‘Registrations’
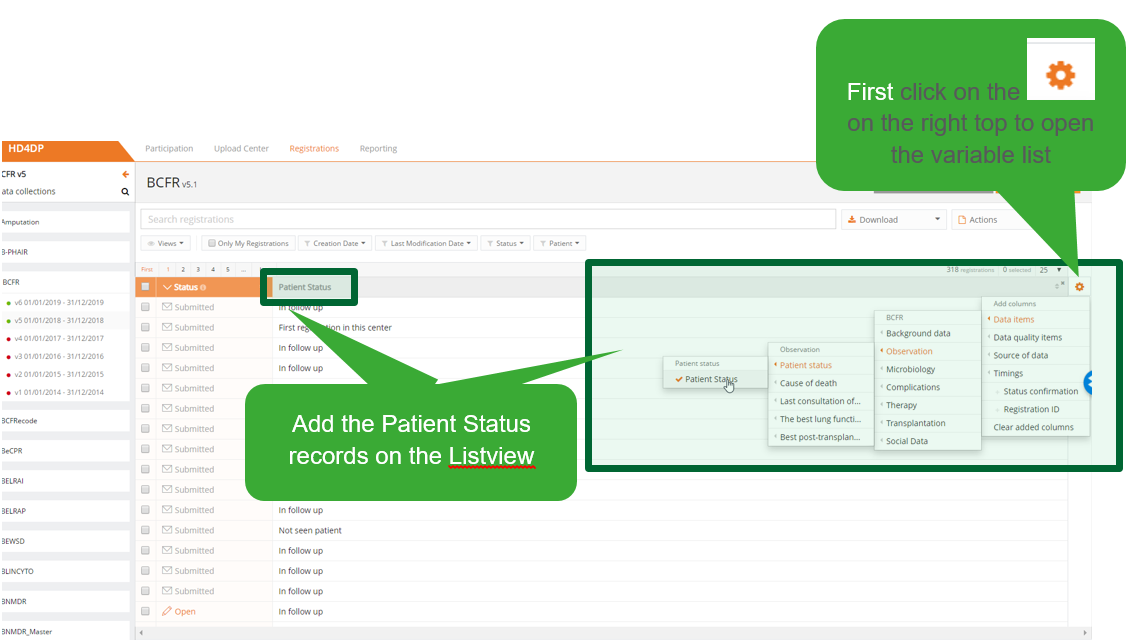
- Add the field ‘Patient Status’ in the registrations list view as shown below
[Data items -> Observation -> Patient status -> Patient status]
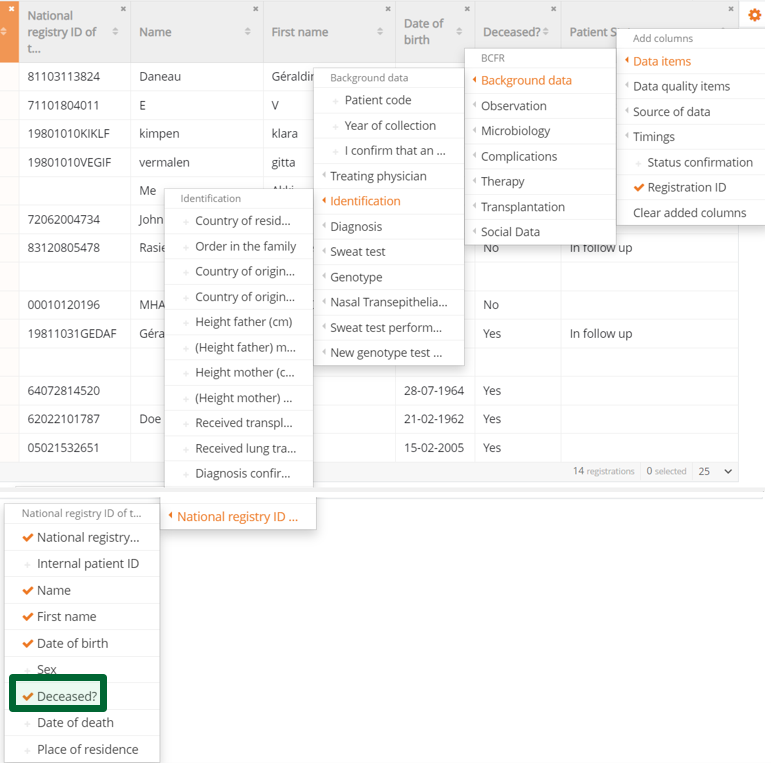
- Similarly, add the field ‘Deceased’ in the registrations list view [Data items -> Background data -> Identification -> National registry ID -> Deceased ?]
- Sort the records in the listview according to the field ‘Deceased’ (click twice on the column name, so that ‘Yes’ is at the top’), and then ‘Patient Status’
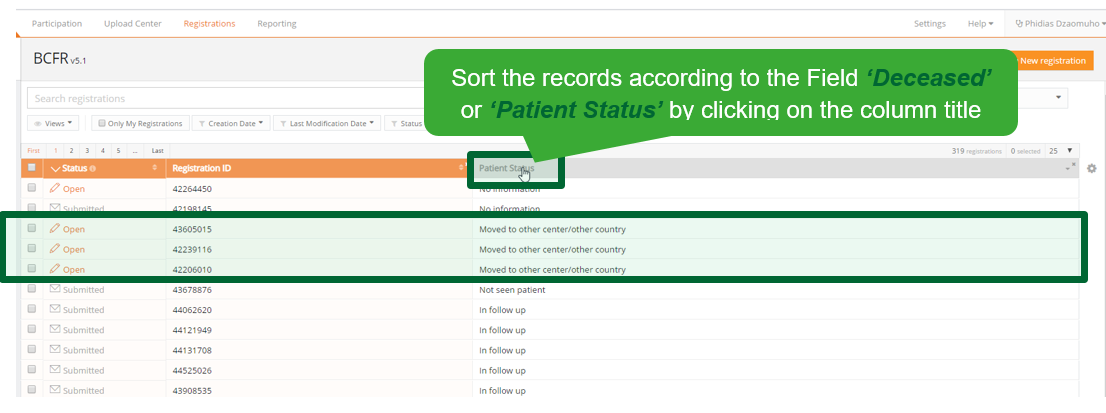
- Select only the records whose the field ‘Deceased’ is “No” and ‘Patient Status’ does not have the value “Moved to other center/other country”, “Revoked diagnosis”, “Lost to follow-up”, or “Revoked consent”
In the practice: select all records, and unselect the deceased patients and the few ones with those ‘Patient Status’ (NB: the deceased patients are expected to be shown at the beginning of each status group, if you sorted as described above)
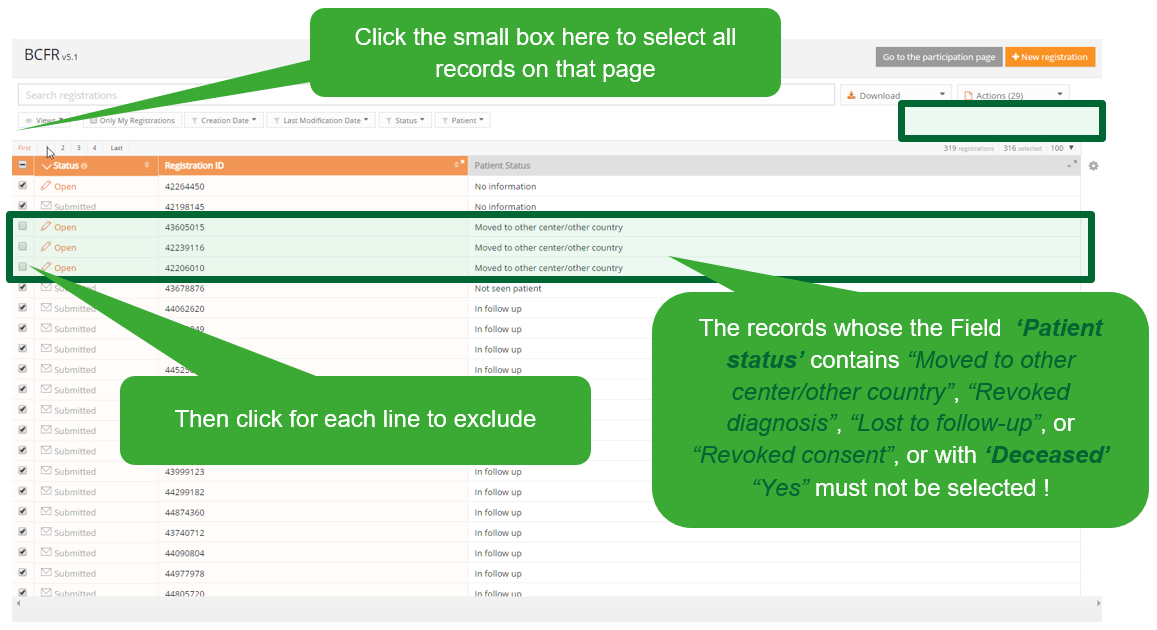
NB: If you have several pages, select first ‘all’ on the first page, unselect the ones to remove (if any), then go to the next page(s) to do the same on each page (don’t do ‘Select all’ on all pages before unselecting on some of those, it will not be possible anymore !) To reset the selection if blocked, just click again on the Version in the left column, and restart the record selection process
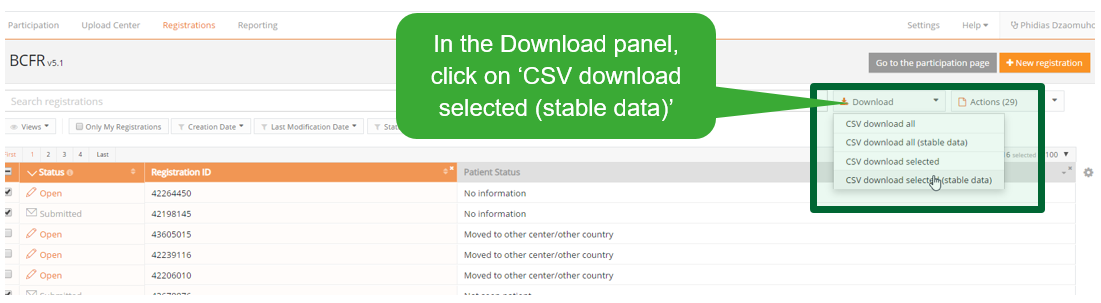
- Export the stable data of the selected records by clicking on Download, and select CSV download selected (stable data)
- The application will display the screen ‘Downloading’ and return a CSV file named ‘BCFR’
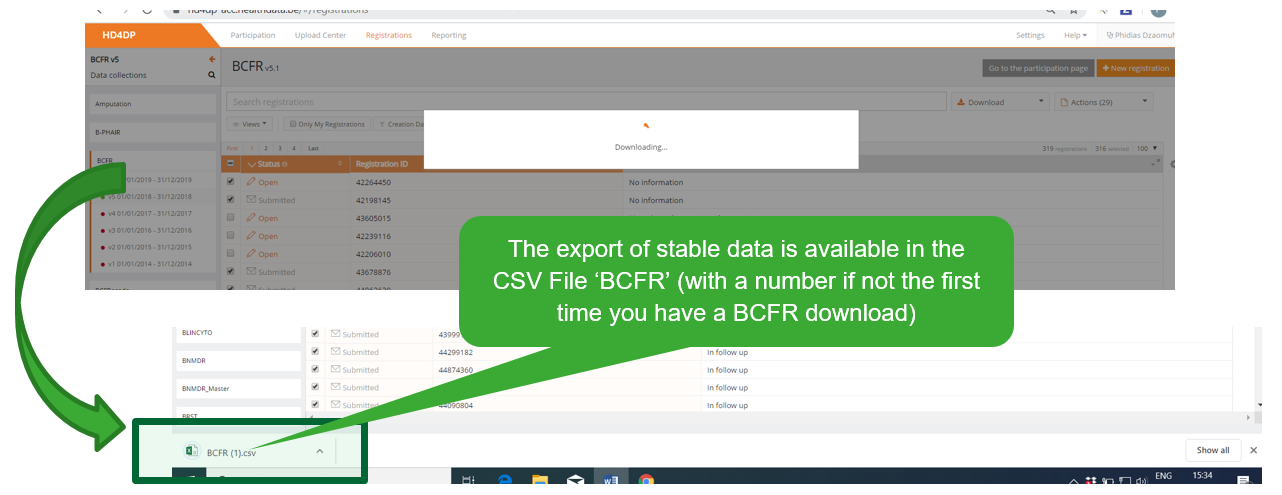
- The file is saved on the automatic download folder of your computer, or your system may ask where to save it: click on the arrow on the right of the file name, and select “Show in folder” or “Save” (depending on your computer). Don’t open the document directly from this link, or via the Windows Explorer (open only via the procedure described in 3.2.1) !
Adapt the CSV content
When you need to open the CSV file in Excel, you have to follow a specific procedure to categorize the SSIN variable as a text field rather than a numeric field. Otherwise, the leading zero’s will be removed, and the SSIN code for patients born in 2000-2009 will not be recognized.
Open the CSV file
- Open Excel, then open the ‘BCFR’ CSV File exported (not directly via Windows Explorer !)
- Select the appropriate criteria in the CSV wizard
- Step 1 : ‘Delimited’ and ‘My data has headers’
- Step 1 : ‘Delimited’ and ‘My data has headers’
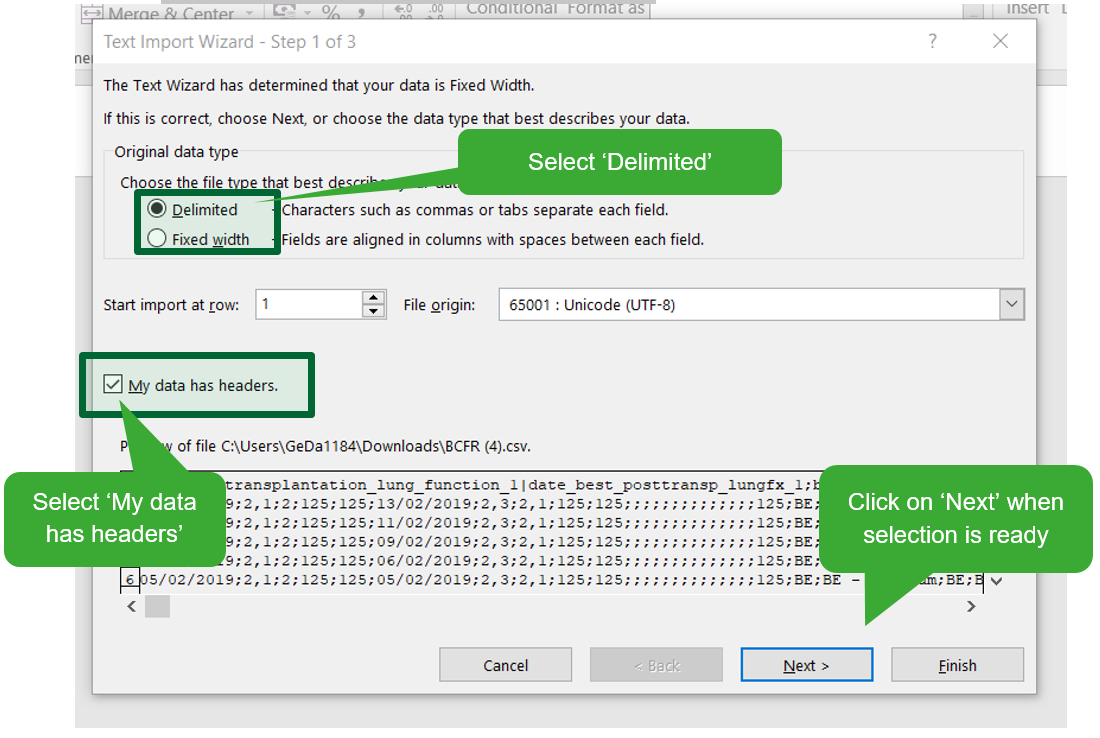
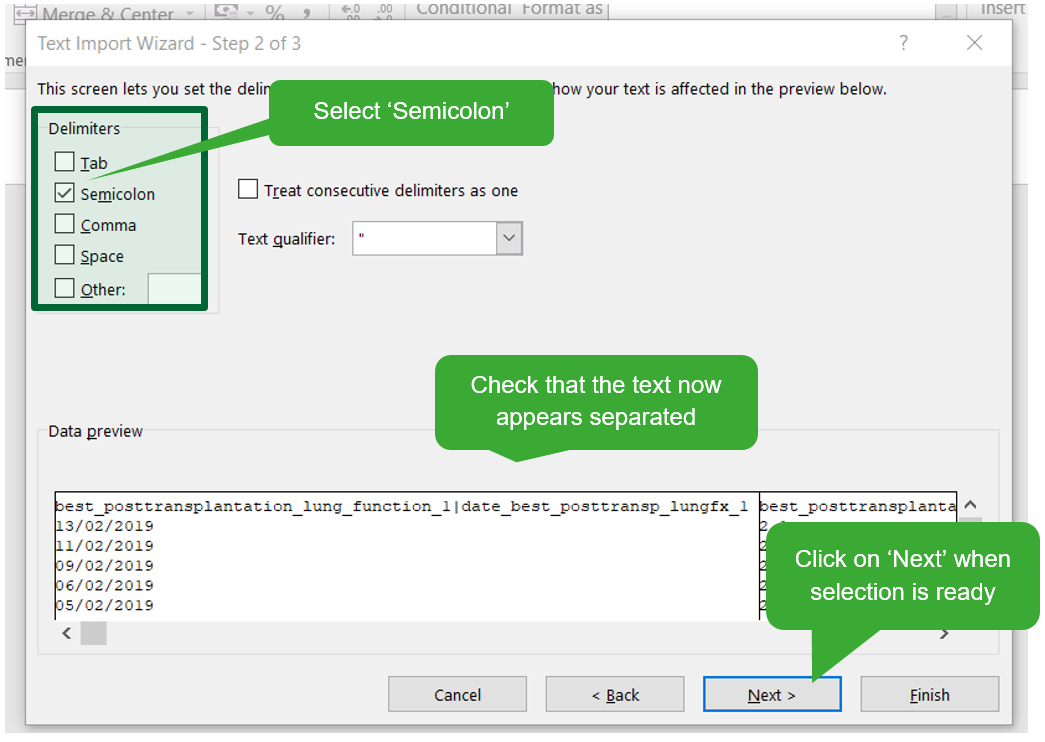
- Step 2 : Select Delimiters as ‘Semicolon’
- Step 3 : When the column ‘patient_id’ is selected, select format ‘Text’
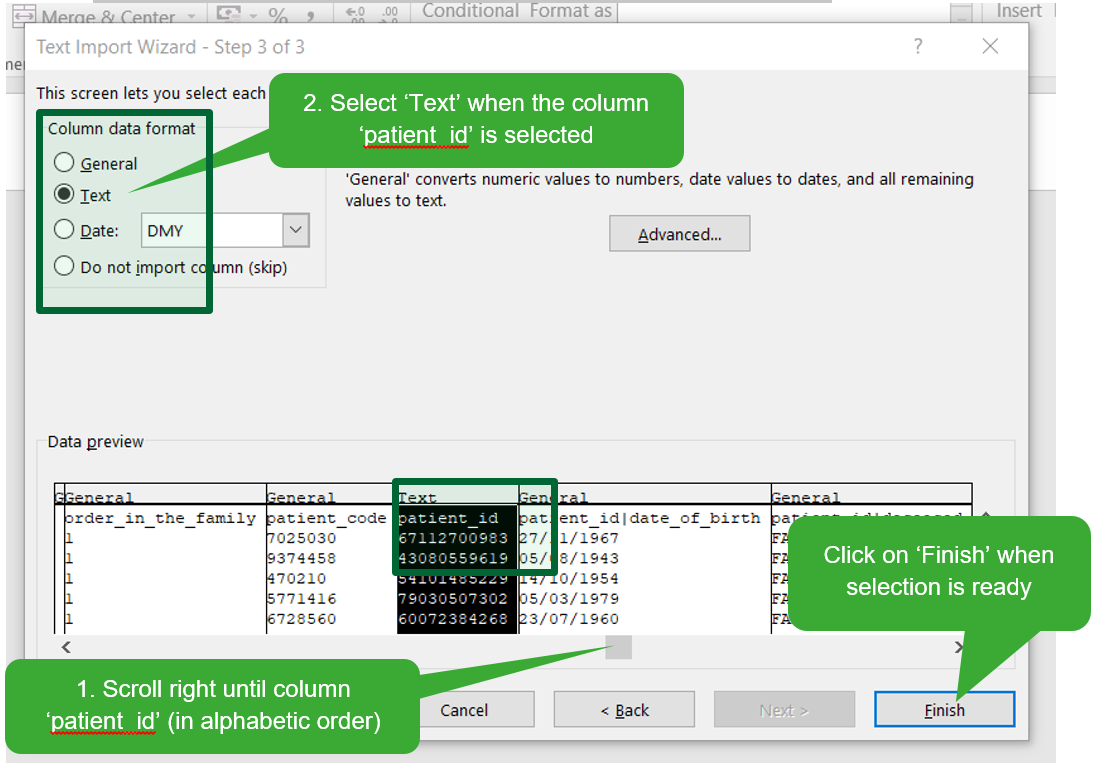
-> your file open as an Excel file (one variable per column)
Add author group
Next to the variables for stable data, the system needs to have an Author group (and Author and Coauthor) attributed to each record, so that it appears on the list in HD4DP. This is a new parameter, to be manually added to the CSV file.
When the Author group, Author and/or Coauthor have been left out of the csv file, the default Author group, Author and Coauthor will be used automatically.
- If you have only one Author group (only one Associate), you don’t need to add those variables, and so you can use the csv as downloaded -> you can go directly to 3.3 to upload the CSV
- If you have at least two author groups, you need to specify for each record to which author group it belongs. There are two ways:
- You don’t add this information in the CSV; then only the Lead will see the records in HD4DP2. These can then be attributed/corrected manually in HD4DP2 (for each record independently). If you choose this option, go directly to 3.3 to upload the CSV without opening it.
- You add the information in the CSV -> follow the steps below
- Create three new columns: on your ‘Home’ tool bar, click on the arrow under ‘Insert’ then select ‘Insert sheet columns’
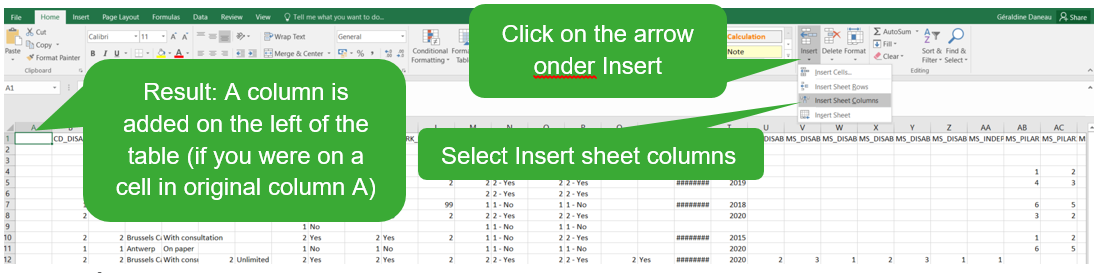
-> an empty column is added to the left of your sheet
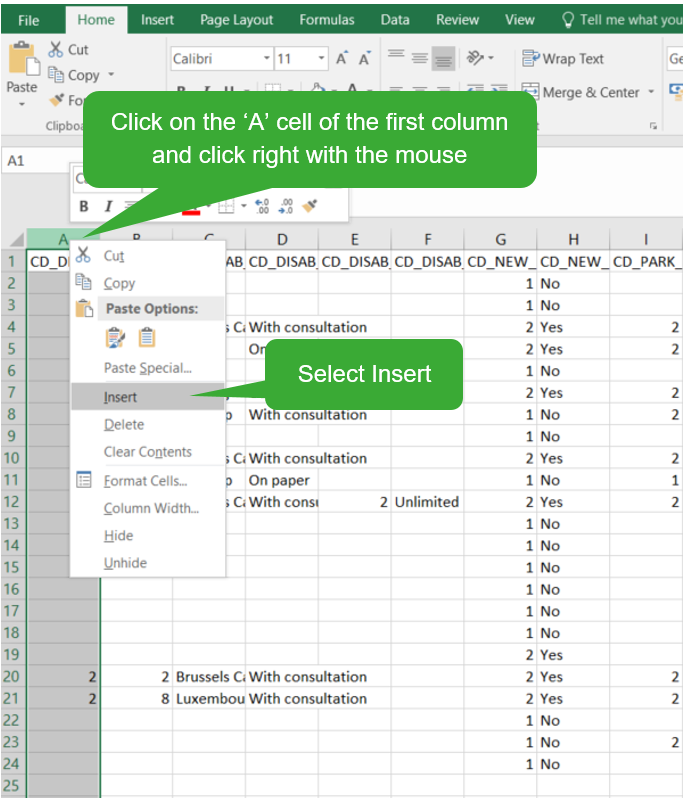
Alternative: click on the ‘A’ column cell with the mouse right button, and select Insert
- Repeat to have three empty columns
- Add column names
- In the first column, first row (cell A1), add column title TX_AUTHOR_GR
- In the second column, first row (cell B1), add column title TX_AUTHOR
- In the third column, first row (cell C1), add column title TX_COAUTHOR
- Add appropriate value for the respective columns
- The value in the TX_AUTHOR_GR field commonly are the <first name> and <last name> separated with a space
- The value in the TX_AUTHOR field is an e-mail address
- The value in the TX.COAUTHOR field is an e-mail address
- Be sure to avoid leading and trailing spaces when entering the Author group value.
- Save the file (name and place at your best convenience)
Add Status
Similarly, add the filename 'STATUS' in an additional column. Add the value 'draft' in case a manual submission of the record is requested. If not, the record will be submitted without manual intervention.
Add Repeatable and Multiple choice fields
- Manually enter the repeatable fields as shown in the following template: field_category|<index>|field.
Examples for transplants and for treating physician:
transplants|0|transplant_status;transplants|1|transplant_status

treating_physician|0|rizivinamicode_of_the_treating_physician;treating_physician|1|rizivinamicode_of_the_treating_physician- For reporting fields with a multiple choice formatting, the selected answers can be reported separated by the pipe symbol (|).
Example:
cftr_modulating_therapy_1
1|2|3|4|5|6
Additional information
- Following the upgrade to version 9 of BCFR, some fields have not been retained: i.e. CD_NEW_GENTPE and osteopenia__osteoporosis. These fields could be removed before uploading. When uploading a csv file still containing these fields, a warning will be logged in the result file as follows:

- Given the fact that the treating physician is a required and repeatable field, the correct name of the field should be provided. Replace the header “Treating physician” by "treating_physician|0|rizivinamicode_of_the_treating_physician”
Note: A warning will only be the result of a technical error, such as uploading an .xls file instead of a .csv file and the like.
Upload the CSV file via SFTP server
The user must save the CSV file on the SFTP server of the BCFR, to have the list appearing in HD4DP2.
Step 1: Open the sftp tool like WinSCP
Step 2: Get the credentials (Host name, Port number, User name and Password) from the IT department of the Data Provider, to log on to the sftp server located on the Data Provider side.
Step 3: Fill in the credentials into the Login screen and click on Login to be able to access the different upload folders:

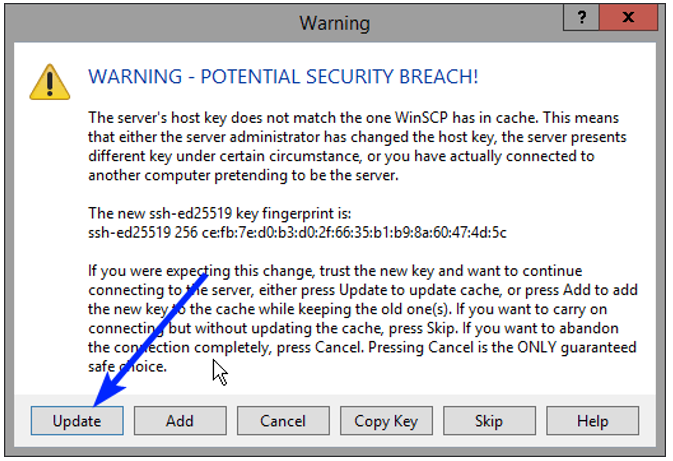
Note: A warning might be given, just click on Update
Now the CSVUpload folder structure is displayed on the right-hand side panel:
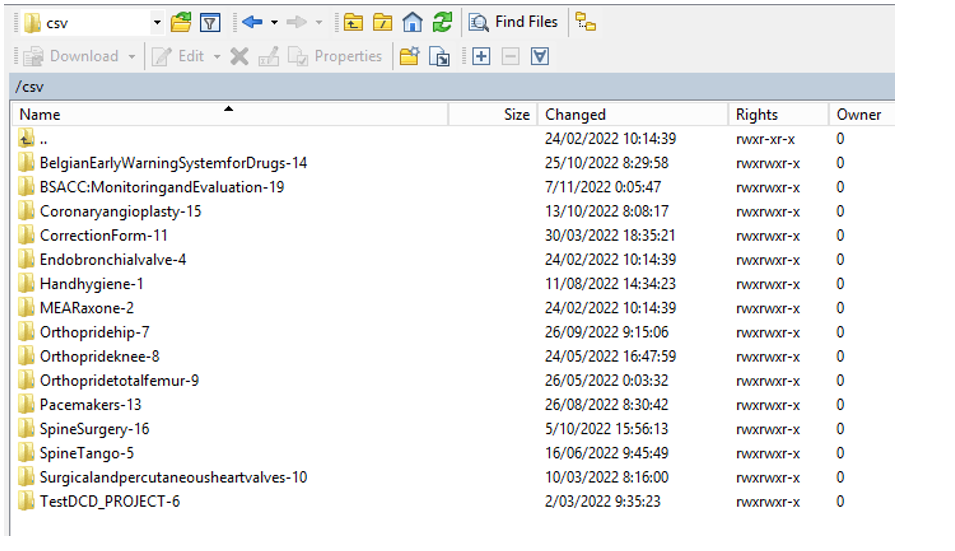
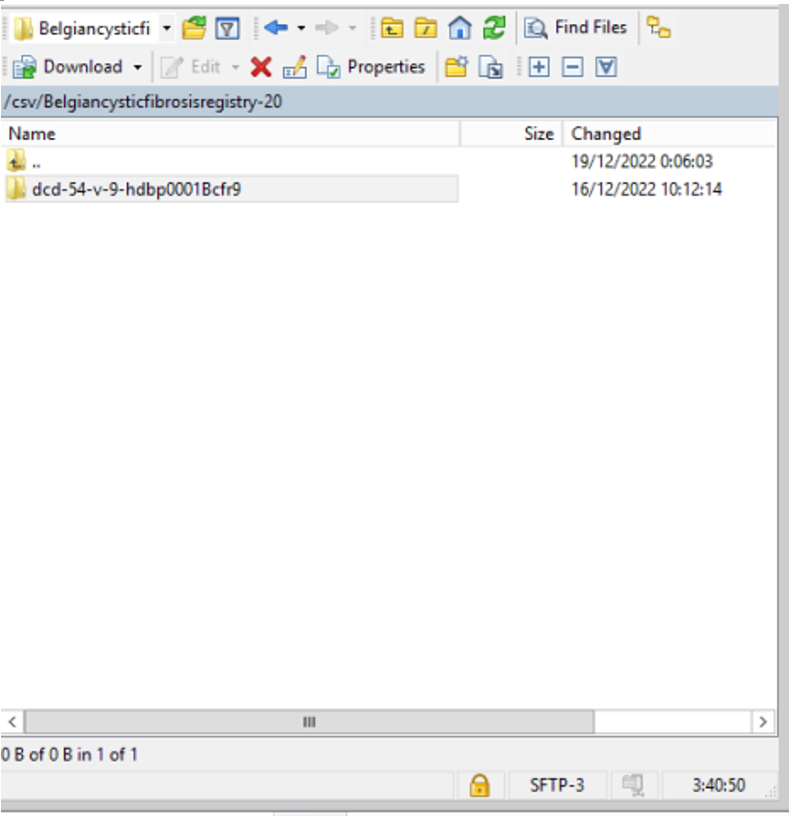
Step 4: Select the project folder Belgiancysticfibrosisregistry-20 and open it by double-clicking on it:

Step 5: Double-click on the DCD folder to open it:
Step 6: Now go to the folder on the left-hand side panel where the CSV file to be uploaded is located:
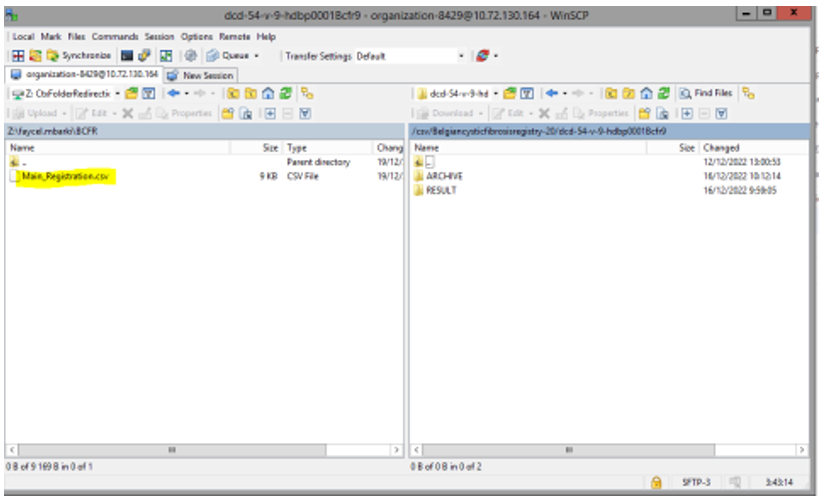
Step 7: Drag the CSV file to be uploaded from the left-hand side panel into the folder on the right-hand side panel:
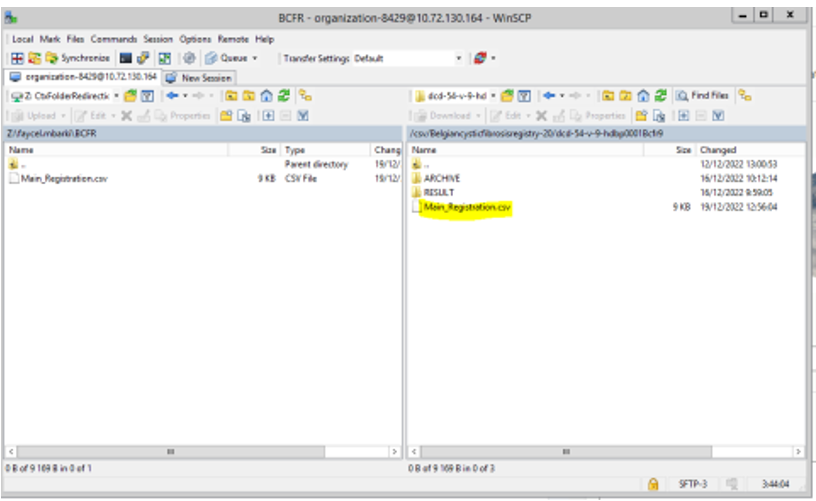
Step 8: Wait until the polling system of the CSV Uploader has picked up the CSV file and has processed it.
Once the CSV file has been processed it will disappear from the folder, when we refresh the page manually!
Validate CSV Upload
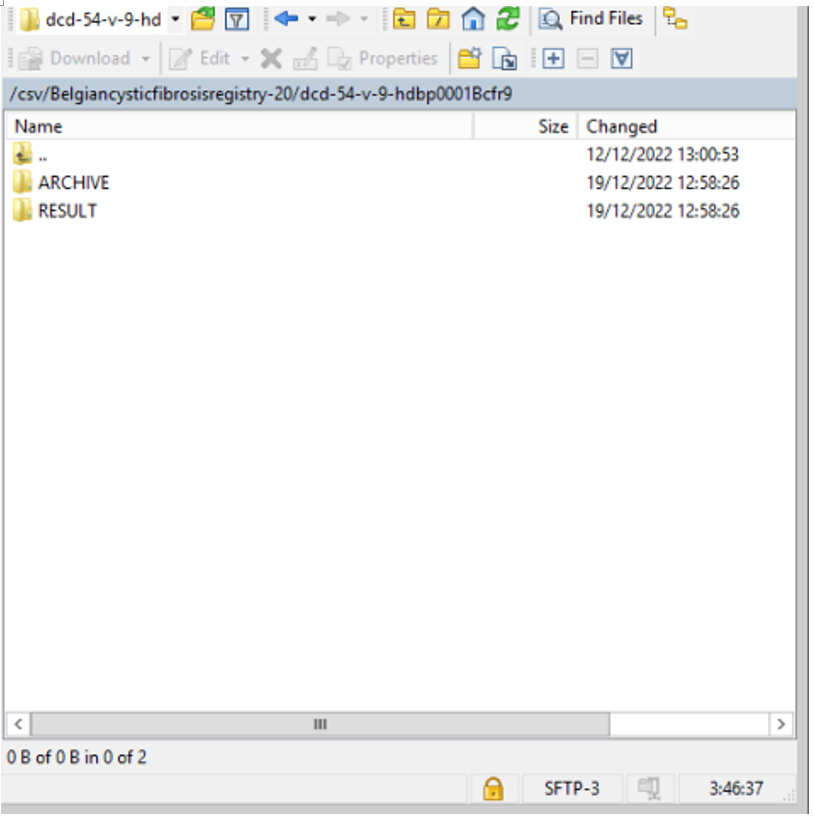
Once the CSV file has been processed, 3 folders will be created (if they haven't been created already) in the DCD folder:
- ARCHIVE (after a csv file has been processed, the original csv file will be saved in this folder)
- RESULT (when the csv file is placed in this folder, it means that the csv file has been processed, a file will be created or (or appended, if the file already existed) with the result of the upload of the csv file).
All the errors that are described in this file are business related, which means that they are technically correct, but in violation with the business rules or contains wrong values for that field. - ERROR (when the csv file is placed in this folder, it means that a technical error has occurred like the csv file contained erroneous formatting. The csv file won't get processed and an error file will be created with the errors and reason why the csv file couldn't be processed)

Validation of the CSV Upload via sftp tool:
Step 1: Double-click on the ERROR folder to open it, click on the refresh button and verify that there is no error file present.

Step 2: Return to the DCD folder. Now double-click on the RESULT folder to open it, click on the refresh button and verify that the result file is present.

Step 3: Double-click on the result file to open it.
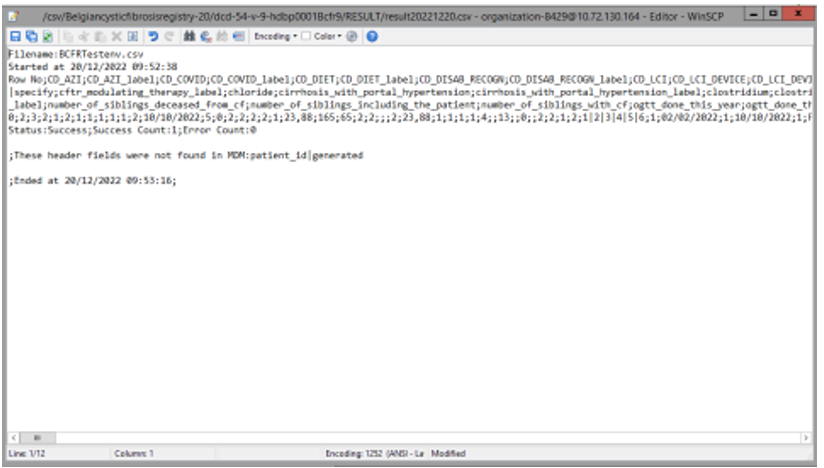
Step 4: If there are multiple records in the result file, scroll to the entry of the current csv upload by looking at the upload date (Started at dd/mm/yyyy hh:mm).
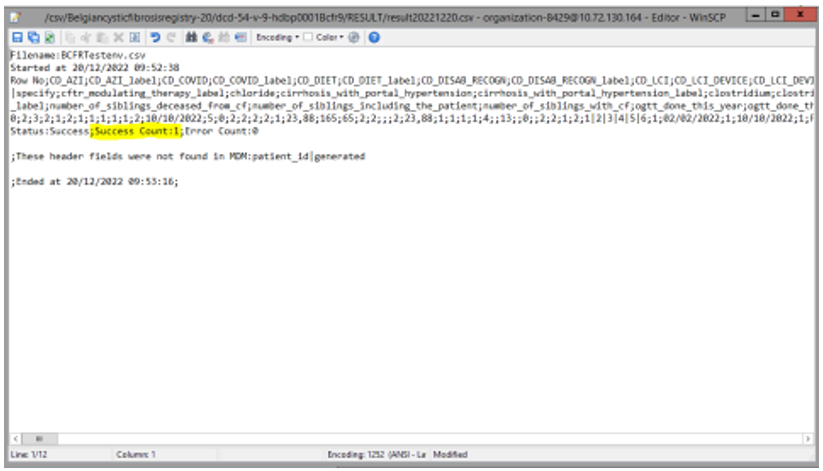
Verify the result file that the upload was successful by searching for the word SUCCESS and having a look at the Status. This Status must contain: Success;Success Count:1;Error Count:0
Validation of the CSV Upload via HD4DP 2.0
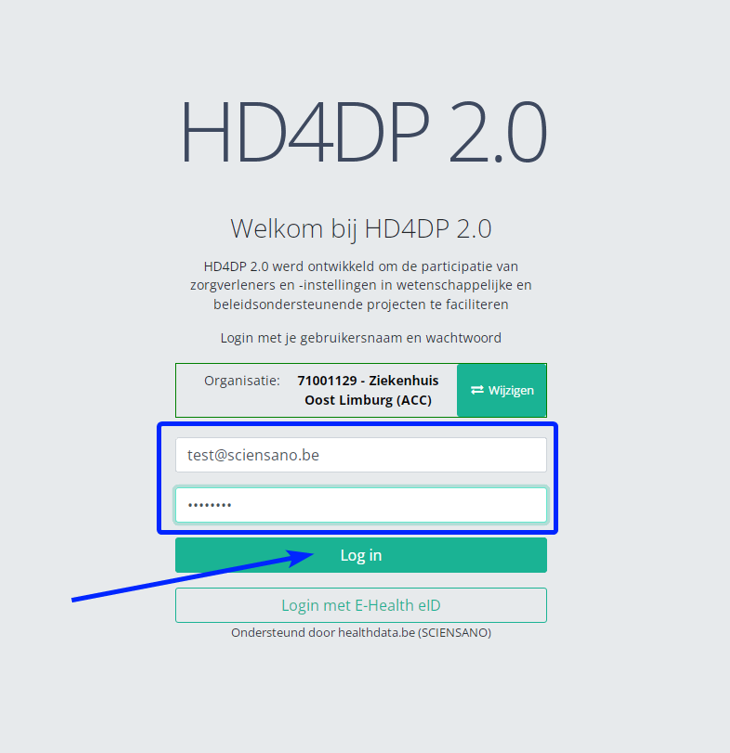
Step 1: Open the web application HD4DP 2.0.
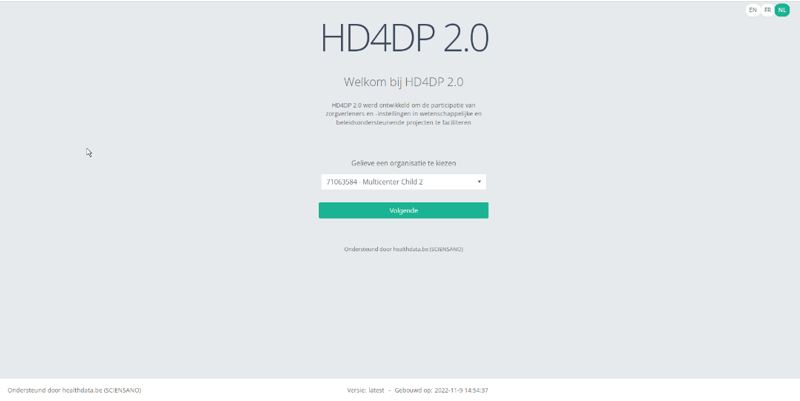
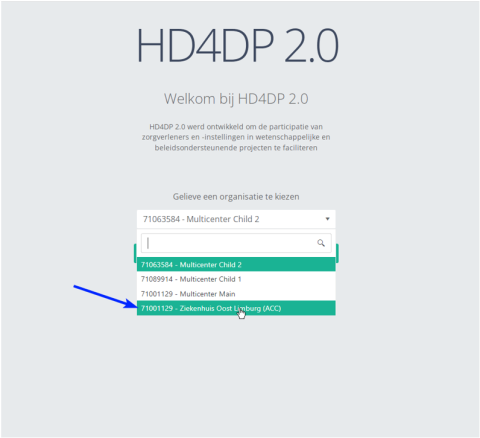
Step 2: Select the concerned organization in the dropdown list and click on Volgende (Next)
Step 3: Fill in the username and password, that has been provided by your IT Department or Healthdata team, and click on Log in to access the HD4DP 2.0 application.
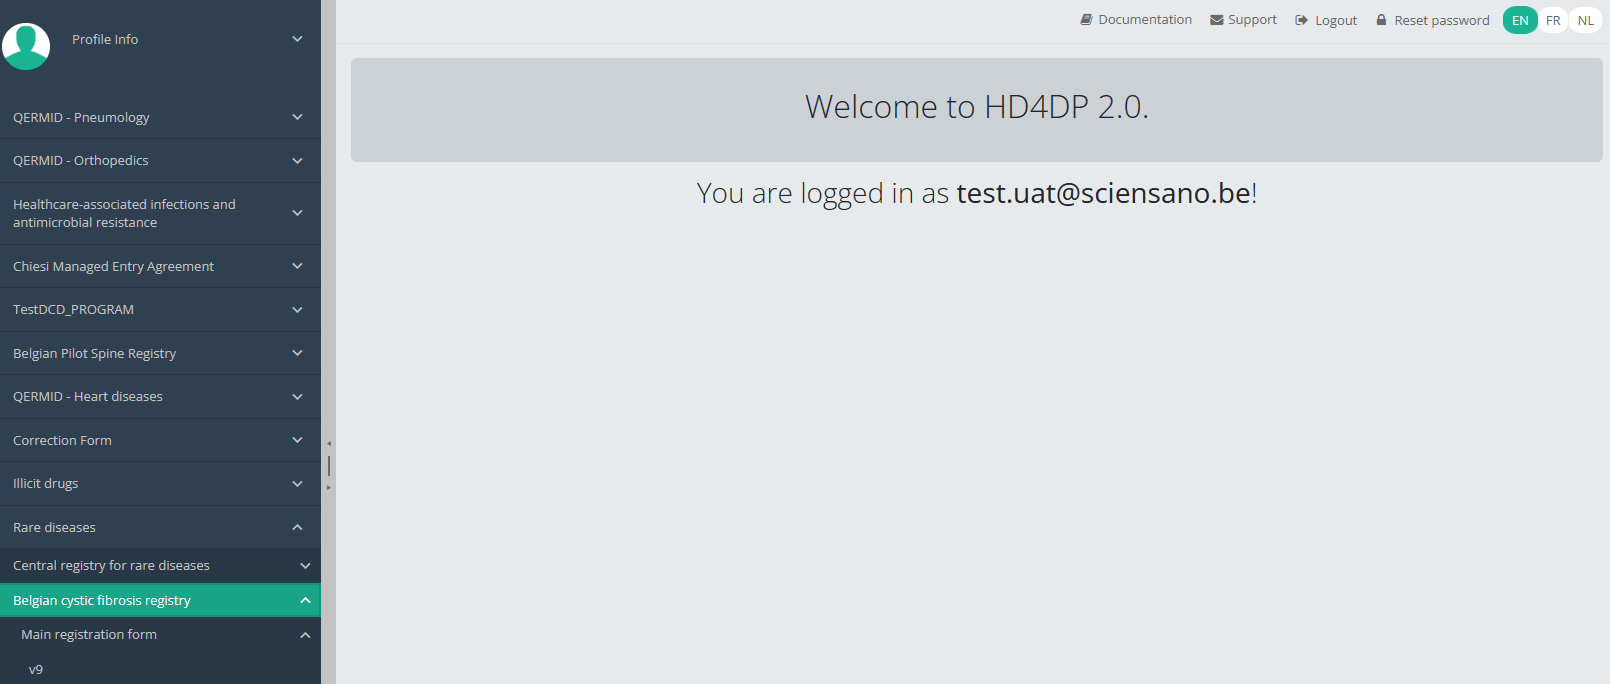
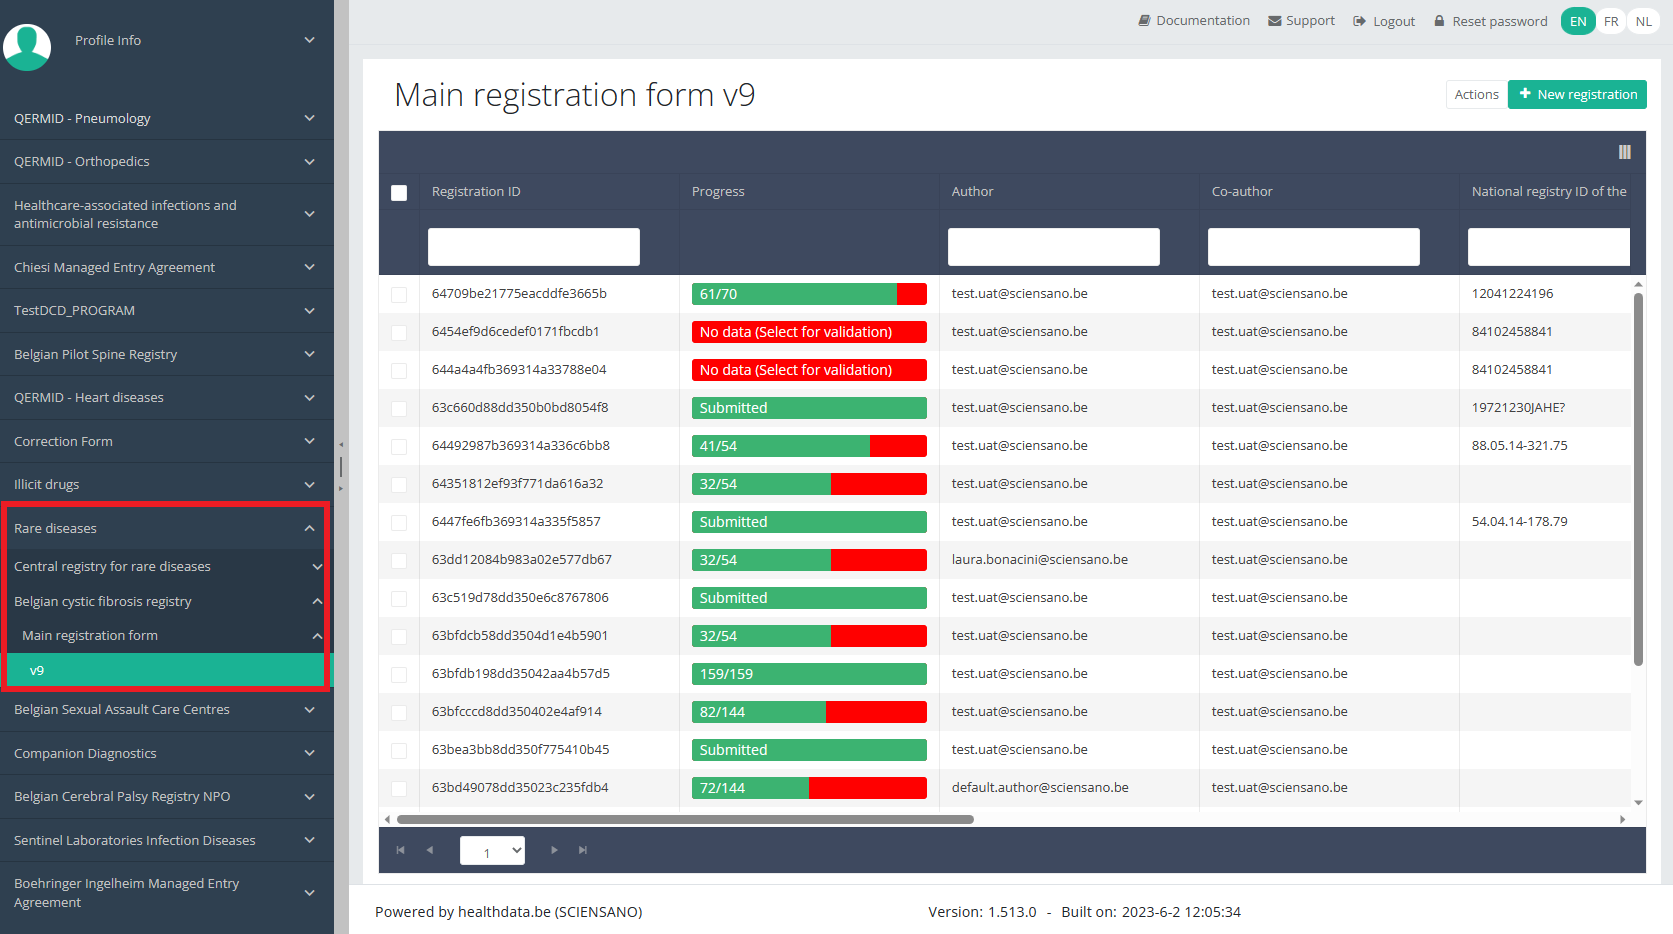
Step 4: Navigate in the menu on the left-hand side panel to the desired DCD:
Step 5: Check that the uploaded DCD(s) is/are displayed in the DCD overview
This documentation is under construction. We try to provide as correct, complete and clear as possible information on these pages. Nevertheless, if you see anything in the documentation that is not correct, does not match your experience or requires further clarification, please send us an email via support.healthdata@sciensano.be to report this documentation issue. Please, do not forget to mention the URL or web address of the page with the documentation issue. We will then adjust the documentation as soon as possible. Thank you!